Overview
Running tests in FutureAGI involves a 4-step wizard that guides you through:- Test configuration
- Scenario selection
- Evaluation configuration
- Review and execution
Creating a Test
Step 1: Test Configuration
Navigate to Simulations → Run Tests and click “Create Test” to start the test creation wizard.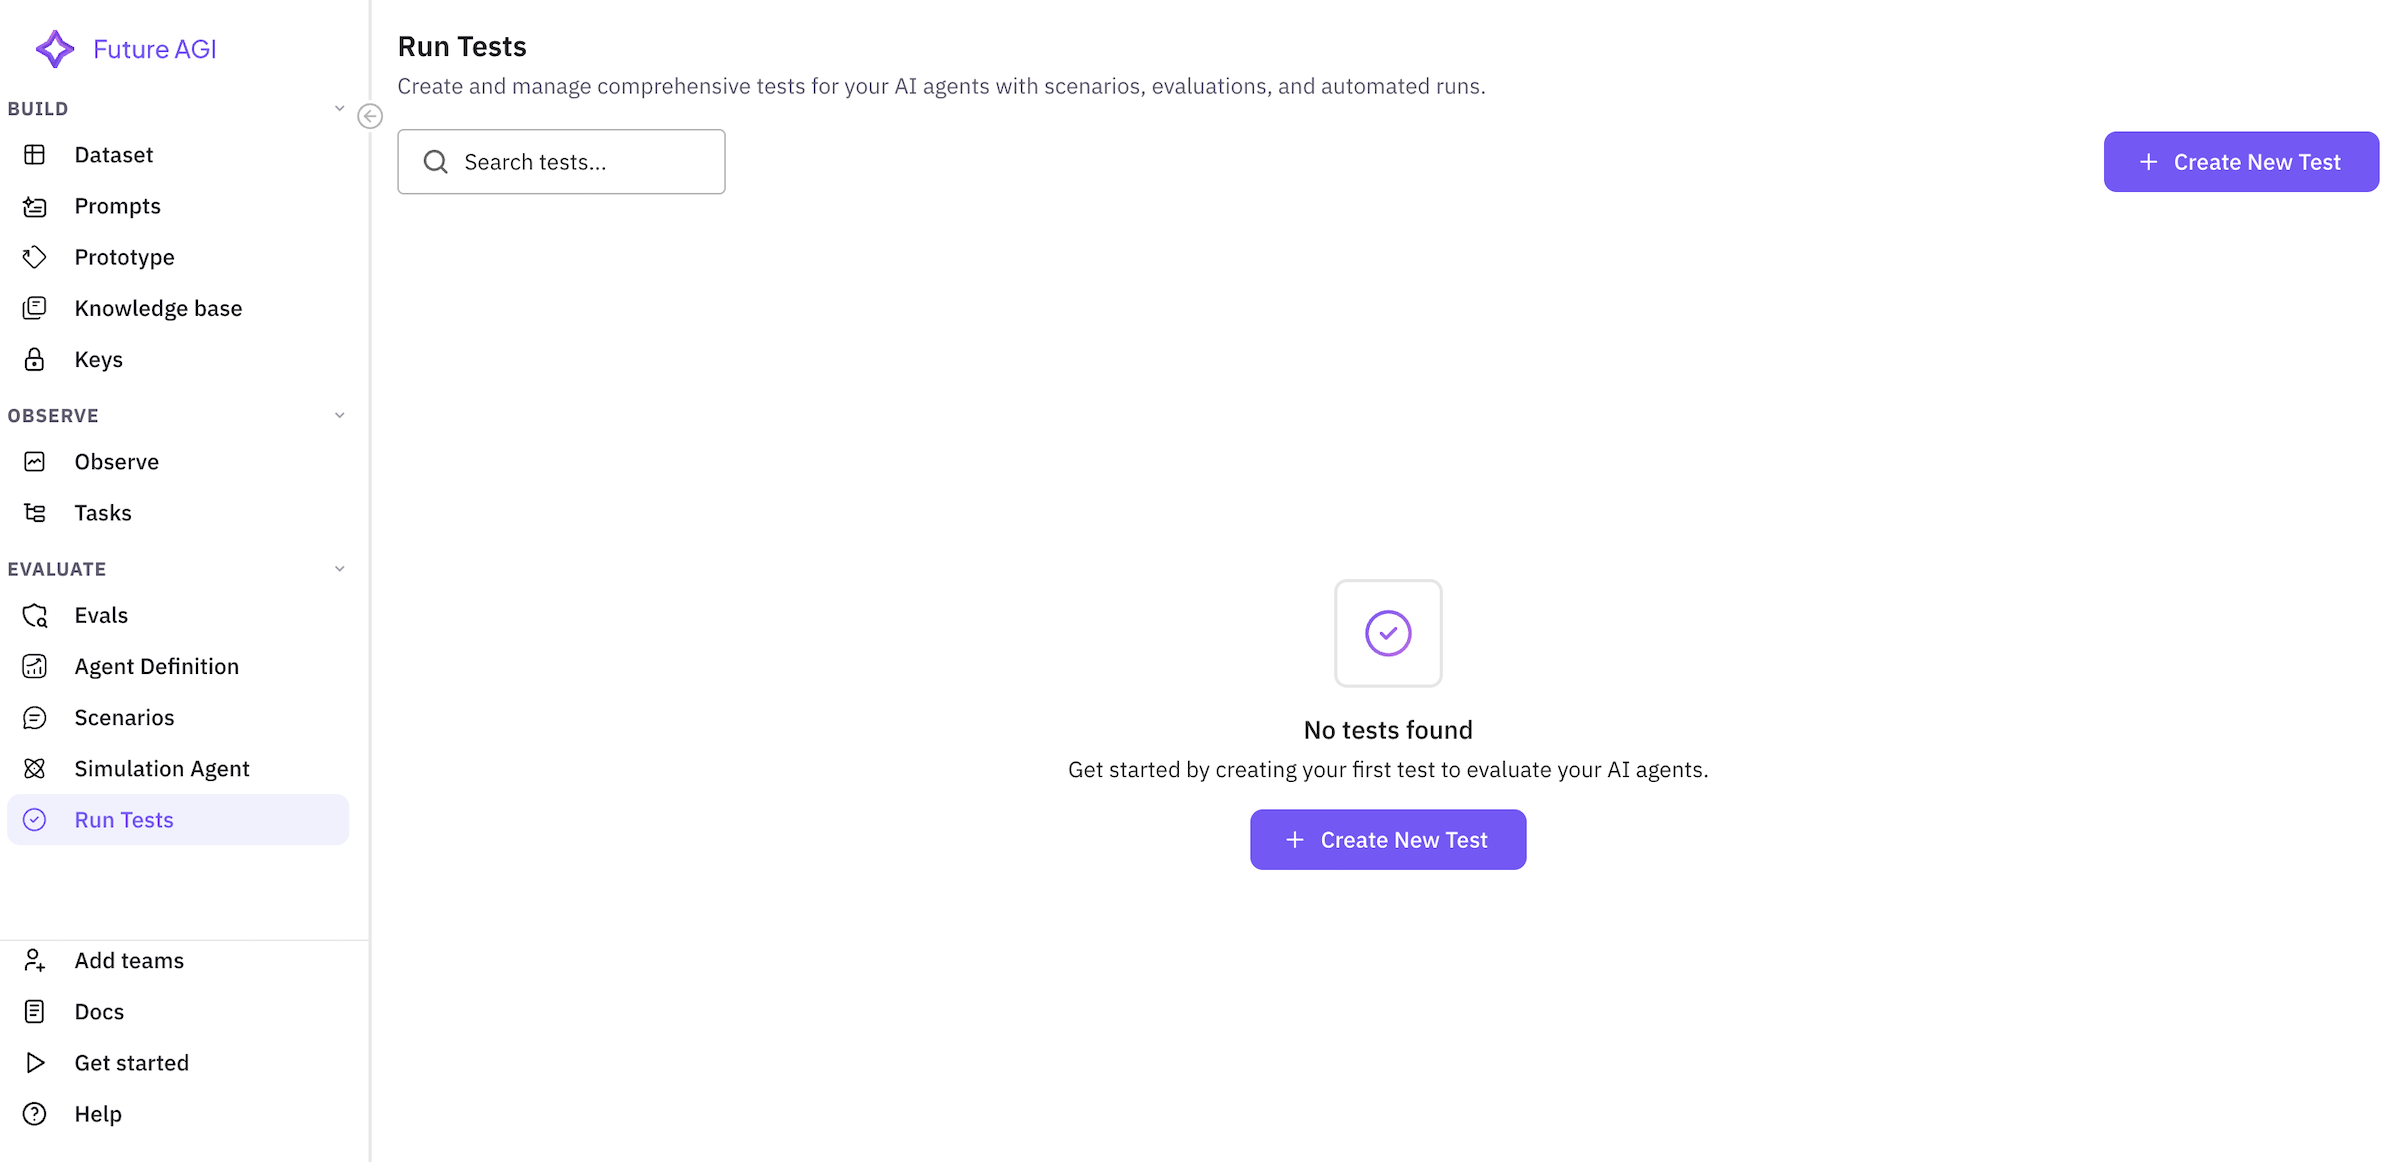
Basic Information
Configure your test with meaningful information: Test Name (Required)- Enter a descriptive name for your test
- Example:
Insurance Sales Agent - Q4 Performance Test - Best practice: Include agent type, purpose, and timeframe
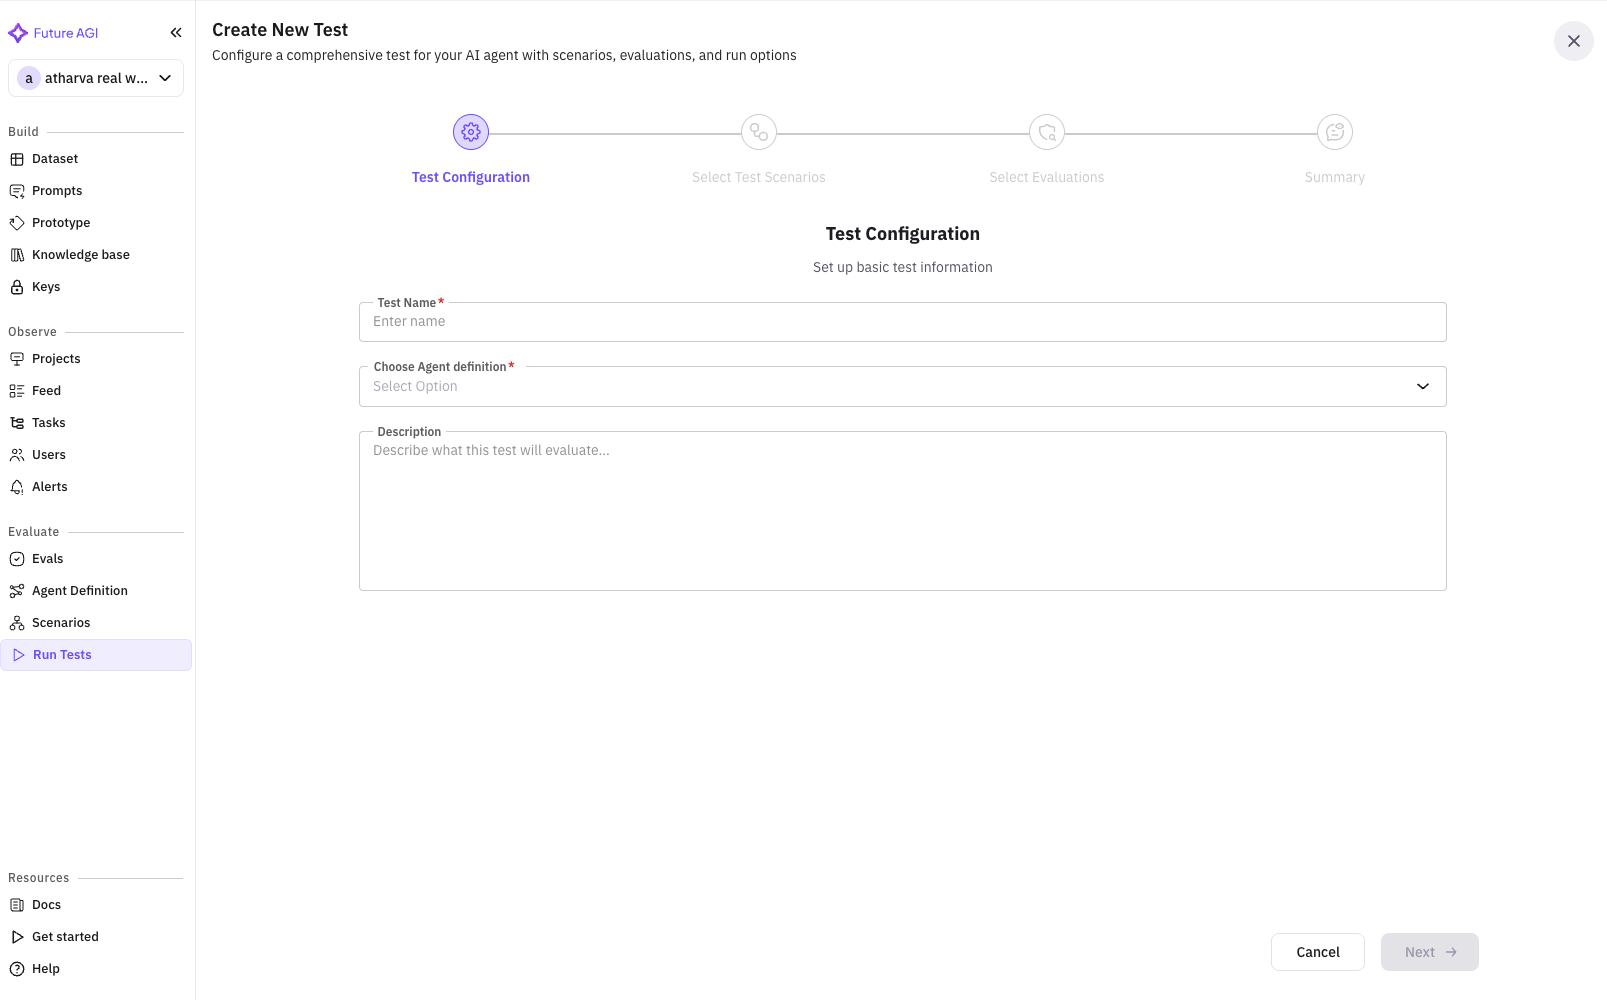
- Provide context about what this test evaluates
- Example:
Testing our insurance sales agent's ability to handle diverse customer profiles, with focus on objection handling and conversion rates - Include test goals and success criteria
Step 2: Select Test Scenarios
Choose one or more scenarios that your agent will be tested against. This screen shows all available scenarios with their details.Scenario Selection Features
Search Bar- Search scenarios by name or description
- Real-time filtering as you type
- Example: Search “insurance” to find relevant scenarios
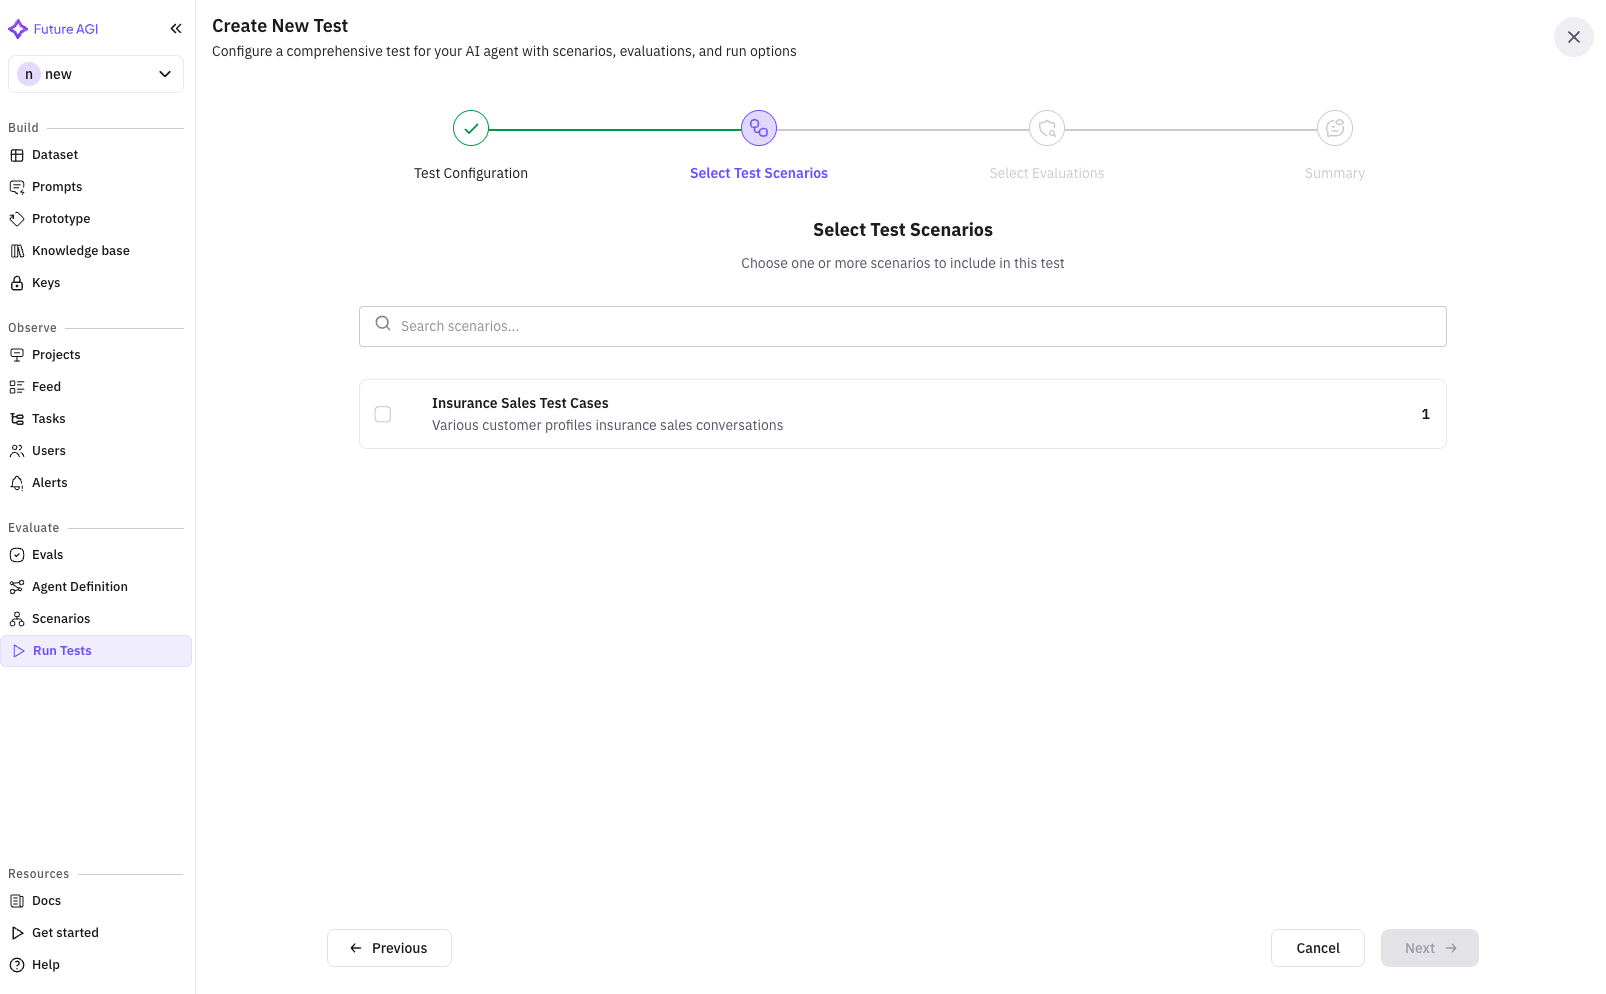
- Name: Scenario identifier
- Description: What the scenario tests
- Type Badge: Dataset, Graph, Script, or Auto-generated
- Row Count: Number of test cases (for dataset scenarios)
- Check multiple scenarios to test various situations
- Selected scenarios are highlighted with a primary border
- Counter shows total selected: “Scenarios (3)”
- Navigate through scenarios if you have many
- Adjust items per page (10, 25, 50)
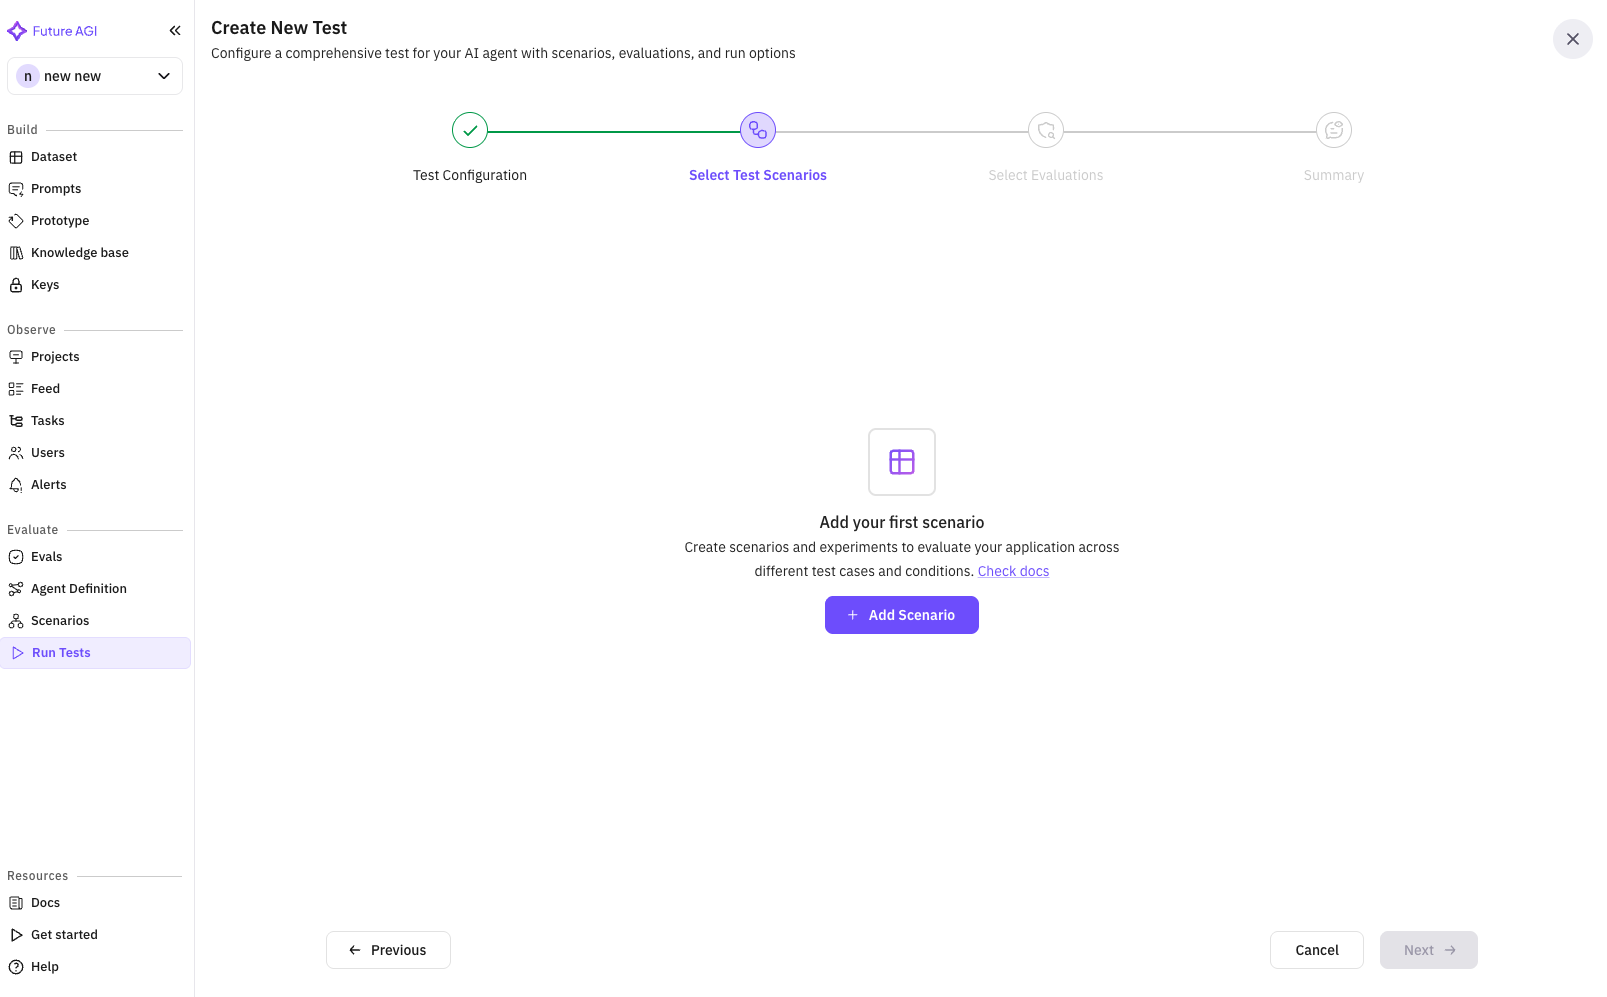
Empty State
If no scenarios exist, you’ll see:- Empty state message
- Direct link to create scenarios
- Documentation link
Step 3: Select Test Agent
Choose the simulation agent that will interact with your insurance sales agent. This agent simulates customer behavior during tests.
Agent Selection Features
Search Functionality- Search agents by name
- Filter to find specific customer personas
- Name: Agent identifier (e.g., “Insurance Customer Simulator”)
- Radio Button: Single selection only
- Clean, simple interface for quick selection
- Helpful message about creating agents
- Direct button to add simulator agent
- Links to documentation
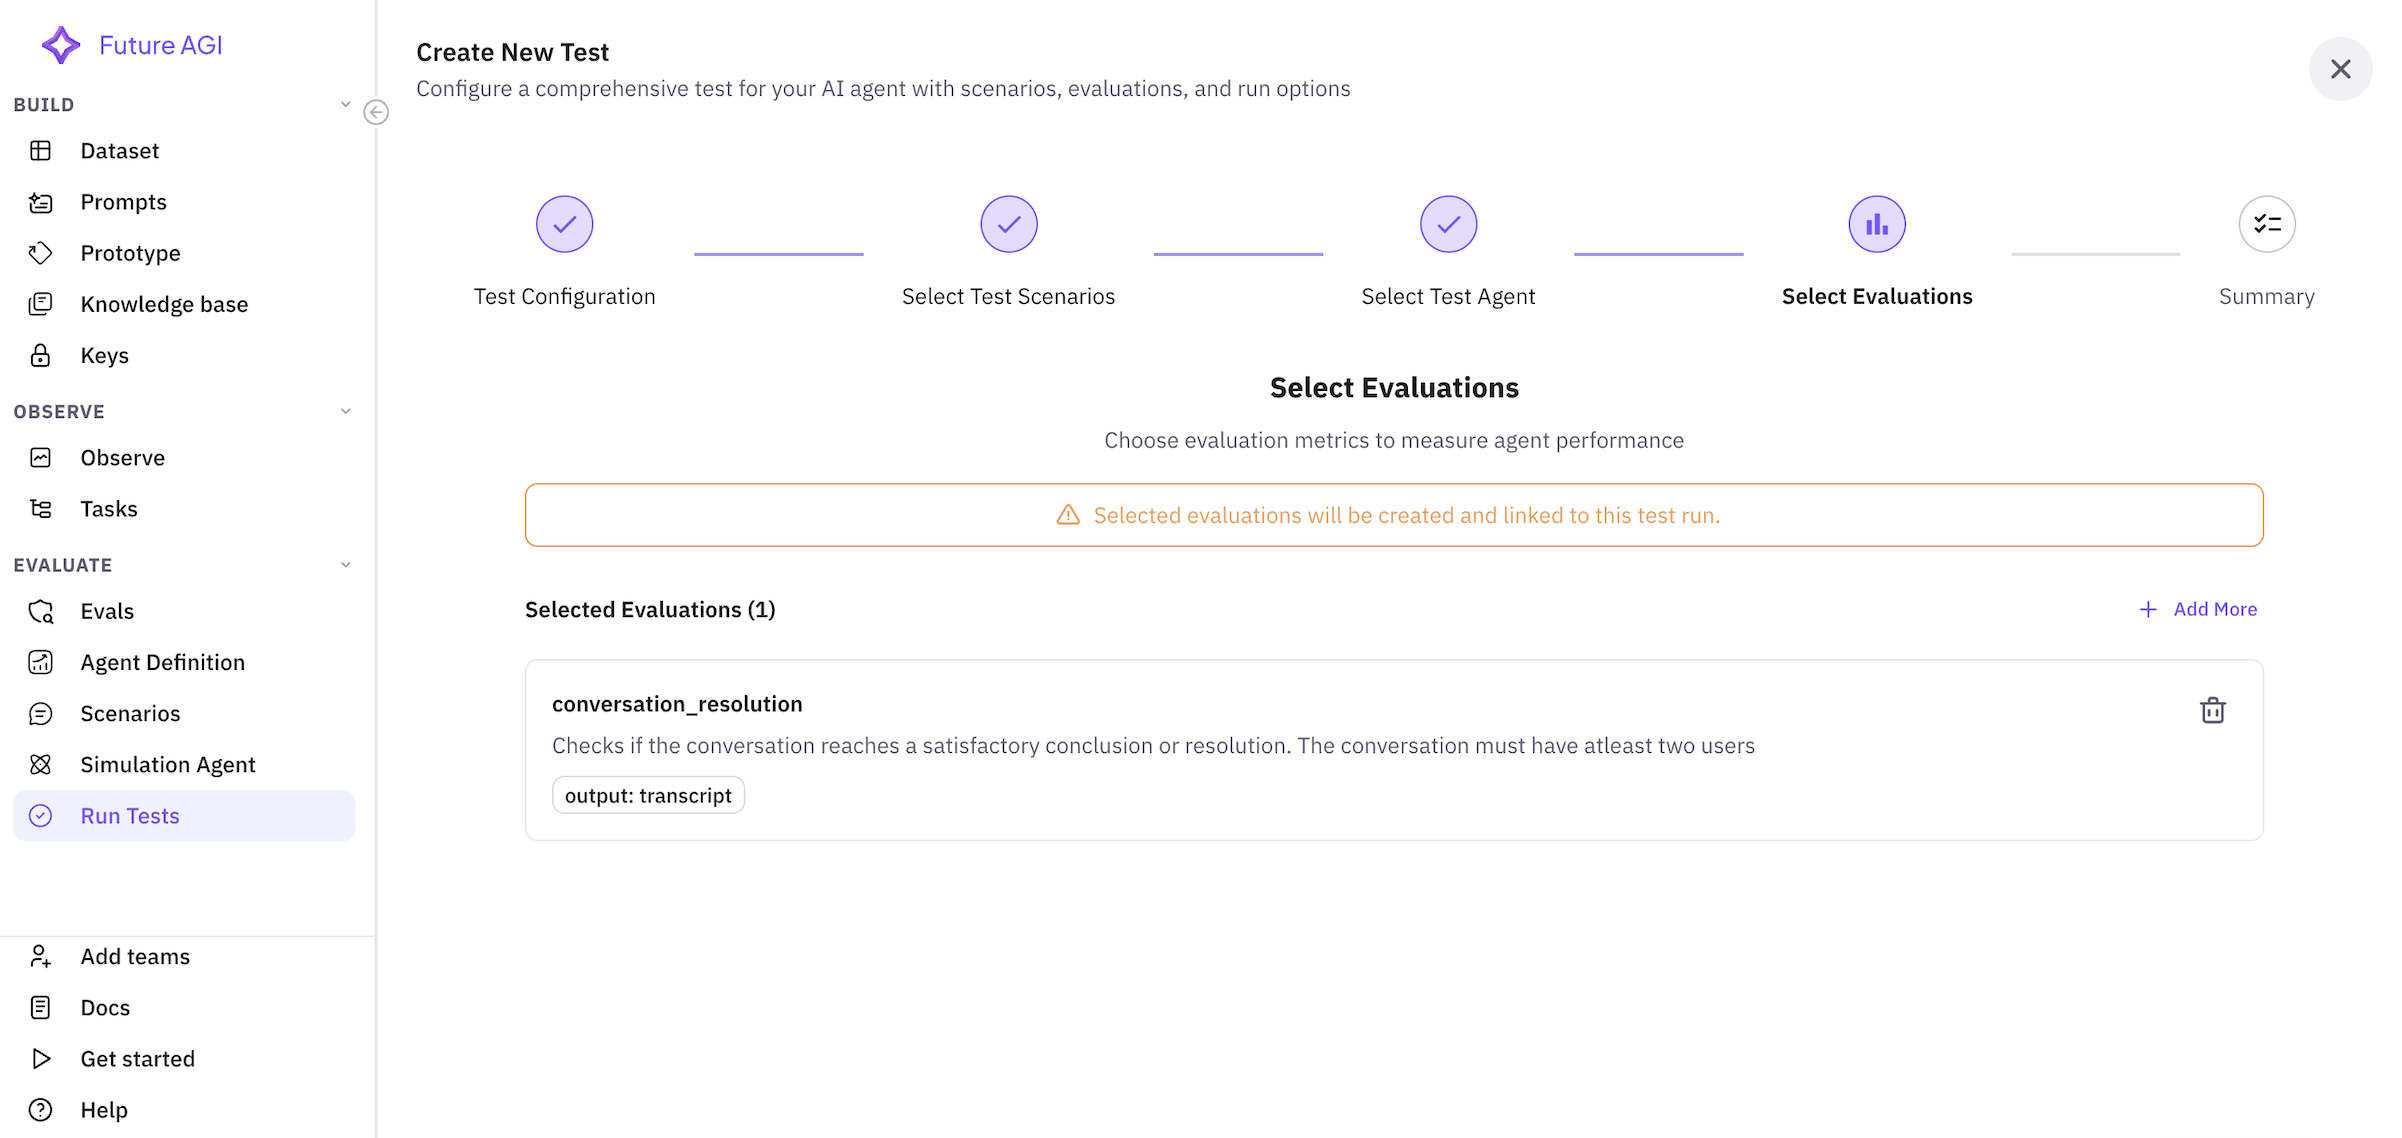
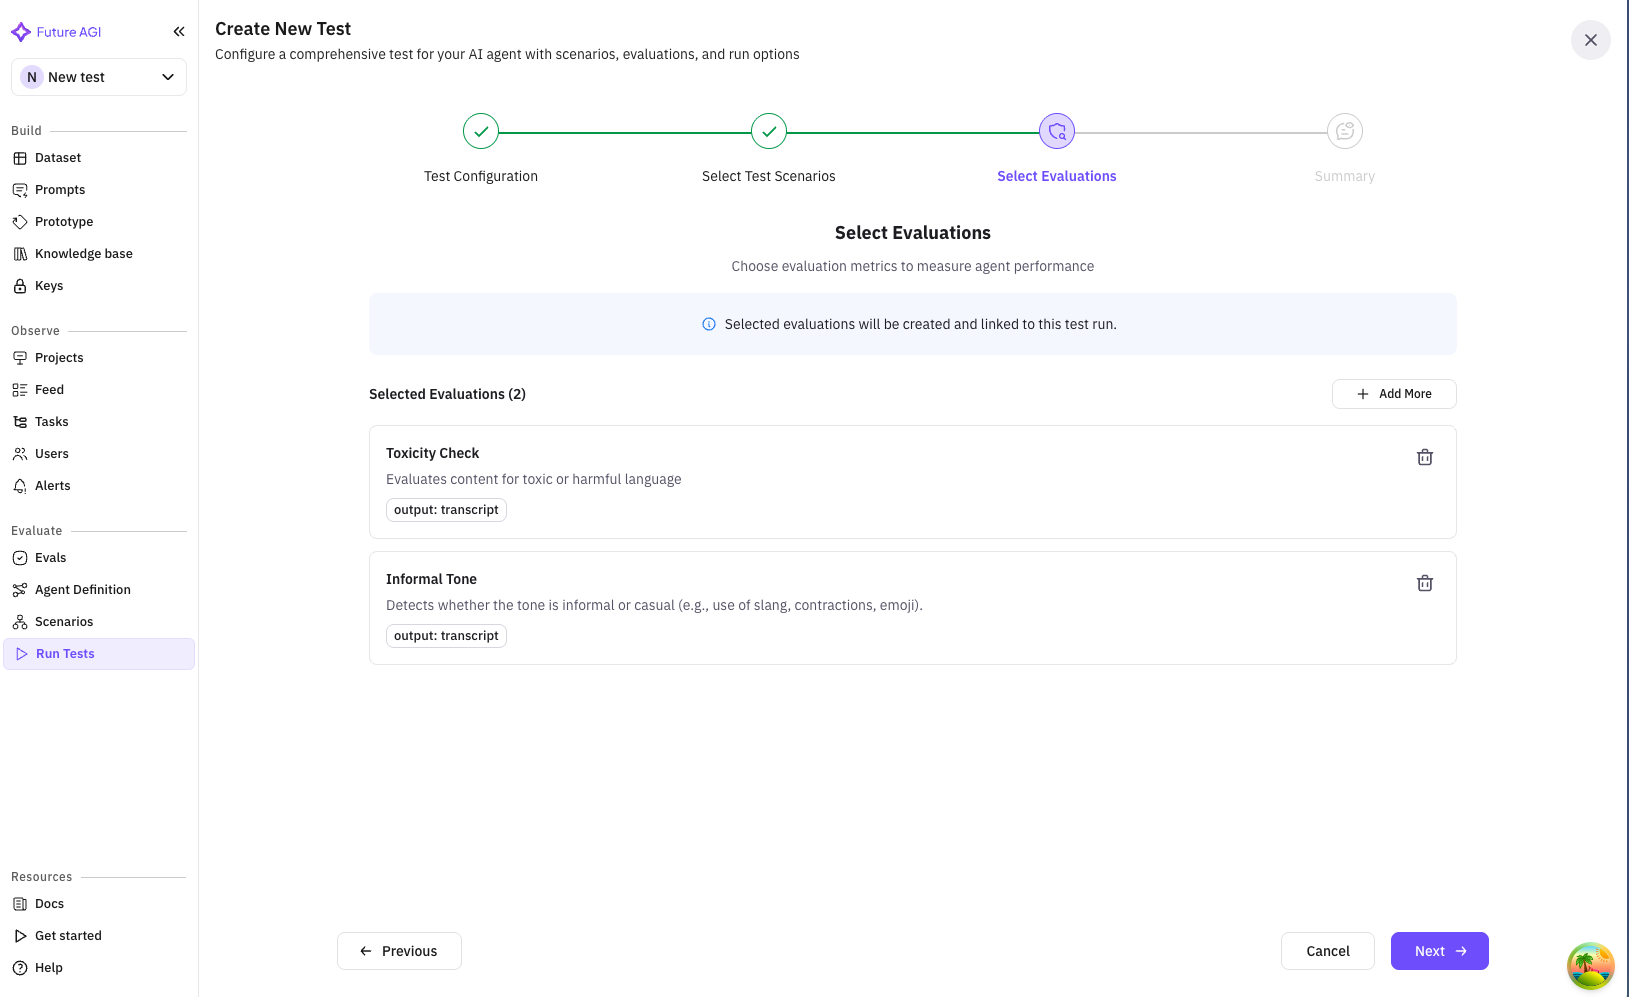
Step 3: Select Evaluations
Configure evaluation metrics to measure your agent’s performance. This step is crucial for defining success criteria.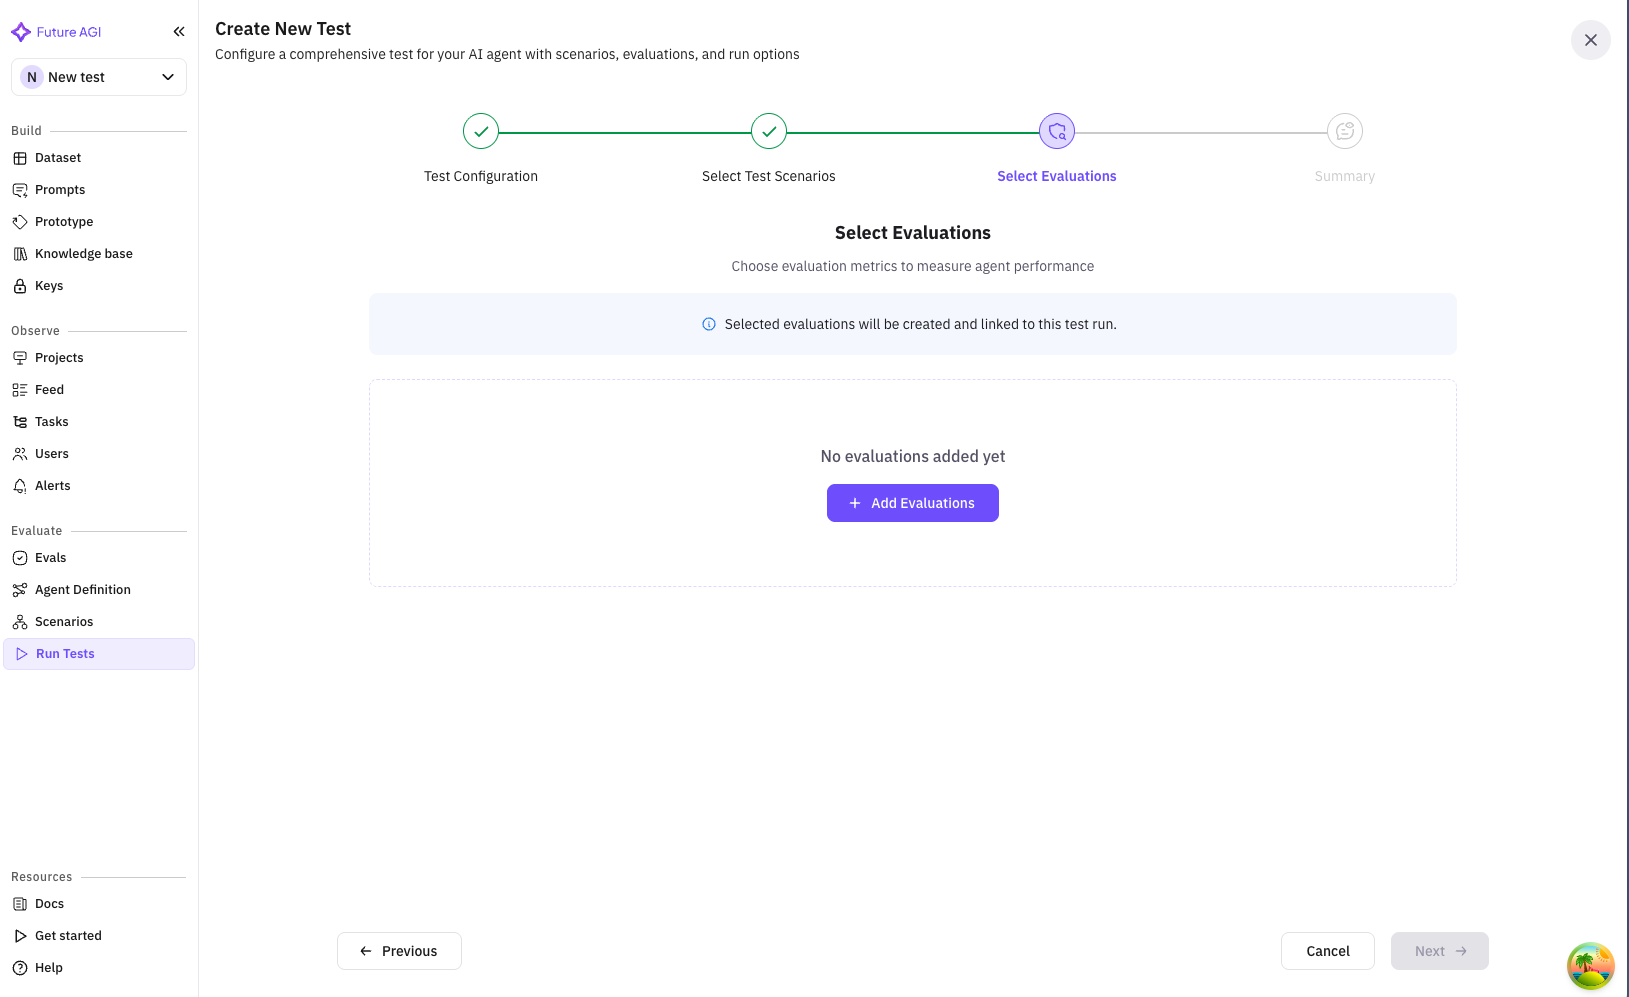
Important Notice
A warning banner explains:- Selected evaluations will be created and linked to this test run
- Evaluations become part of your test configuration
- They’ll run automatically during test execution
Adding Evaluations
Initial State When no evaluations are selected:- Empty state with clear message
- Prominent “Add Evaluations” button
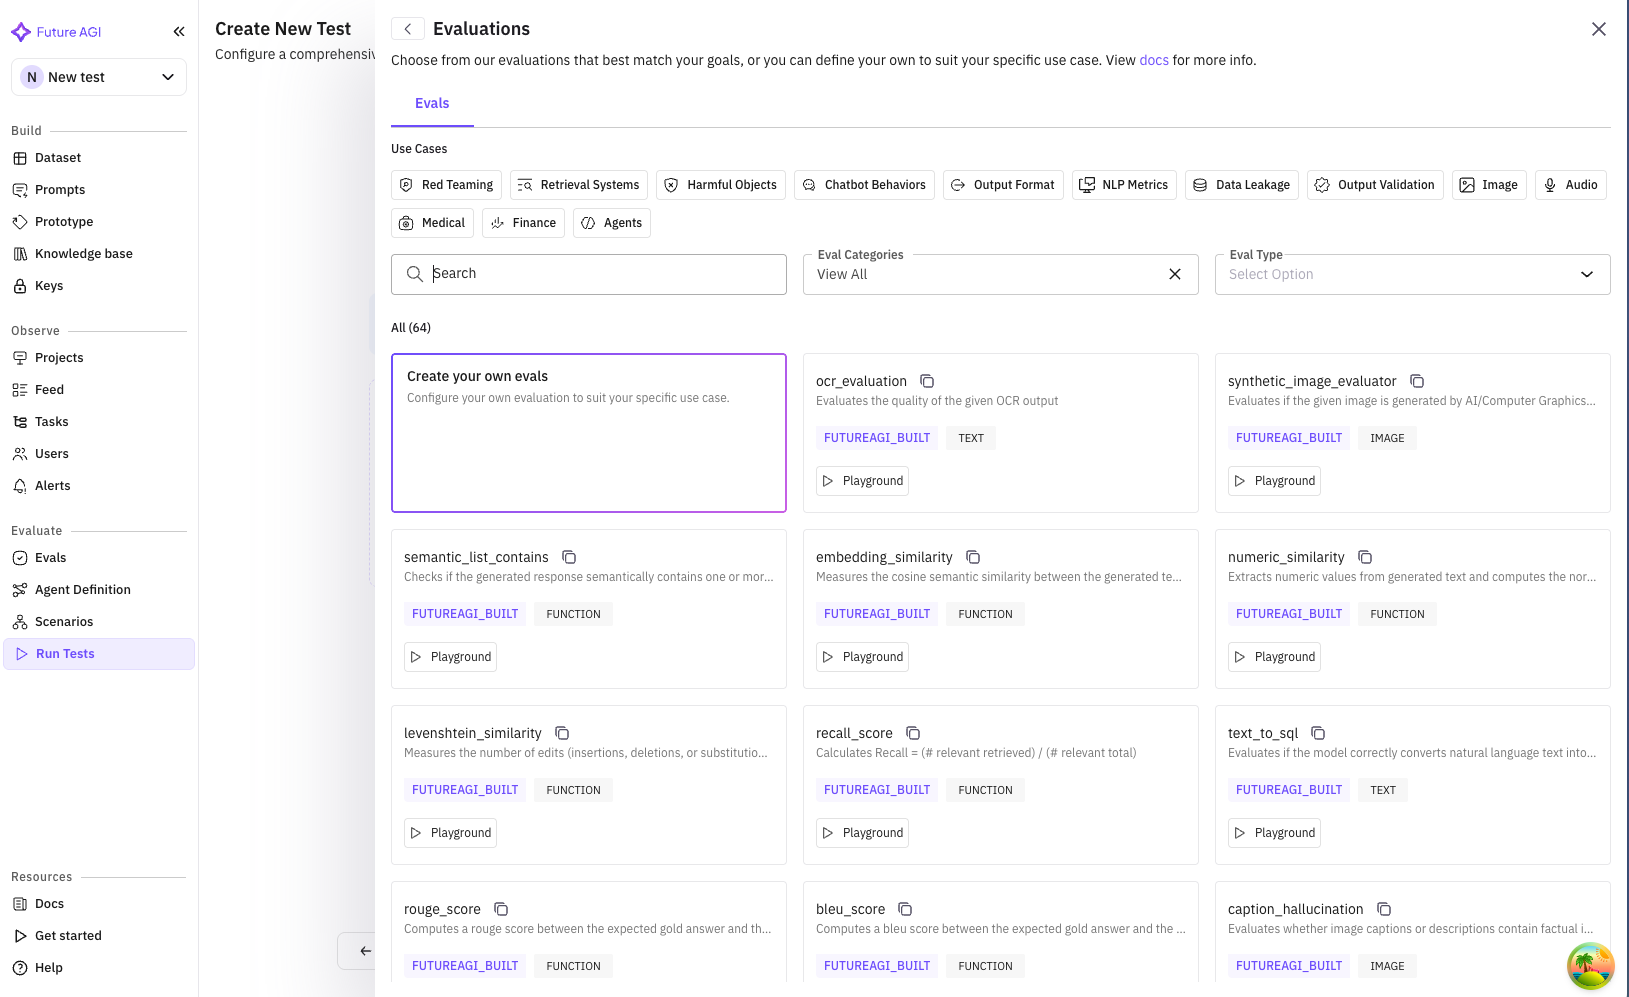
- Search bar: Find evaluations by name or type
- Category tabs: System, Custom, or All evaluations
- Evaluation list: Available evaluation templates
- Conversation Quality: Measures professionalism and clarity
- Sales Effectiveness: Tracks conversion and objection handling
- Compliance Check: Ensures regulatory requirements
- Product Knowledge: Verifies accurate information
- Customer Satisfaction: Simulated CSAT score
Selected Evaluations View
After adding evaluations, you’ll see:- Total count: “Selected Evaluations (5)”
- “Add More” button for additional evaluations
- List of selected evaluations with:
- Name and description
- Configuration details (if any)
- Mapped fields shown as chips
- Remove button (trash icon)
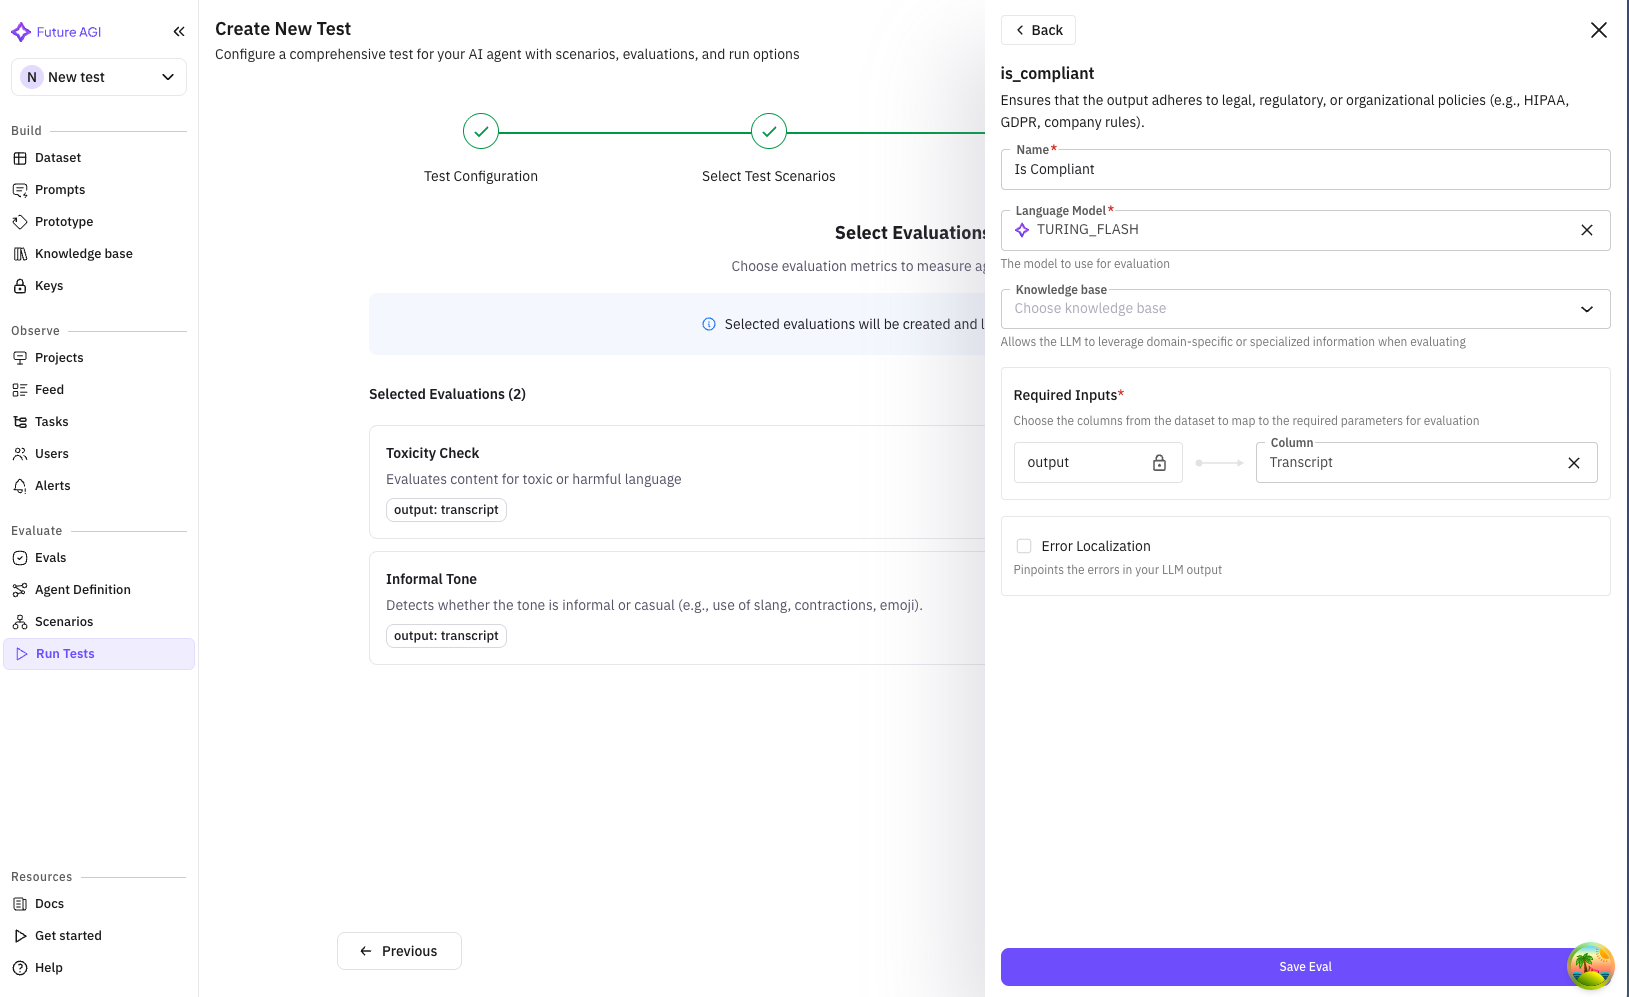
Evaluation Configuration
Some evaluations require field mapping:- Map evaluation inputs to your data fields
- Example: Map “customer_response” to “agent_reply”
- Configured mappings show as chips
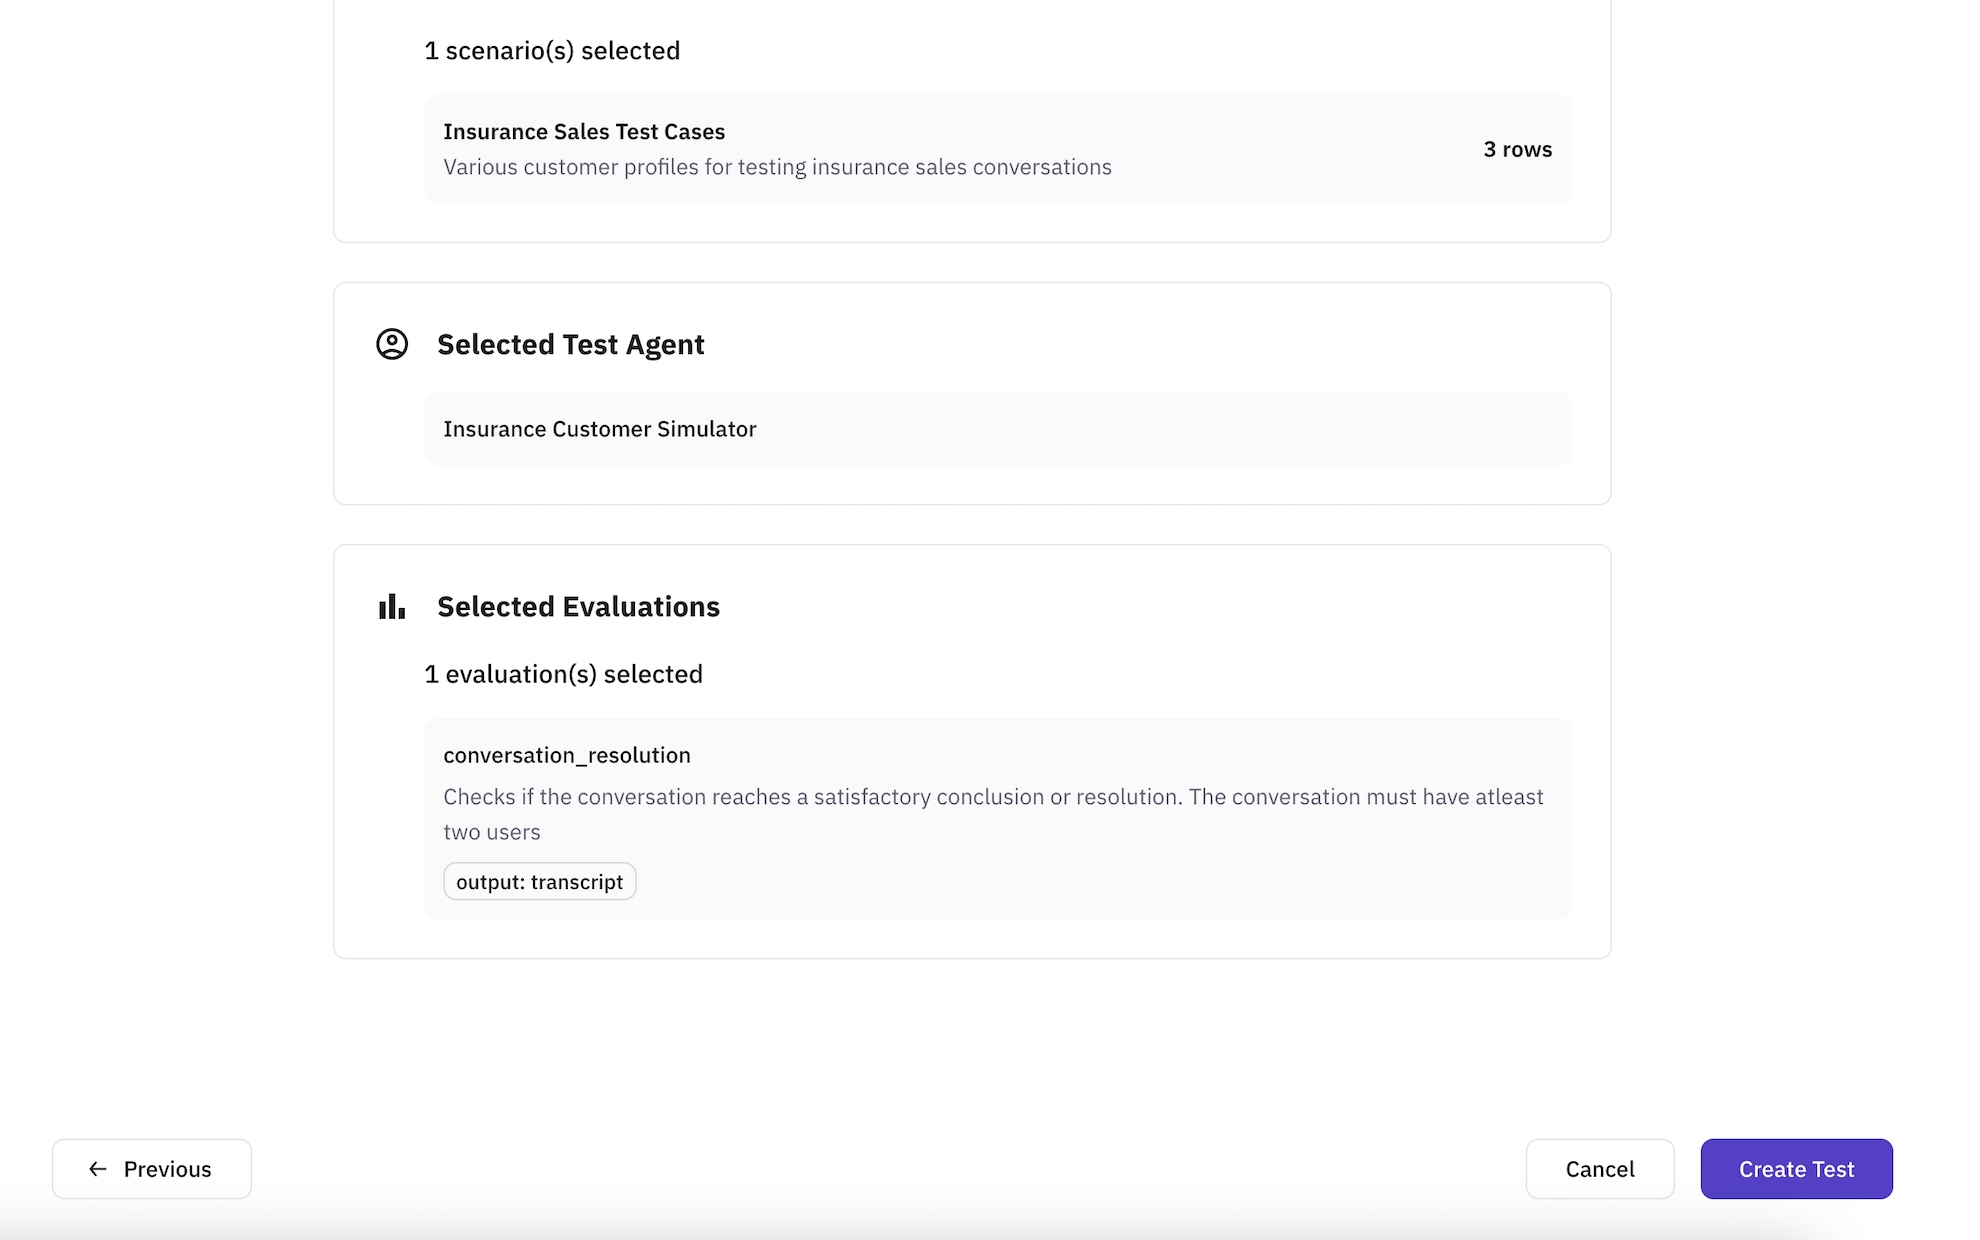
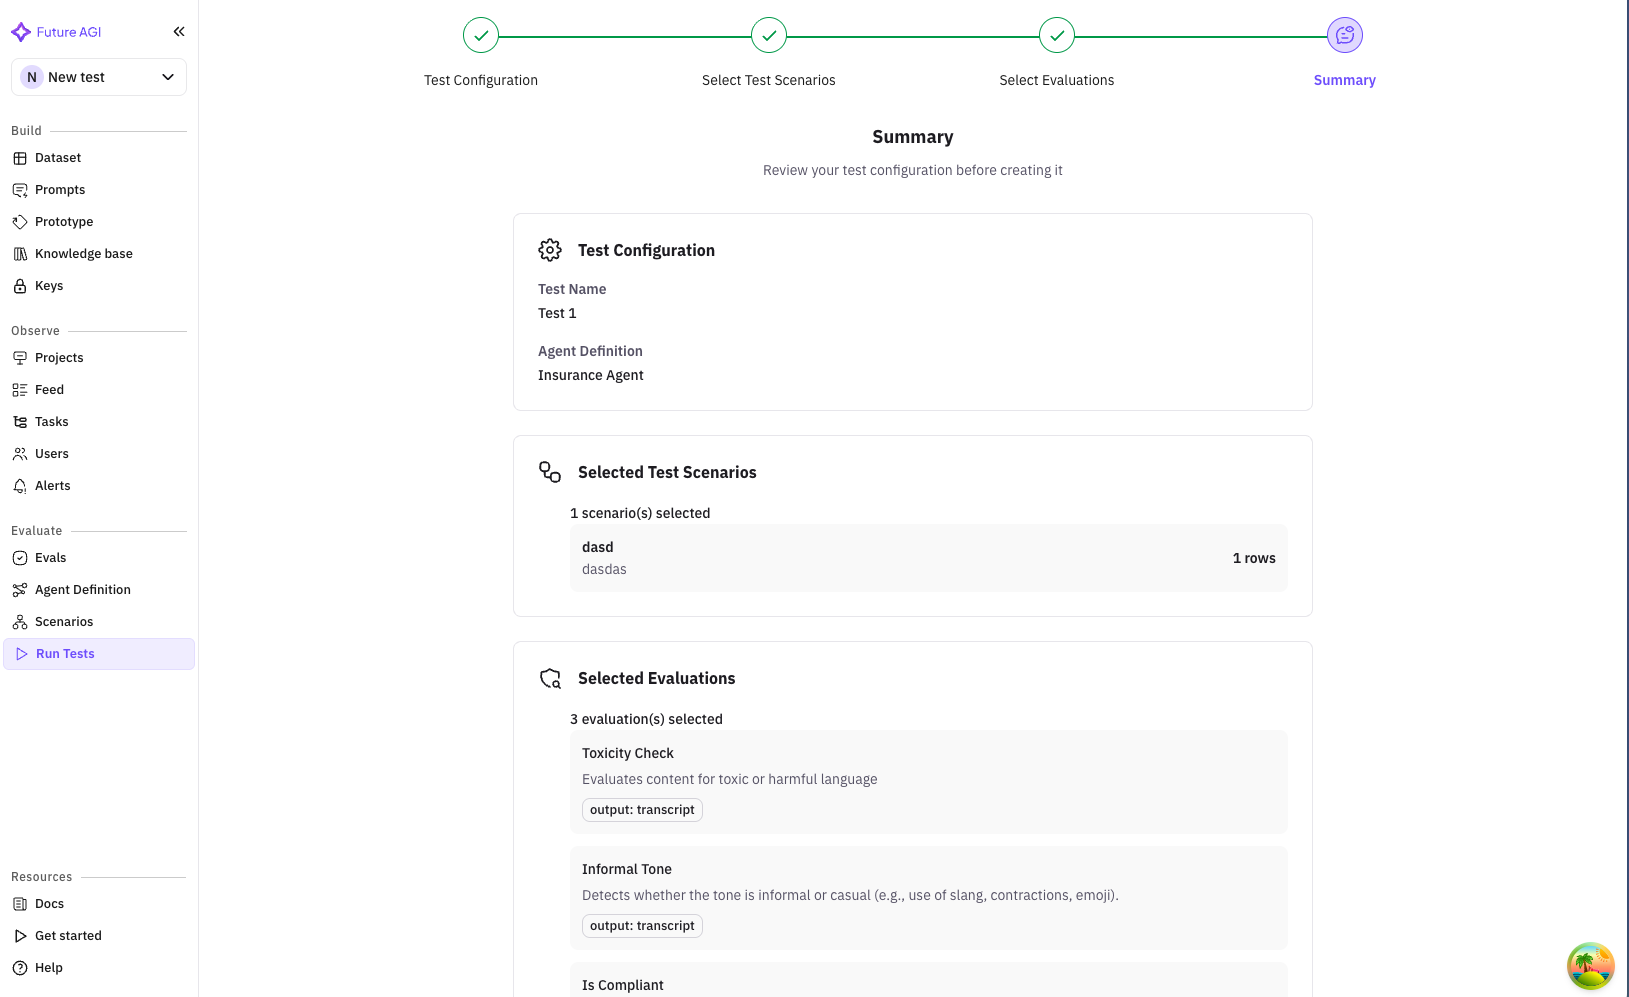
Step 5: Summary
Review all your test configuration before creating the test. The summary is organized into clear sections:Test Configuration Section
Shows your basic test setup:- Test name
- Description (if provided)
- Creation timestamp
Selected Test Scenarios Section
Displays all chosen scenarios:- Total count: “3 scenario(s) selected”
- Each scenario shows:
- Name and description
- Row count for datasets
- Gray background for easy scanning
Selected Test Agent Section
Shows your chosen simulation agent:- Agent name
- Description (if available)
- Highlighted in gray box
Selected Evaluations Section
Lists all evaluation metrics:- Total count: “5 evaluation(s) selected”
- Each evaluation shows:
- Name and description
- Any configured mappings
- Gray background boxes
Action Buttons
- Back: Return to modify any section
- Create Test: Finalize and create the test
Creating the Test
When you click “Create Test”:-
Loading State
- Button shows “Creating…” with spinner
- All inputs are disabled
- Prevents duplicate submissions
-
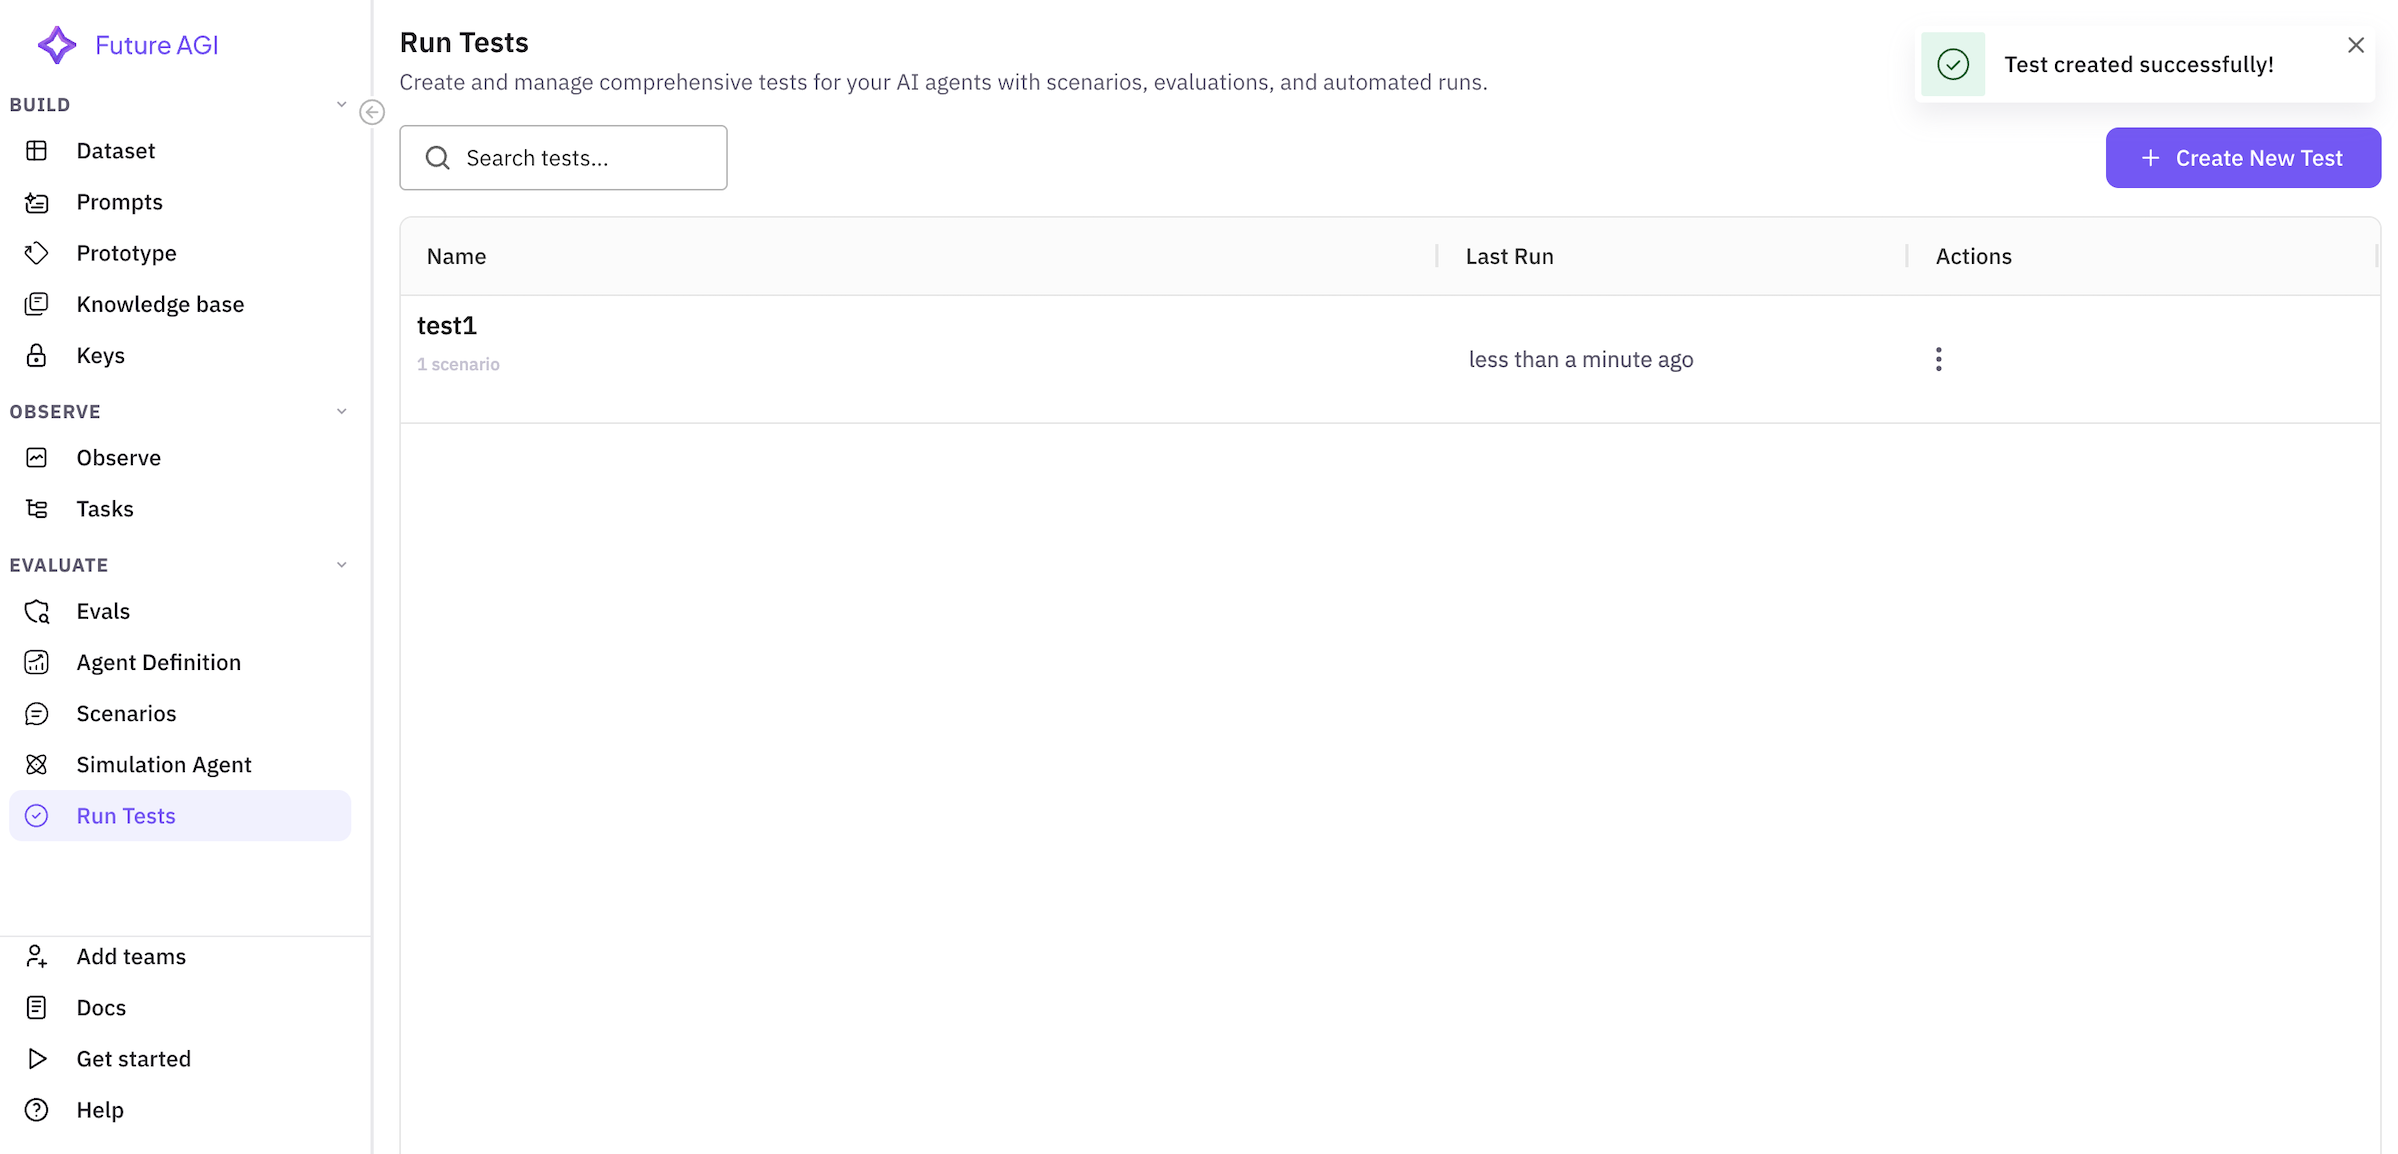
Success
- Success notification appears
- Automatically redirects to test list
- Your test appears at the top
-
Error Handling
- Clear error messages
- Specific guidance on issues
- Ability to retry
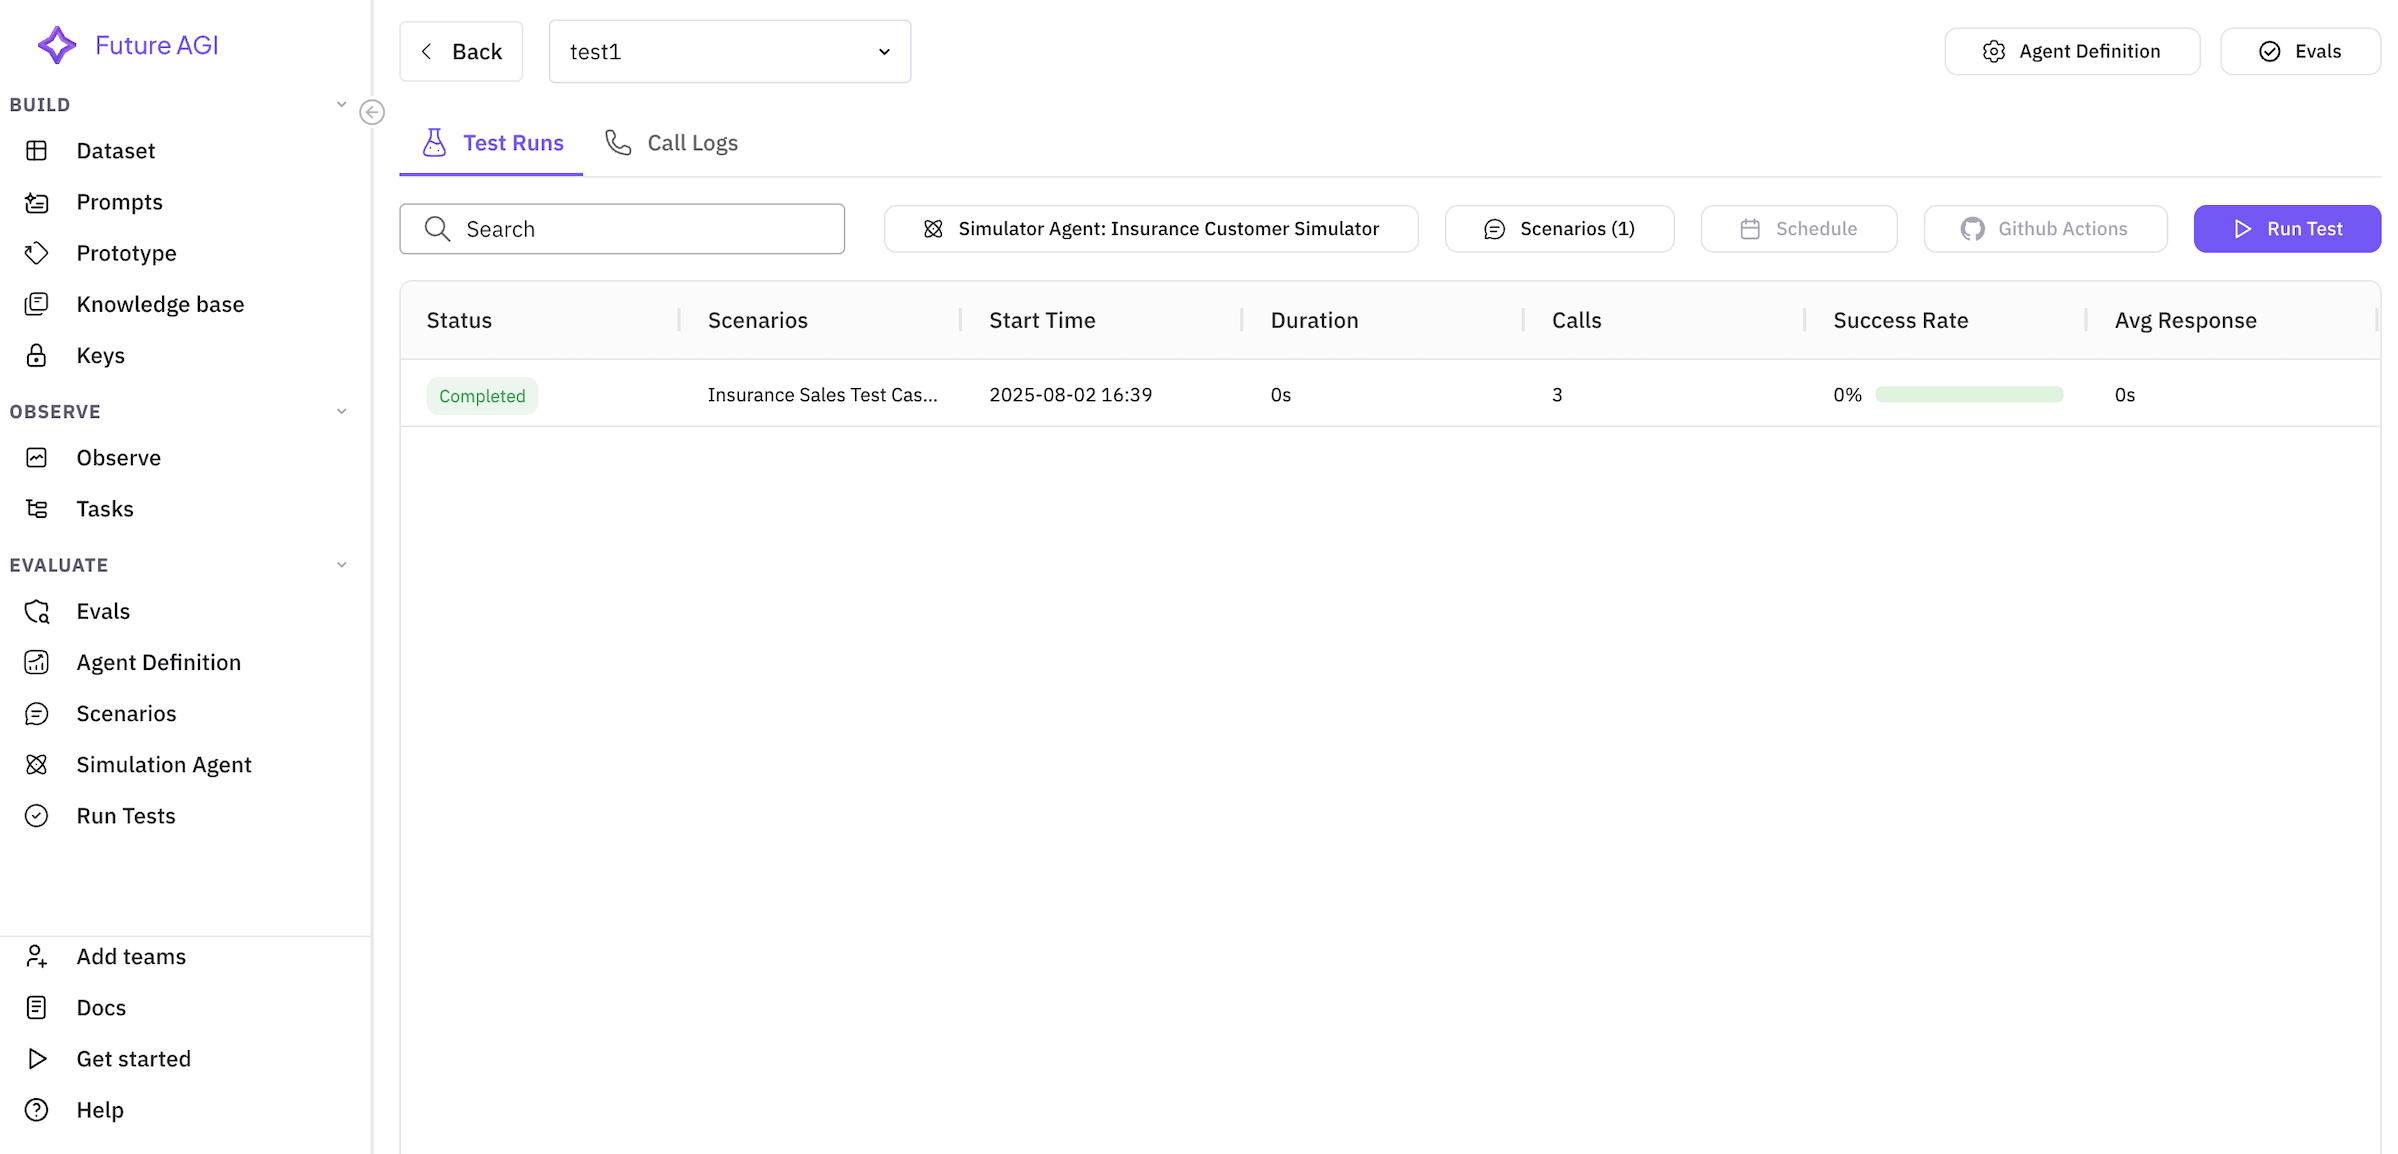
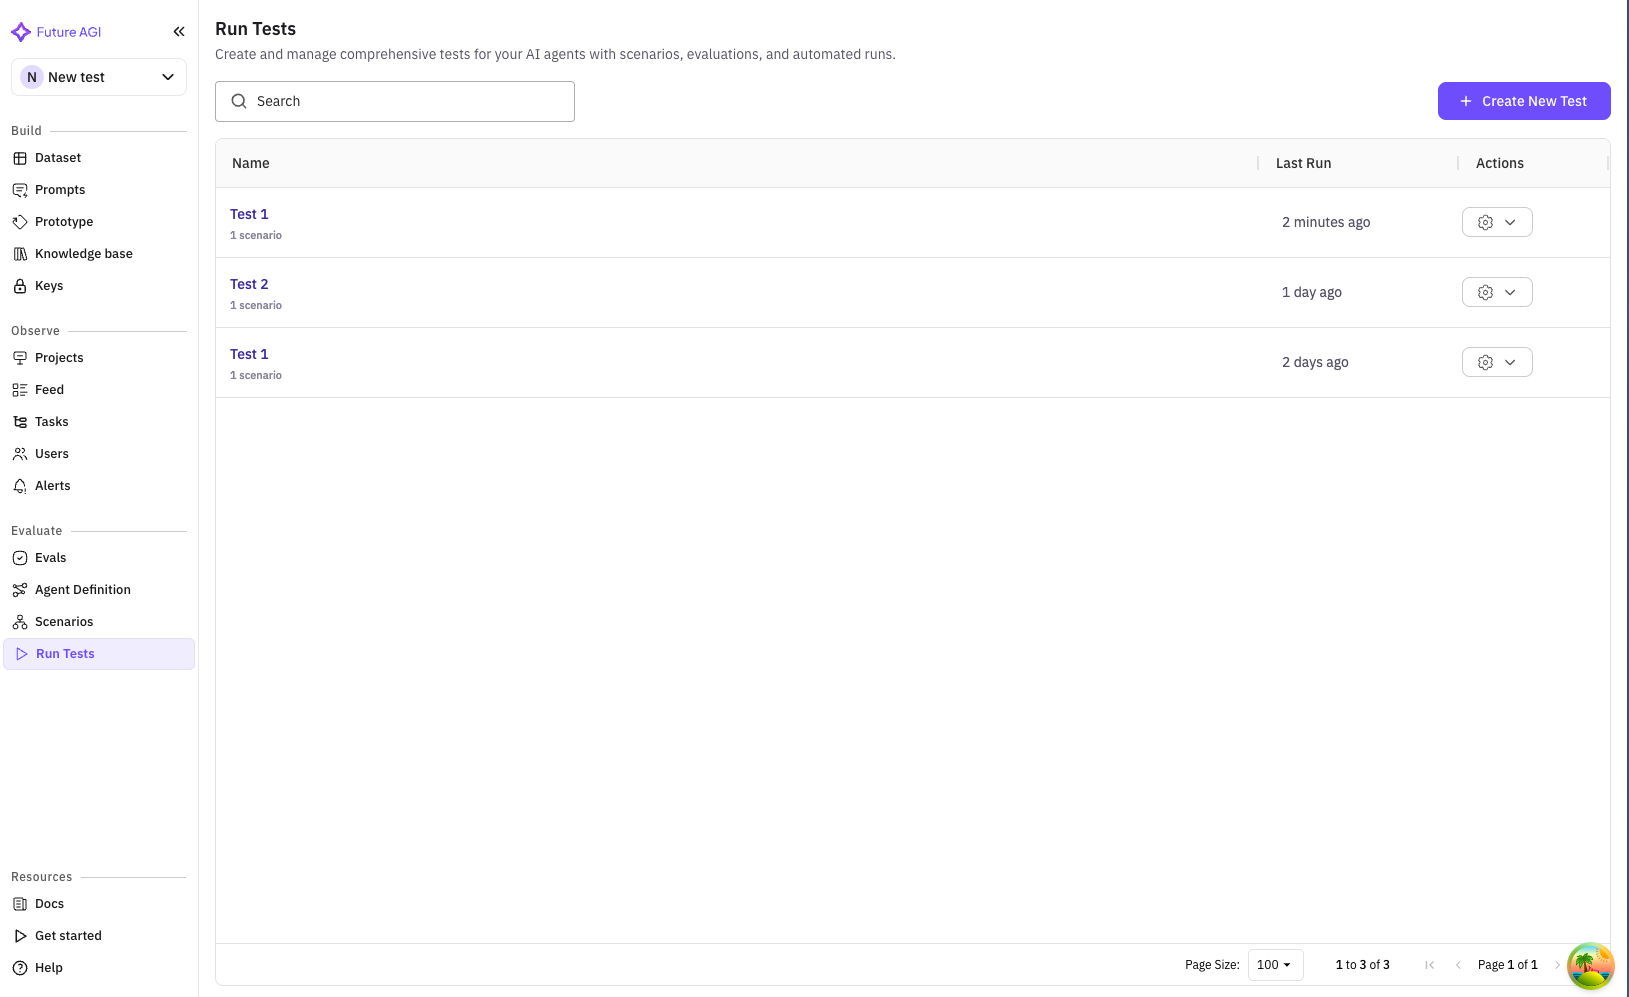
Running Tests
Once created, tests appear in your test list. Here’s how to run them:Test List View
Navigate to Simulations → Run Tests to see all your tests. Each test row shows:- Name & Description: Test identifier and purpose
- Scenarios: Count of included scenarios
- Agent: Which sales agent is being tested
- Testing Agent: Customer simulator being used
- Data Points: Total test cases from all scenarios
- Evaluations: Number of metrics being tracked
- Created: Timestamp
- Actions: Run, view details, edit, delete
Running a Test
Click on a test to view its details and run options.Test Detail Header
Shows test information and primary actions:- Test name and description
- Run Test button (primary action)
- Navigation breadcrumbs
- Quick stats (scenarios, evaluations, etc.)
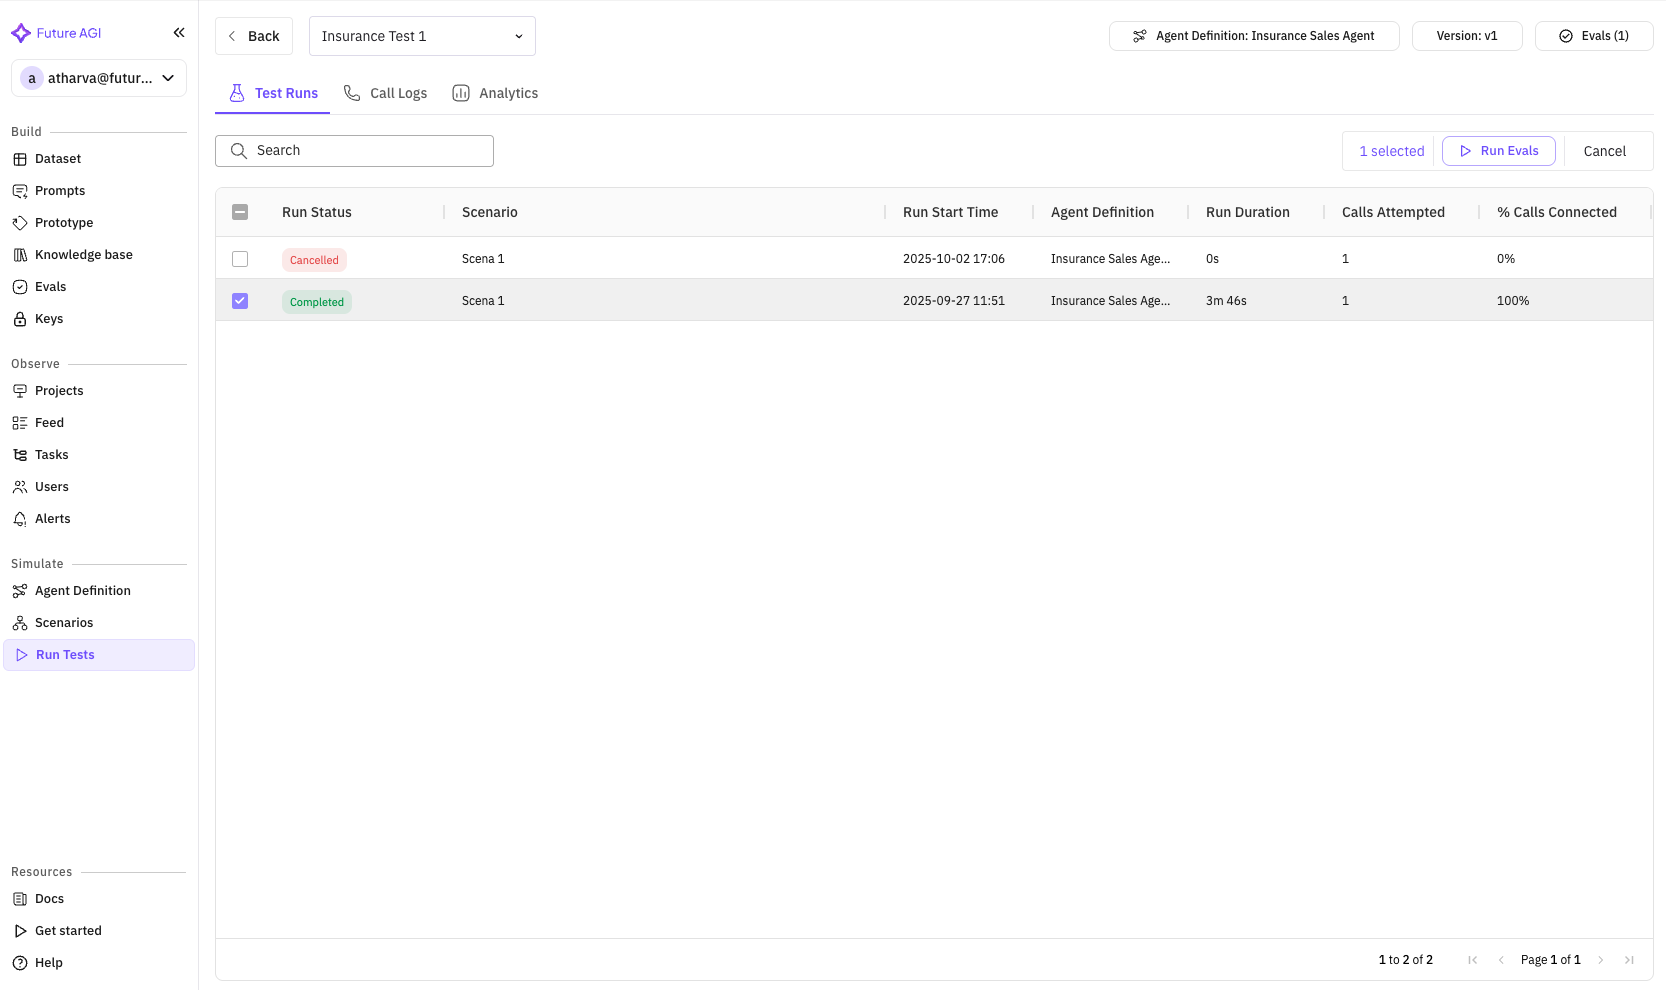
Test Runs Tab
The default view shows all test runs: Run Test Button Click “Run Test” to start execution:- Confirmation dialog appears
- Shows estimated duration
- Option to run all or select specific scenarios
- Click “Scenarios (X)” button
- Opens scenario selector
- Check/uncheck scenarios to include
- Shows row count for each
- Status Badge: Running, Completed, Failed
- Progress Bar: Real-time completion percentage
- Duration: Elapsed time
- Start Time: When test began


Monitoring Test Progress
Click on a running test to monitor progress: Real-time Updates- Overall progress percentage
- Current scenario being executed
- Completed vs total test cases
- Live duration counter
- Scenario: Which scenario is running
- Status: Pending, In Progress, Completed, Failed
- Duration: Time per test case
- Result: Pass/Fail indicator
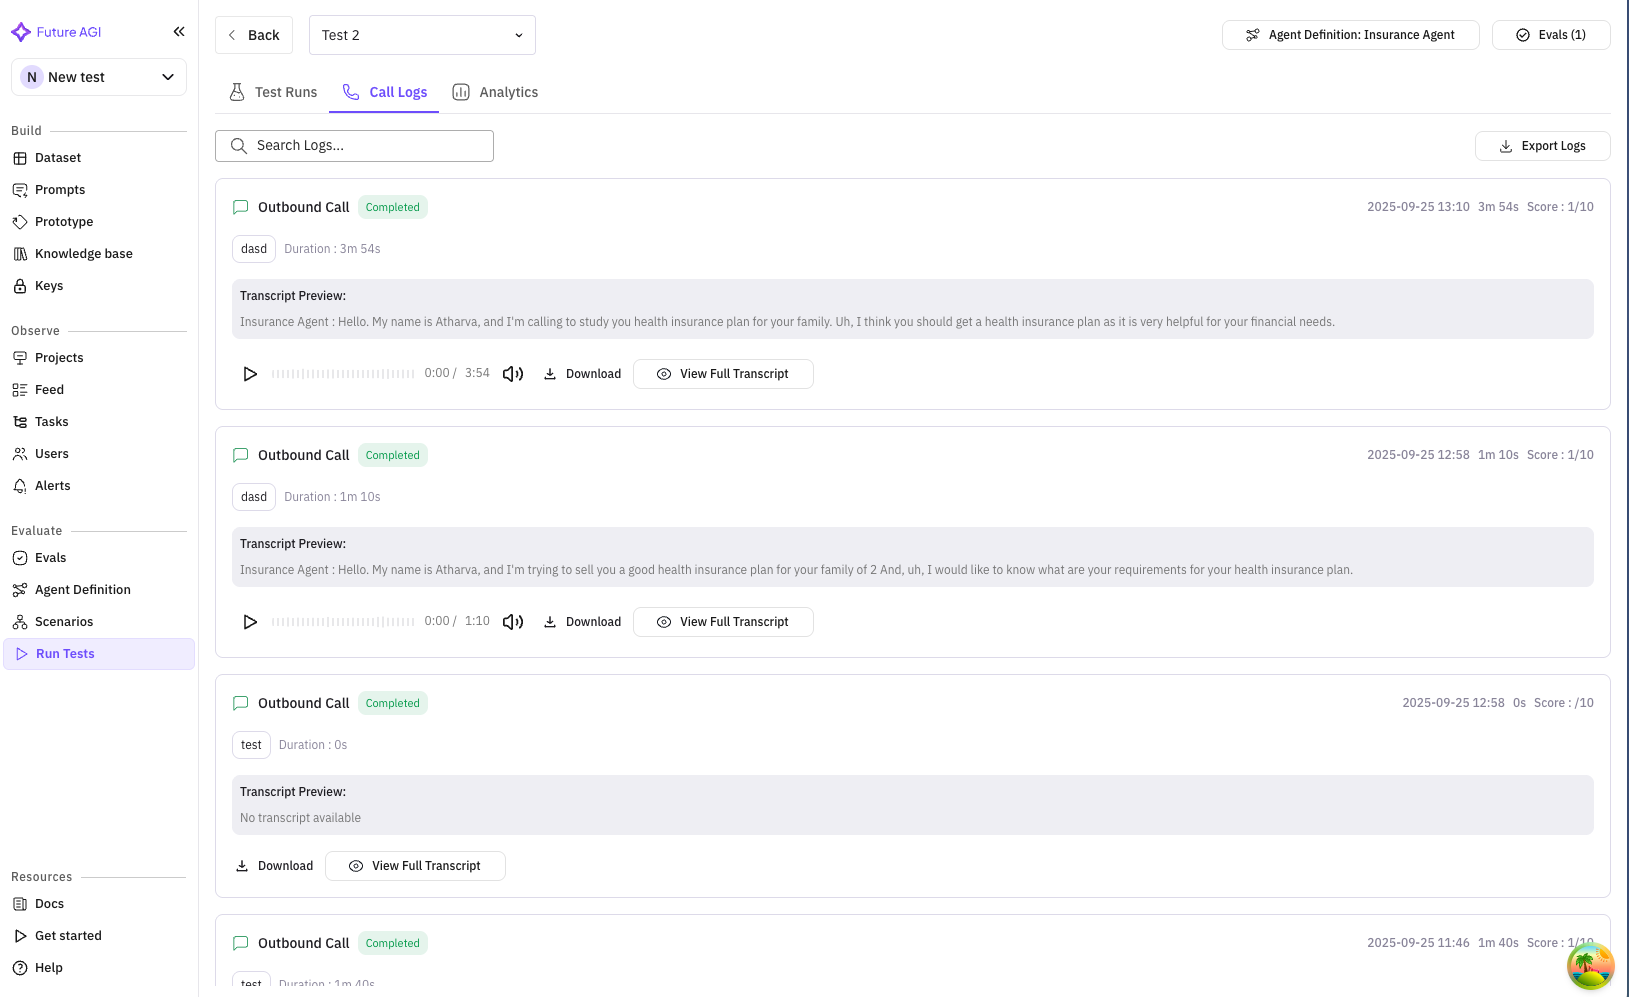
Call Logs Tab
View detailed conversation logs from your tests: Features:- Search conversations by content
- Filter by status, duration, or evaluation results
- Export logs for analysis
- Pagination for large result sets
- Timestamp and duration
- Scenario used
- Conversation preview
- Evaluation scores
- Detailed view link
- Full conversation transcript
- Turn-by-turn analysis
- Evaluation results per metric
- Audio playback (if enabled)
- Key moments flagged by evaluations
Test Results & Analytics
After test completion, comprehensive results are available:Test Run Summary
Access from the test runs list by clicking a completed test: Key Metrics Dashboard- Overall Score: Aggregate performance (e.g., 85/100)
- Pass Rate: Percentage of successful test cases
- Average Duration: Mean conversation length
- Conversion Rate: For sales scenarios
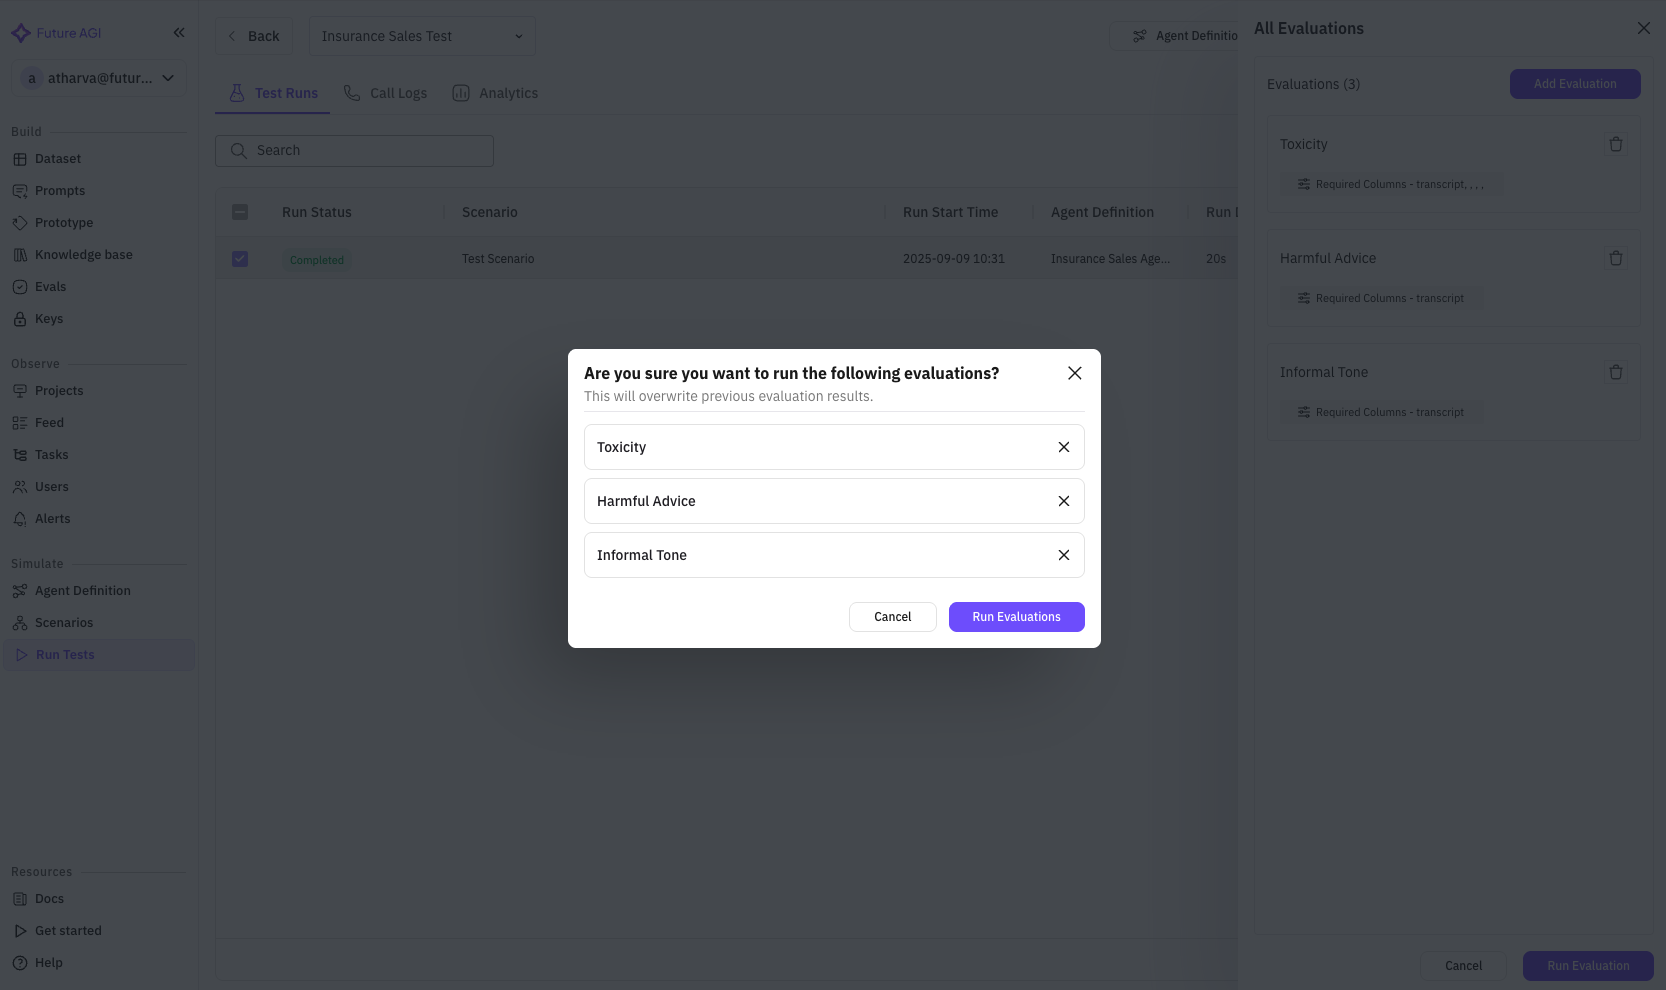
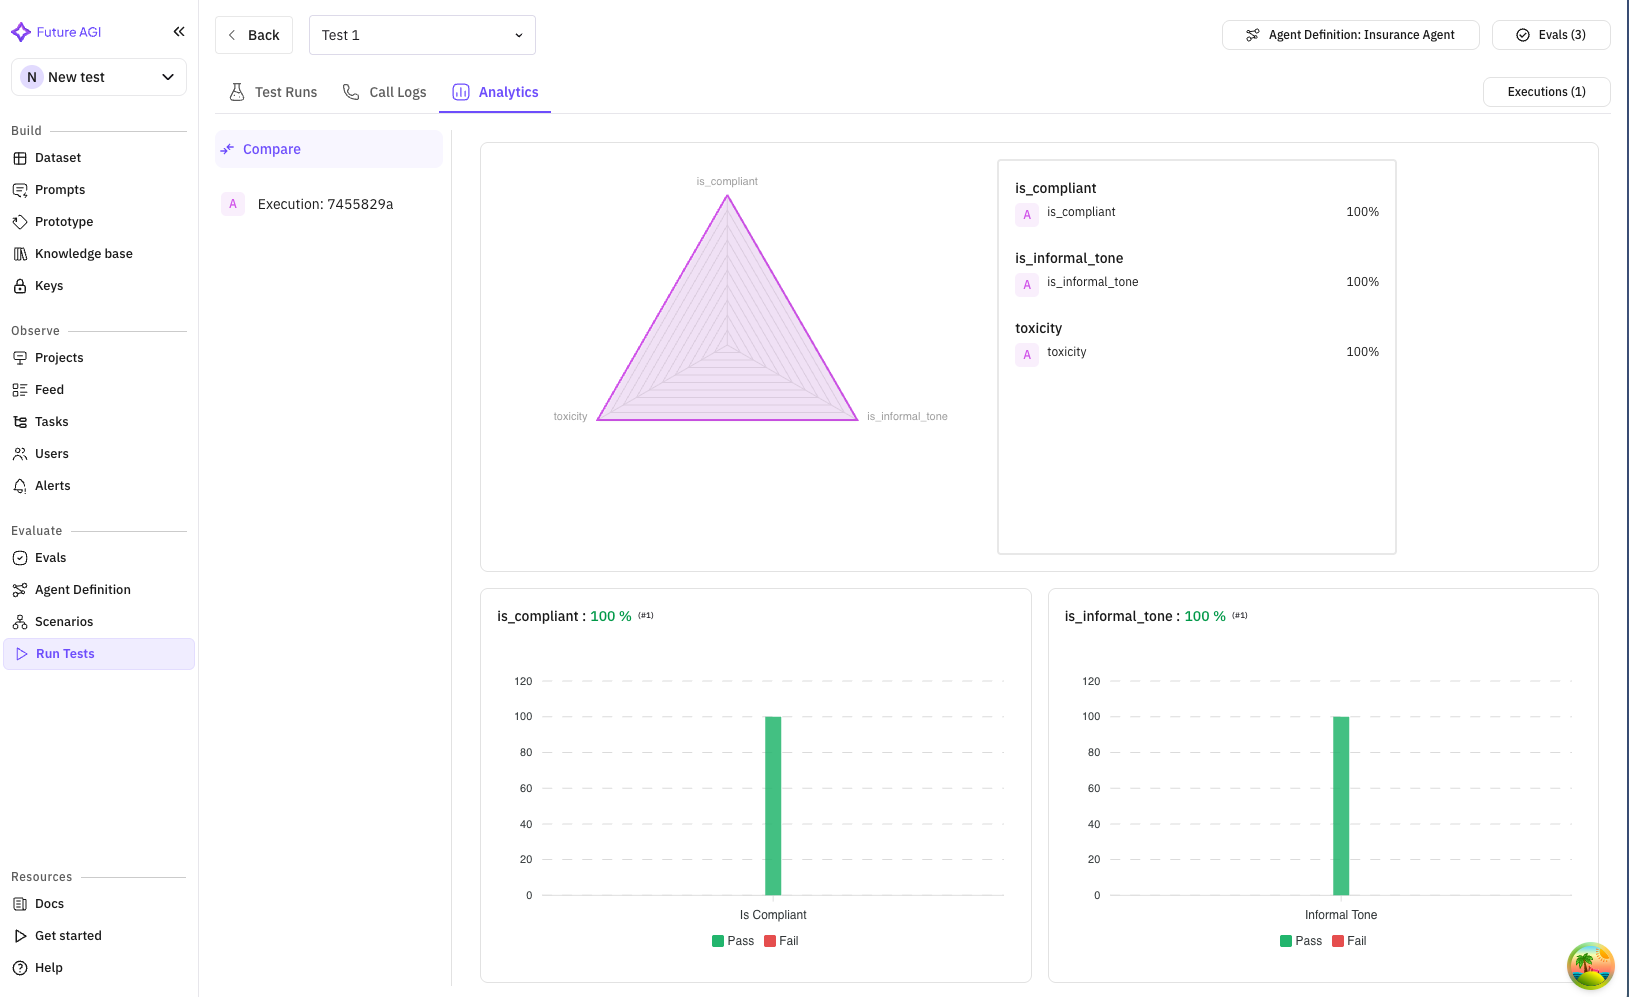
Evaluation Results
View performance across all evaluation metrics: Per-Evaluation Breakdown:- Score distribution graph
- Pass/fail percentages
- Detailed insights
- Comparison to benchmarks
- Compliance Score: 98% (regulatory adherence)
- Product Accuracy: 92% (correct information)
- Objection Handling: 87% (successful responses)
- Conversion Rate: 65% (sales closed)
- Customer Satisfaction: 4.2/5 (simulated CSAT)
Detailed Analysis
Conversation Analysis- Common failure points
- Successful patterns
- Word clouds of key terms
- Sentiment progression
- Bar charts by scenario
- Identify weak areas
- Drill down capabilities
Export Options
Export your test results for further analysis: Export Button Located in the test run header: Export Formats:- PDF Report: Executive summary with graphs
- CSV Data: Raw evaluation scores
- JSON: Complete test data
- Call Recordings: Audio files (if enabled)
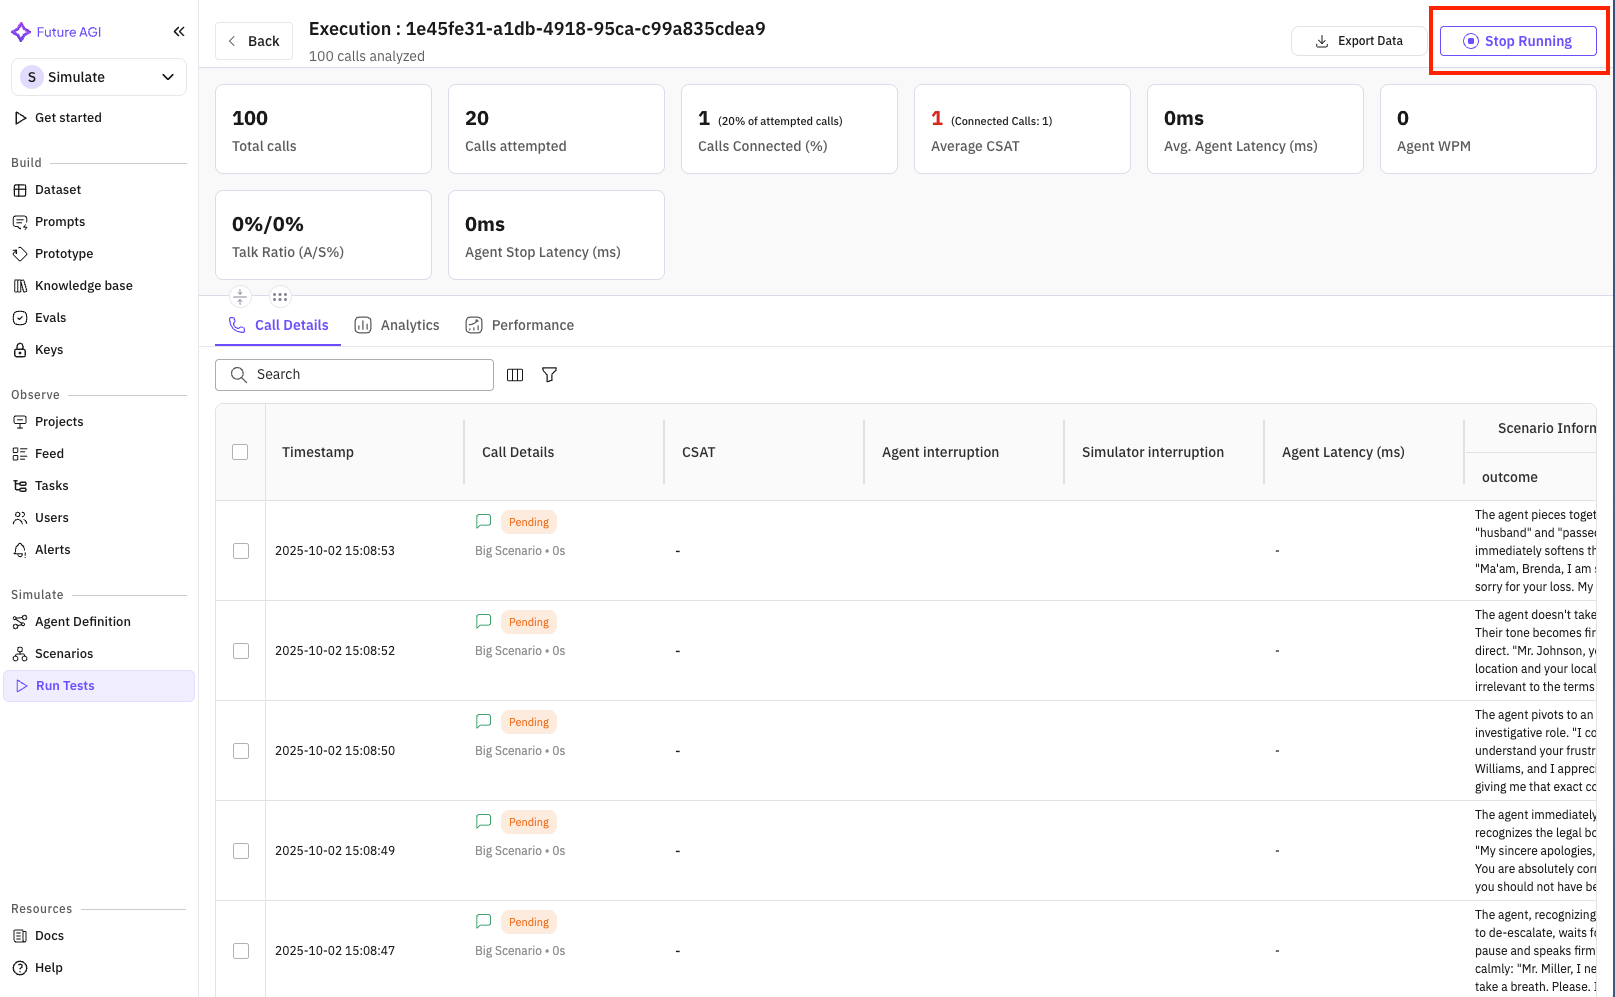
Call Details
Call details shows each call that has happened in the test run Each Call Execution Shows- Timestamp : Time of call
- Call Detail : Details related to call : Phone number, Call End Reason and transcript
- CSAT : Customer Satisfaction Score for the particular call
- Agent Interruption : No of times the agent itself cuts users off in this particular call
- Simulator Interruption : No of times when simulator agent cuts the agent off mid-response in this particular call
- Scenario Information : Columns related to scenario : Persona, Outcome, Situation
- Evaluation Metrics : Result related to evaluation run on a test
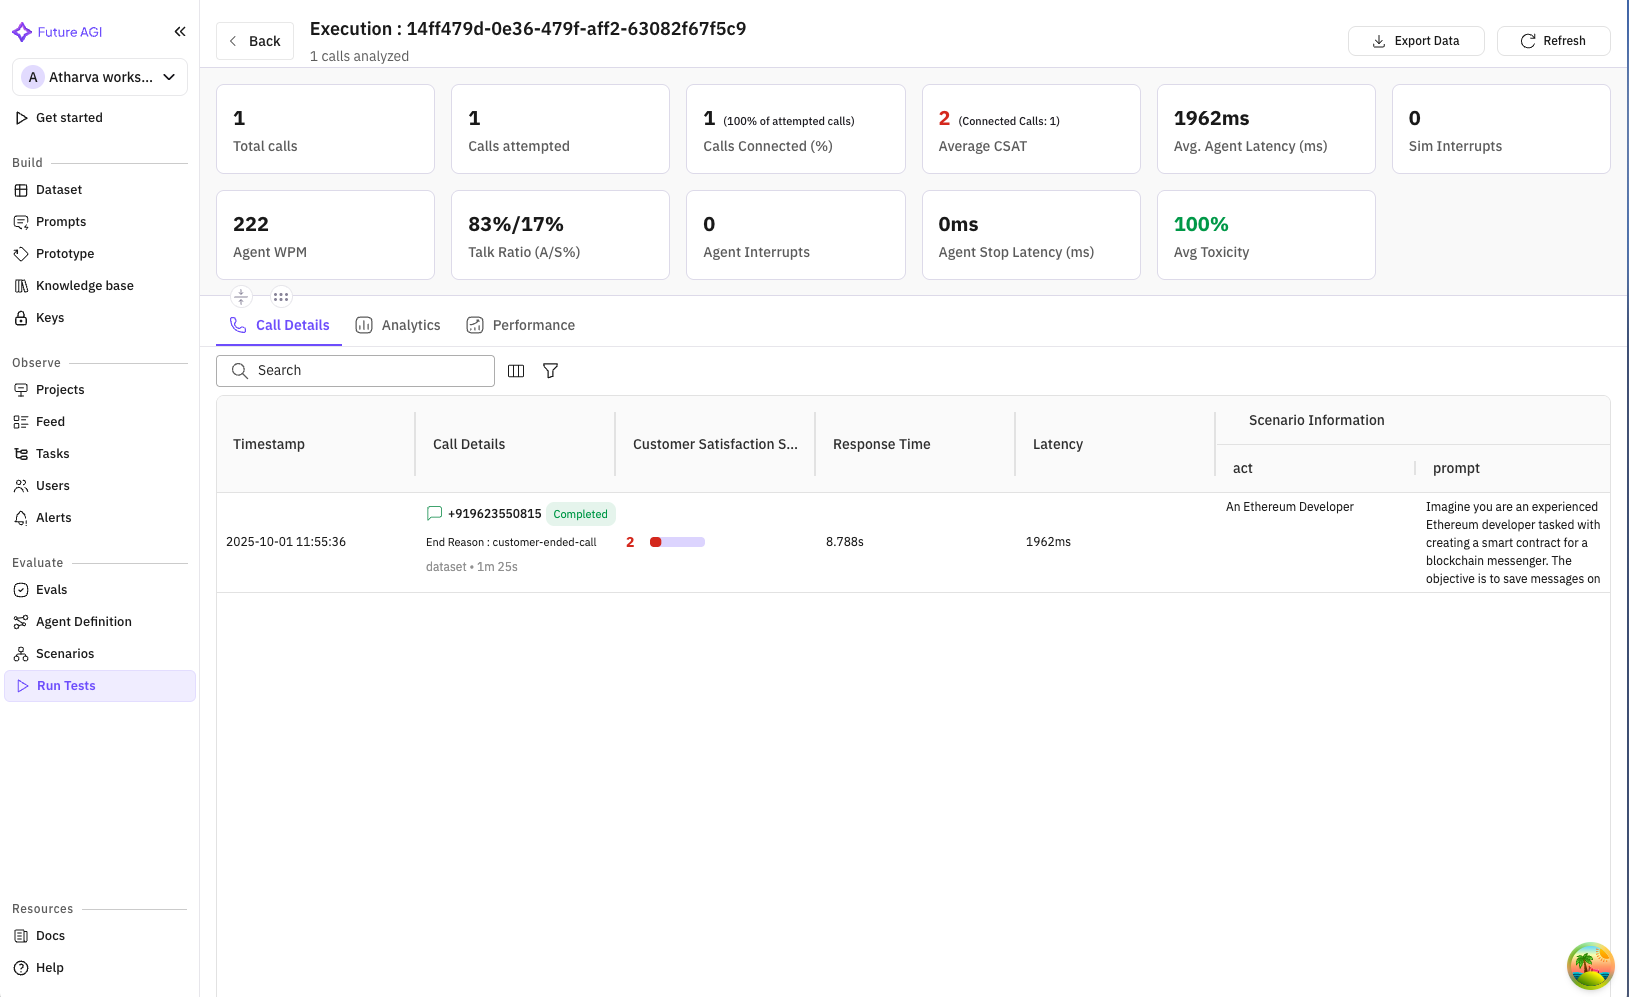
- Total Calls : No of calls to be executed in this test
- Calls Attempted : No calls that have been attempted in this test
- Calls Connected : No of calls which have been connected successfully
- Average CSAT : Average Customer Satisfaction Score, this score gives an idea about how well the customer queries were resolved depending on tone of the customer.
- Average Agent Latency : Average time in milliseconds it took for the agent to respond to the customer
- Agent WPM : The speed of speech impacts both comprehension and naturalness. An agent speaking too fast feels rushed, while too slow feels awkward. Monitoring words per minute ensures that delivery matches user comfort levels.
- Talk Ratio : The balance between Agent speaking and user speaking should feel conversational. If the agent dominates, users may disengage; if users do all the talking, the system may not be guiding effectively. Talk ratio helps measure this balance.
- Agent Stop Latency : When a user interrupts, the agent should stop quickly and gracefully. Slow stop times make it feel unresponsive. Monitoring this reaction time helps create a more natural back-and-forth flow. This metric measures that in milliseconds.
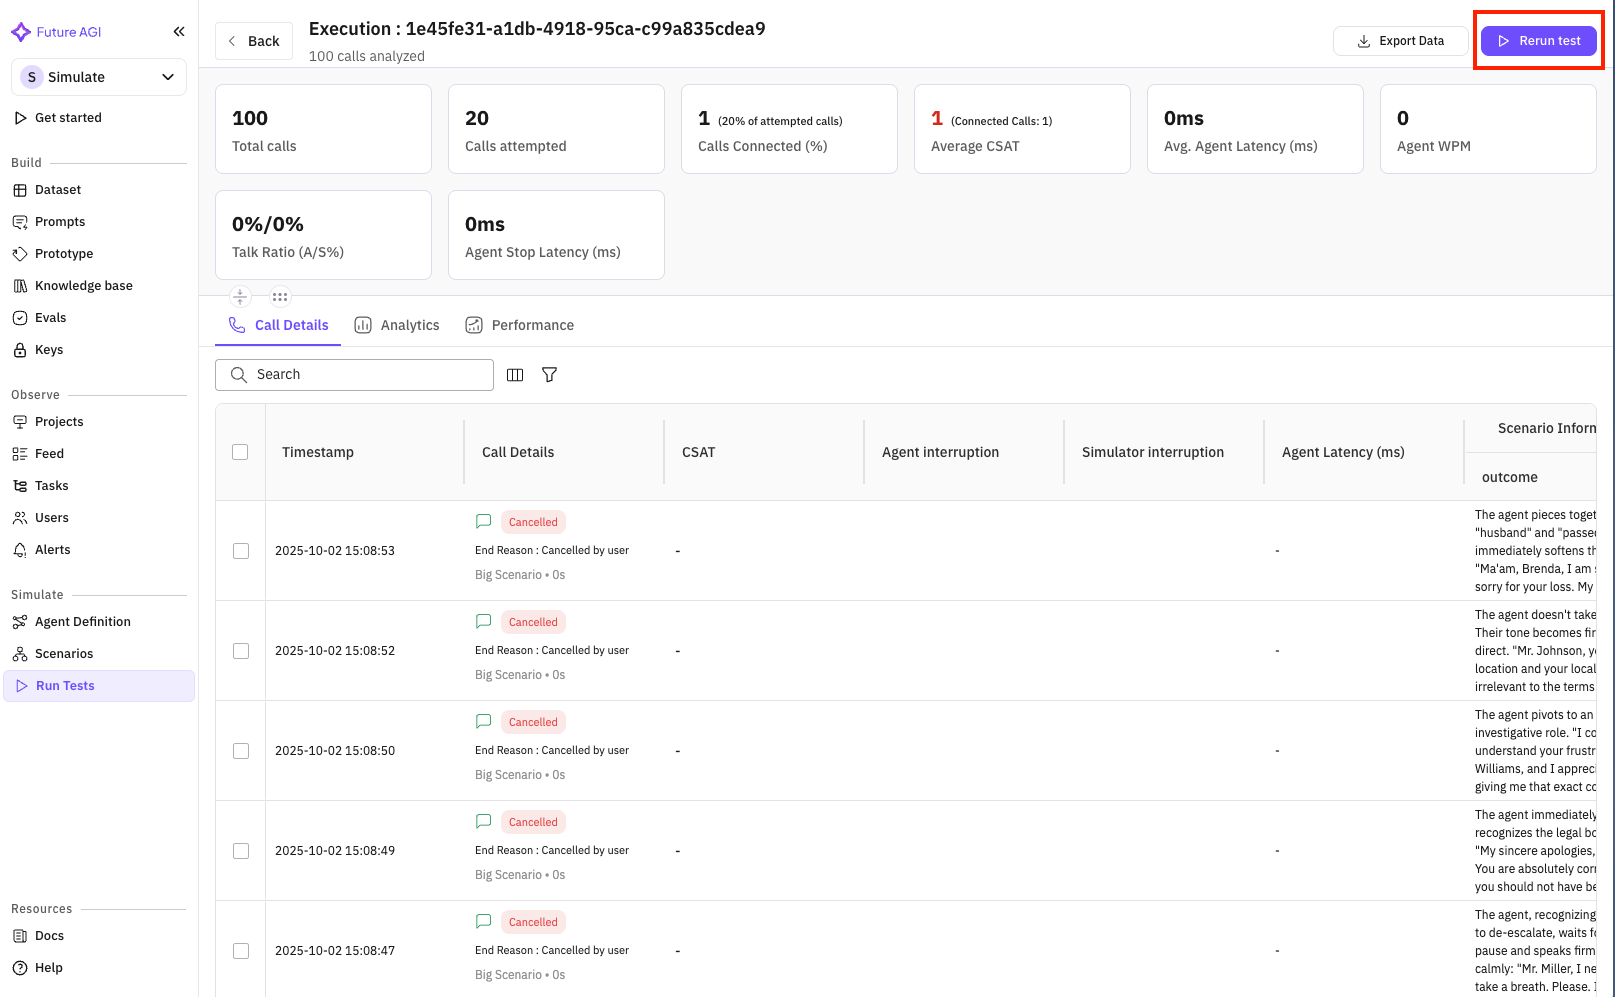
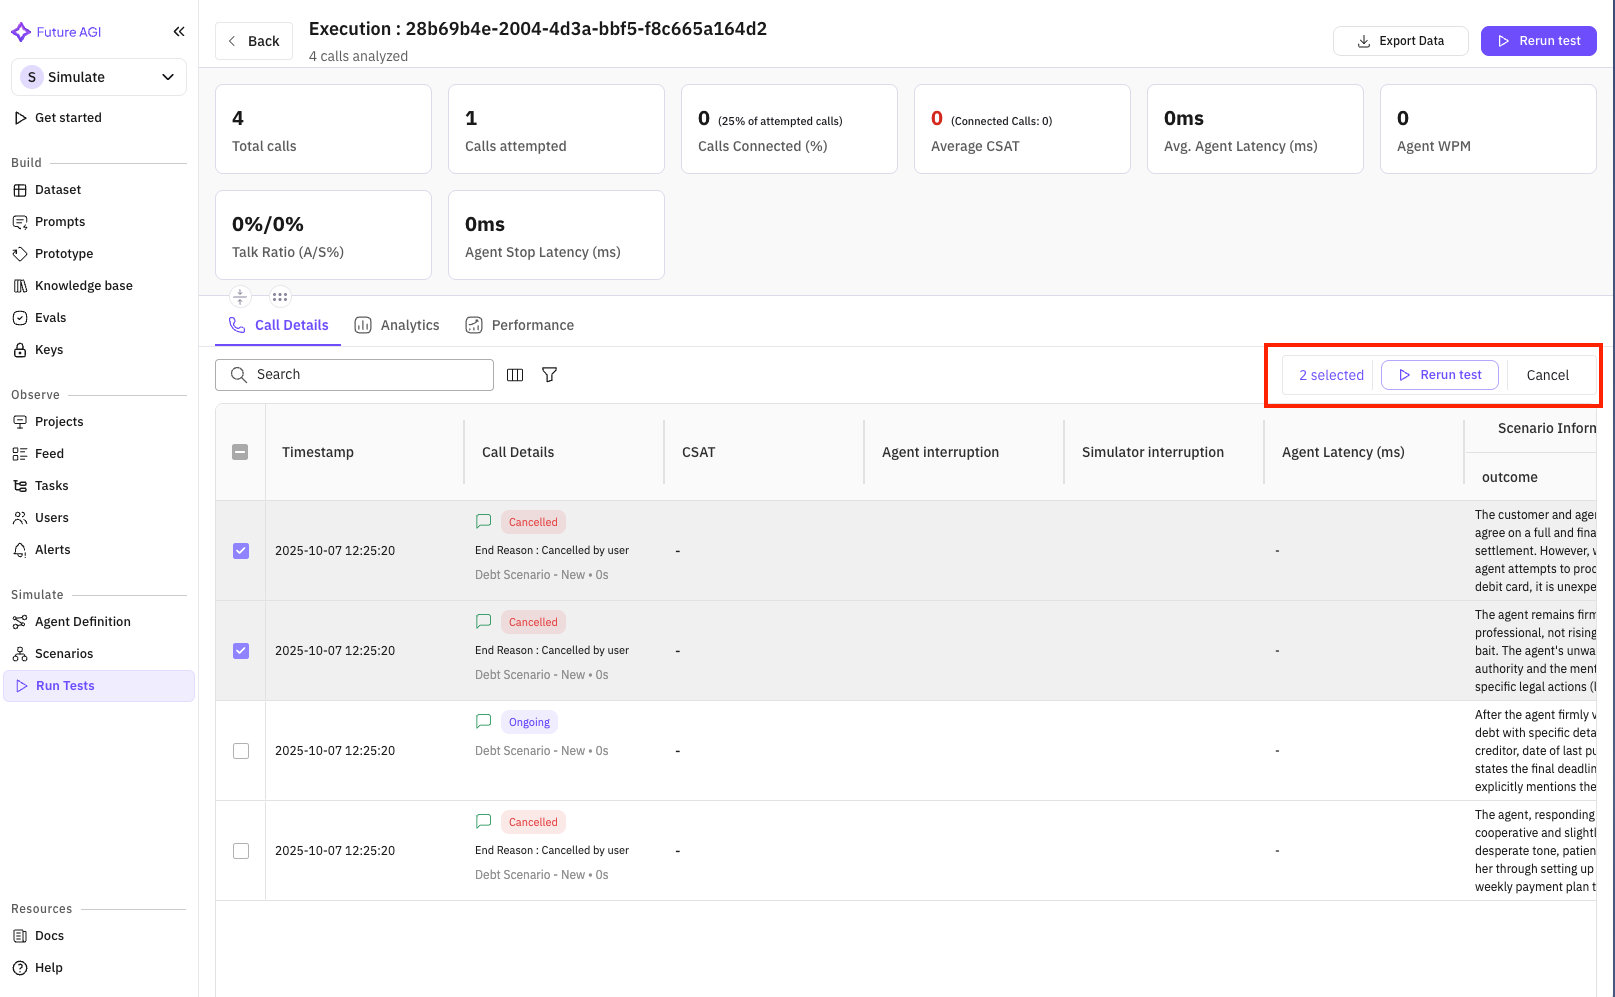
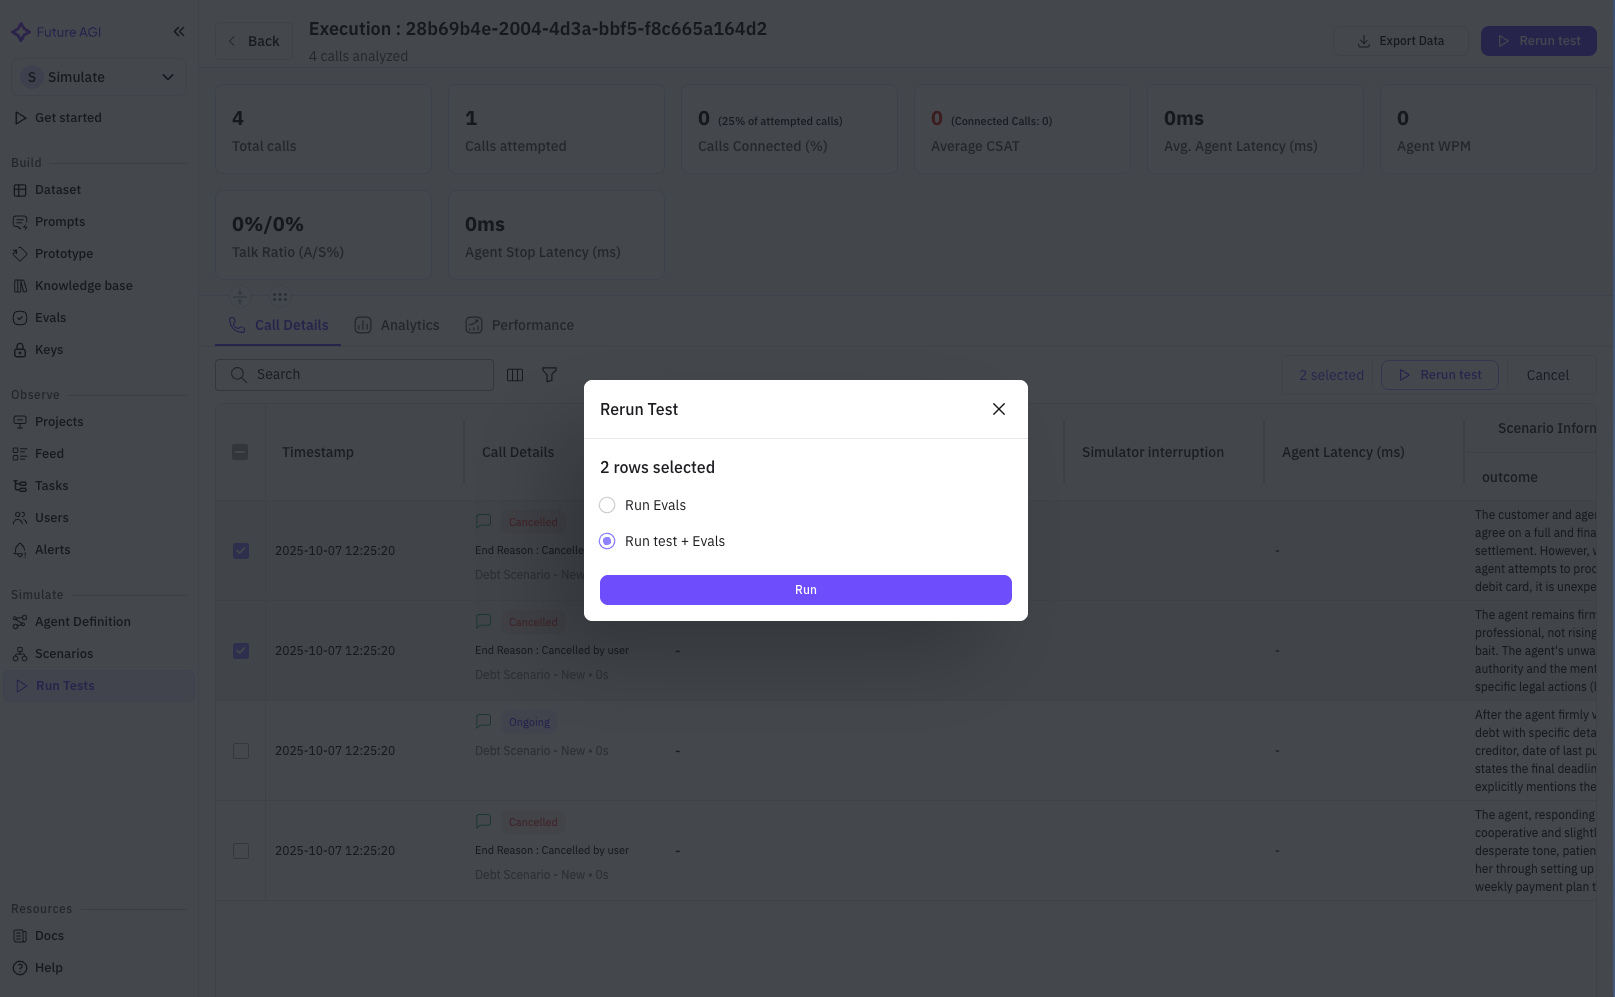
Rerun and Stop Executions
You can rerun the whole test and all the calls in it using the Rerun test button on the top right of the screen. This will rerun all the calls in the test and also rerun all corresponding evaluations.
Advanced Features
Scheduled Tests
Set up recurring test runs:- In test details, click “Schedule” button
- Configure:
- Frequency (daily, weekly, monthly)
- Time and timezone
- Notification preferences
- Auto-report generation
Test Comparison
Compare multiple test runs:- Select tests to compare (checkbox)
- Click “Compare” button
- View side-by-side metrics
- Identify improvements or regressions
Evaluation Management
From the test detail view:- Add new evaluations
- Remove underperforming metrics
- Adjust evaluation thresholds
- Create custom evaluations
Best Practices
Test Strategy
- Start Small: Begin with 5-10 test cases
- Increase Gradually: Add scenarios as you improve
- Regular Cadence: Run tests daily or weekly
- Version Control: Track agent changes between tests
Scenario Coverage
For insurance sales agents:- Demographics: Test all age groups and income levels
- Products: Cover all insurance types
- Objections: Include common customer concerns
- Edge Cases: Difficult or unusual situations
Evaluation Selection
Choose evaluations that match your goals:- Quality: Conversation flow and professionalism
- Accuracy: Product information correctness
- Compliance: Regulatory requirement adherence
- Business: Conversion and revenue metrics
Results Analysis
- Look for Patterns: Identify common failure points
- Compare Scenarios: Find which situations challenge your agent
- Track Trends: Monitor improvement over time
- Act on Insights: Update agent based on results
Troubleshooting
Common Issues
Test Won’t Start- Verify agent definition has valid API credentials
- Check simulation agent is properly configured
- Ensure scenarios have valid data
- Confirm you have sufficient credits
- Review evaluation thresholds
- Check if scenarios match agent training
- Analyze failure patterns in call logs
- Adjust agent prompts based on feedback
- Reduce concurrent test cases
- Simplify complex scenarios
- Check for timeout settings
- Monitor resource usage
Getting Help
- Documentation: Detailed guides for each feature
- Support: Contact team for assistance
- Community: Share experiences with other users
- Updates: Regular feature improvements
Next Steps
After mastering test execution:- Optimize Your Agent: Use insights to improve performance
- Expand Testing: Add more scenarios and evaluations
- Automate: Set up scheduled tests and CI/CD integration
- Scale: Test multiple agents and versions