Overview
Creating a simulation test in FutureAGI involves four main steps:- Creating an Agent Definition - Define the AI agent that will handle customer interactions
- Creating a Scenario - Set up test cases with sample customer data
- Creating a Simulation Agent - Configure an agent that will simulate customer behavior
- Running the Test - Execute the simulation and analyze results
Prerequisites
Before you begin, ensure you have:- Access to your FutureAGI dashboard
- Basic understanding of AI agents and simulations
- Sample customer data for testing (we’ll provide examples)
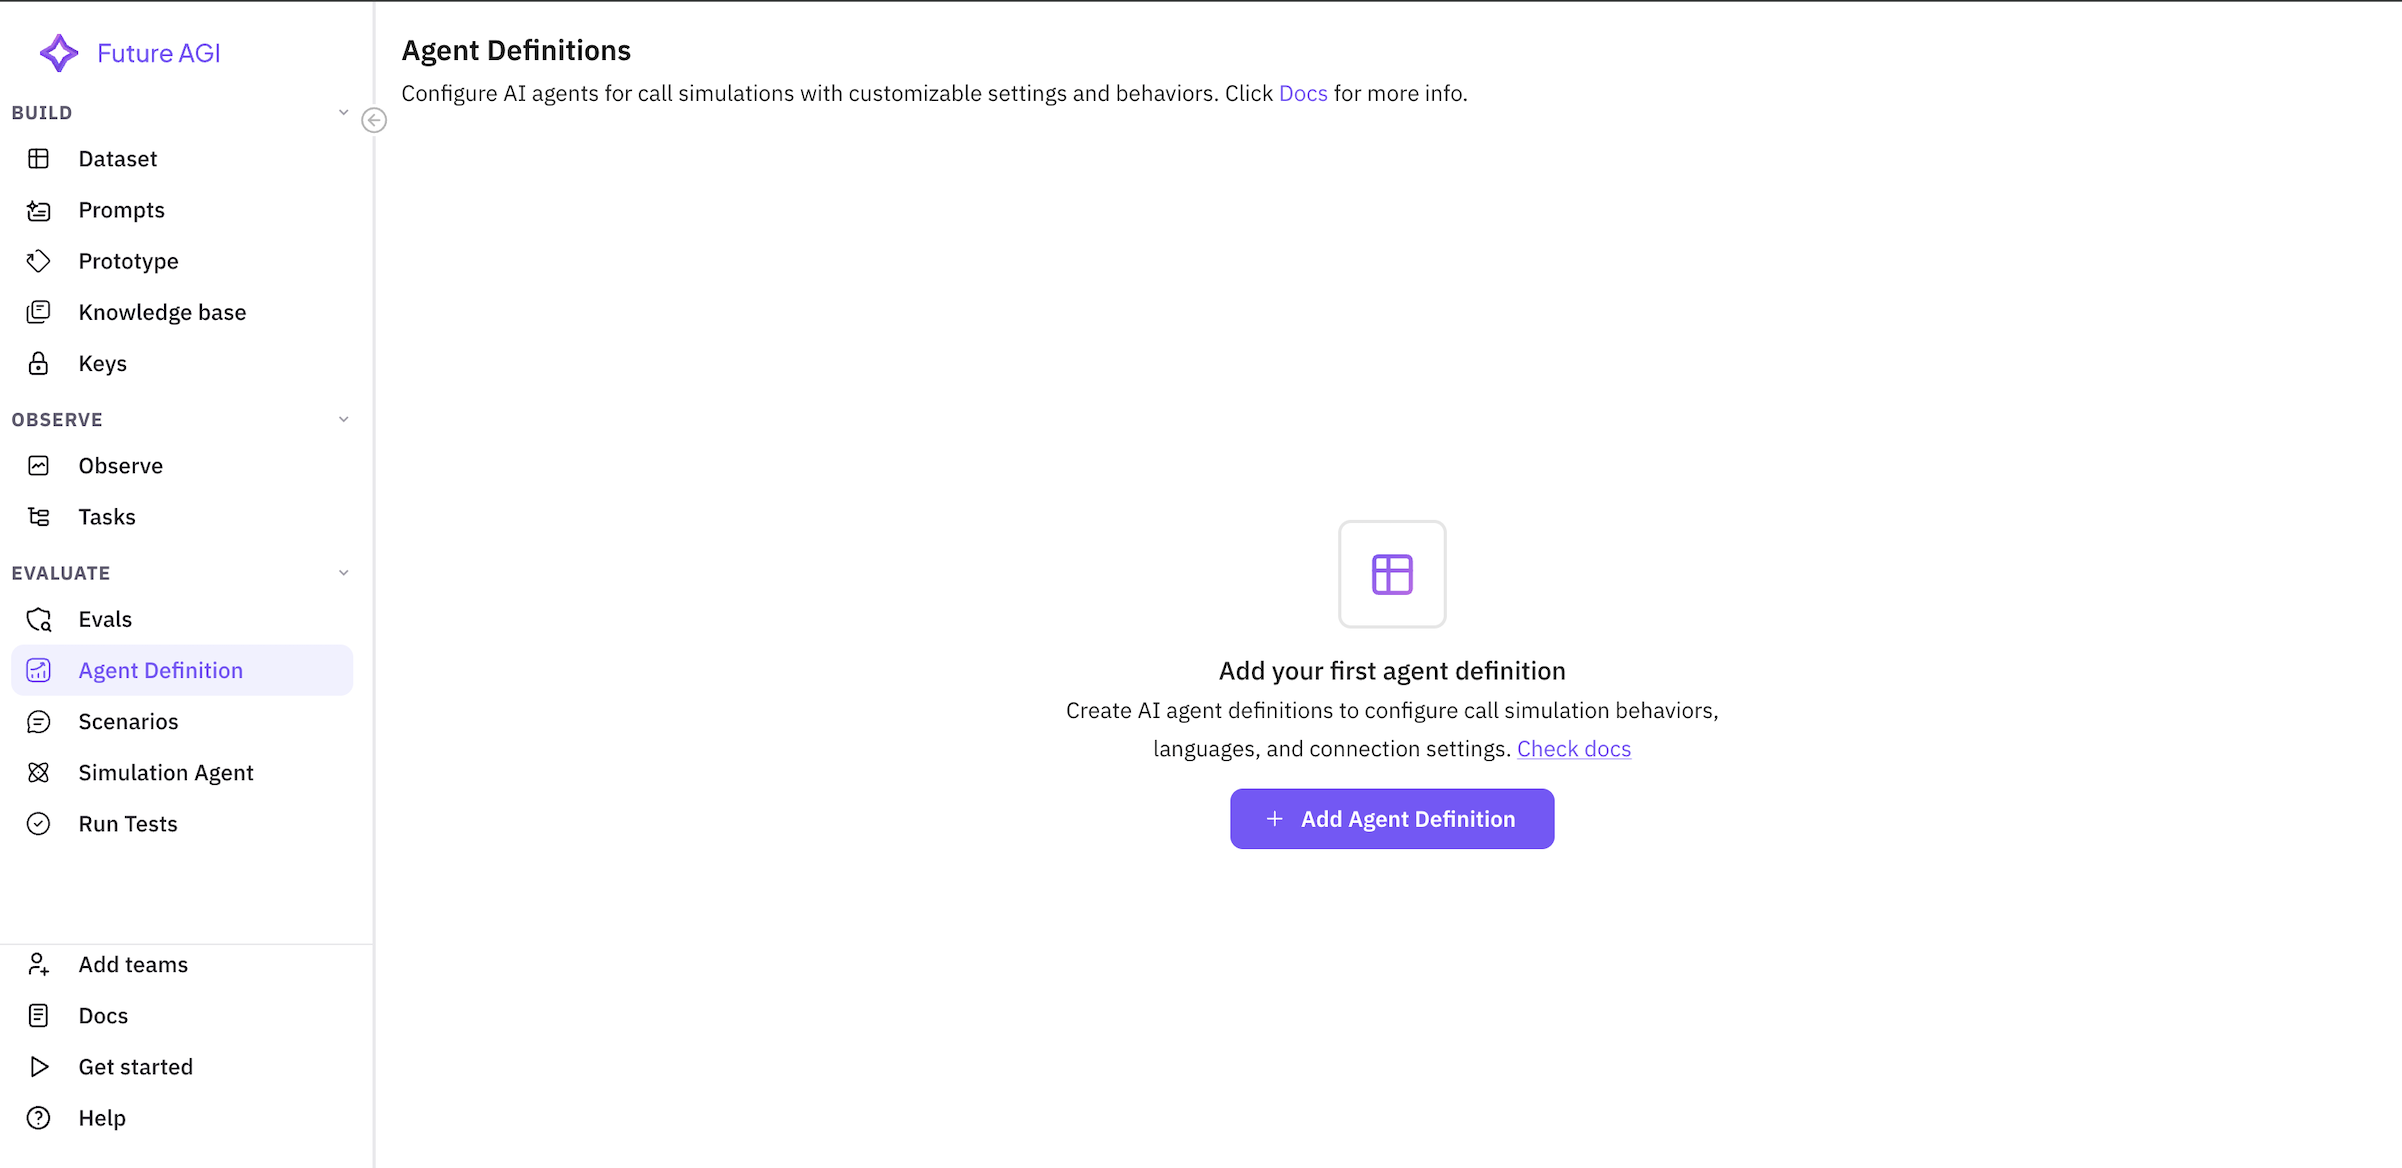
Step 1: Creating an Agent Definition
The agent definition configures how your AI agent will behave during customer interactions. For our insurance sales agent example, we’ll create an agent that can handle insurance inquiries and sales.1.1 Navigate to Agent Definitions
From your FutureAGI dashboard, navigate to the Simulations section in the sidebar, then click on Agent Definitions.1.2 Create New Agent Definition
1.3 Configure Agent Information
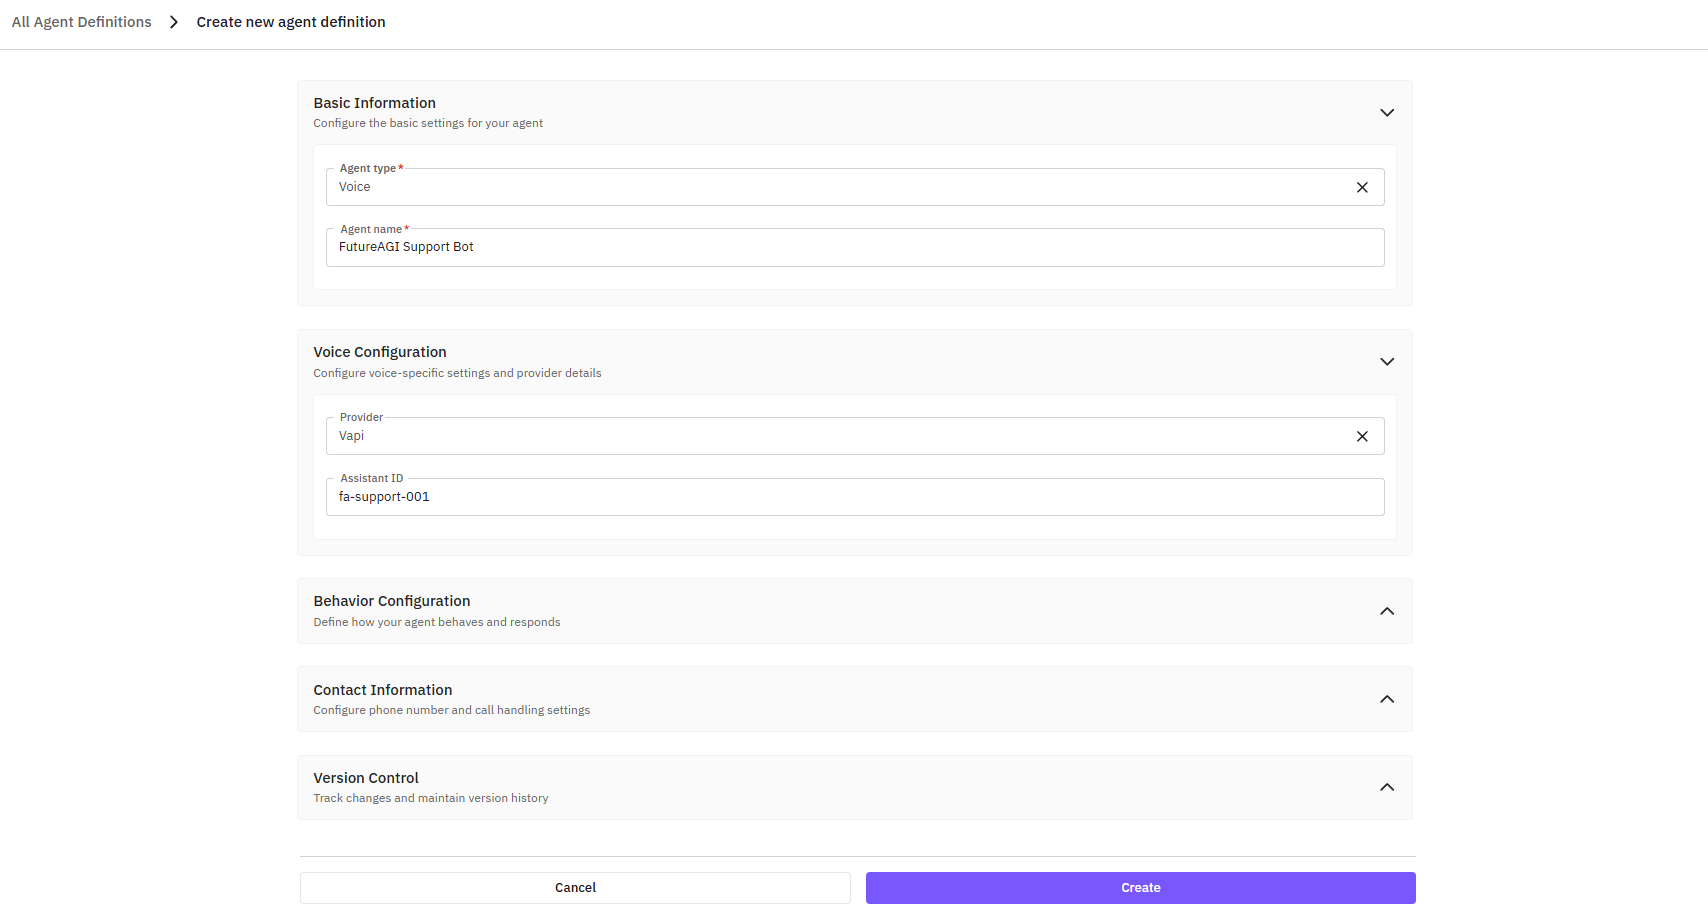
Basic Information
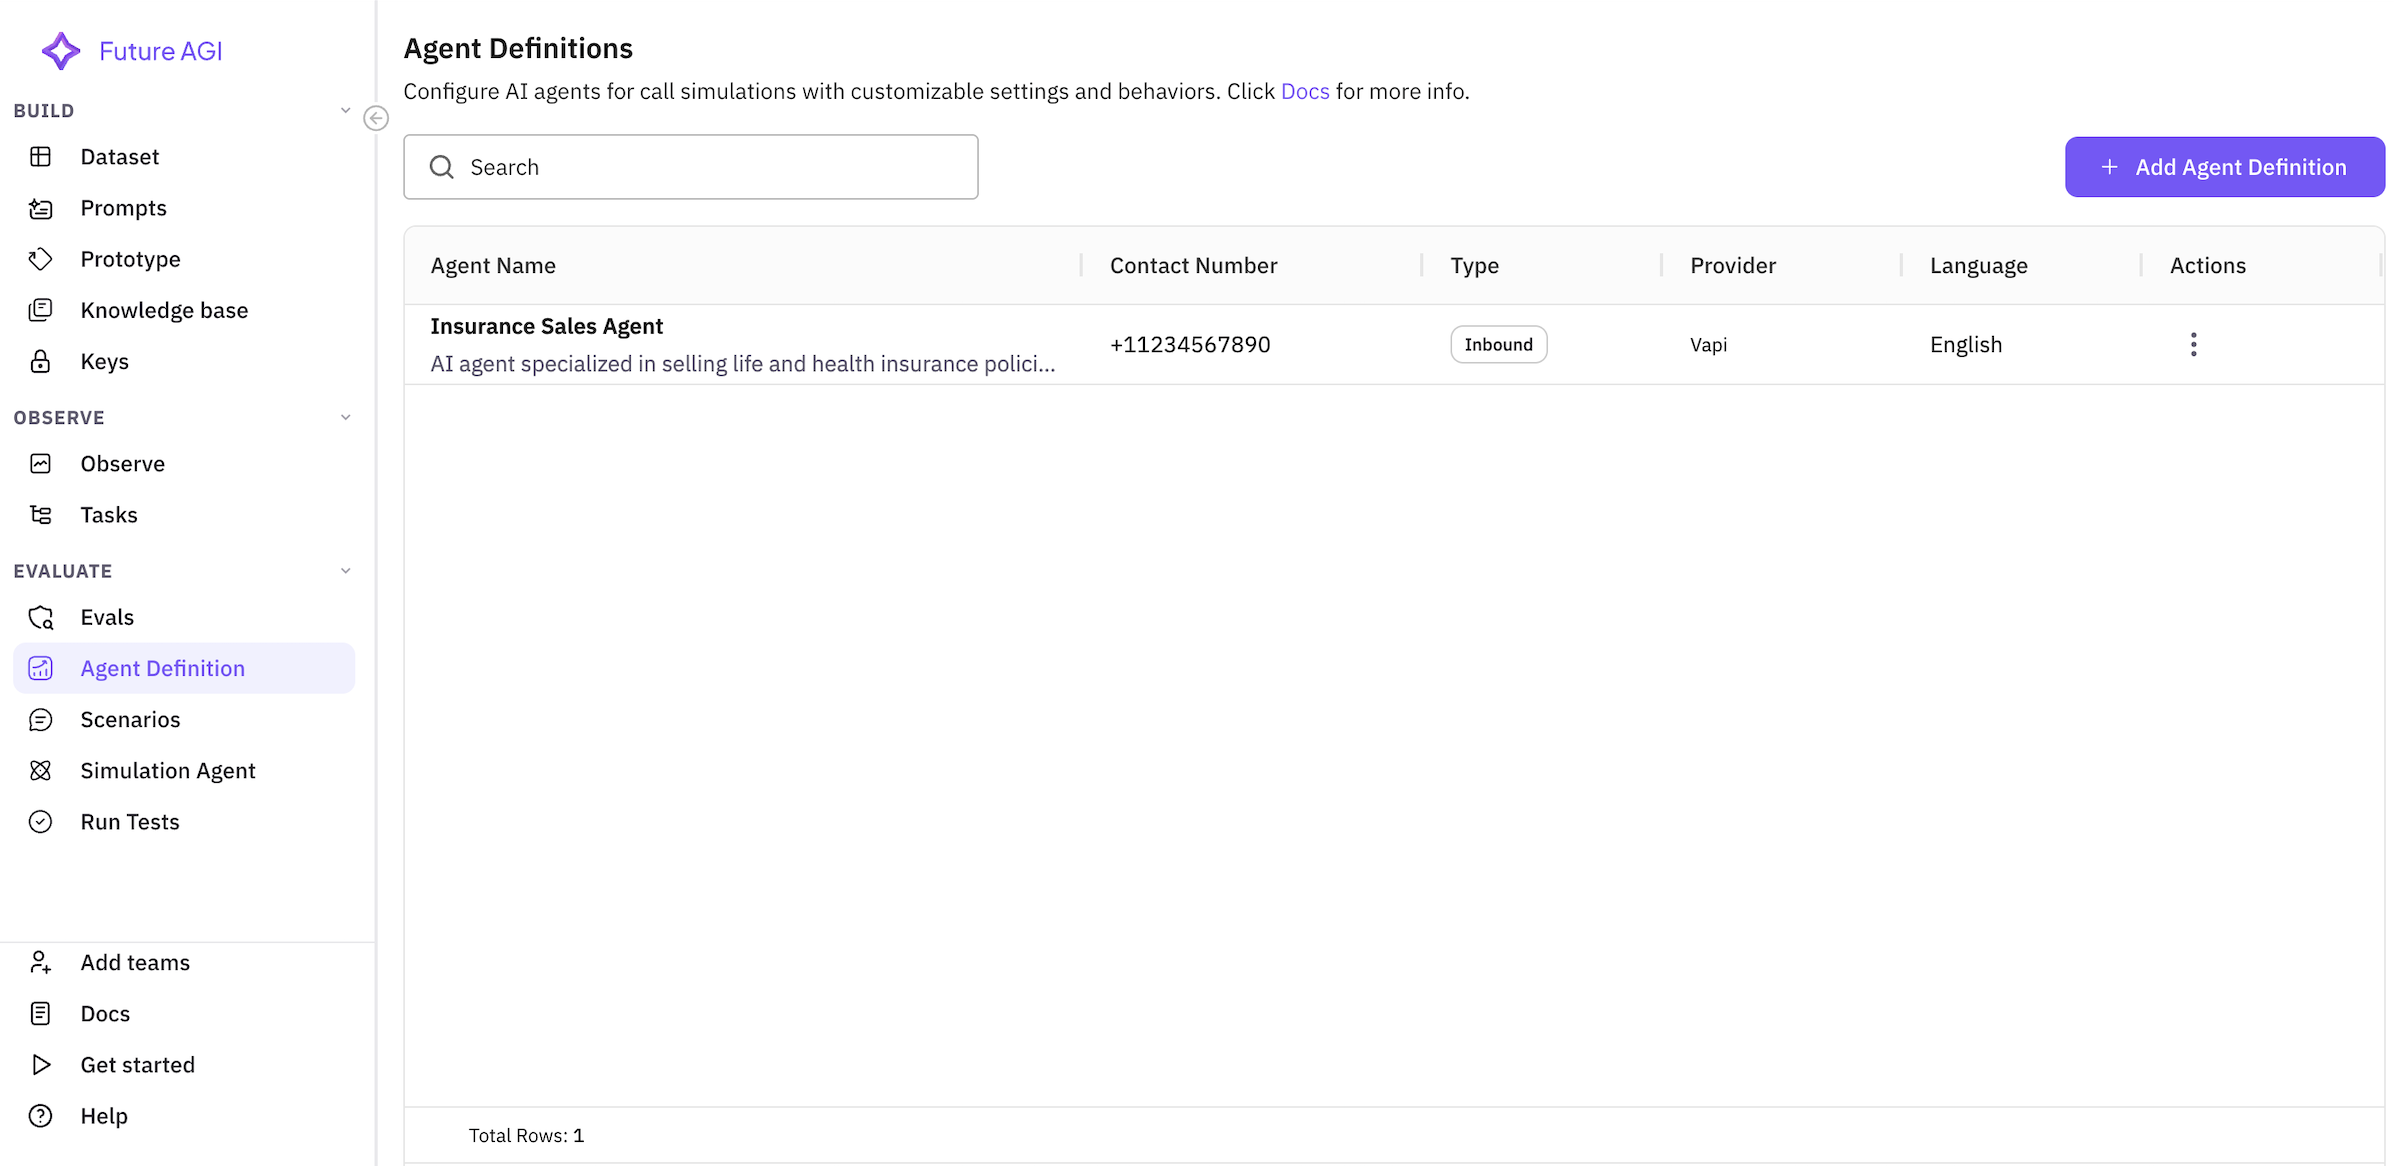
- Agent Name:
Insurance Sales Agent - Description:
AI agent specialized in selling life and health insurance policies to customers
Contact Configuration
- Contact Number:
+1-800-INSURE-ME(or your test number) - Pin Code: Select your country code (e.g., +1 for US)
- Language:
English (en) - Connection Type: Toggle to
Inbound(agent receives calls)
Provider Settings
- Provider: Select provider (e.g., ‘Vapi’ or ‘Retell’)
- Assistant ID: Enter your provider-specific assistant ID (optional)
1.4 Save Agent Definition
Step 2: Creating a Scenario
Scenarios contain the test data and cases that will be used during simulations. For our insurance sales example, we’ll create scenarios with different customer profiles.2.1 Navigate to Scenarios
From the Simulations section, click on Scenarios.2.2 Create New Scenario
Click the “Add Scenario” button to open the scenario creation dialog.
2.3 Choose Scenario Type
Select “Dataset” as the scenario type (recommended for structured test data).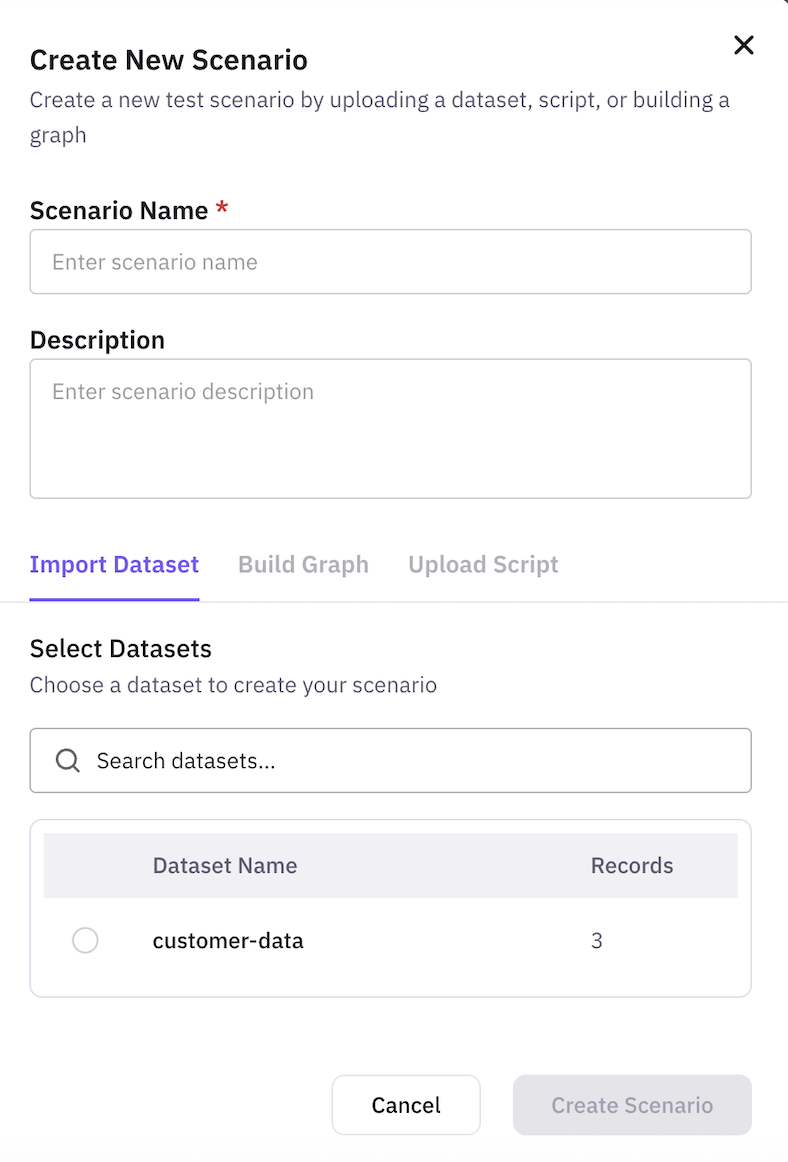
2.4 Configure Scenario Details
Basic Information
- Scenario Name:
Insurance Sales Test Cases - Description:
Various customer profiles for testing insurance sales conversations
2.5 Select or Create Dataset
You can either:- Select an existing dataset from the list
- Create a new dataset with your test data
- customer_id: Unique identifier
- demographics: name, age, occupation, income
- insurance_needs: current coverage, interest, budget
- sales_intelligence: objection type, urgency level, communication preference
Comprehensive Test Dataset
For thorough testing, we recommend using our complete sample dataset with 20 diverse customer profiles that includes:- Various Demographics: Ages 26-55, incomes 250k
- Different Occupations: Healthcare, tech, education, business owners
- Family Situations: Single, married, divorced, with/without dependents
- Health Conditions: From none to chronic conditions
- Insurance Interests: Life, health, disability, supplemental coverage
- Objection Types: Price sensitivity, trust issues, coverage concerns, time constraints
- Risk Profiles: Low, medium, and high-risk customers
2.6 Save Scenario
Click “Create” to save your scenario. The system will validate your dataset and create the scenario.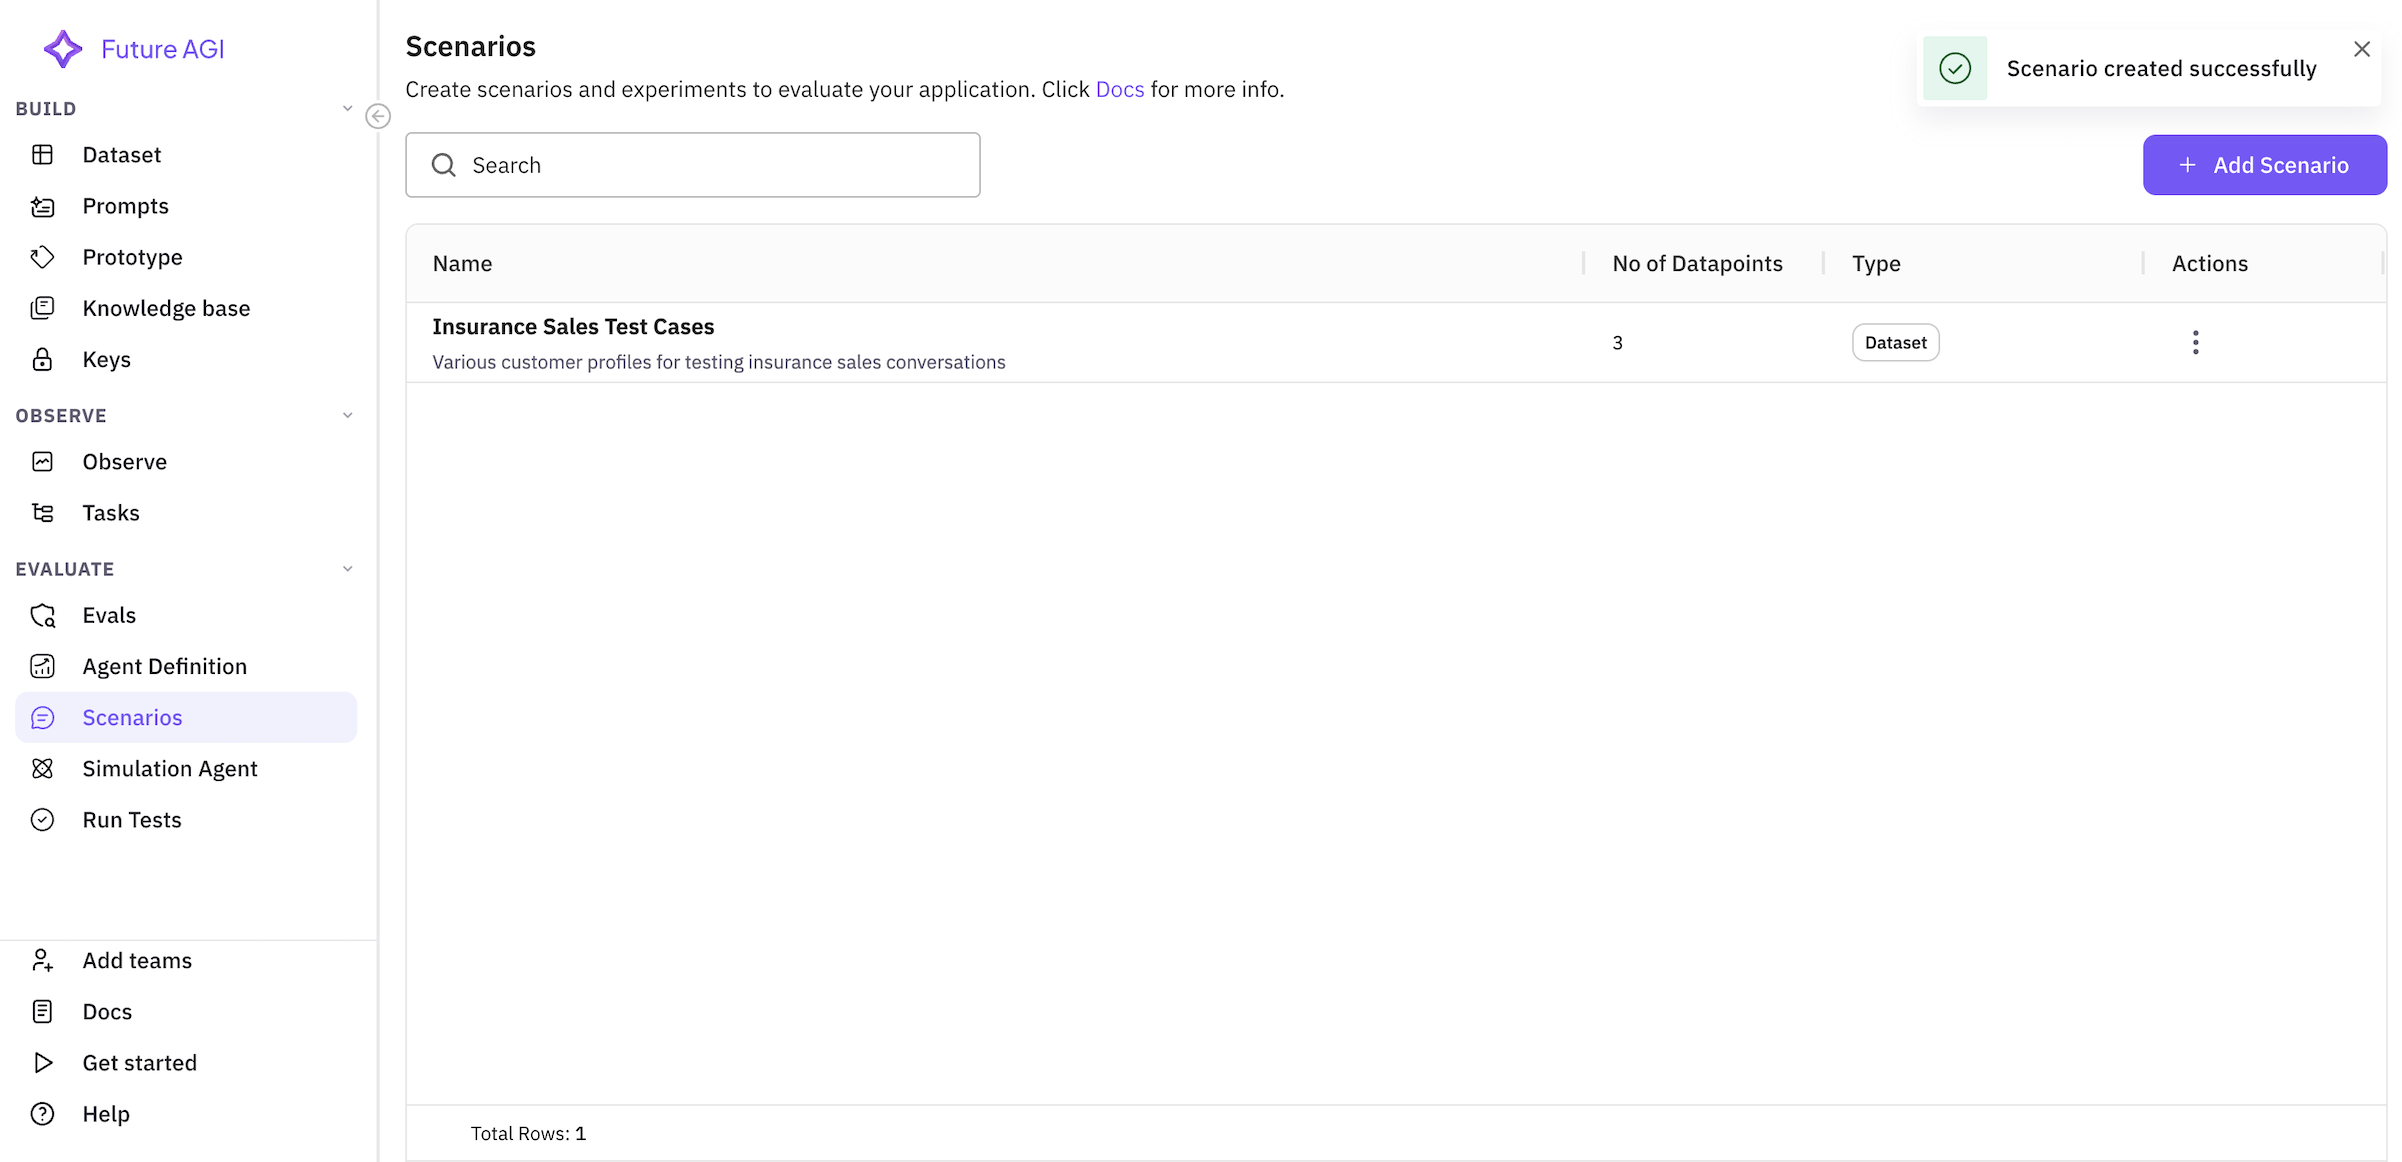
Step 3: Creating a Simulation Agent
The simulation agent simulates customer behavior during the test. It will interact with your insurance sales agent based on the scenario data.3.1 Navigate to Simulation Agents
From the Simulations section, click on Simulation Agents.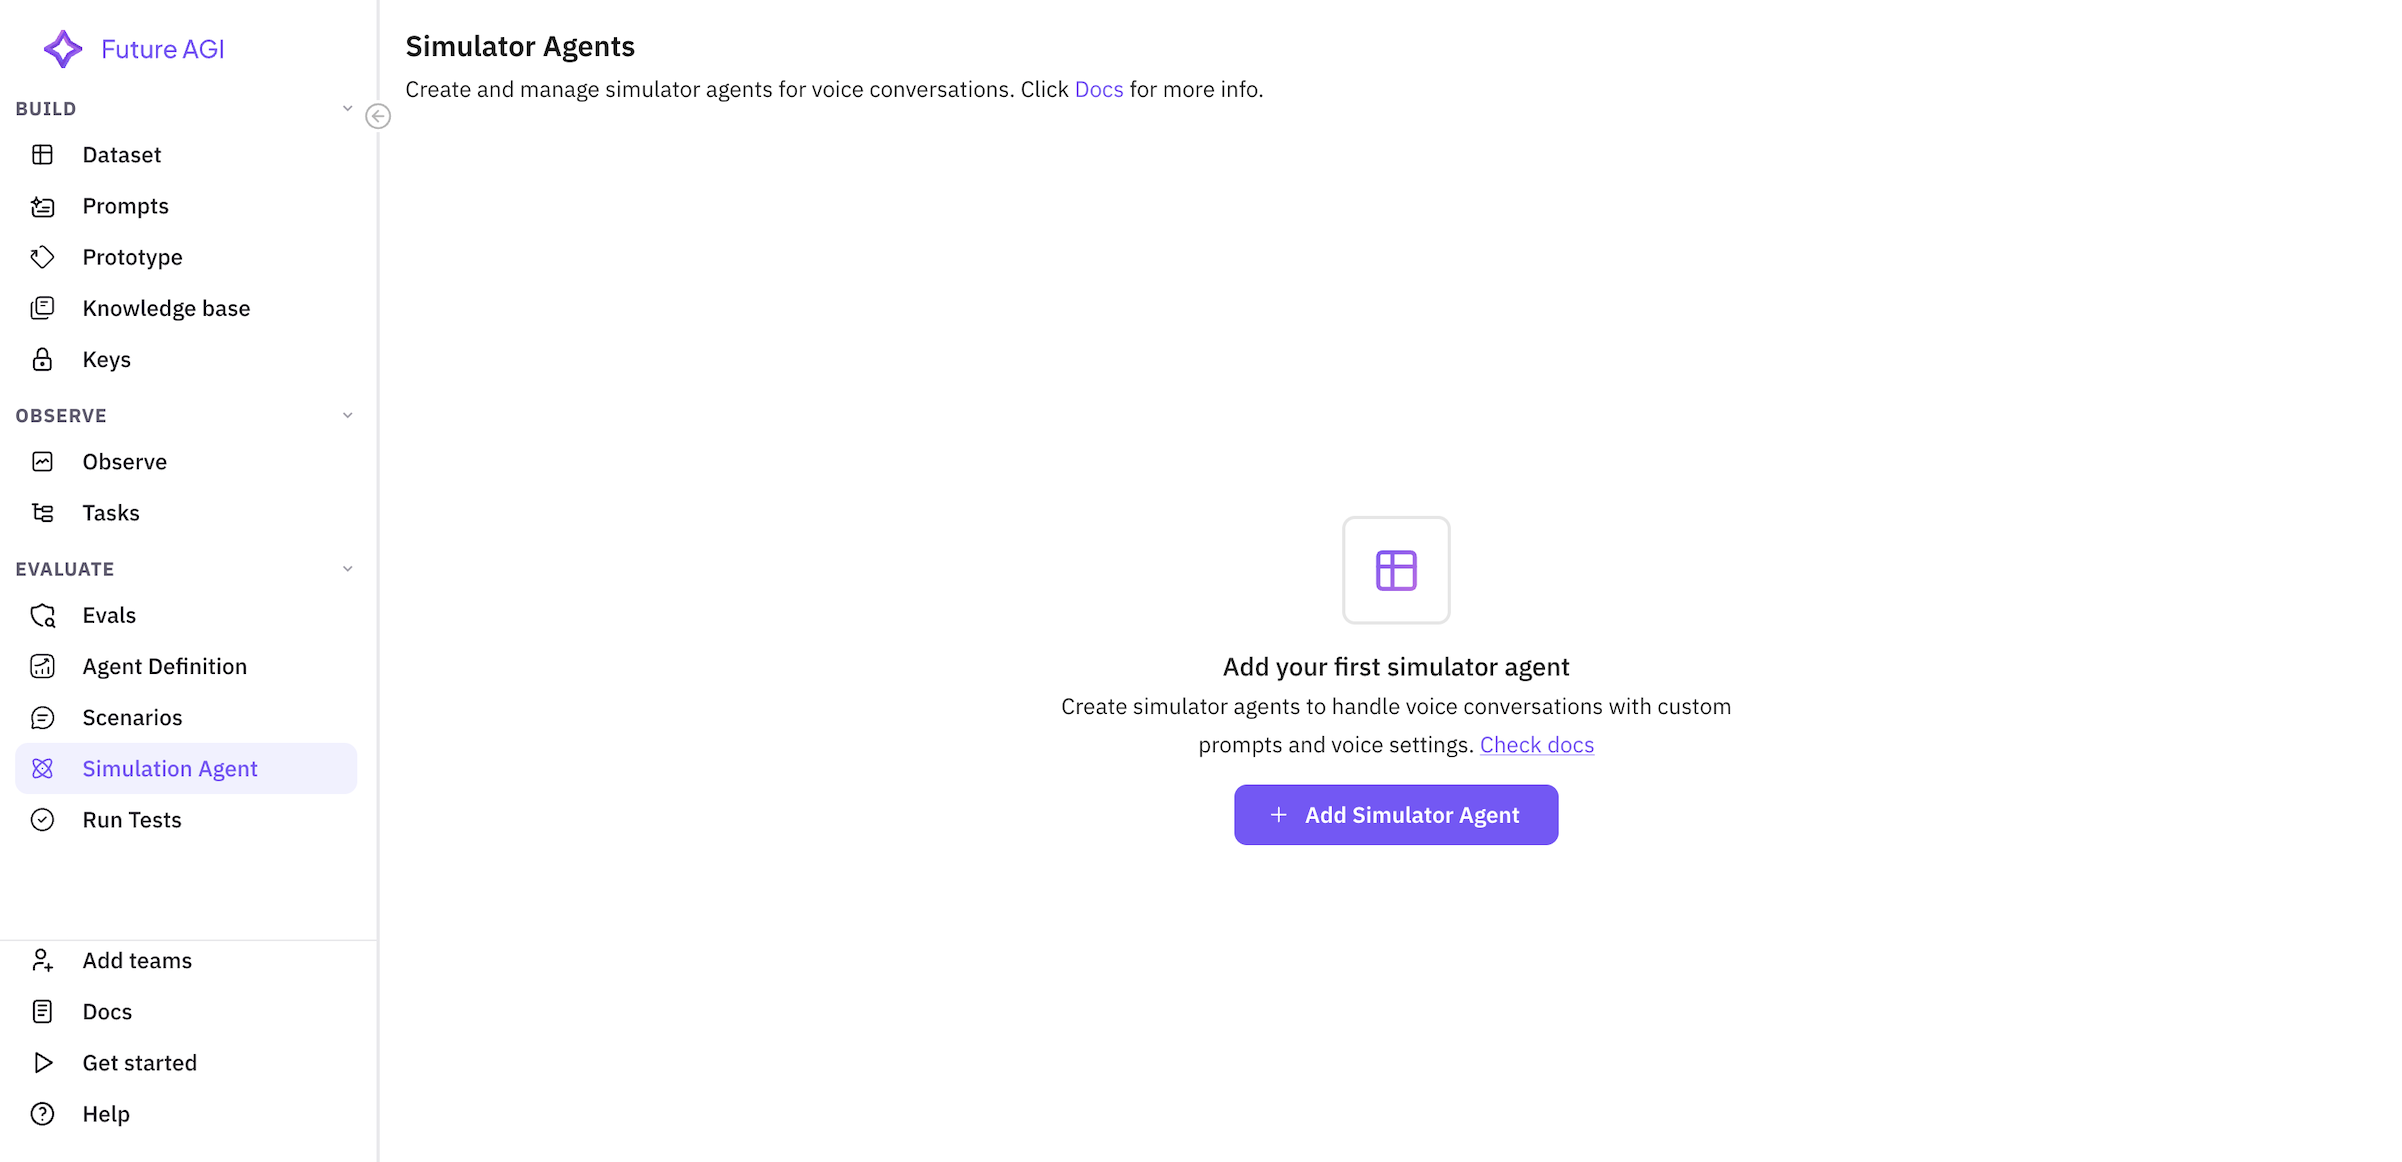
3.2 Create New Simulation Agent
Click “Add Simulation Agent” to create a new simulator agent.3.3 Configure Simulation Agent
Basic Information
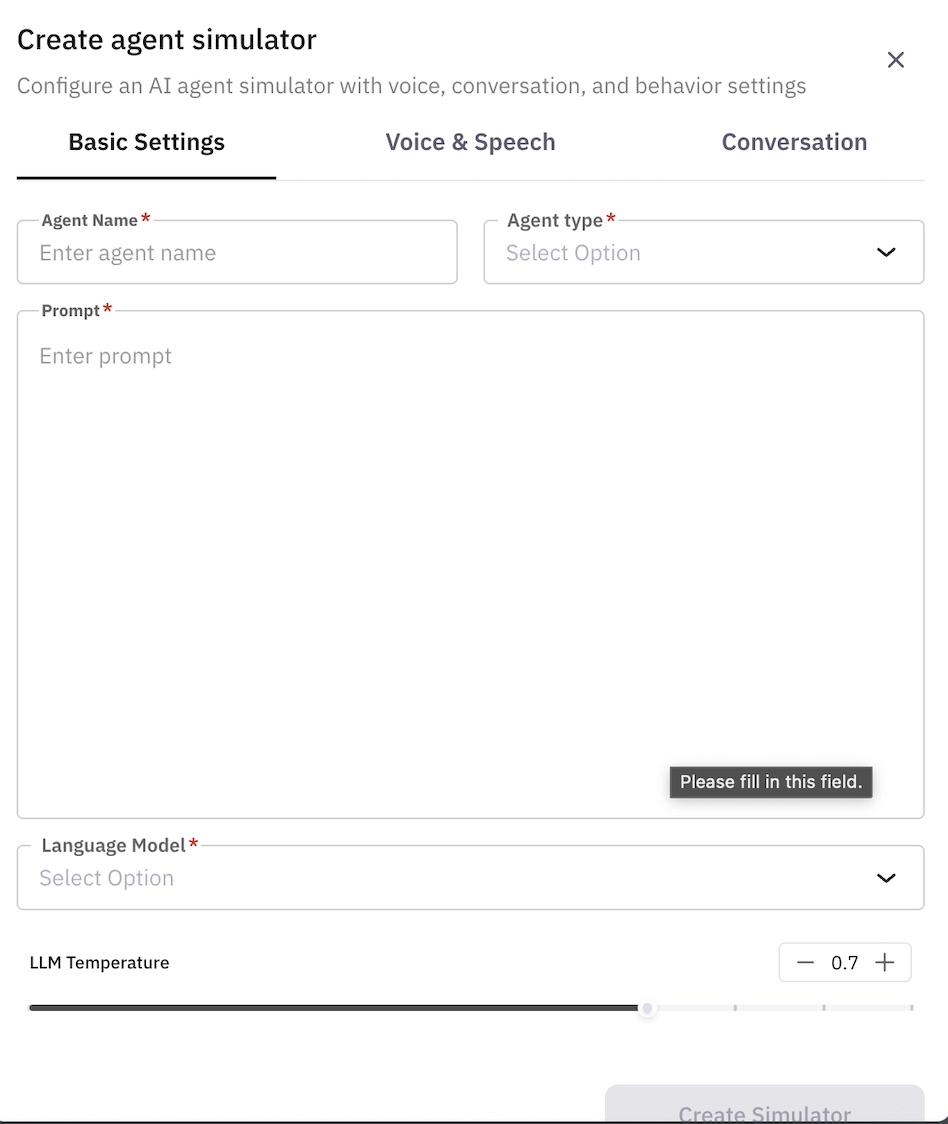
- Agent Name: Enter a name for the simulation agent (e.g., ‘Insurance Customer Simulator’)
- Agent Type: Choose between ‘voice’ or ‘chat’
- Prompt: Enter the prompt for the simulation agent
- Language Model: Select the language model for the simulation agent (eg. ‘gpt’, ‘claude’ or your custom model)
- LLM Temperature: Set the temperature for the language model (0.0 to 1.0) (default: 0.7)
Voice and Speech
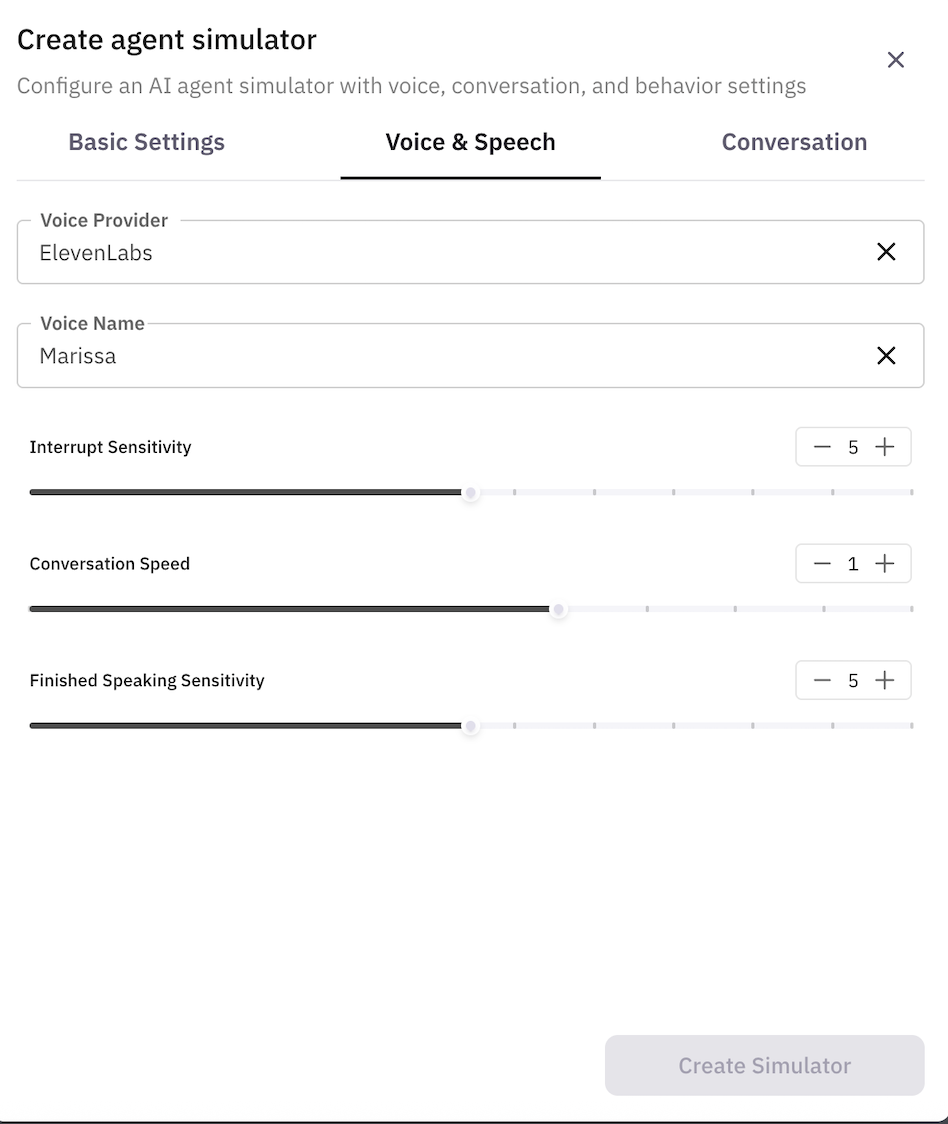
- Voice Provider: Choose between ElevenLabs, Azure Cognitive Services, Google Cloud, etc.
- Voice Name: Choose a voice that suits your use case.
- Interrupt Sensitivity: Set the interrupt sensitivity for the voice
- Conversation Speed: Set the conversation speed for the voice
- Finished Speaking Sensitivity: Set the finished speaking sensitivity for the voice
Conversation
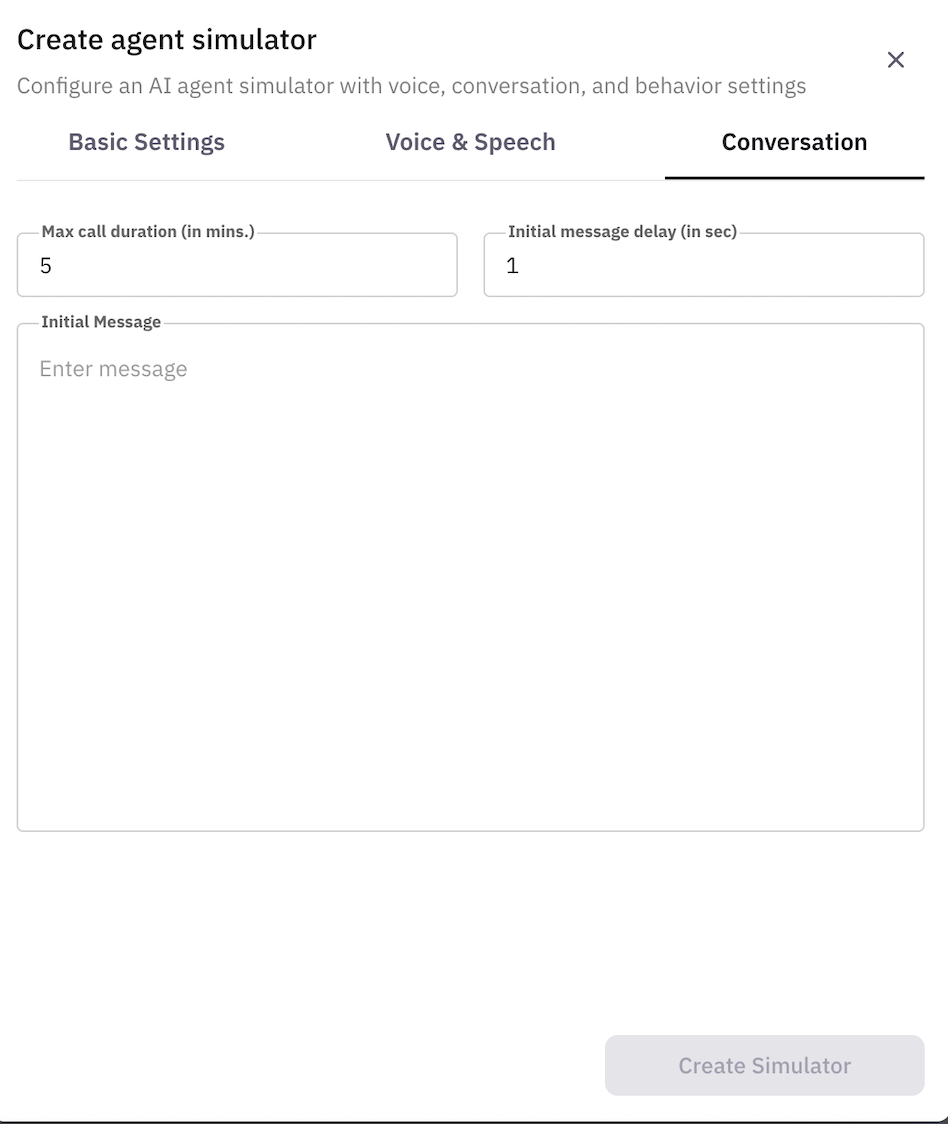
- Max call duration (in minutes): Set the maximum call duration for the simulation agent
- Initial message delay (in seconds): Set the initial message delay for the simulation agent
- Initial message: Set the initial message for the simulation agent
3.4 Save Simulation Agent
Click “Create” to save your simulation agent configuration.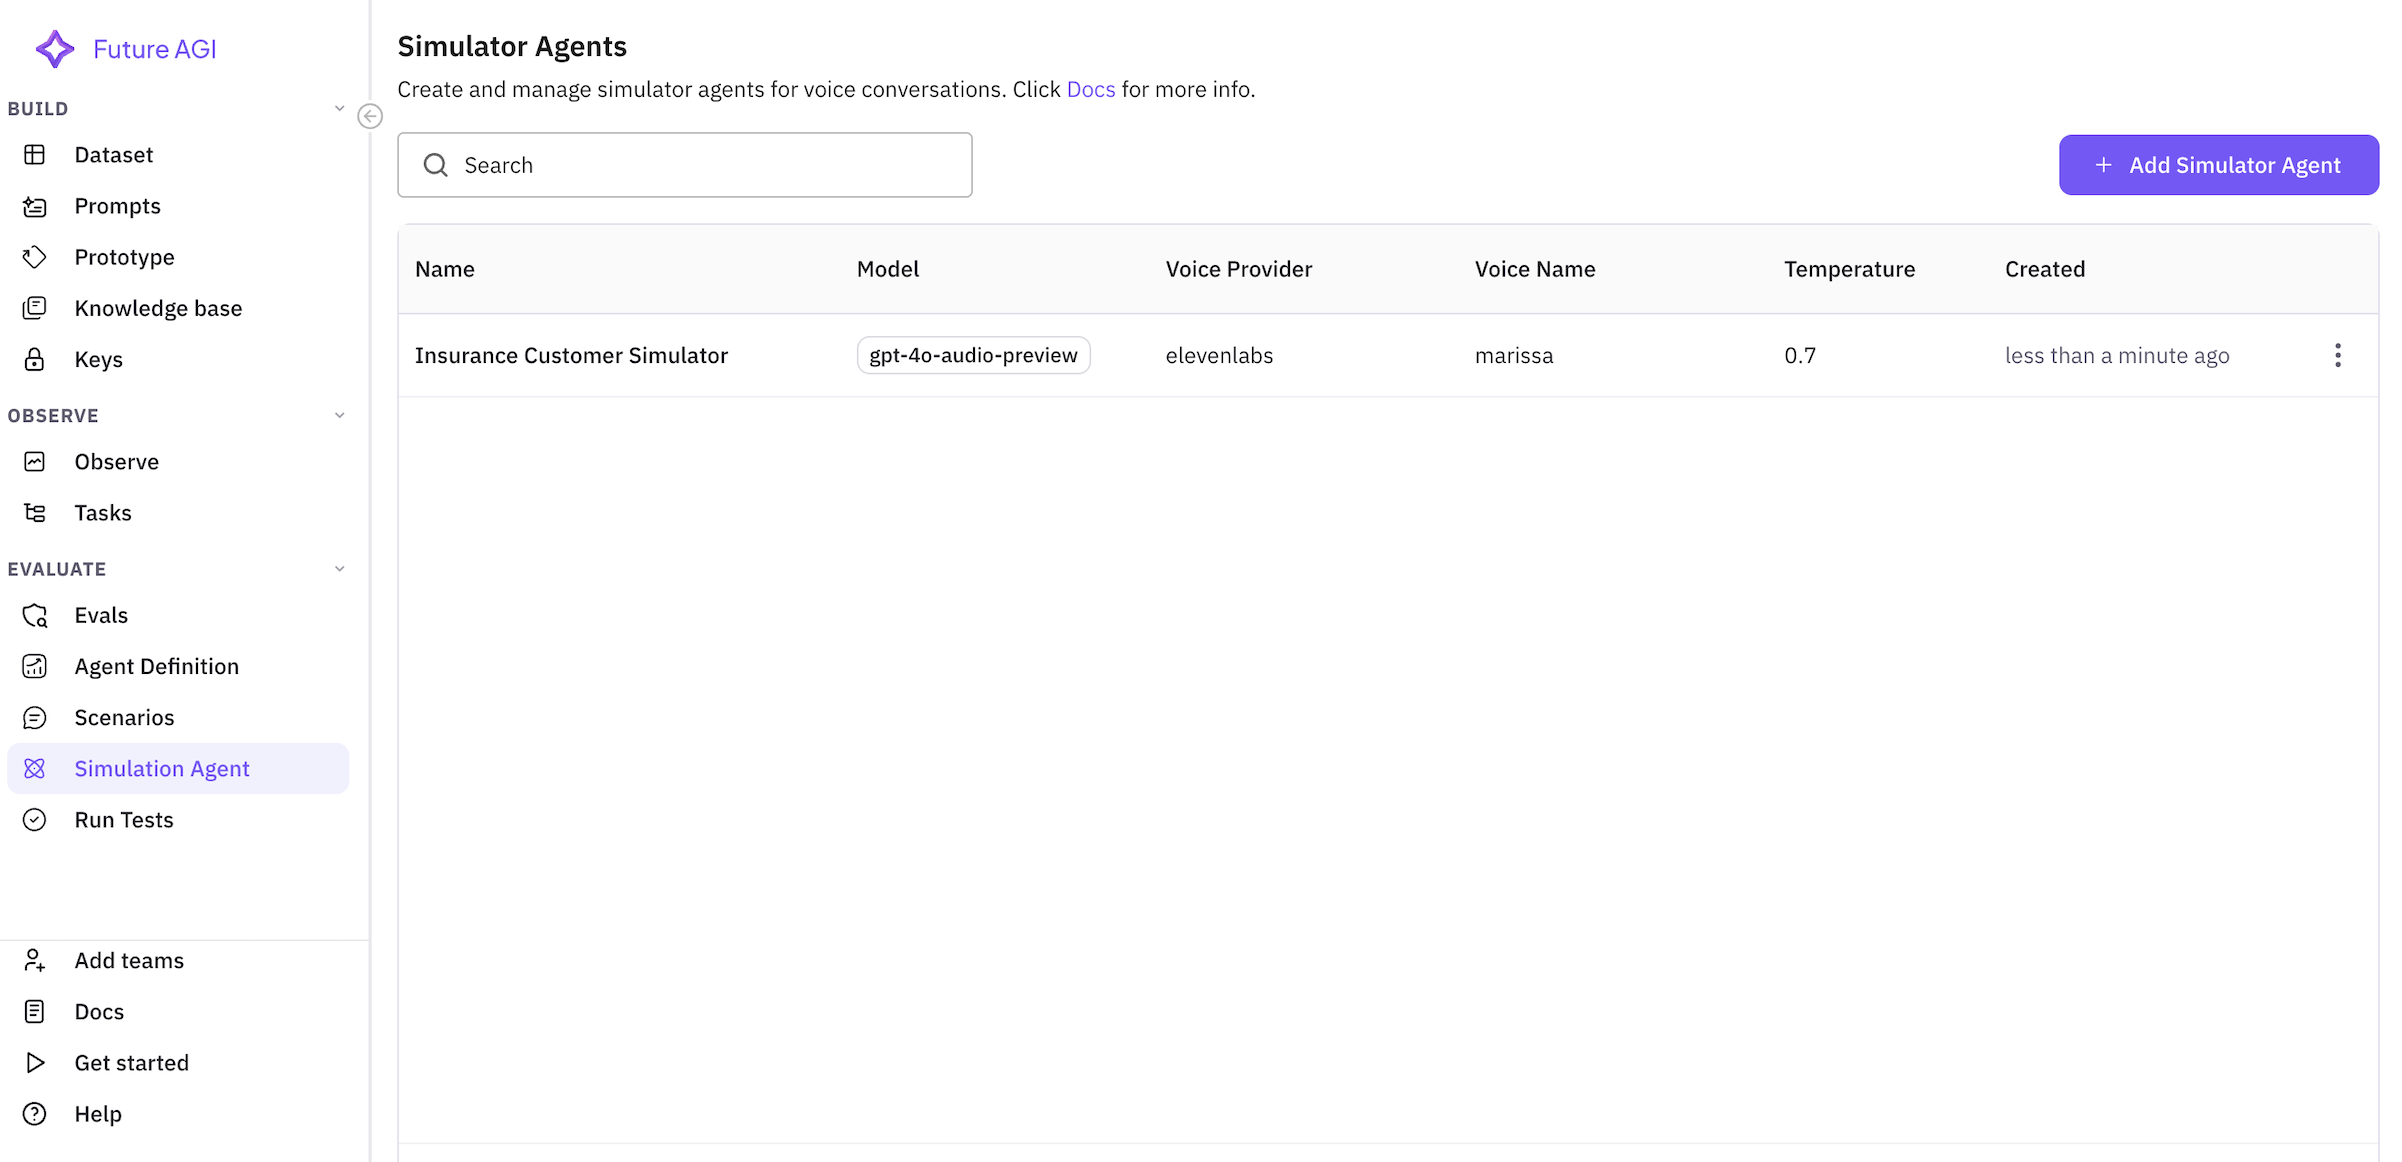
Step 4: Creating and Running a Test
Now we’ll combine all components to create and run a simulation test.4.1 Navigate to Run Tests
From left sidebar, click on Run Tests.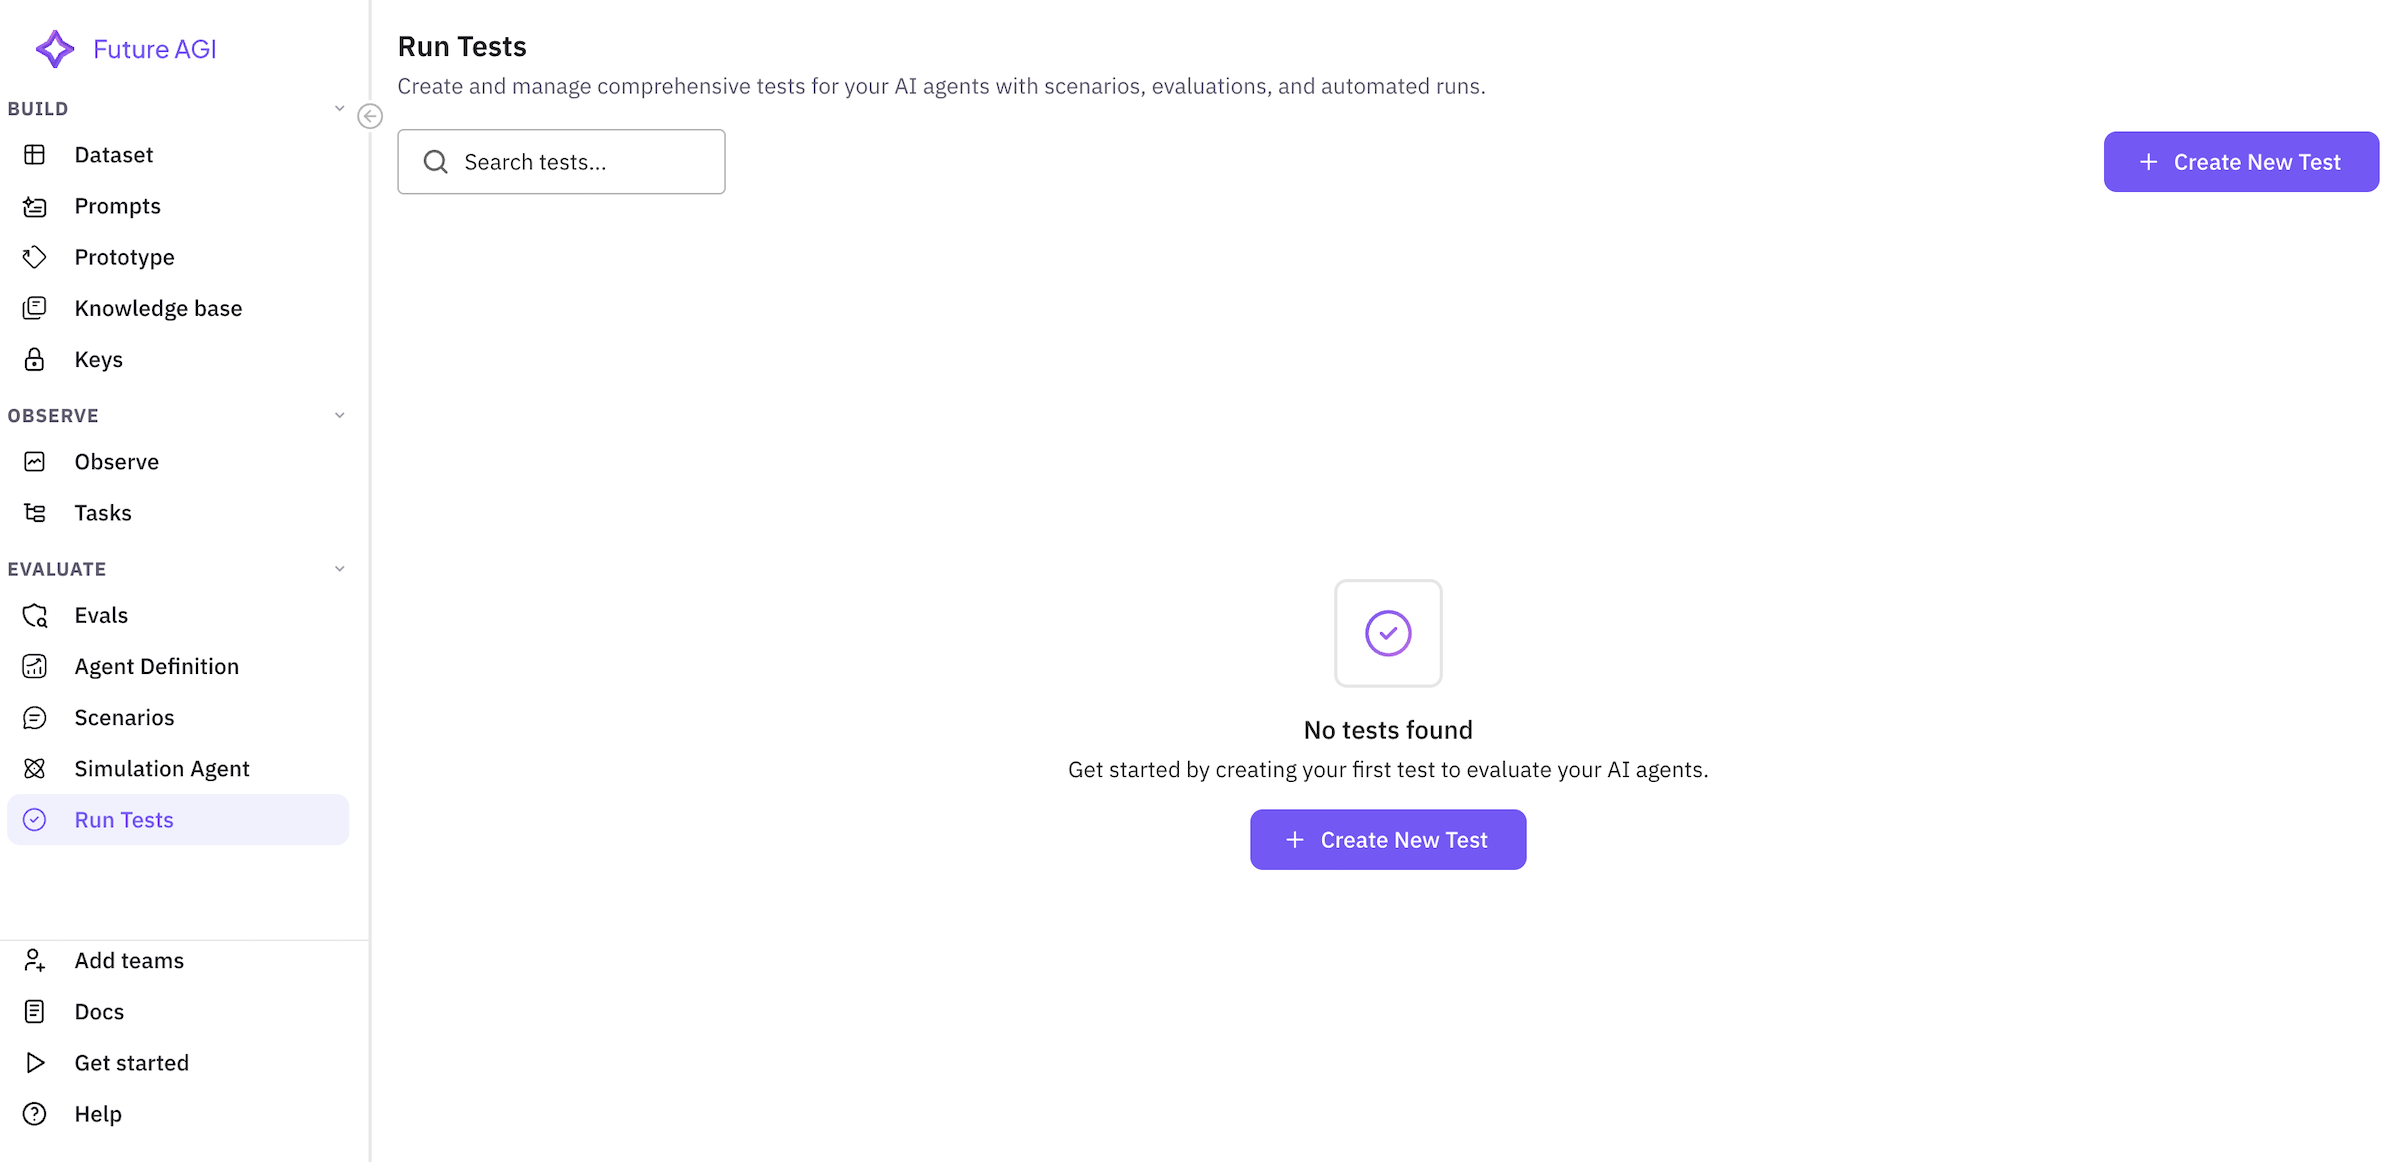
4.2 Create New Test
Click “Create Test” to start the test creation wizard.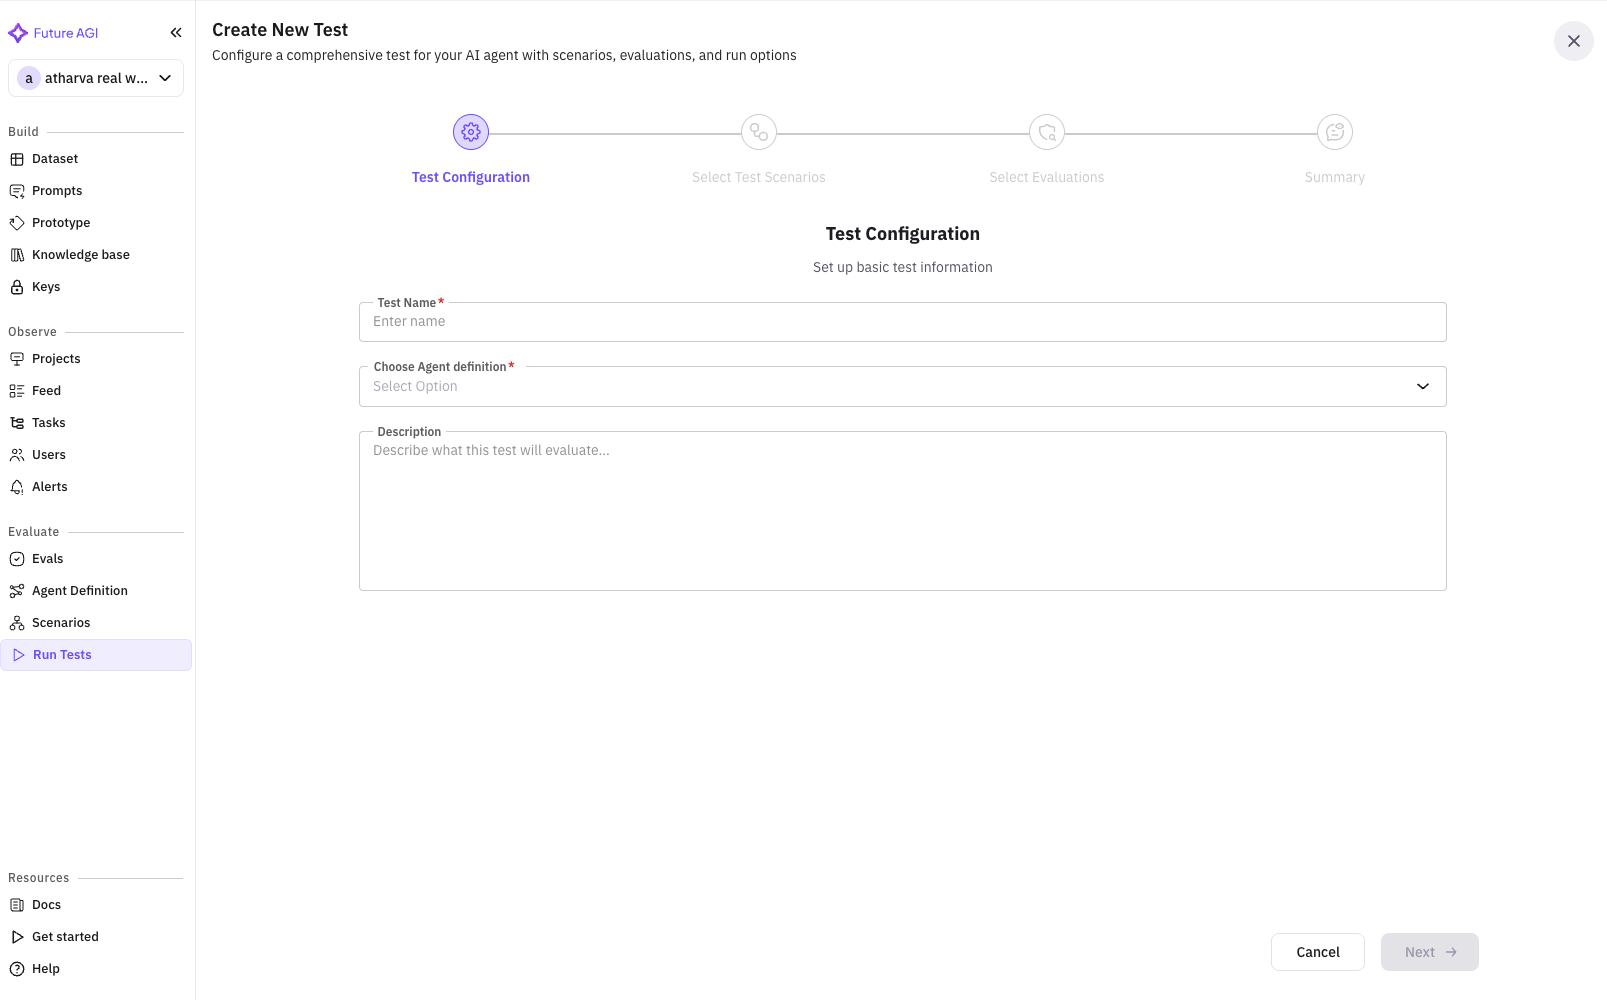
4.3 Test Configuration (Step 1 of 5)
Basic Information
- Test Name:
Insurance Sales Agent Performance Test - Description:
Testing the insurance sales agent's ability to handle different customer profiles and close sales
4.4 Select Test Scenarios (Step 2 of 5)
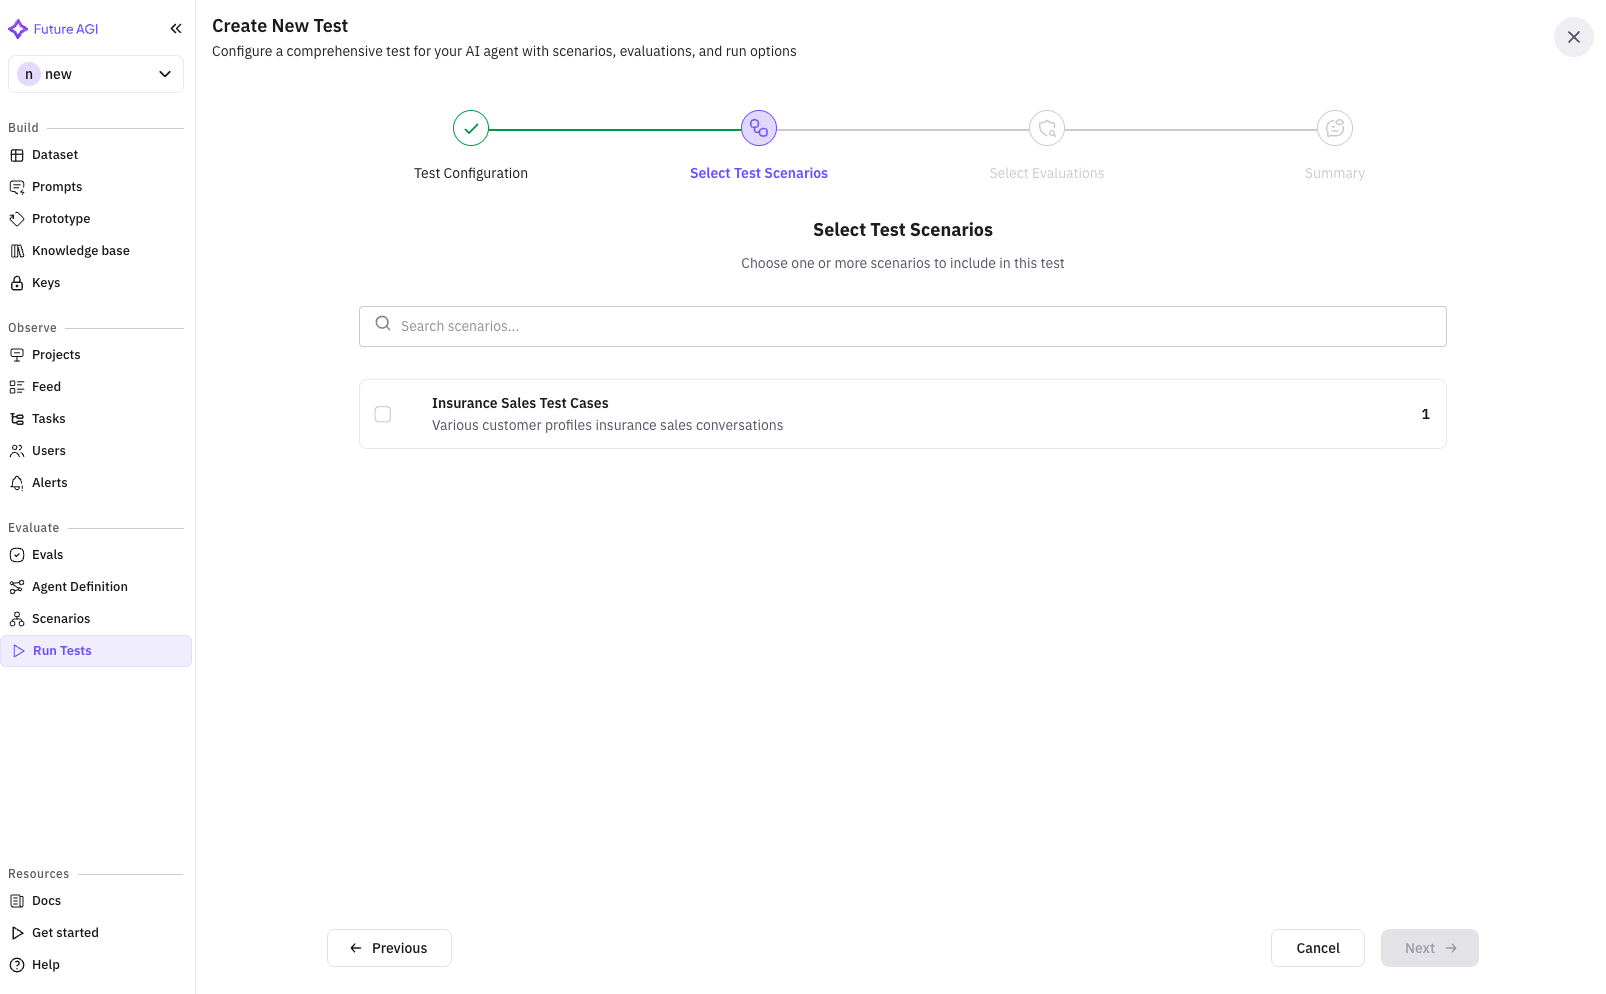
- ✓
Insurance Sales Test Cases
4.5 Select Test Agent (Step 3 of 5)
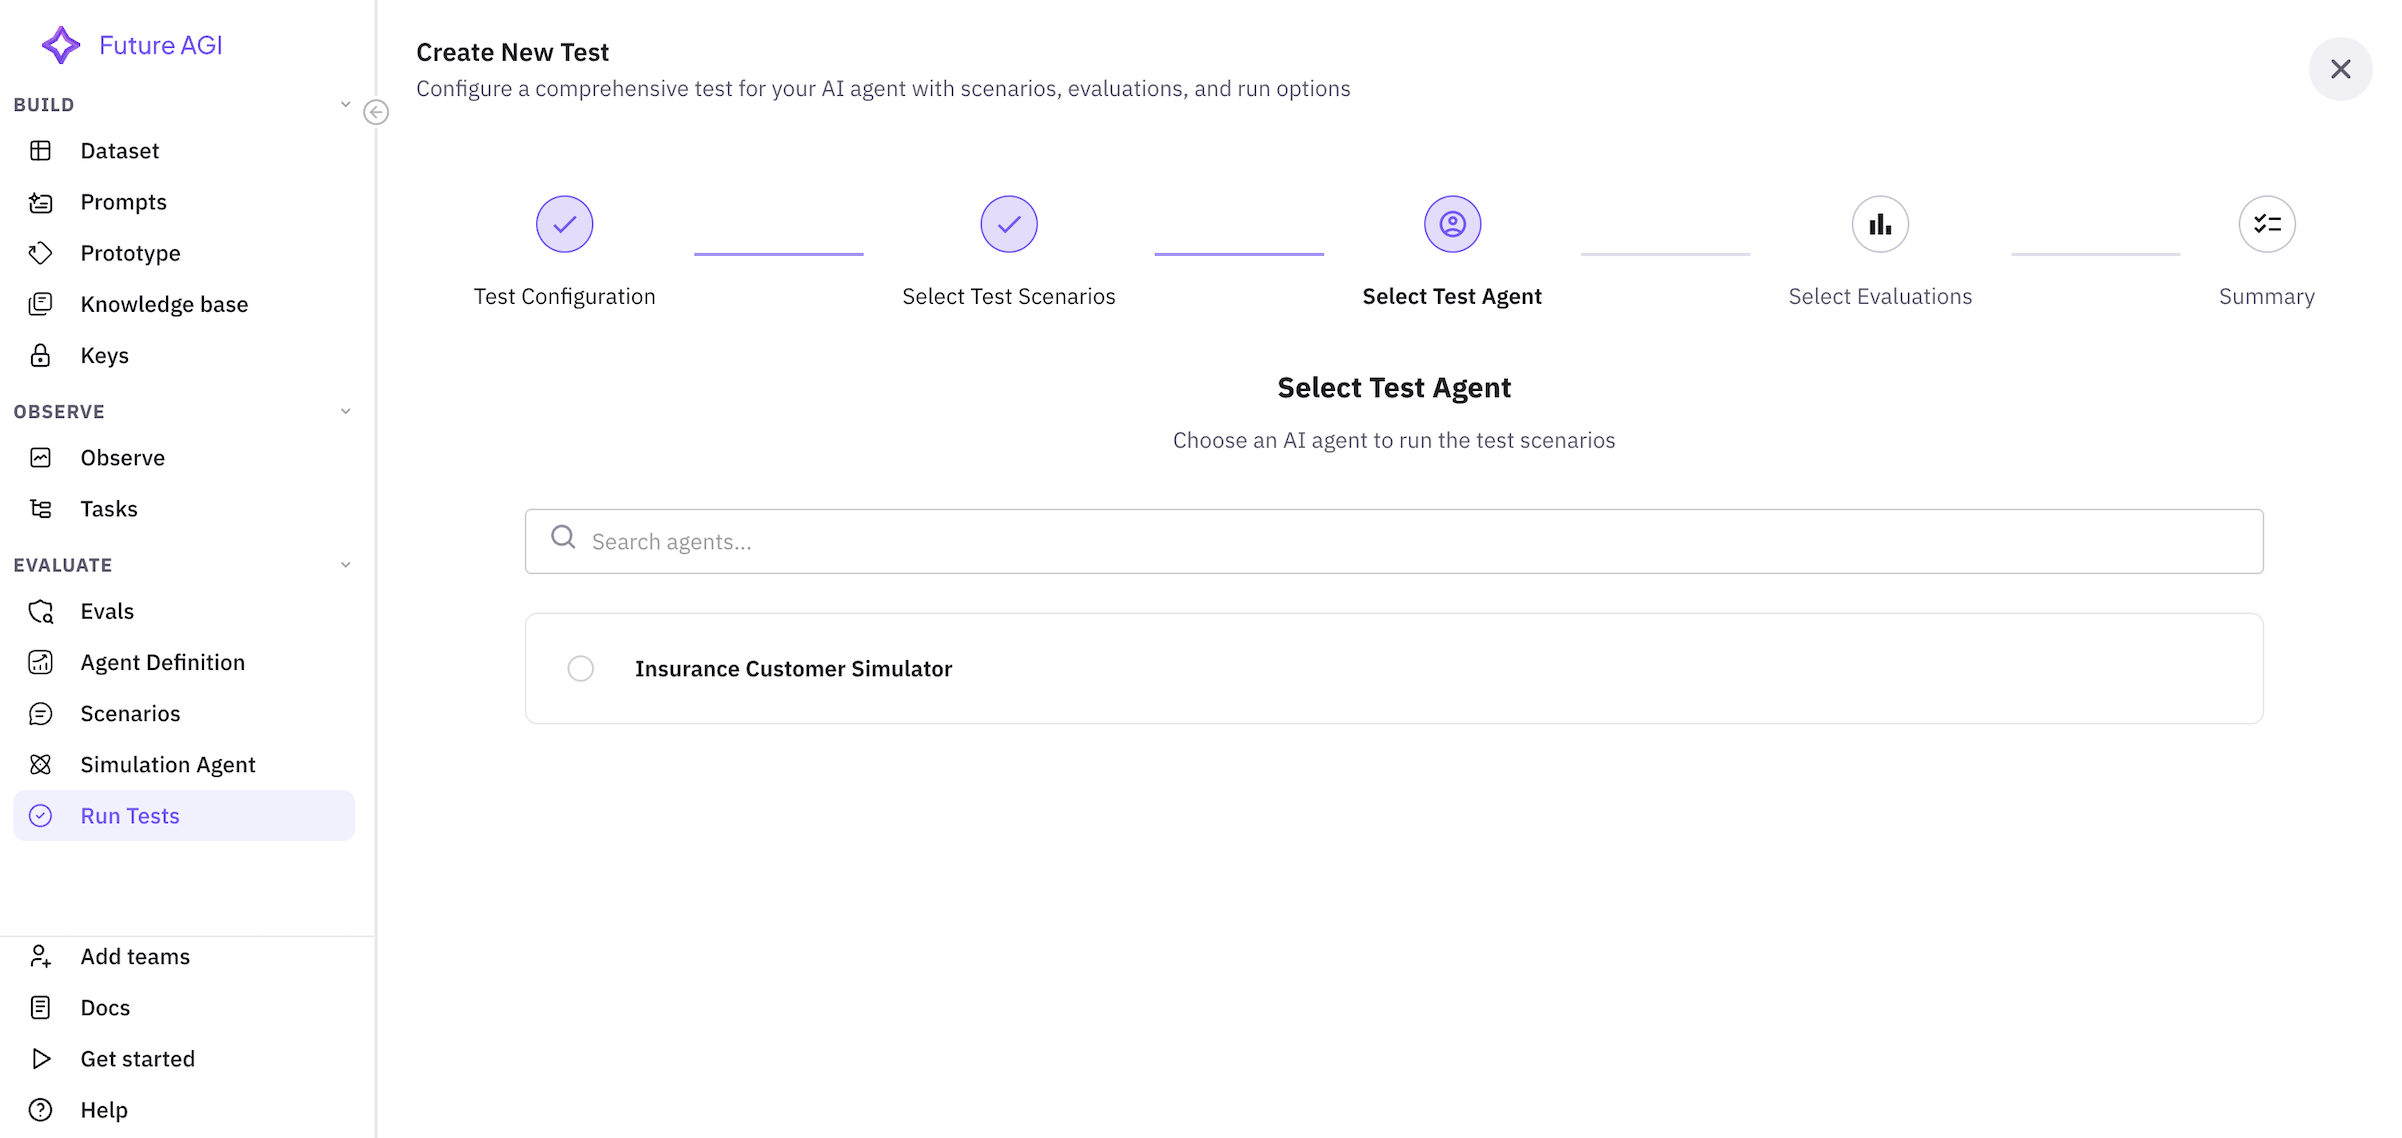
- ✓
Insurance Sales Agent
4.6 Select Evaluations (Step 4 of 5)
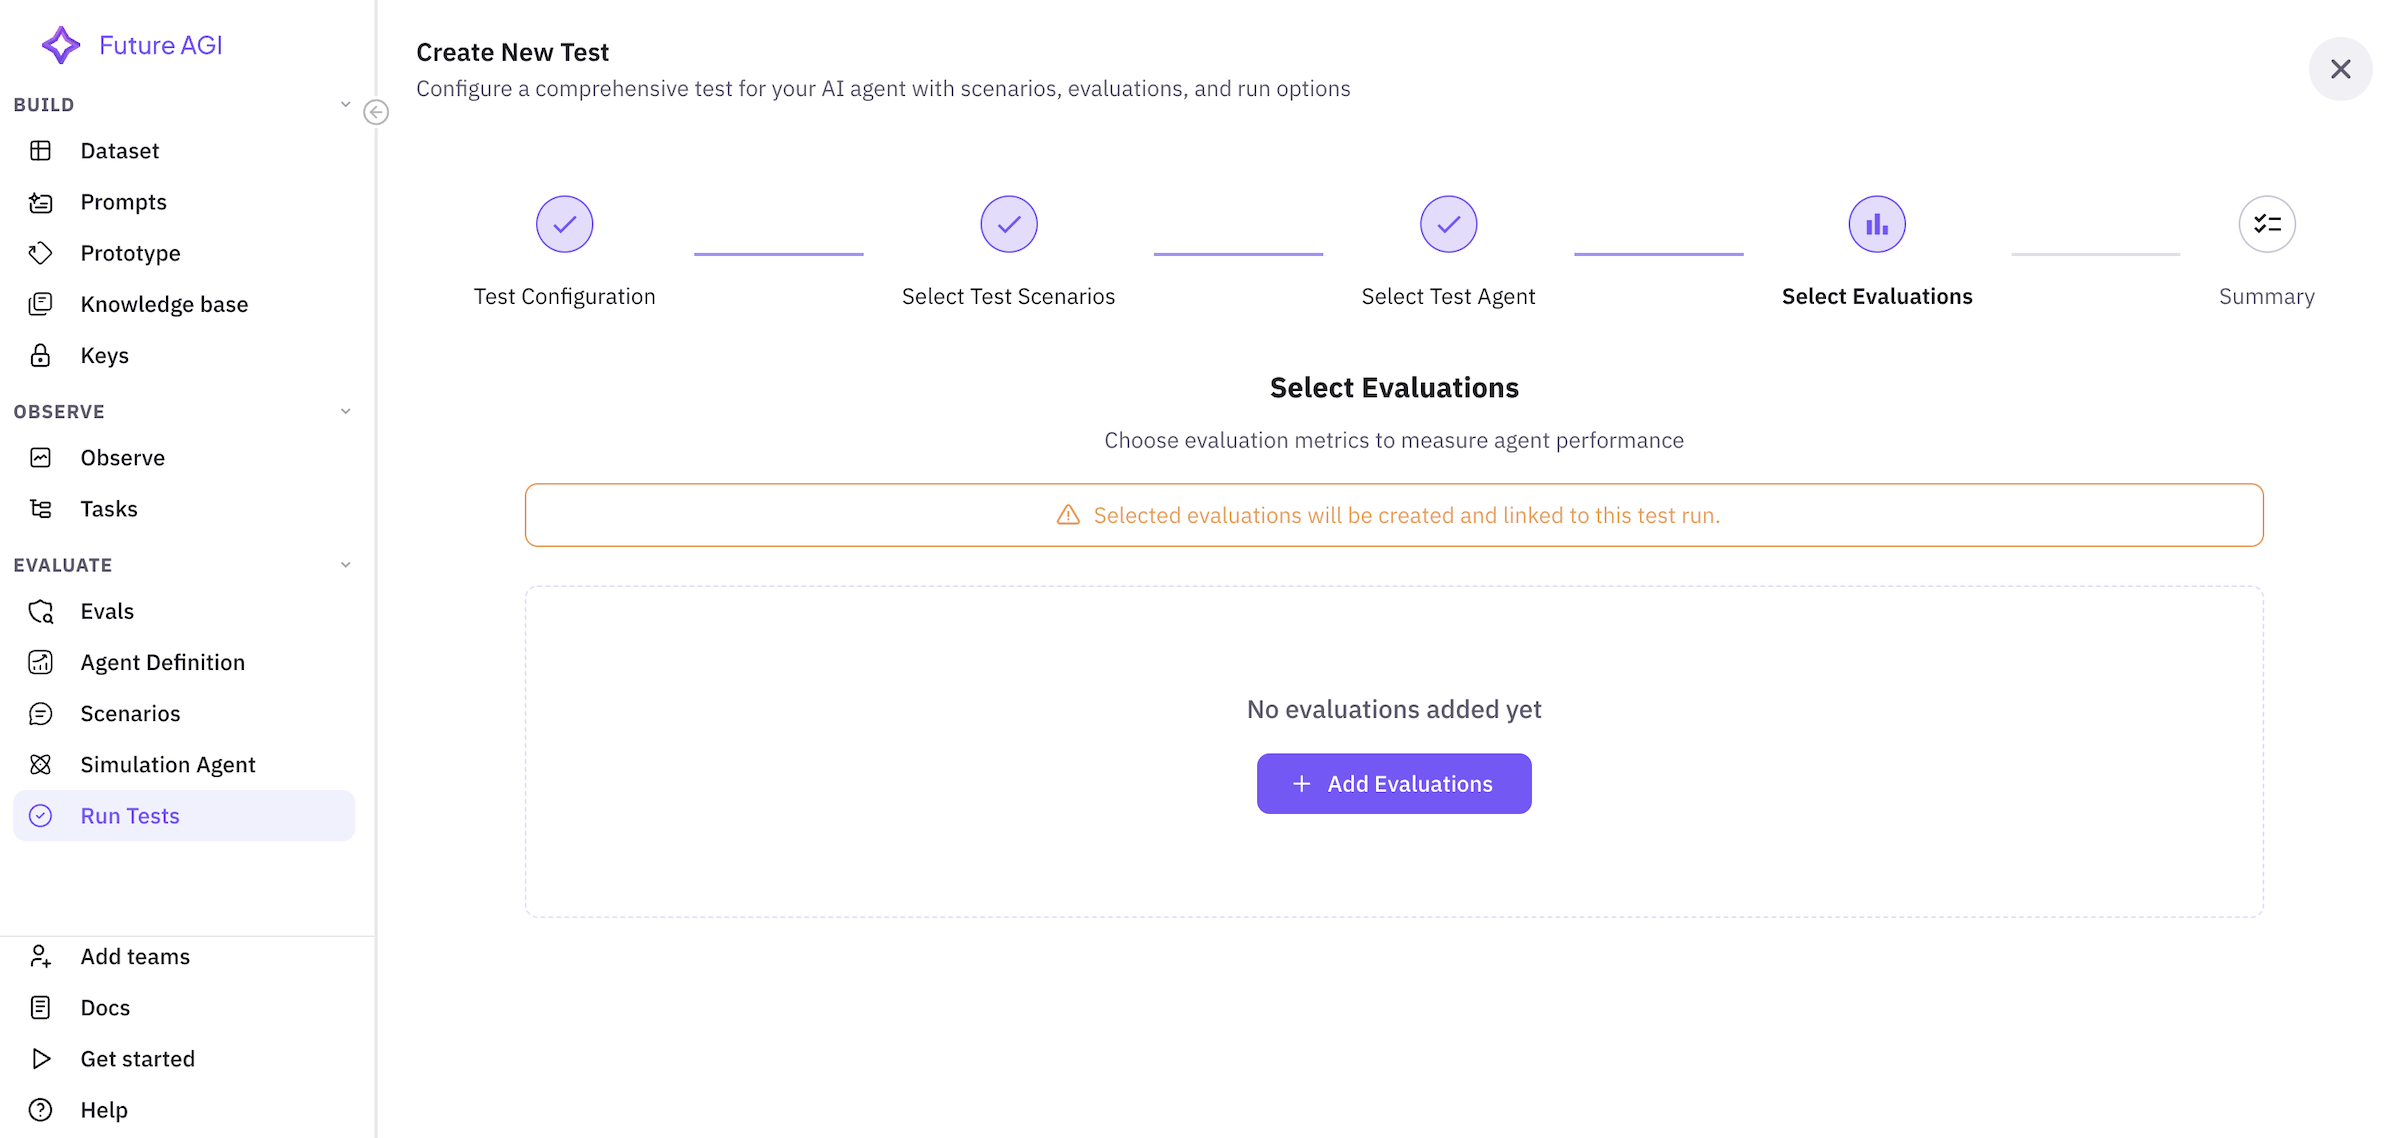

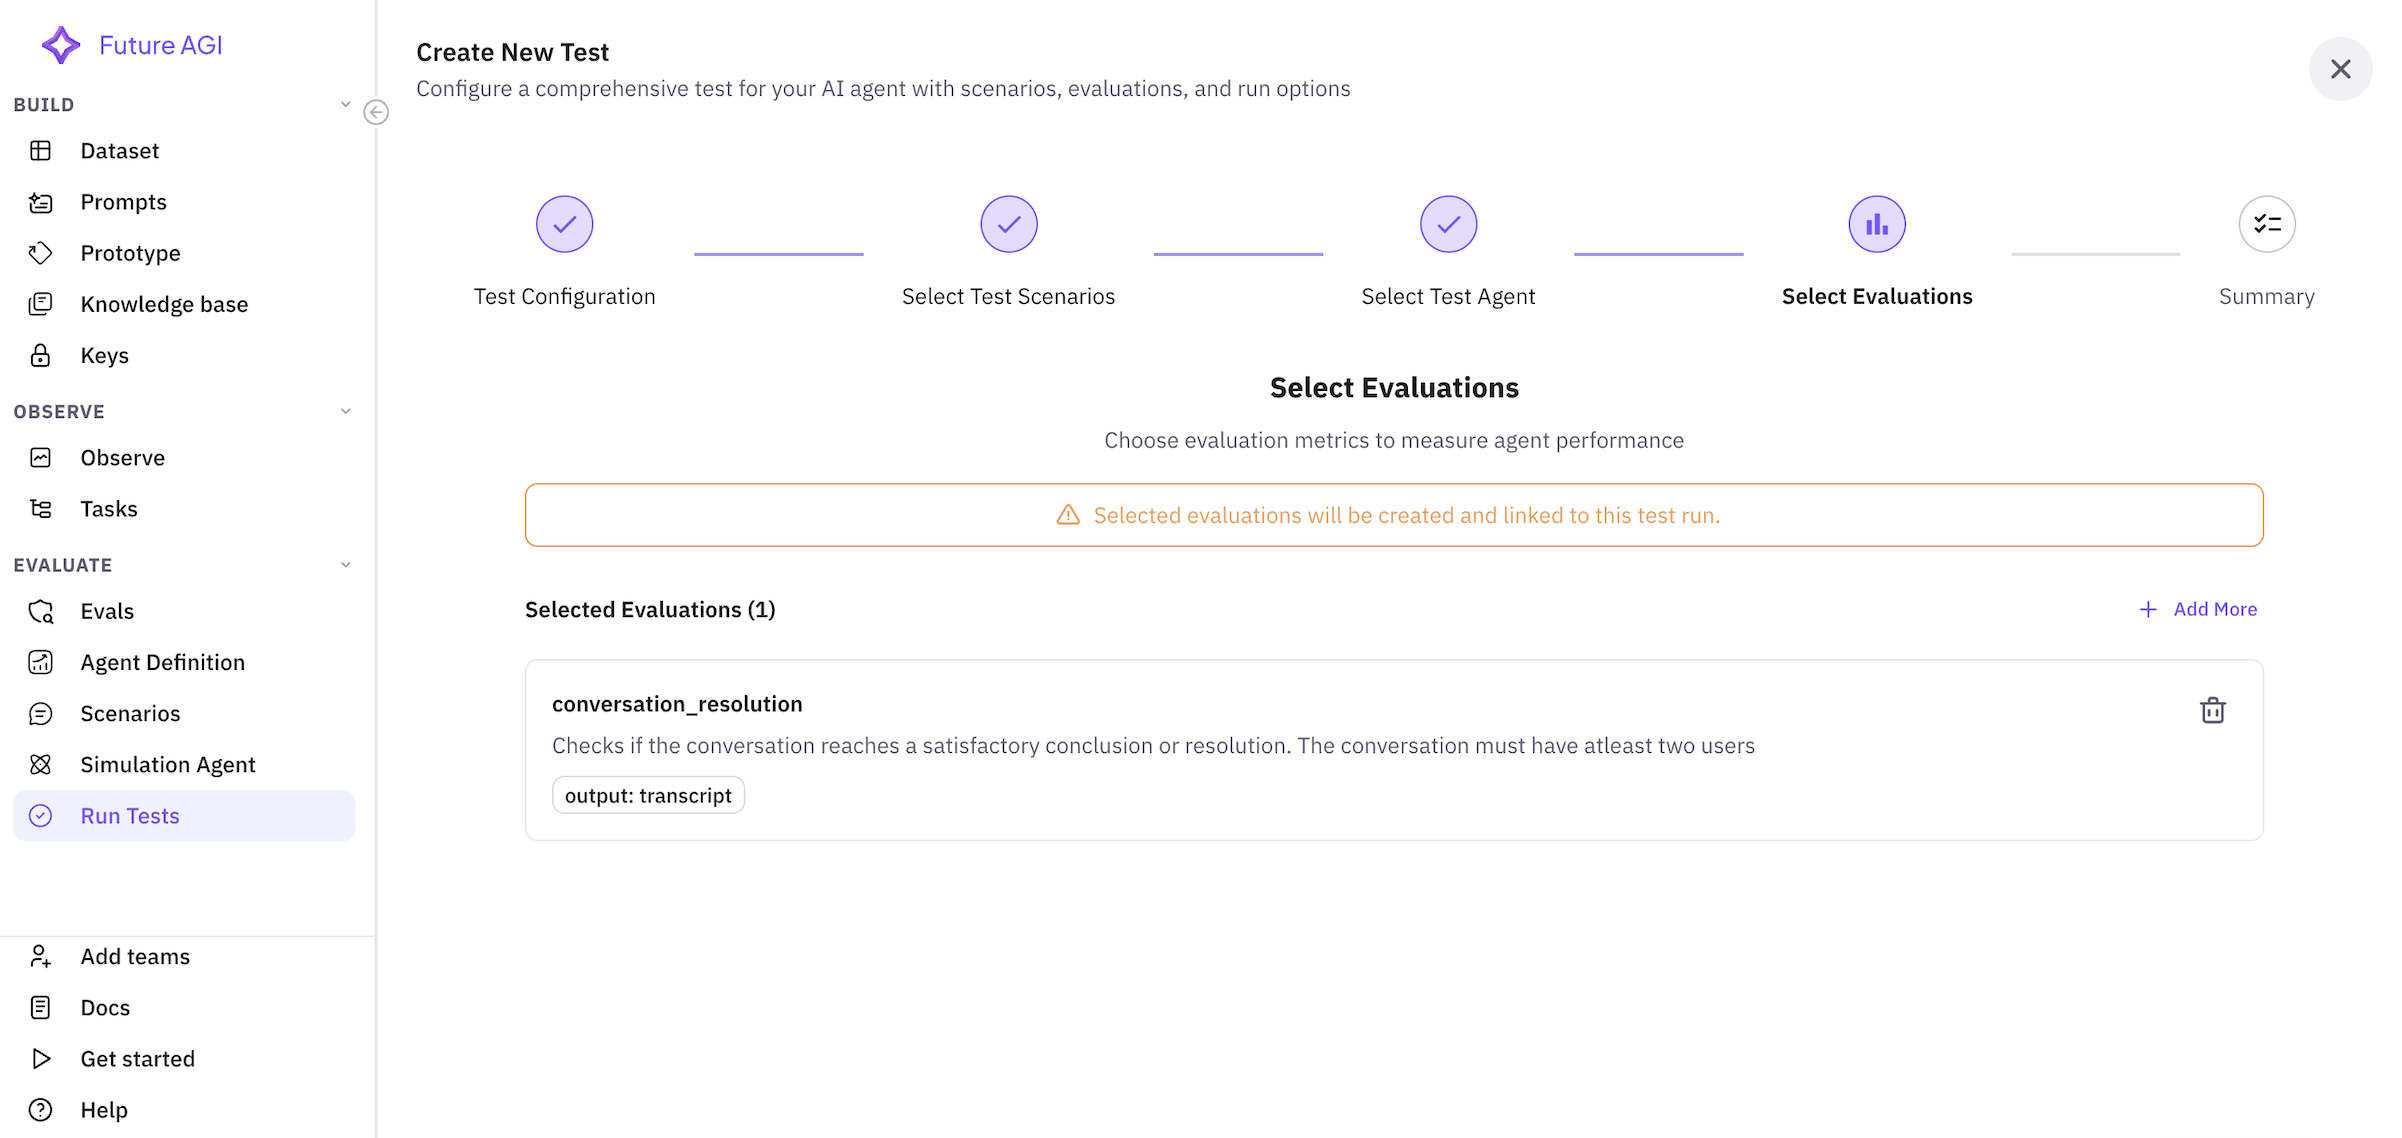
- ✓ Conversation Quality - Measures professionalism and clarity
- ✓ Product Knowledge - Evaluates accuracy of insurance information
- ✓ Sales Effectiveness - Tracks conversion and objection handling
- ✓ Compliance - Ensures regulatory requirements are met
- ✓ Customer Satisfaction - Simulated CSAT score
4.7 Review Summary (Step 5 of 5)
Review your test configuration: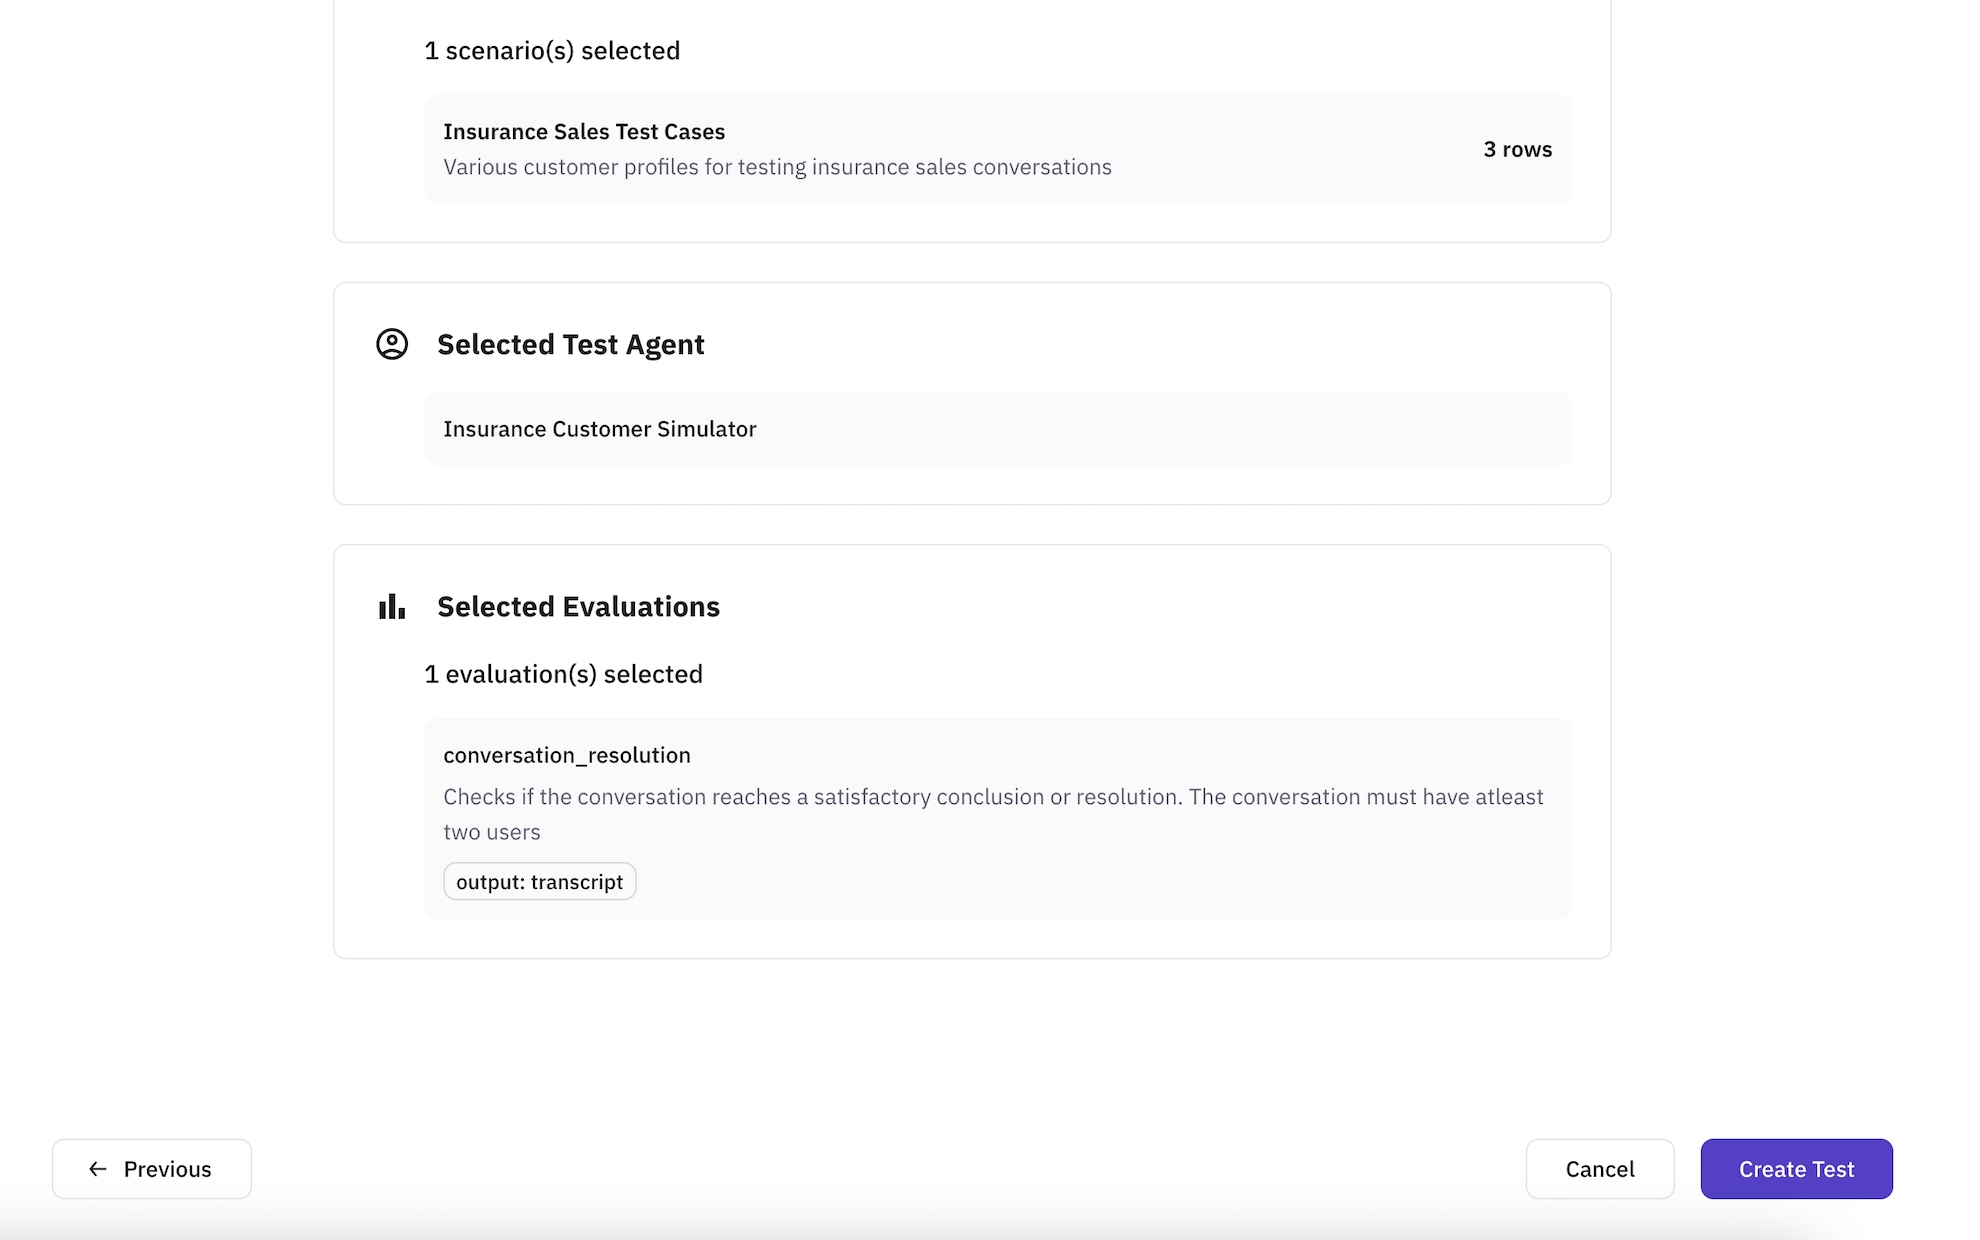
- Name: Insurance Sales Agent Performance Test
- Agent: Insurance Sales Agent
- Simulation Agent: Insurance Customer Simulator
- Scenarios: 1 scenario with 2 test cases
- Evaluations: 5 metrics selected
- Estimated Duration: ~20 minutes
4.8 Run the Test
Click “Run Test” to start the simulation.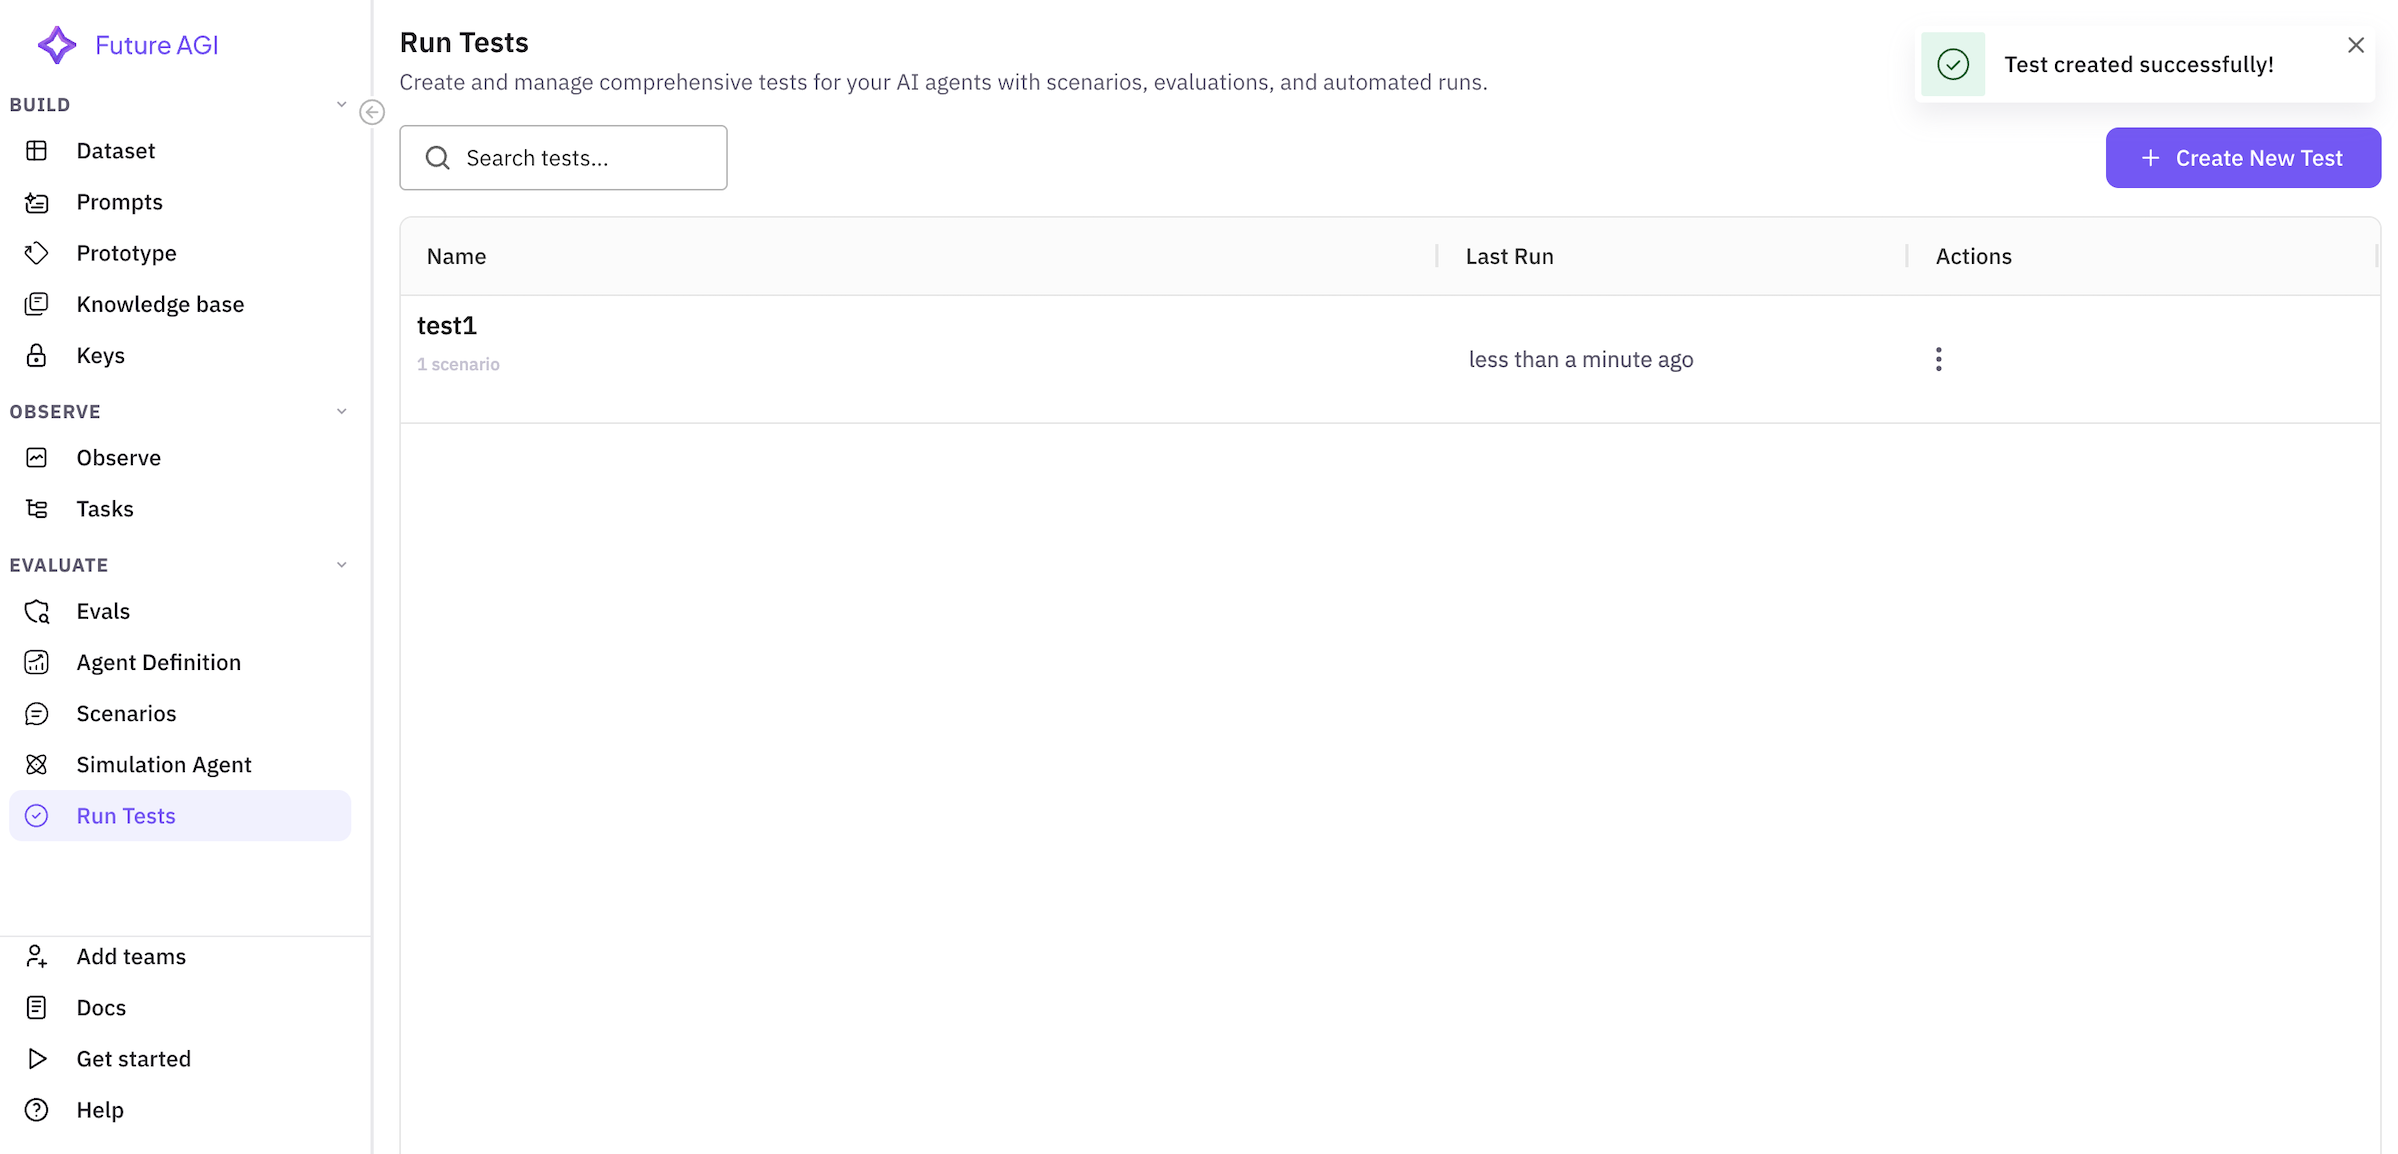
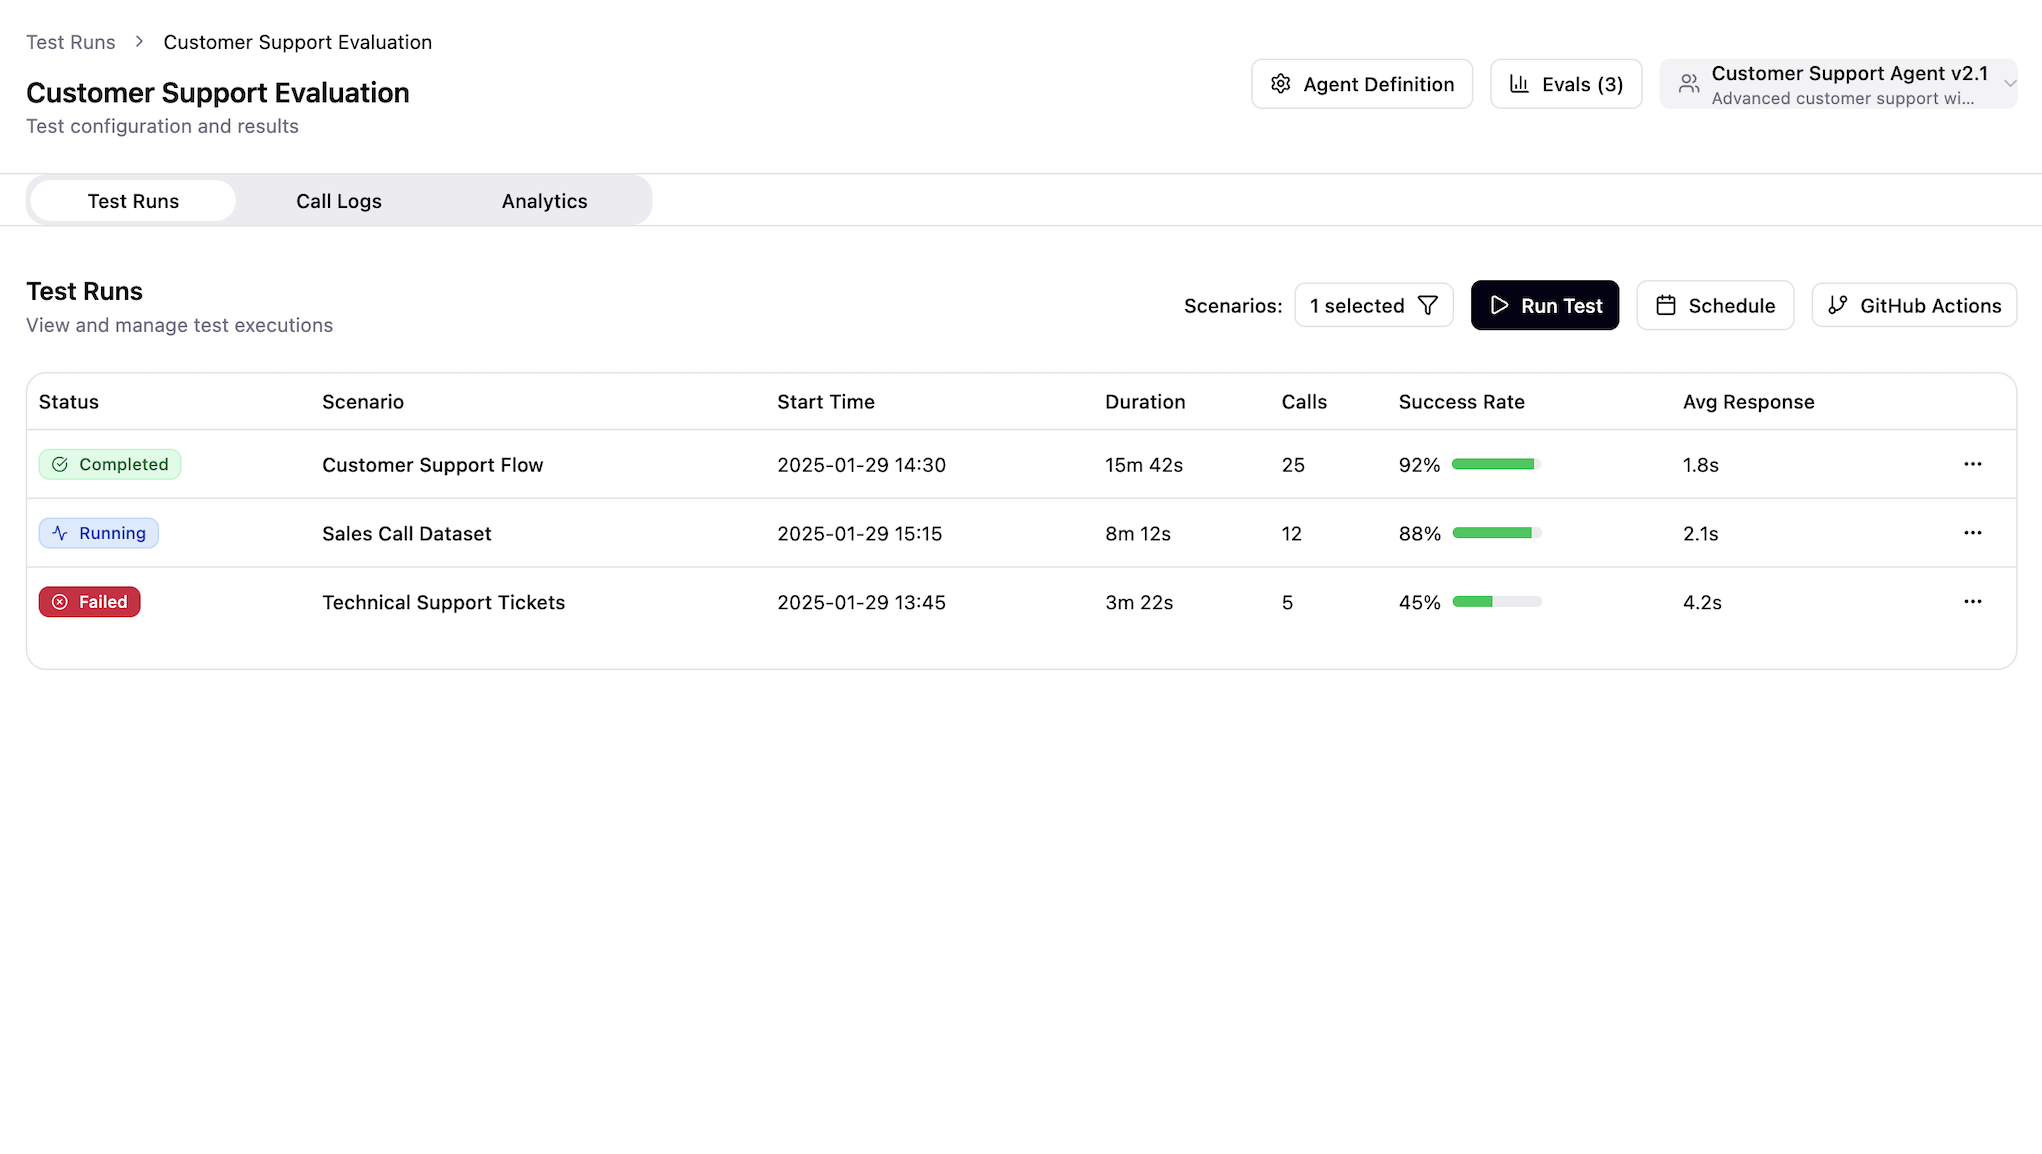
Step 5: Monitoring Test Execution
5.1 Test Progress
Once the test starts, you’ll see a real-time progress view: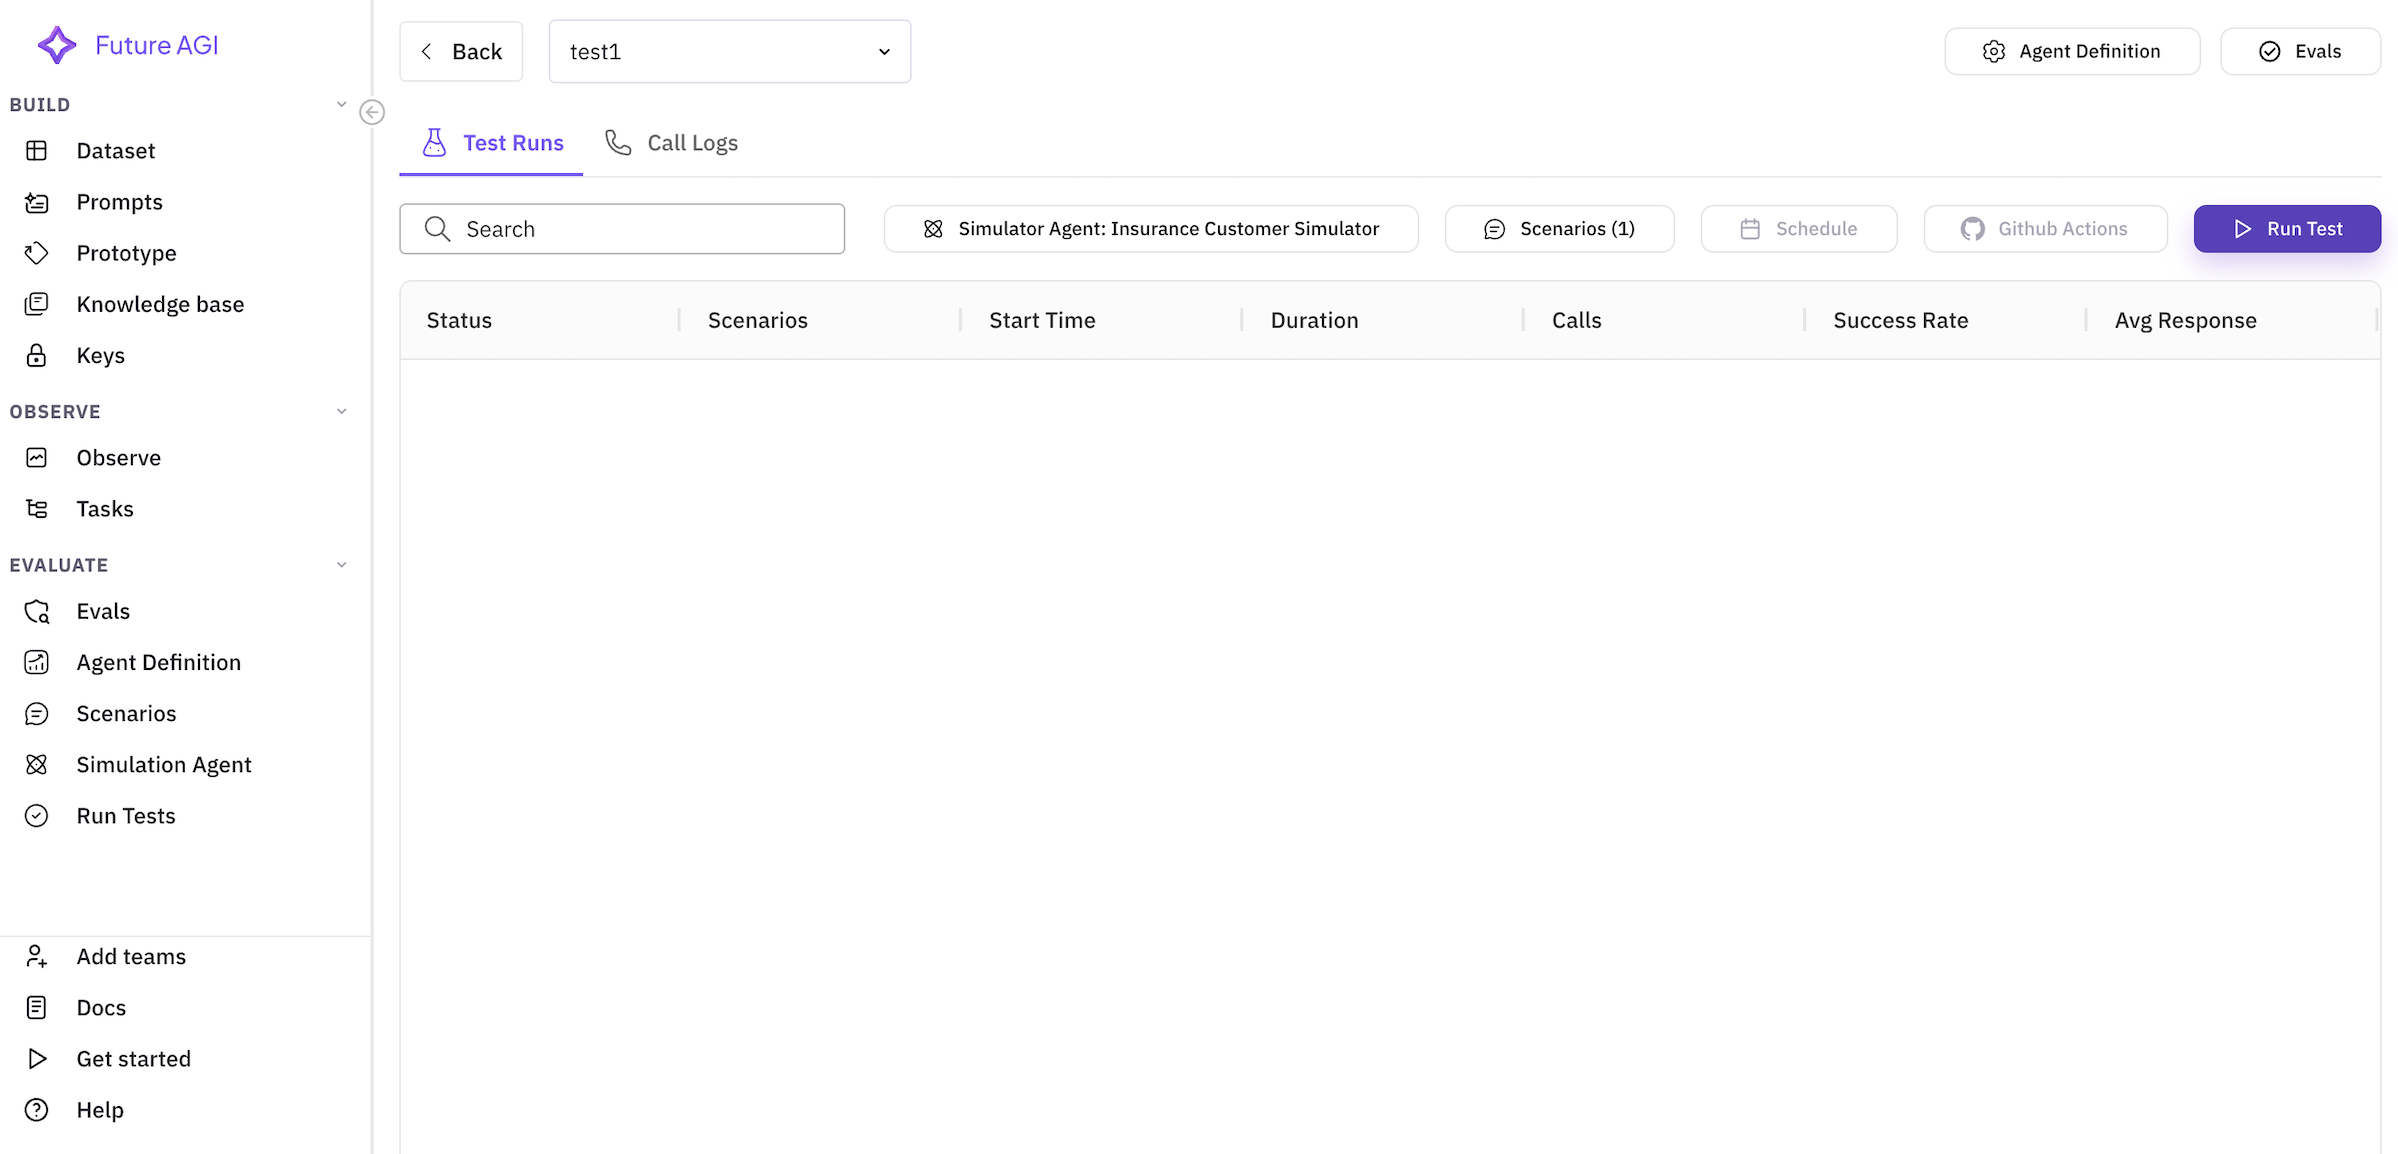
- Overall Progress: Percentage of test cases completed
- Current Scenario: Active test case being executed
- Live Metrics: Real-time evaluation scores
- Call Logs: Streaming conversation transcripts
5.2 View Test Results
After completion, click on your test to view detailed results: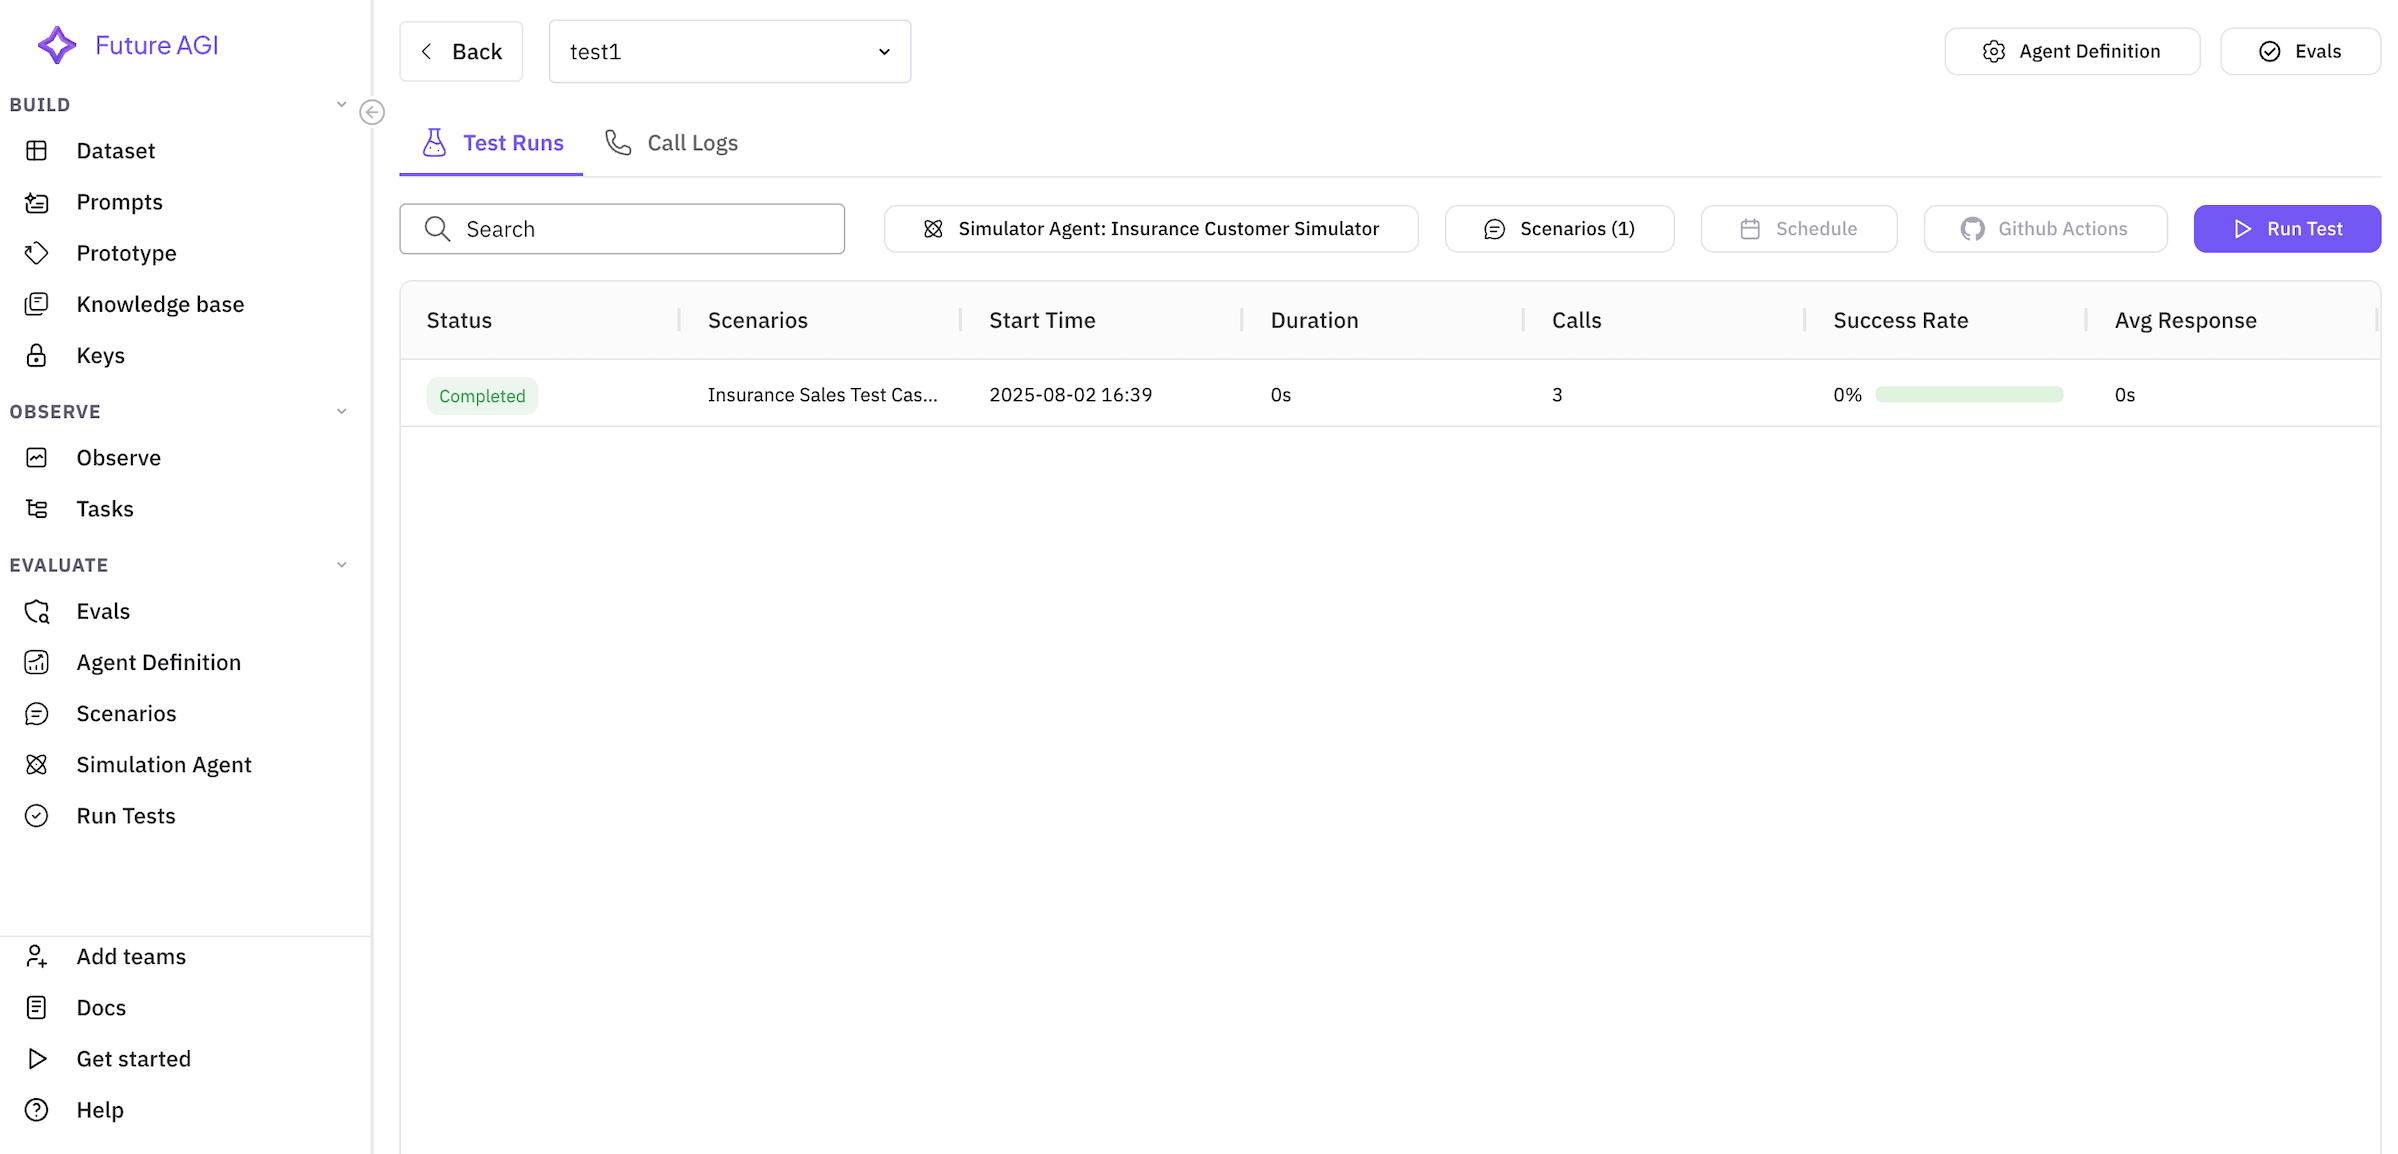
5.3 Analyze Call Logs
Click on “Call Logs” tab to review individual conversations: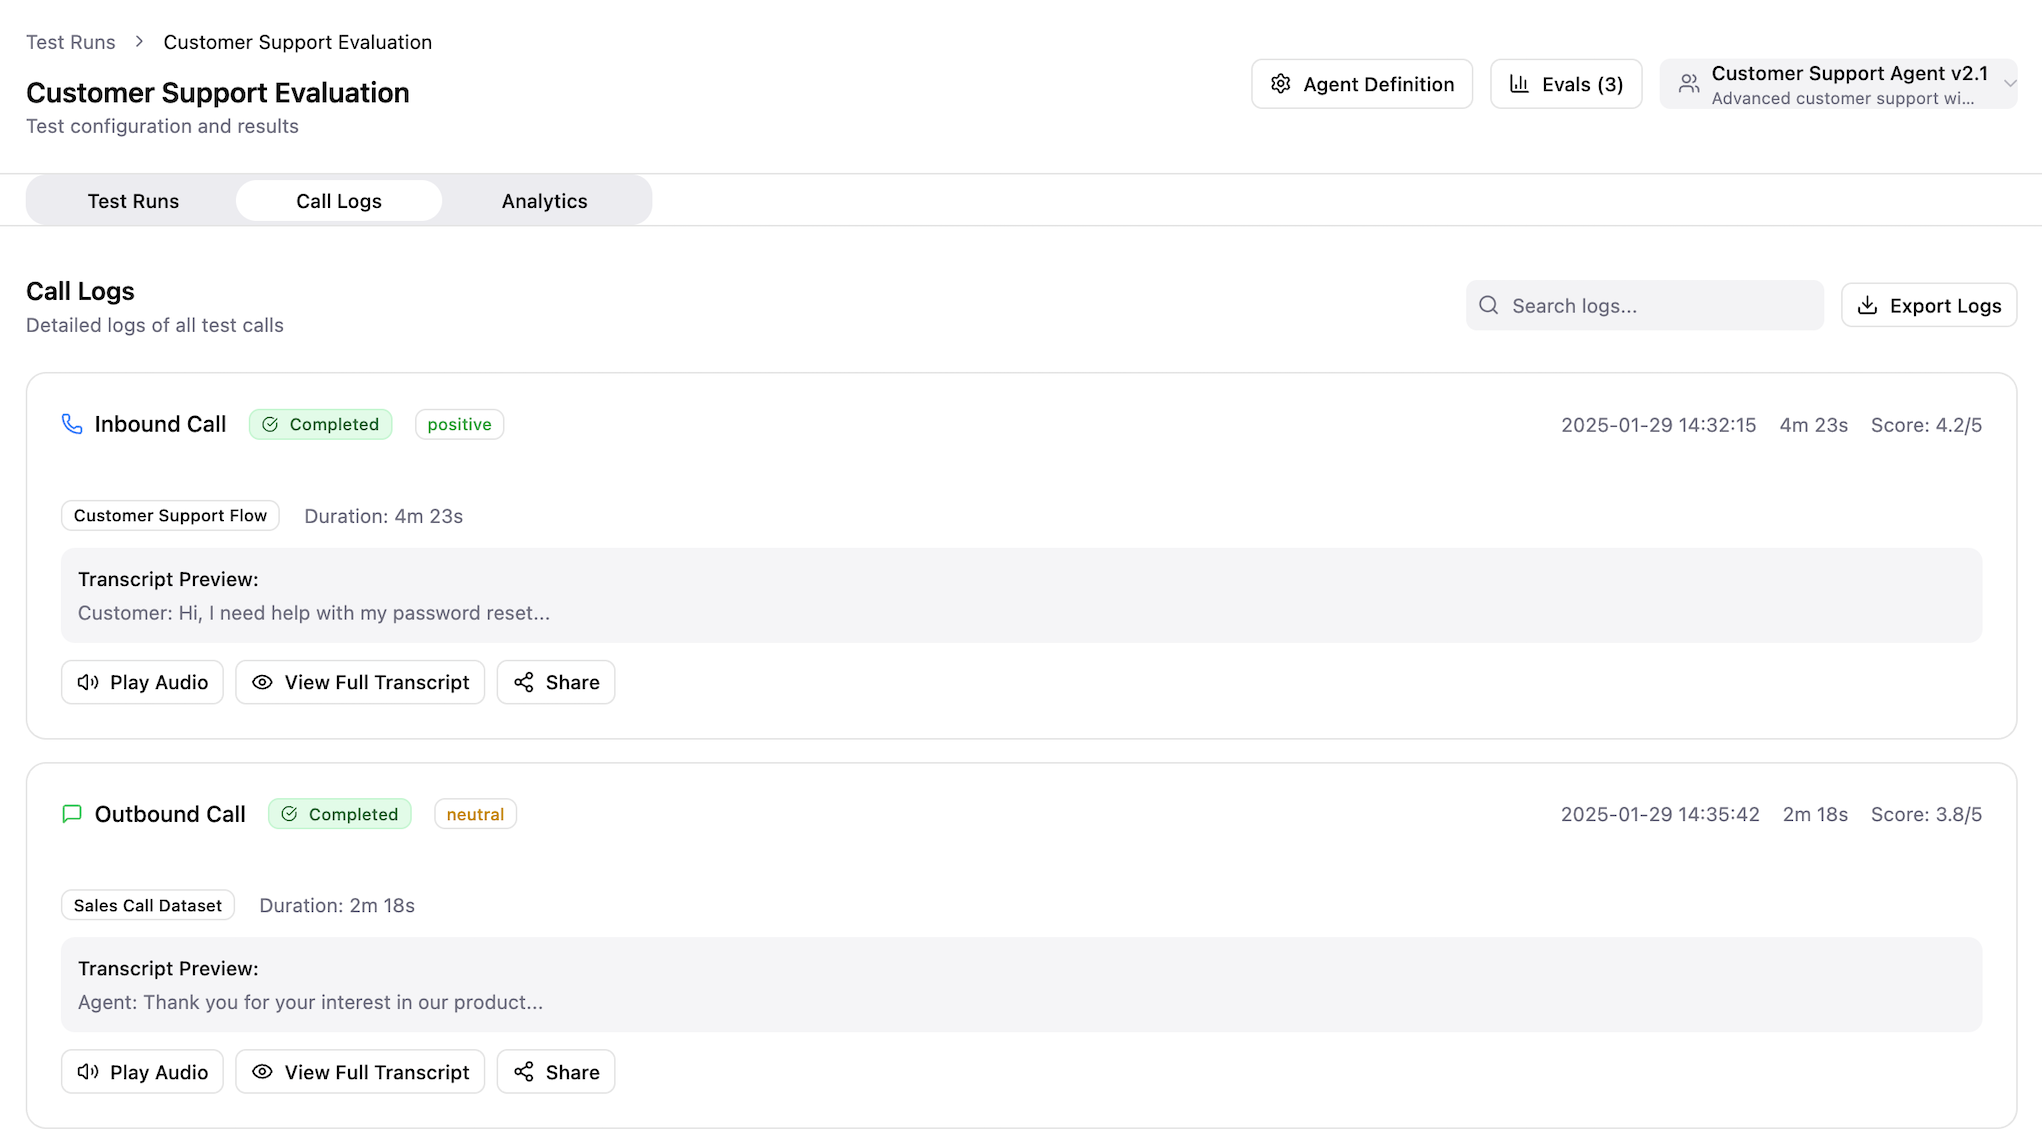
- Full conversation transcript
- Timestamp and duration
- Individual evaluation scores
- Key moments flagged by evaluations
- Audio recording (if enabled)
5.4 Export Results
Export your test results for further analysis:- PDF Report: Comprehensive test summary
- CSV Data: Raw evaluation scores
- Call Recordings: Audio files (if enabled)
Best Practices
For Insurance Sales Agents
-
Scenario Diversity: Include various customer profiles:
- Different age groups and income levels
- Various insurance needs (life, health, auto)
- Different objection types
-
Compliance Testing: Always include compliance evaluations to ensure:
- Proper disclosures are made
- Regulatory requirements are met
- No misleading information is provided
-
Iterative Improvement:
- Run tests regularly
- Analyze failed conversions
- Update agent prompts based on results
General Tips
- Start Small: Begin with 5-10 test cases before scaling up
- Use Realistic Data: Base scenarios on actual customer profiles
- Monitor Trends: Track performance over multiple test runs
- Collaborate: Share results with your team for insights
Troubleshooting
Common Issues
Test Won’t Start- Verify all components (agent, scenarios, simulation agent) are properly configured
- Check that your agent’s API credentials are valid
- Ensure you have sufficient credits/quota
- Review agent prompts and instructions
- Analyze call logs for specific failure points
- Adjust evaluation thresholds if too strict
- Reduce scenario complexity
- Increase timeout settings in test configuration
- Check agent response time settings
Next Steps
Now that you’ve run your first simulation test:- Iterate and Improve: Use test results to refine your agent
- Scale Testing: Add more scenarios and edge cases
- Automate: Set up scheduled test runs
- Advanced Features: Explore multi-agent simulations and custom evaluations