Products
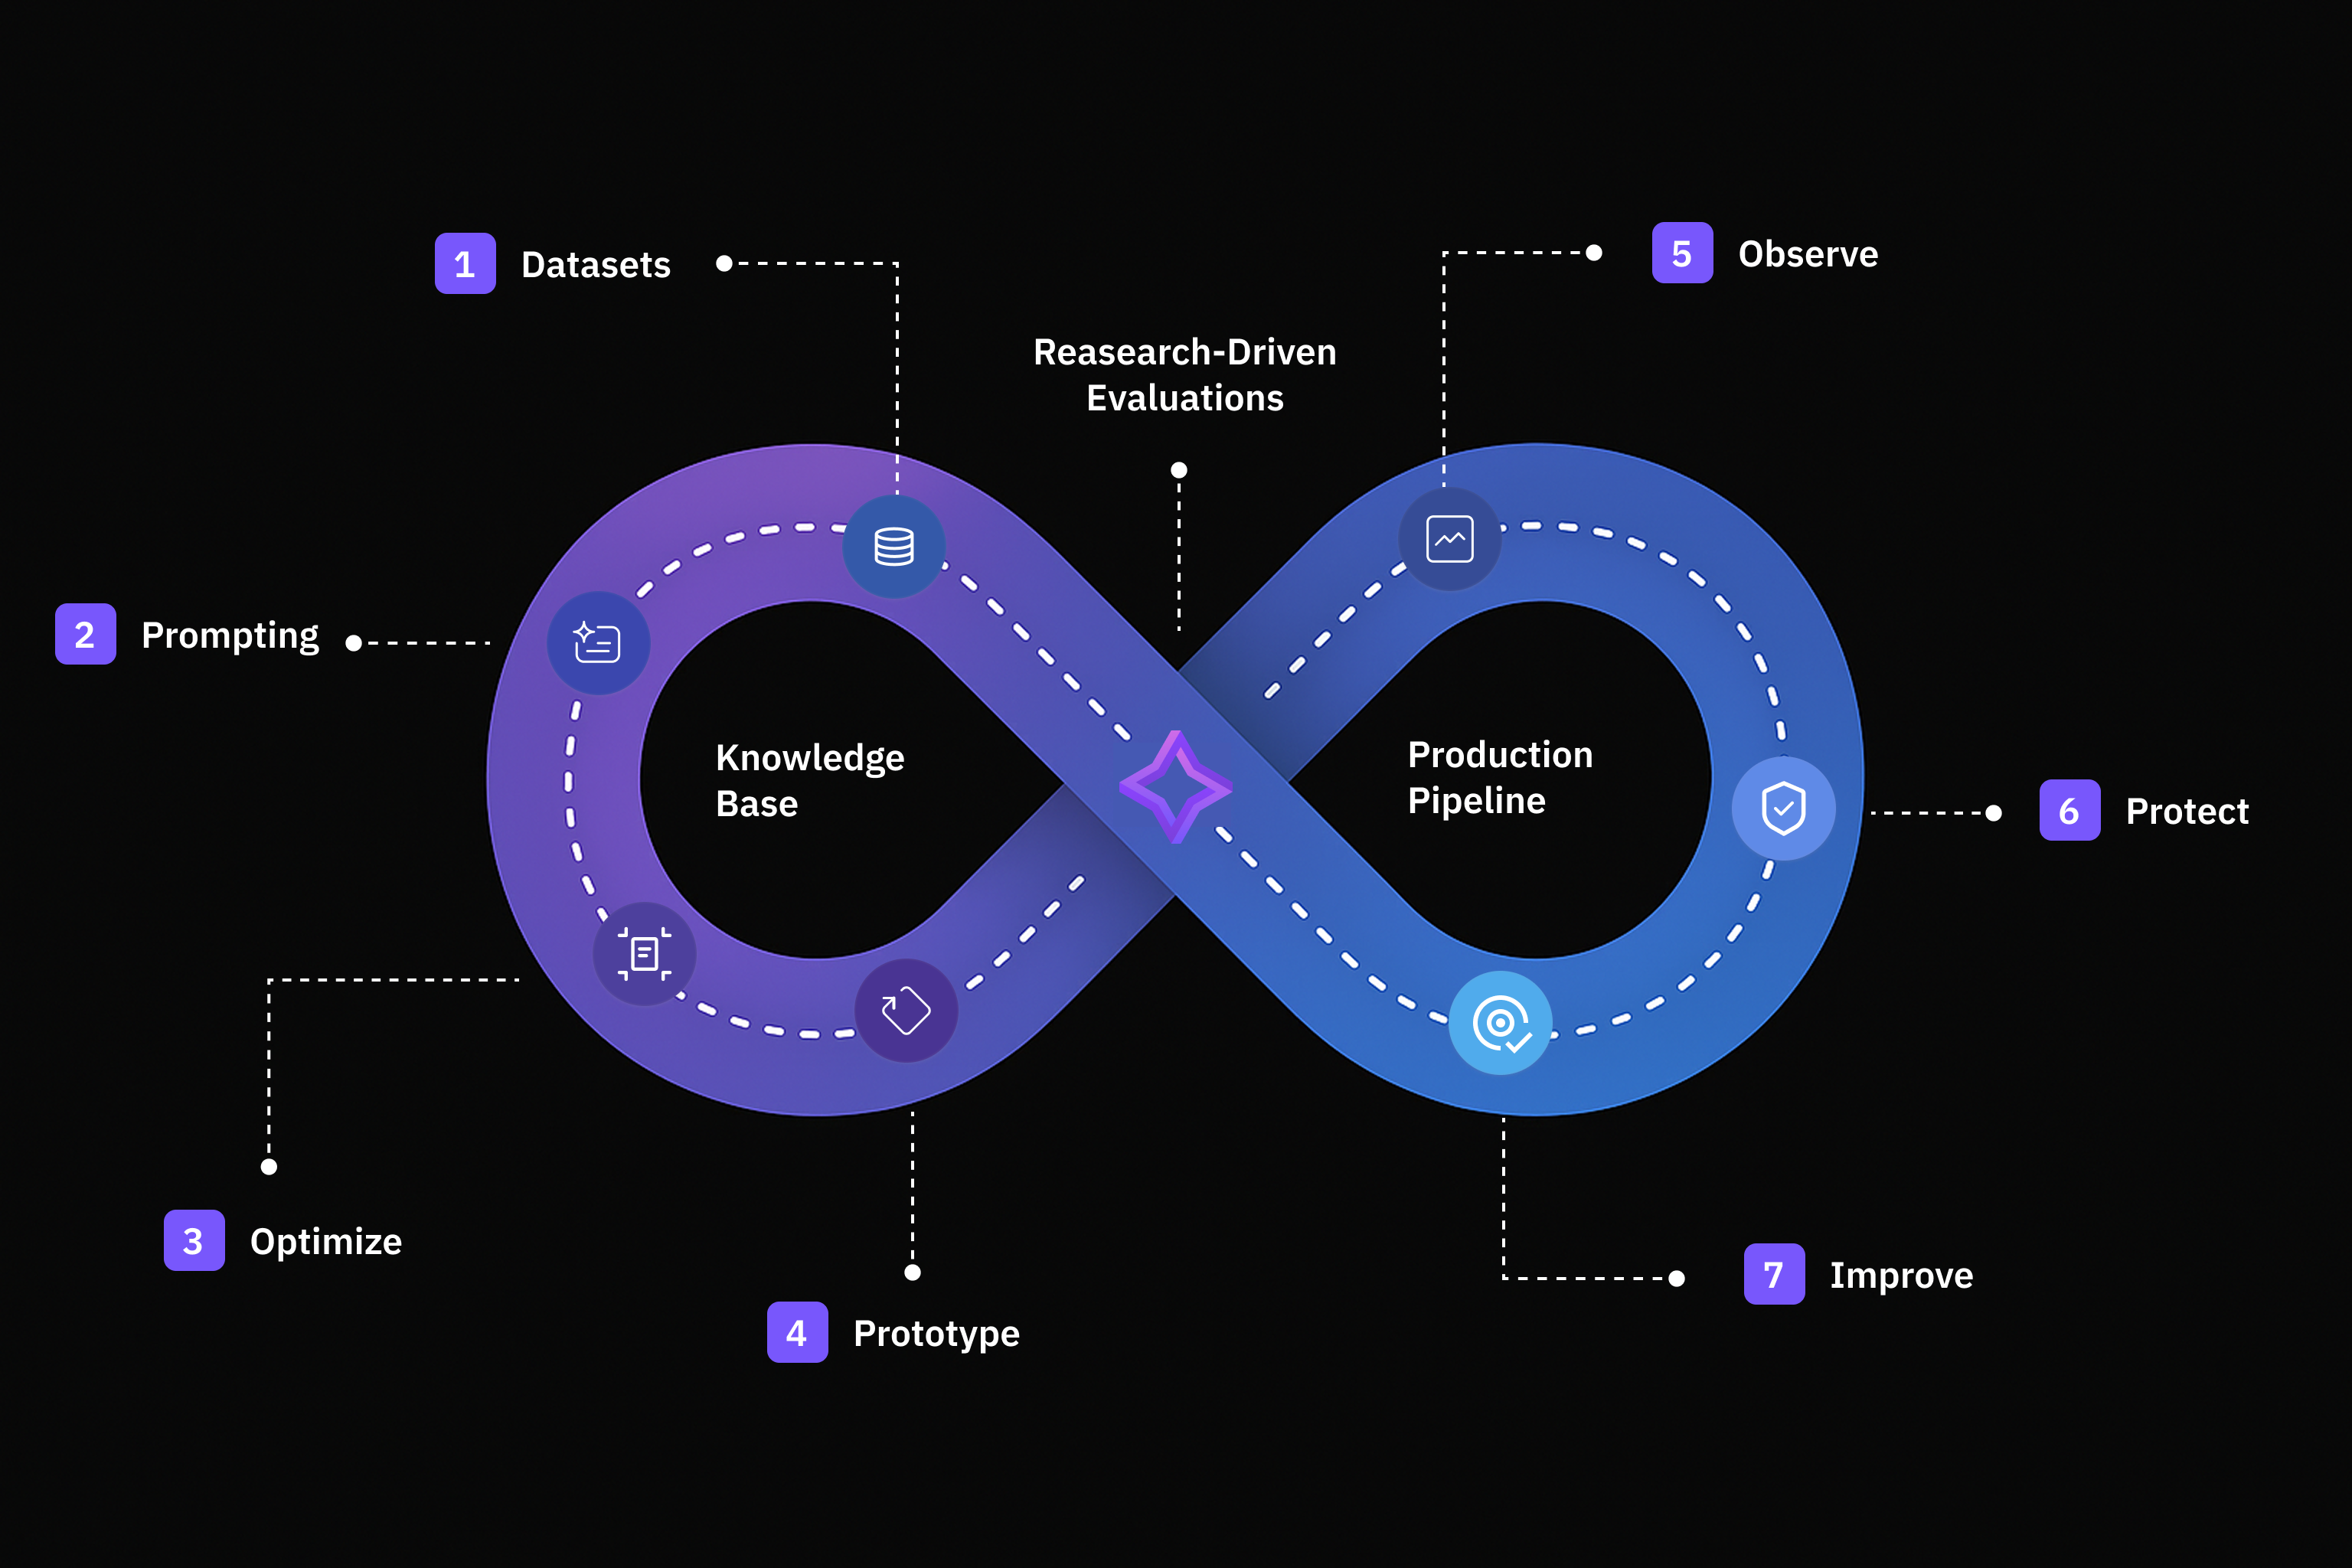
Future AGI provides everything you need to design, test, improve and monitor GenAI applications with speed and confidence.Evaluation
Build reliable AI applications with comprehensive evaluation frameworks for accuracy, compliance, and performance.
Simulation
Create, run, and analyze AI agent simulations to test and improve your applications.
Dataset
Create, import, and structure data efficiently for your AI workflows.
Prompt
Design, execute, and optimize prompts for high-quality, reliable AI responses.
Prototype
Build, test, and iterate on your AI applications with ease.
Observe
Track model behavior, detect anomalies, and monitor real-time performance of your AI applications.
Agent Compass
Intelligent error analysis system that points AI agent development teams in the right direction
Optimization
Refine and improve prompts systematically using evaluation-driven feedback loops.
Protect
Screen and filter requests in real-time to ensure safety and reliability in production.
Knowledge Base
Create foundation for grounded, context-aware synthetic data generation and accurate evaluations.
Experimentation
Test and compare different prompt configurations systematically to achieve consistent performance.
Tracing
Future AGI’s observability platform to help you monitor cost, latency, and evaluation results through comprehensive tracing capabilities.
MCP
Connect your development environment to Future AGI features using the Model Context Protocol.
Admin & Settings
Manage API keys, custom models, usage tracking, and user permissions.