- API key
- Assistand Id
Setting up
1. Creating an agent definition
- To create a new agent definition, head over to the agent definition section of platform
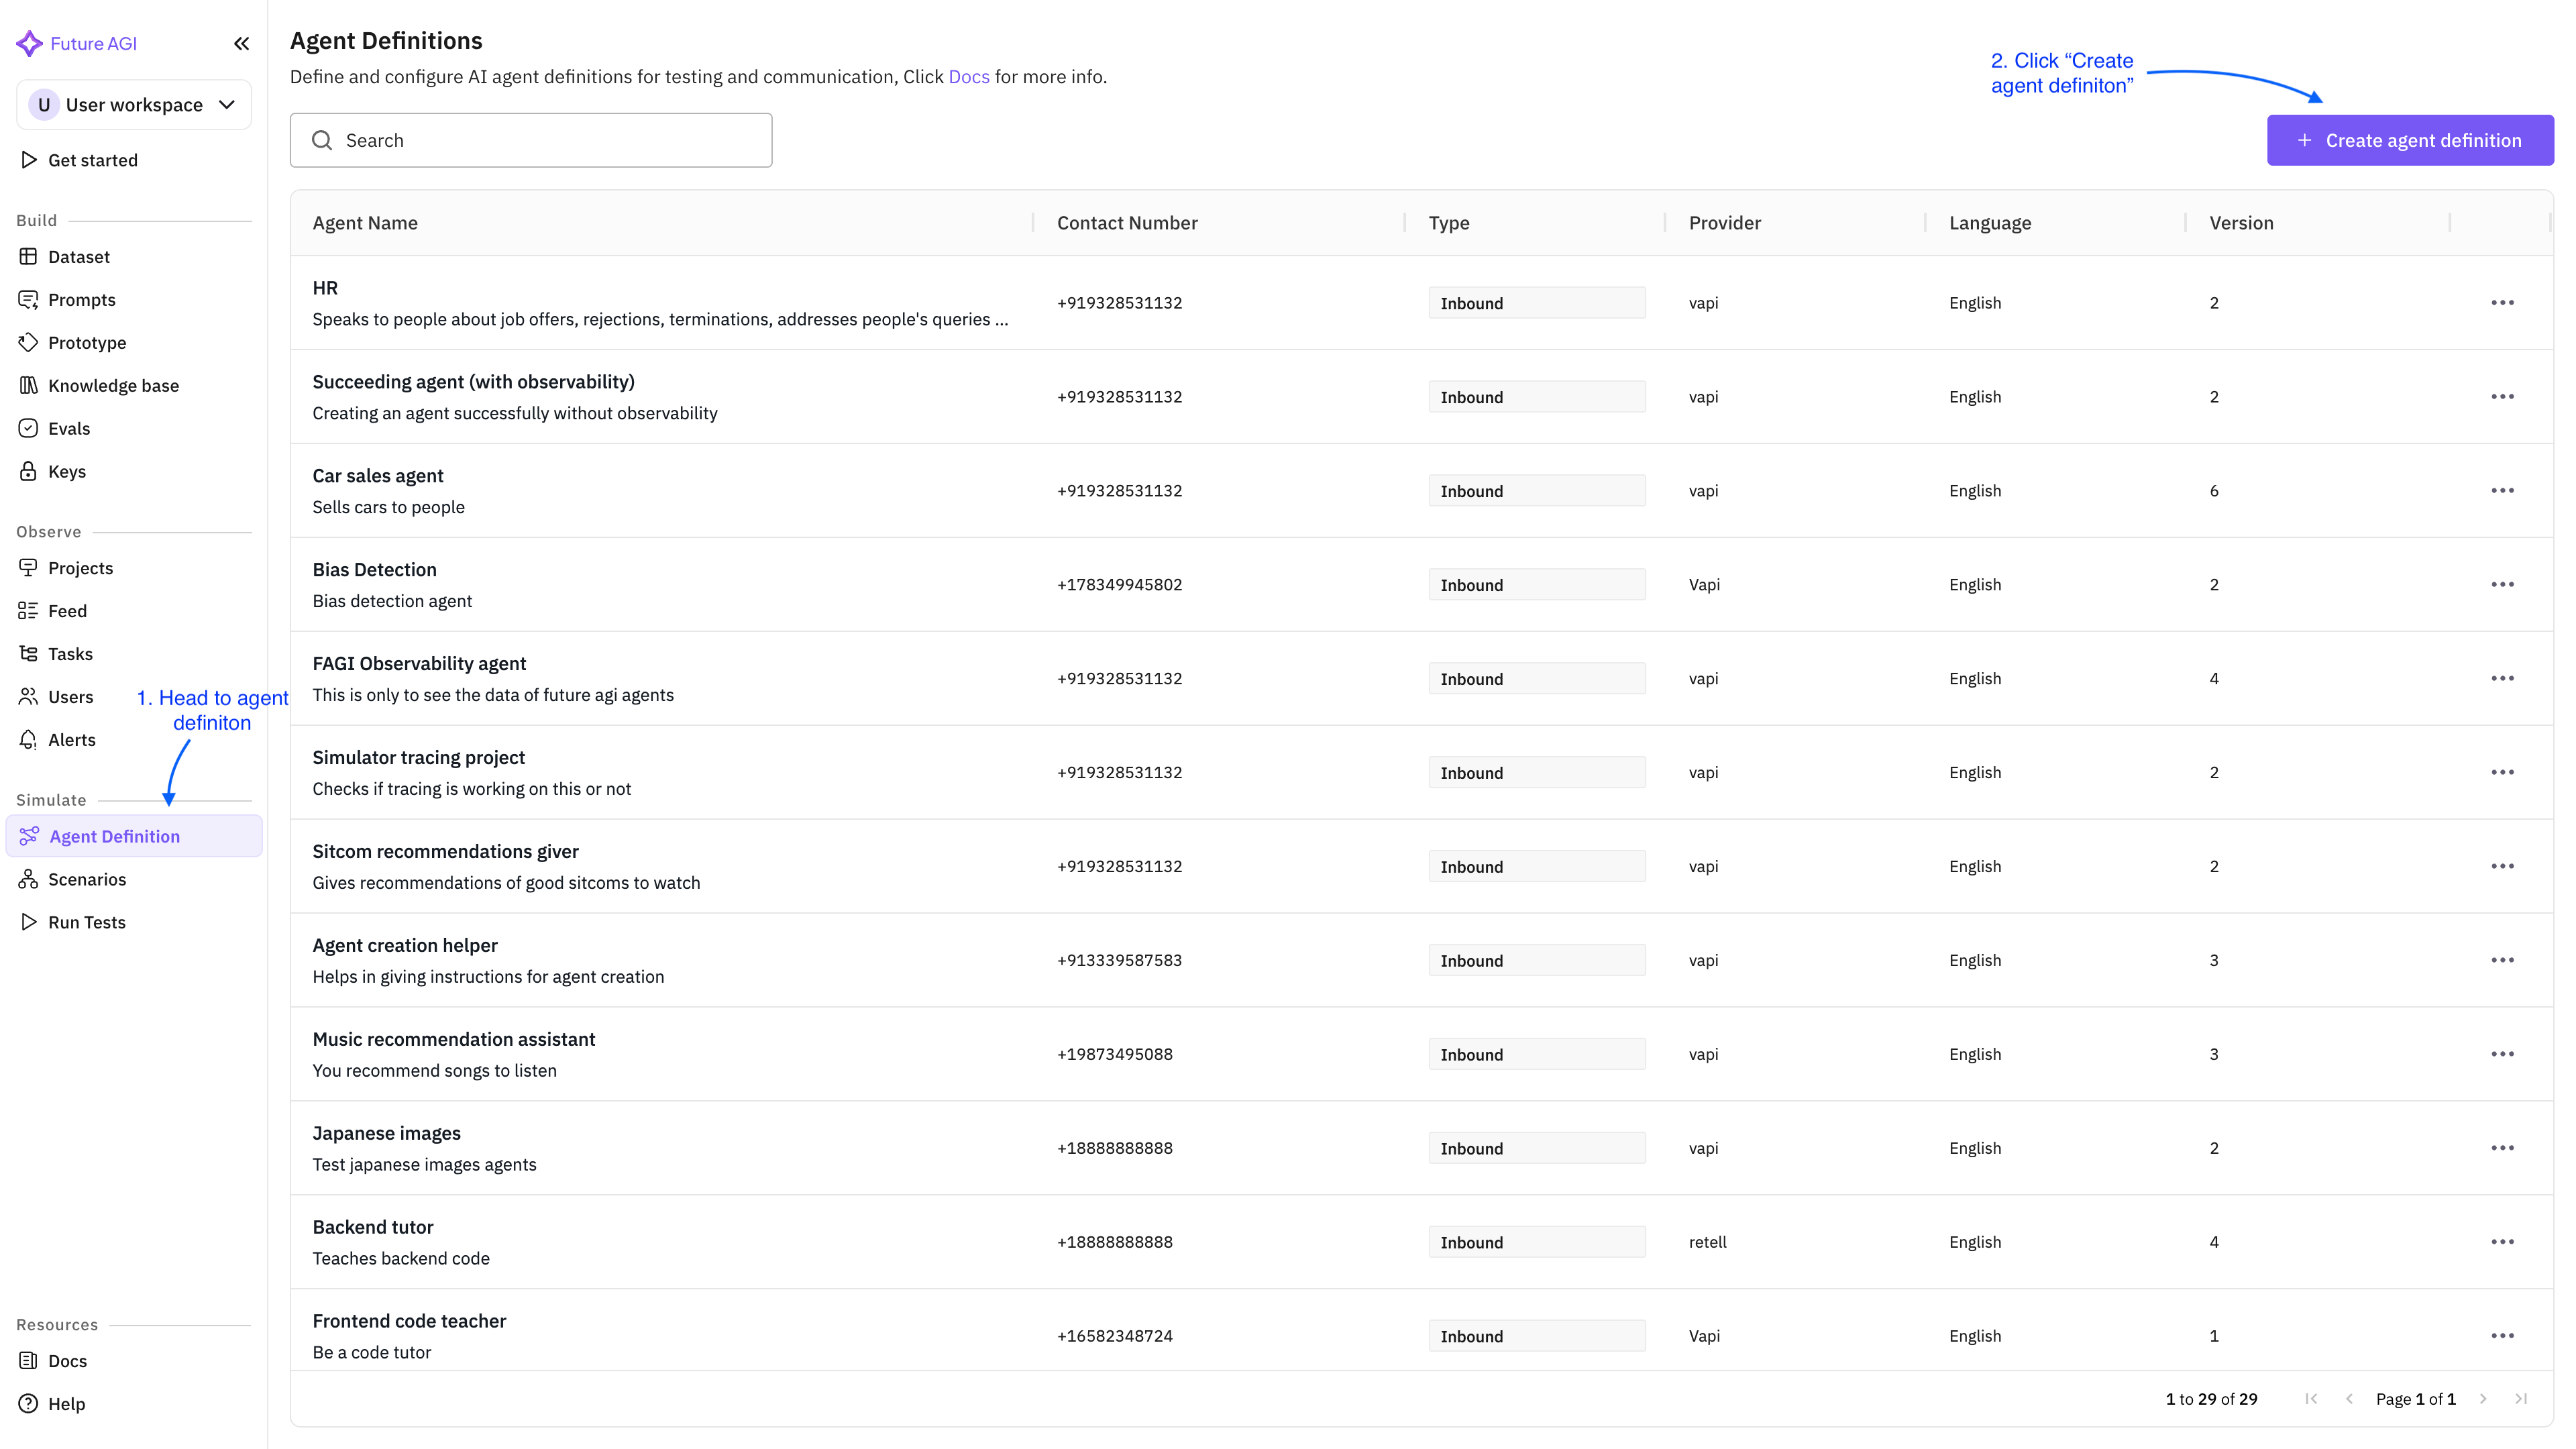
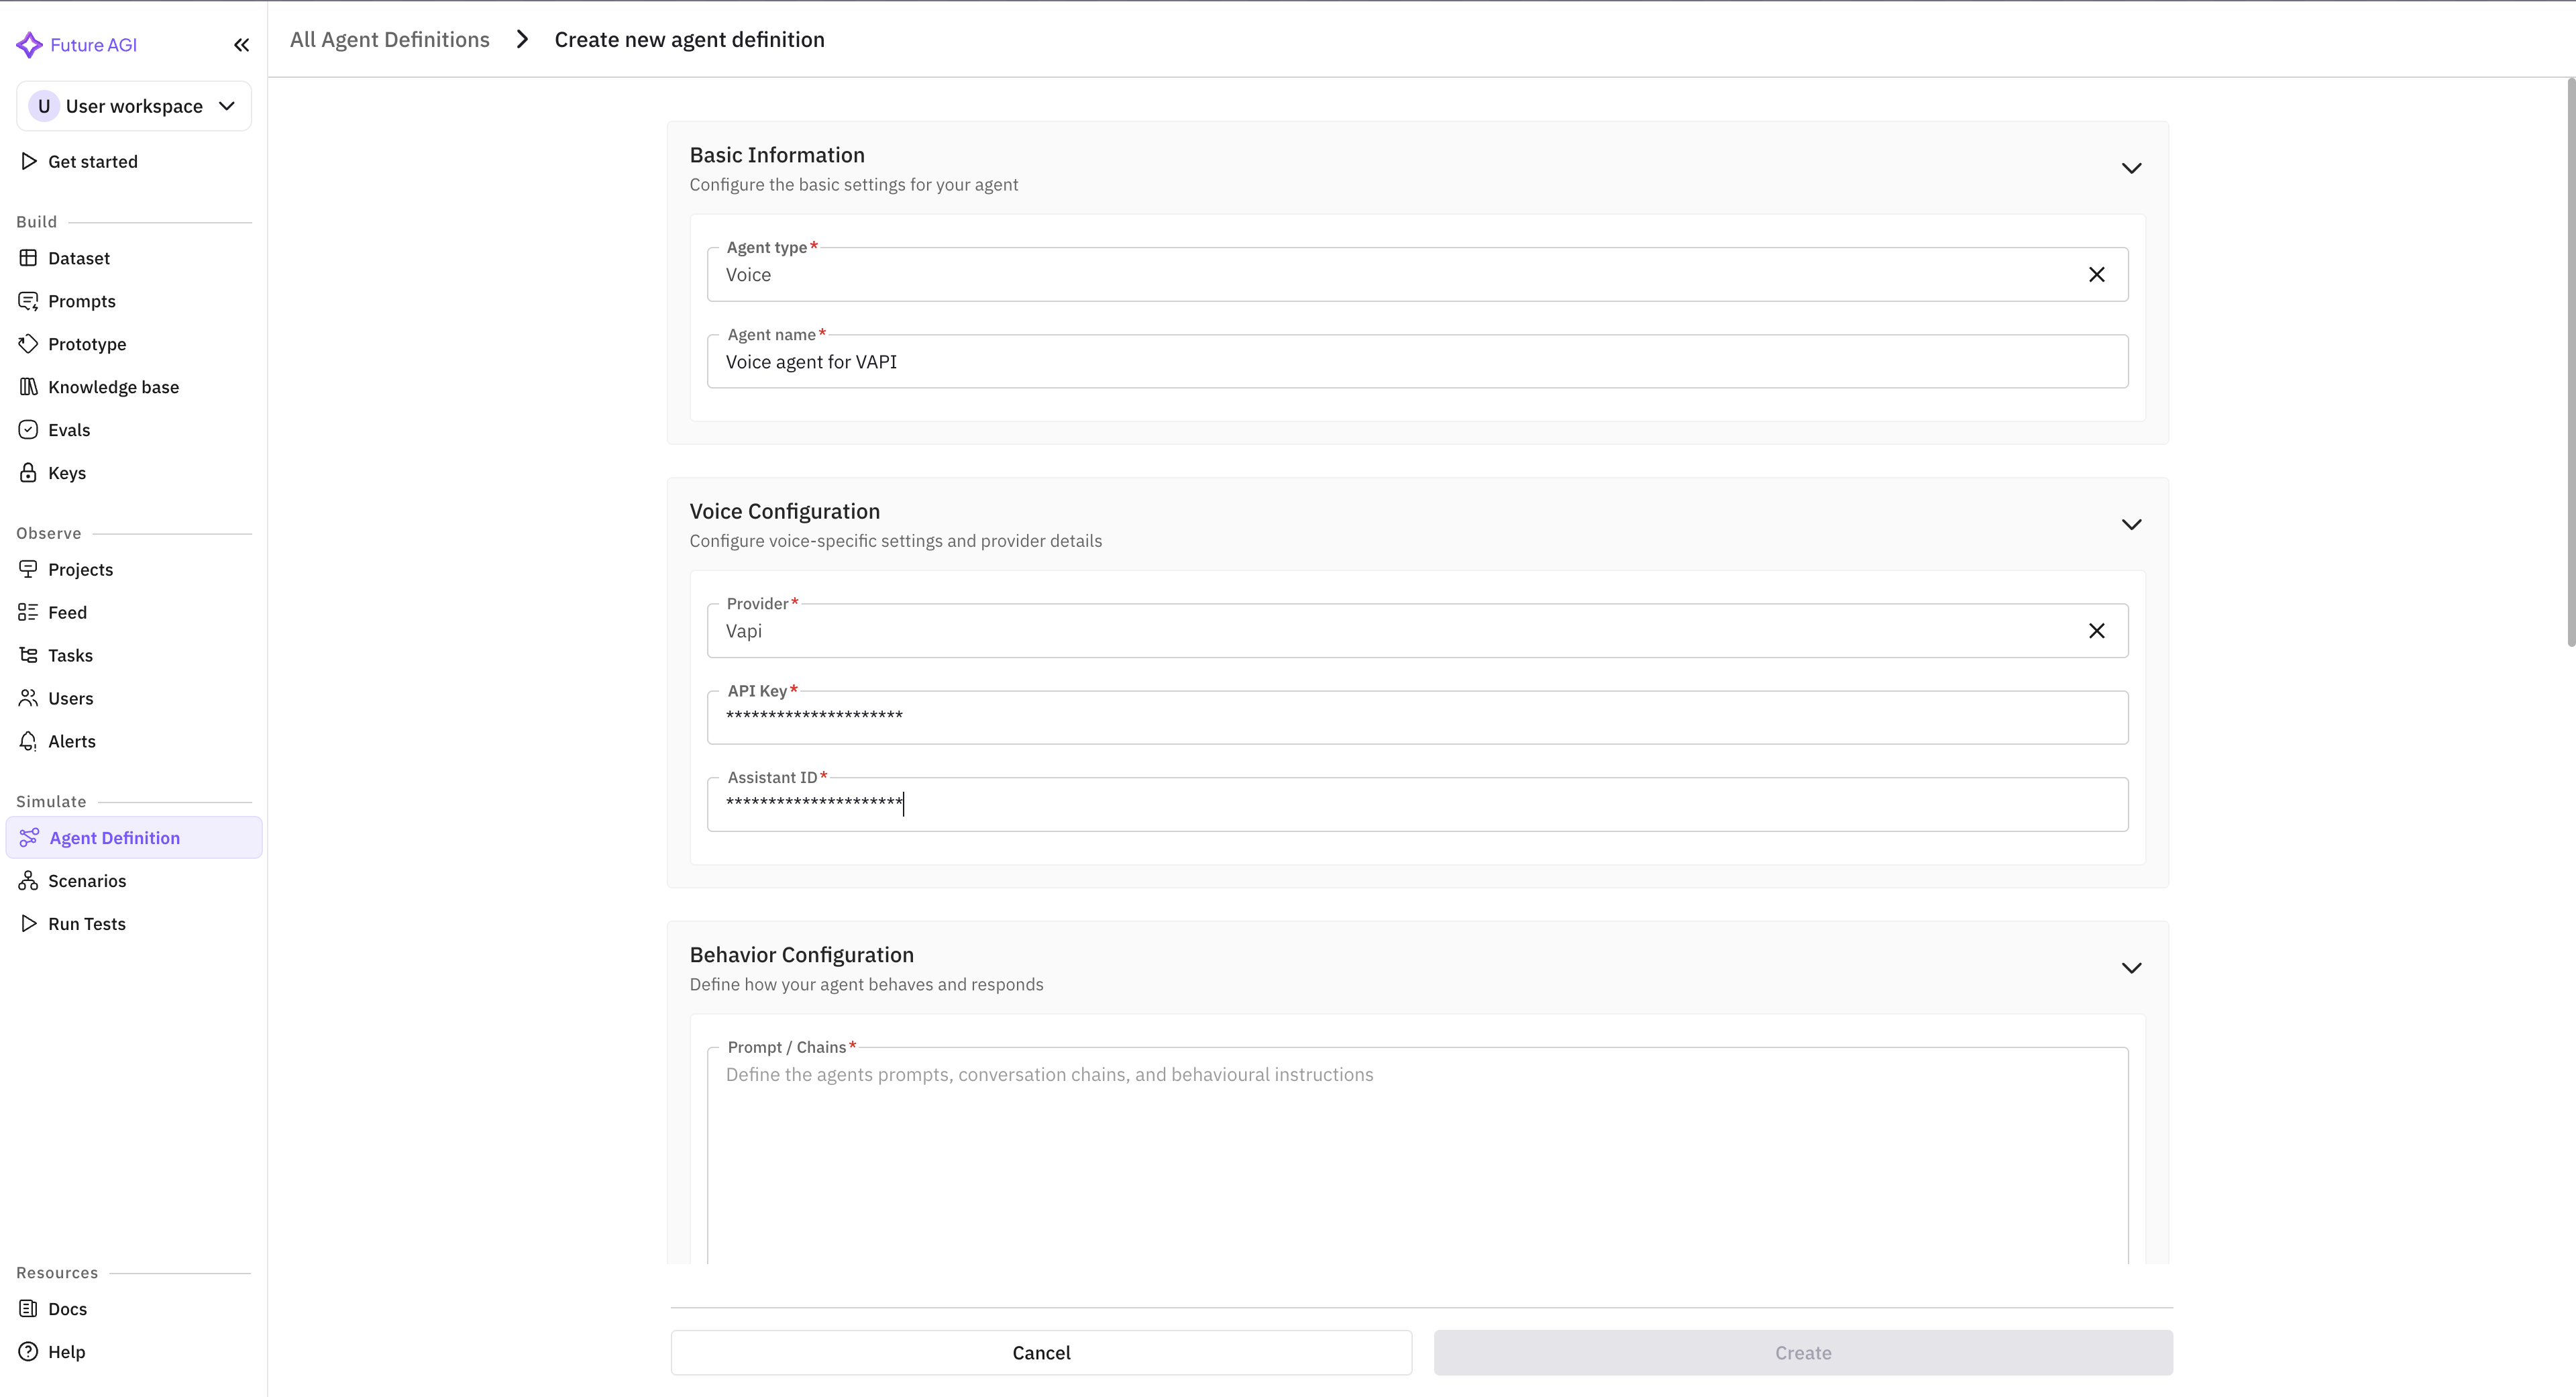
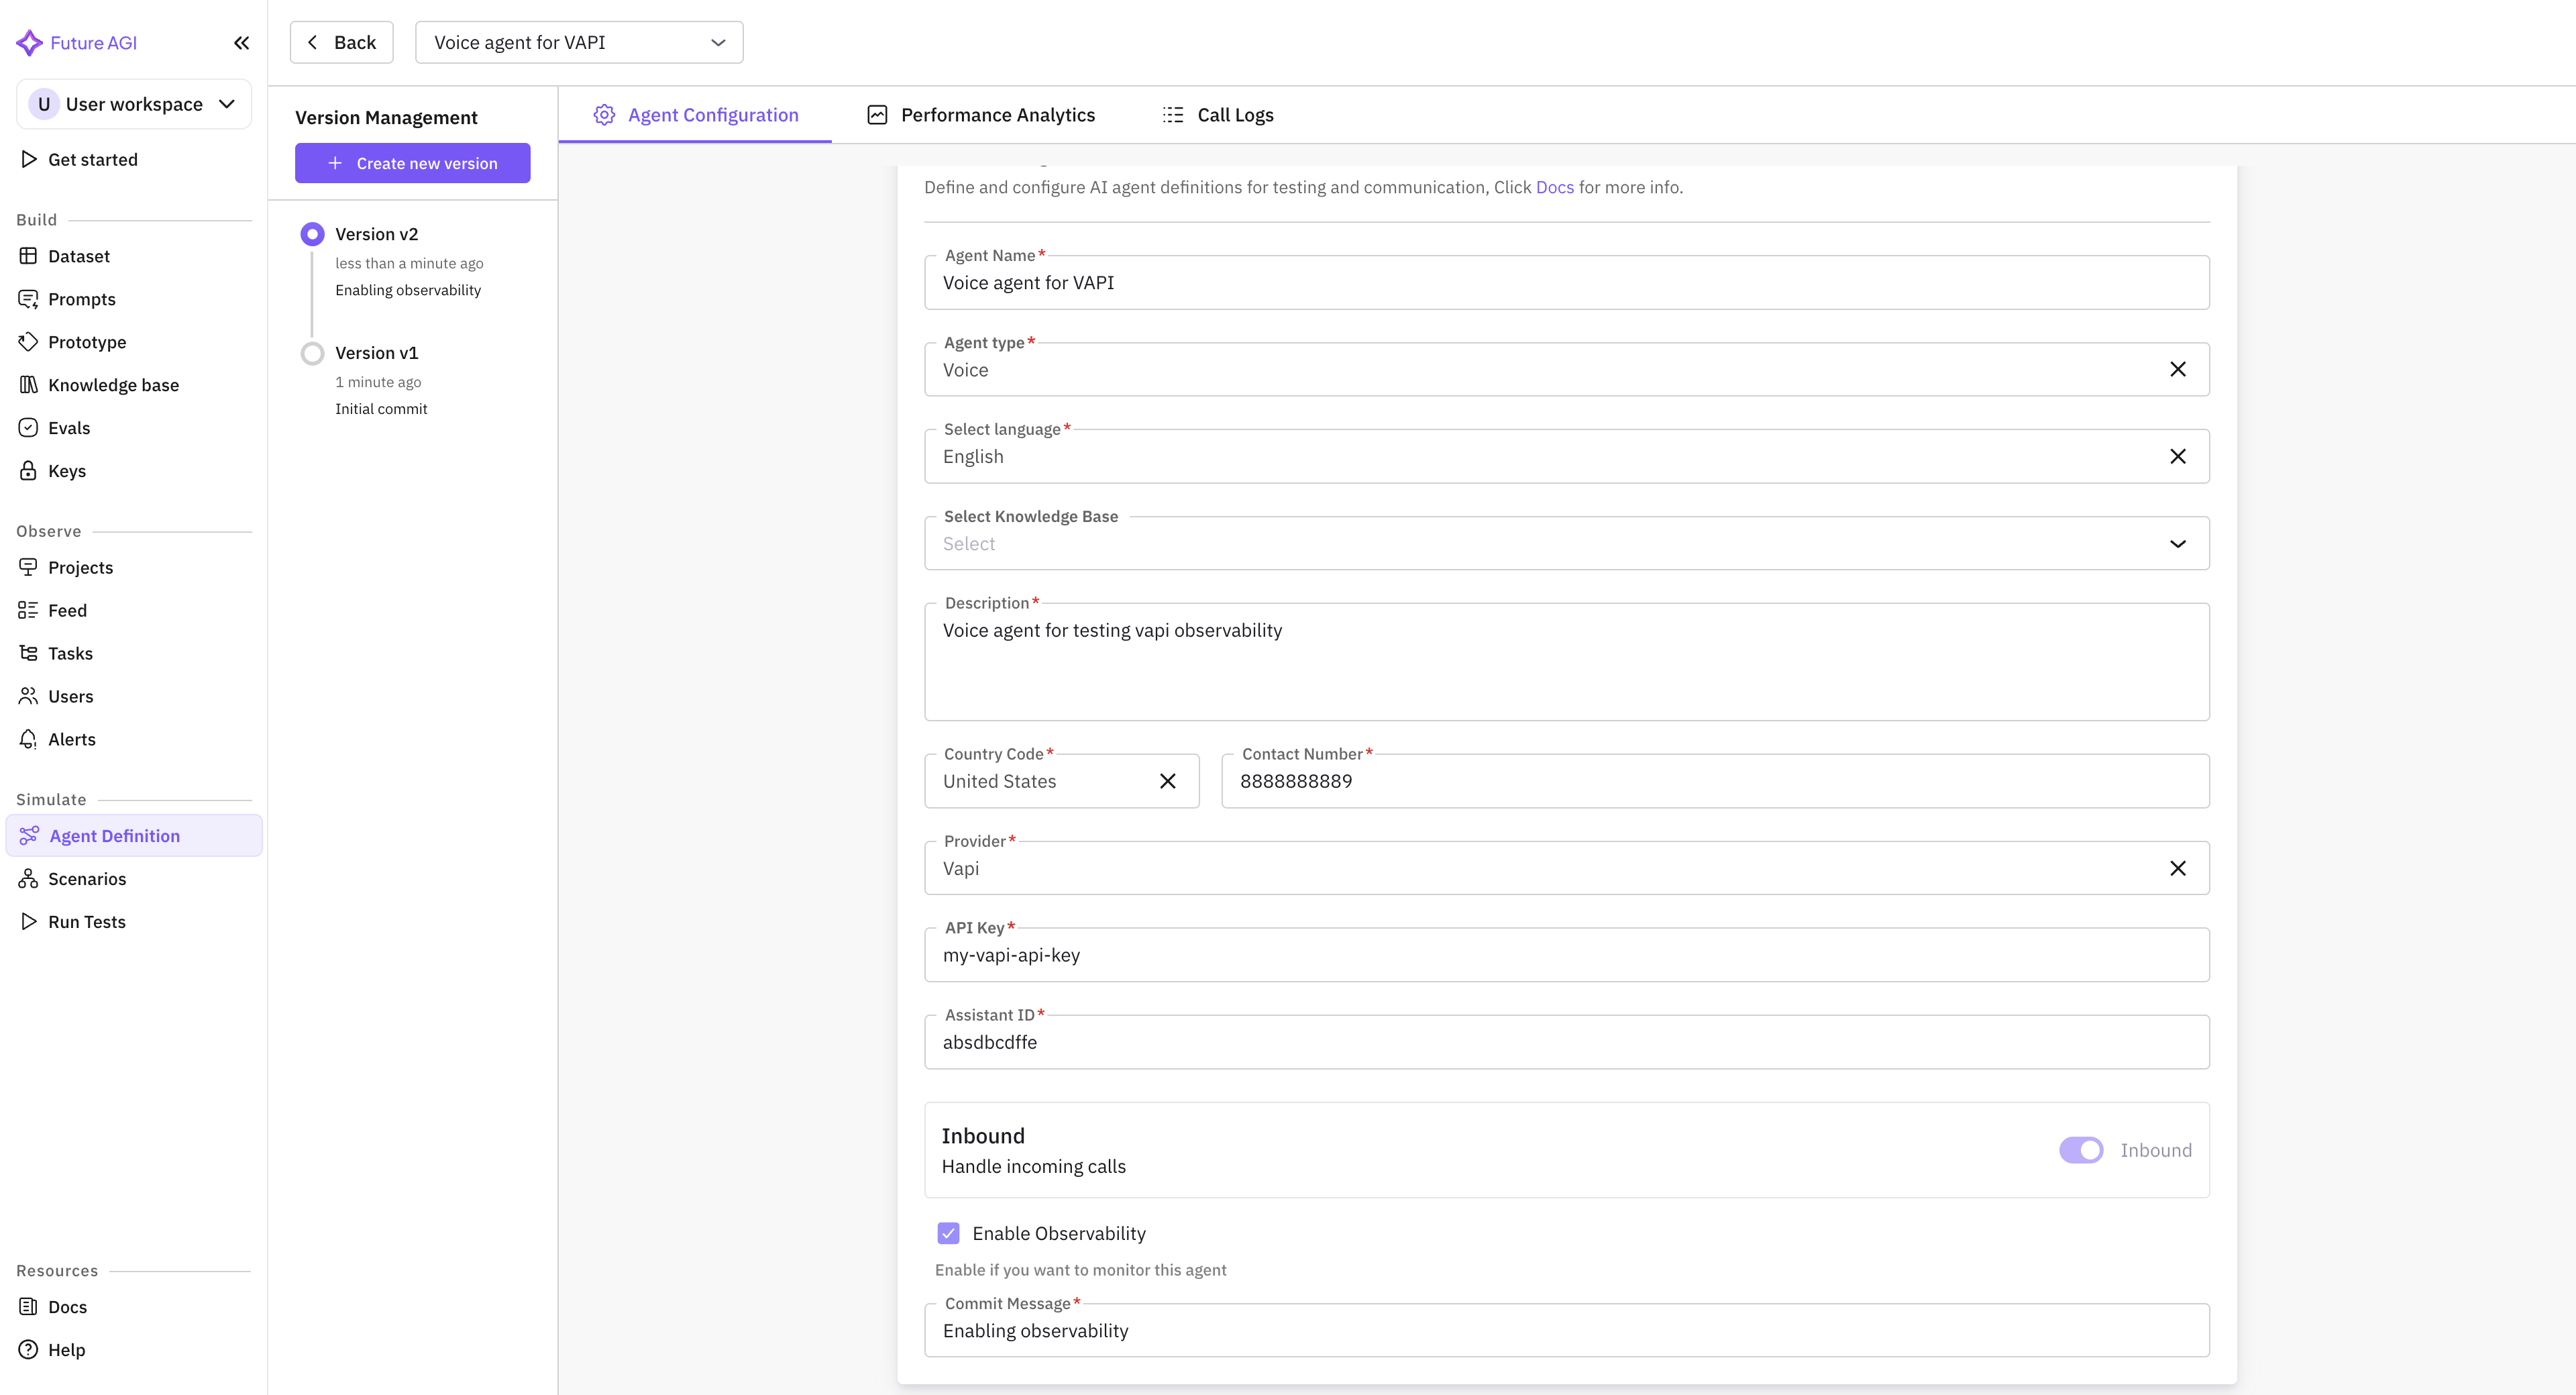
- On clicking the Create agent definition button, the below form opens up. You can fill in the details as required. The API key and Assistand Id are masked here for security reasons
- To enable observability, simply check the Enable Observability checkbox that is present at the end of the form. Please not that the API keya and the Assistant Id are required only if you enable observability. Otherwise they are optional
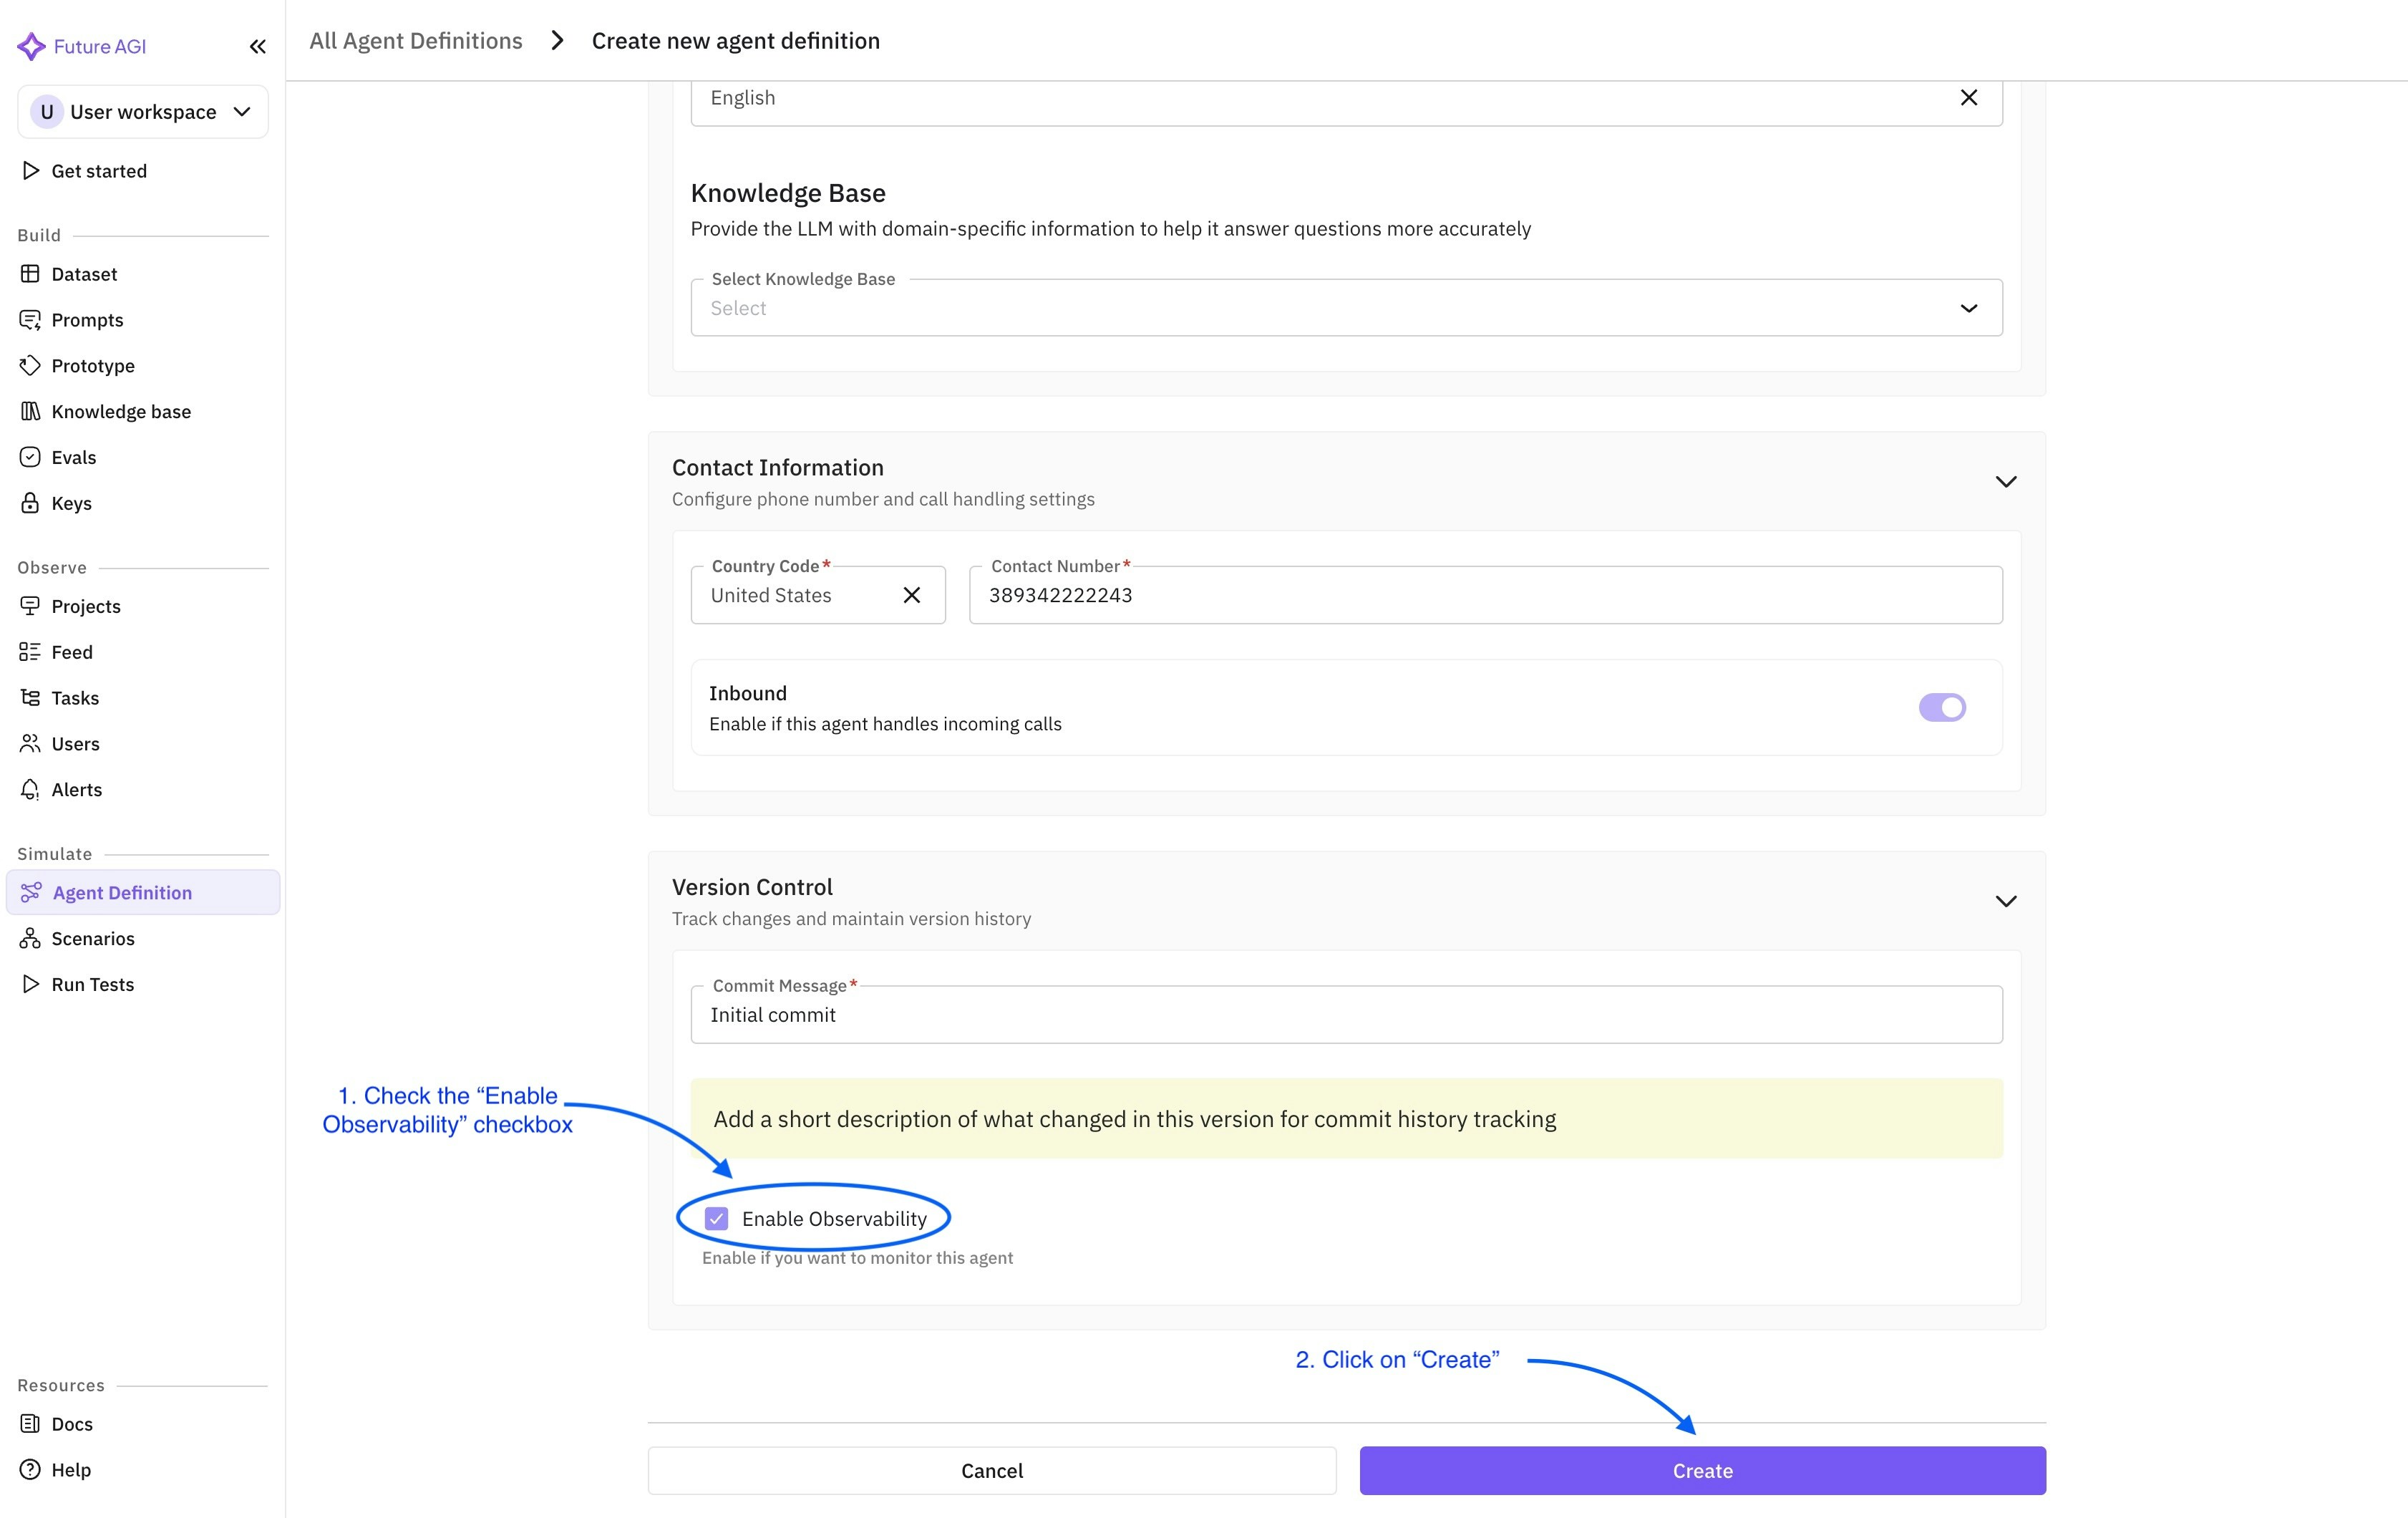
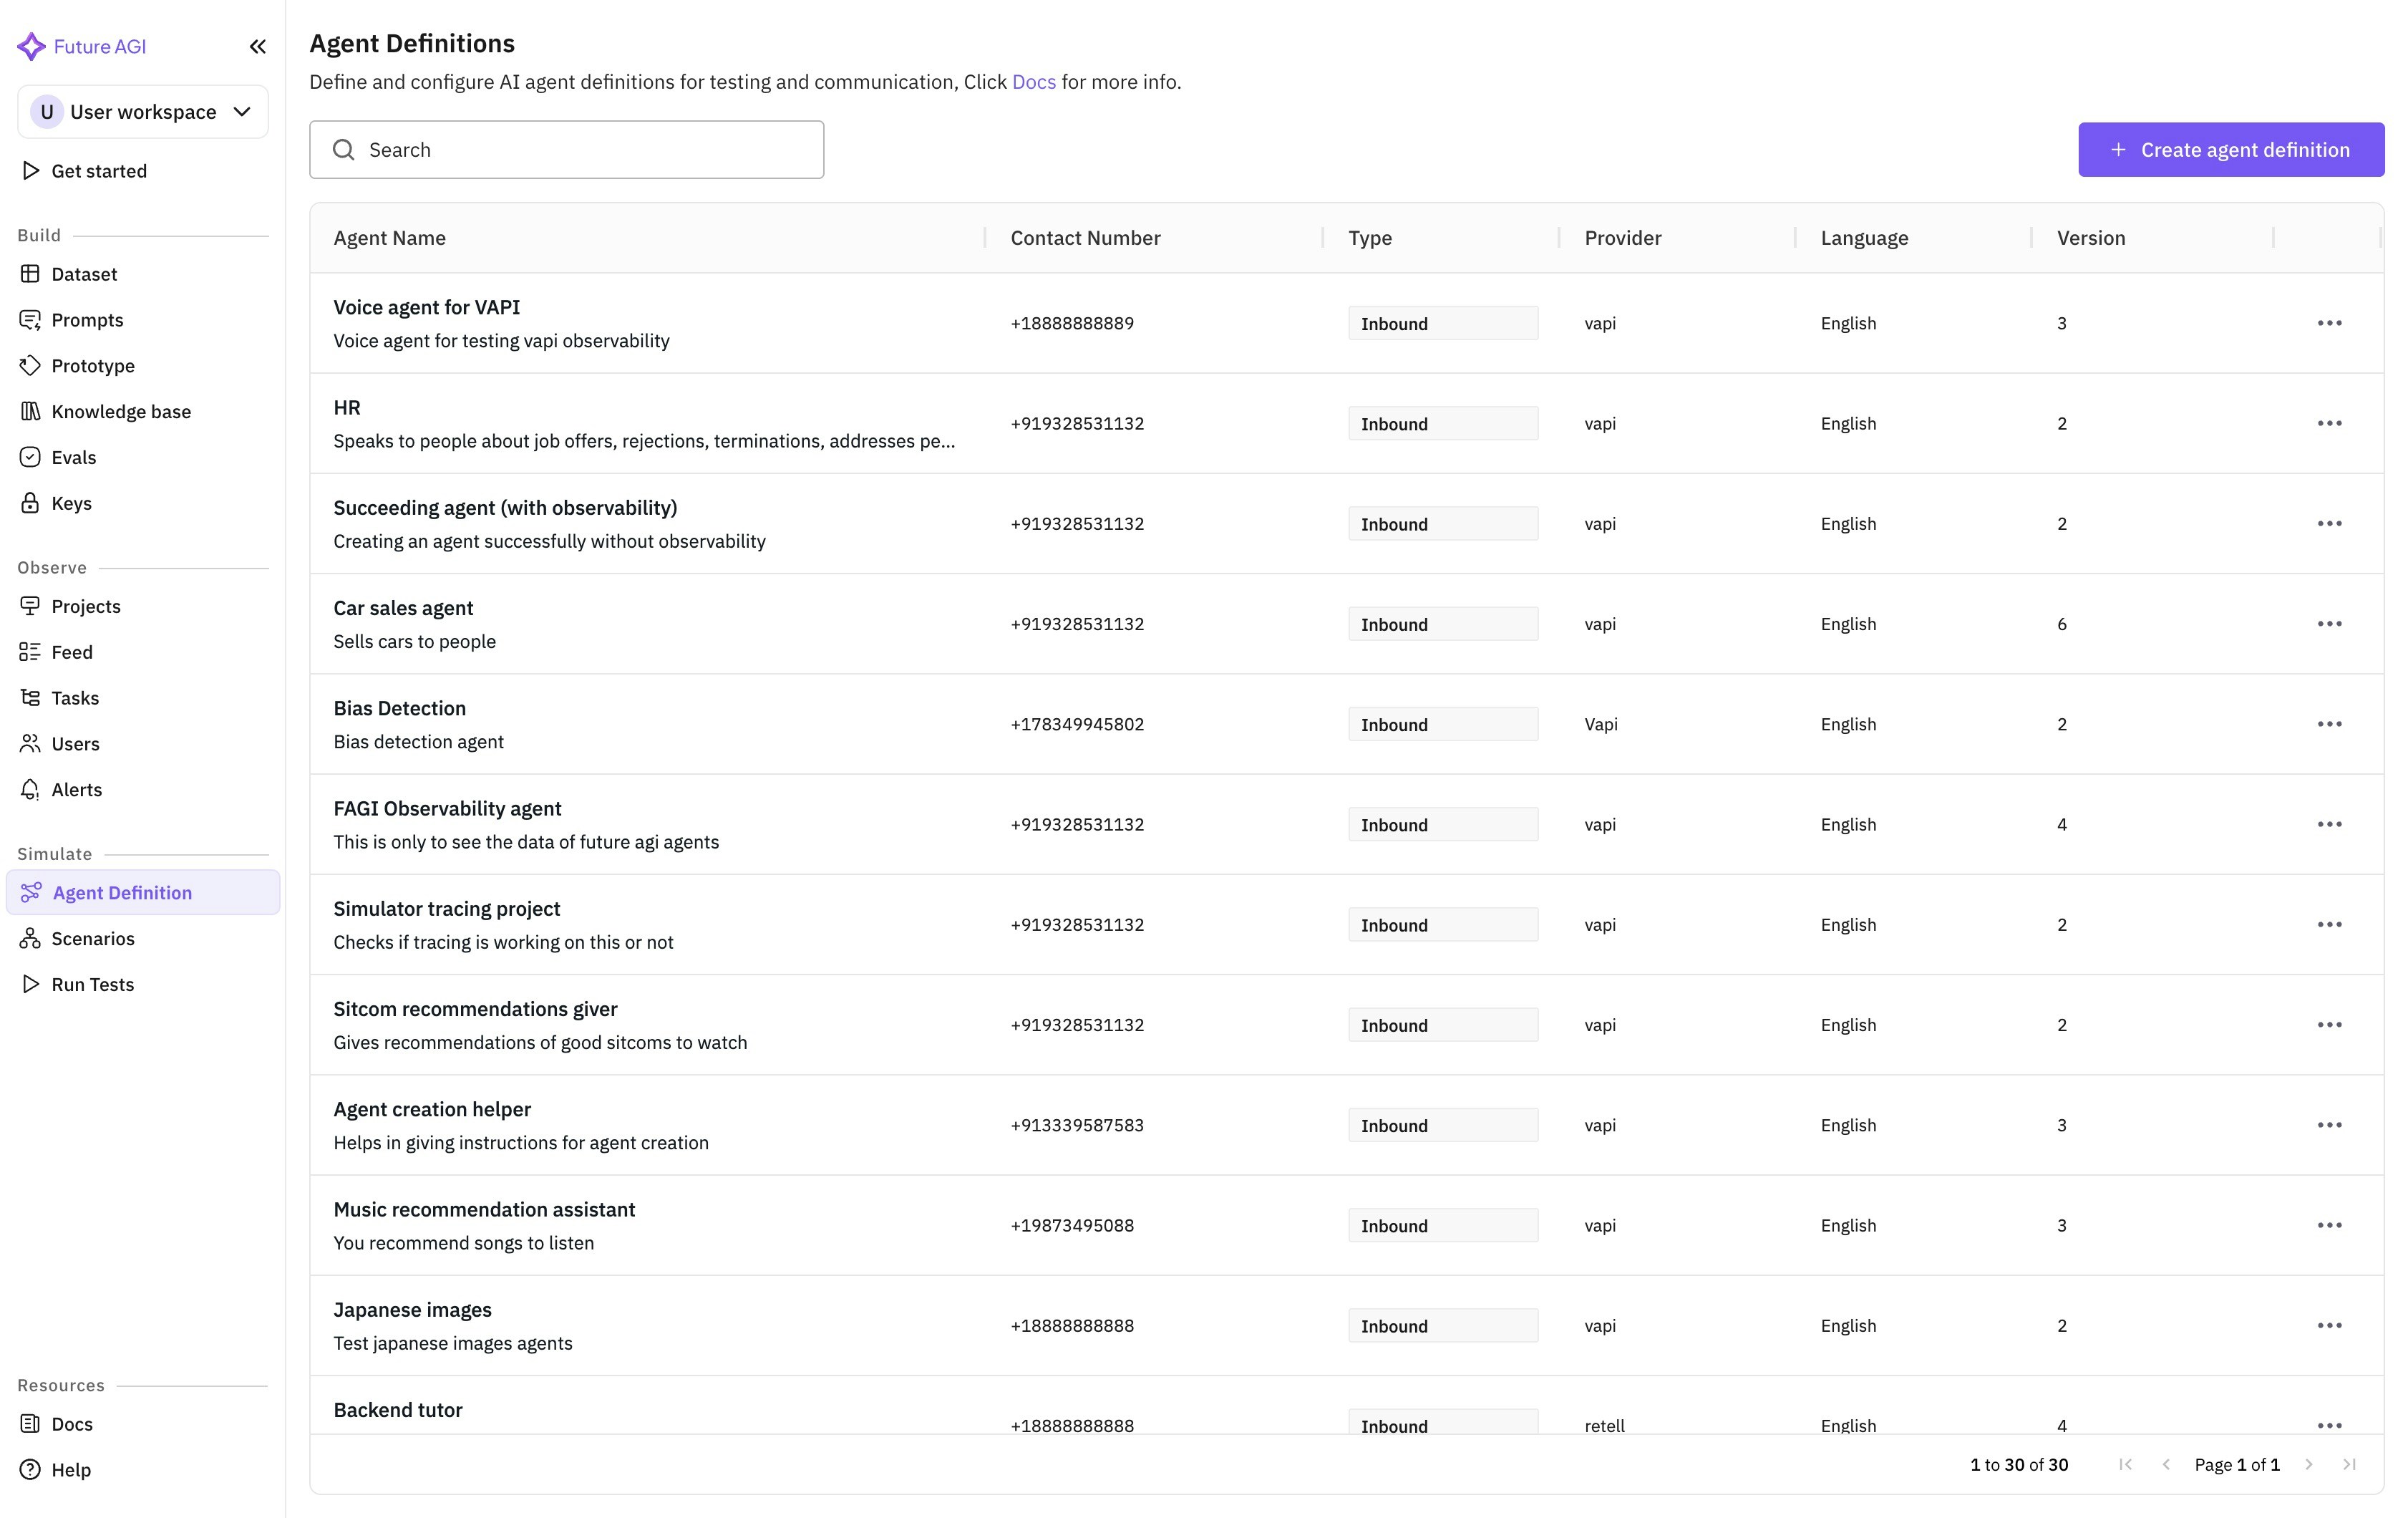
- After filling all the necessary fields, the Create button gets enabled. Click on Create. You then get redirected to the agent list screen and the newly created agent is now visible
2. Observing your agent
- Head over to the Projects tab of the platform. There you will notice a new project has been created with the same name as that of the agent. All your call logs will be shown inside this project
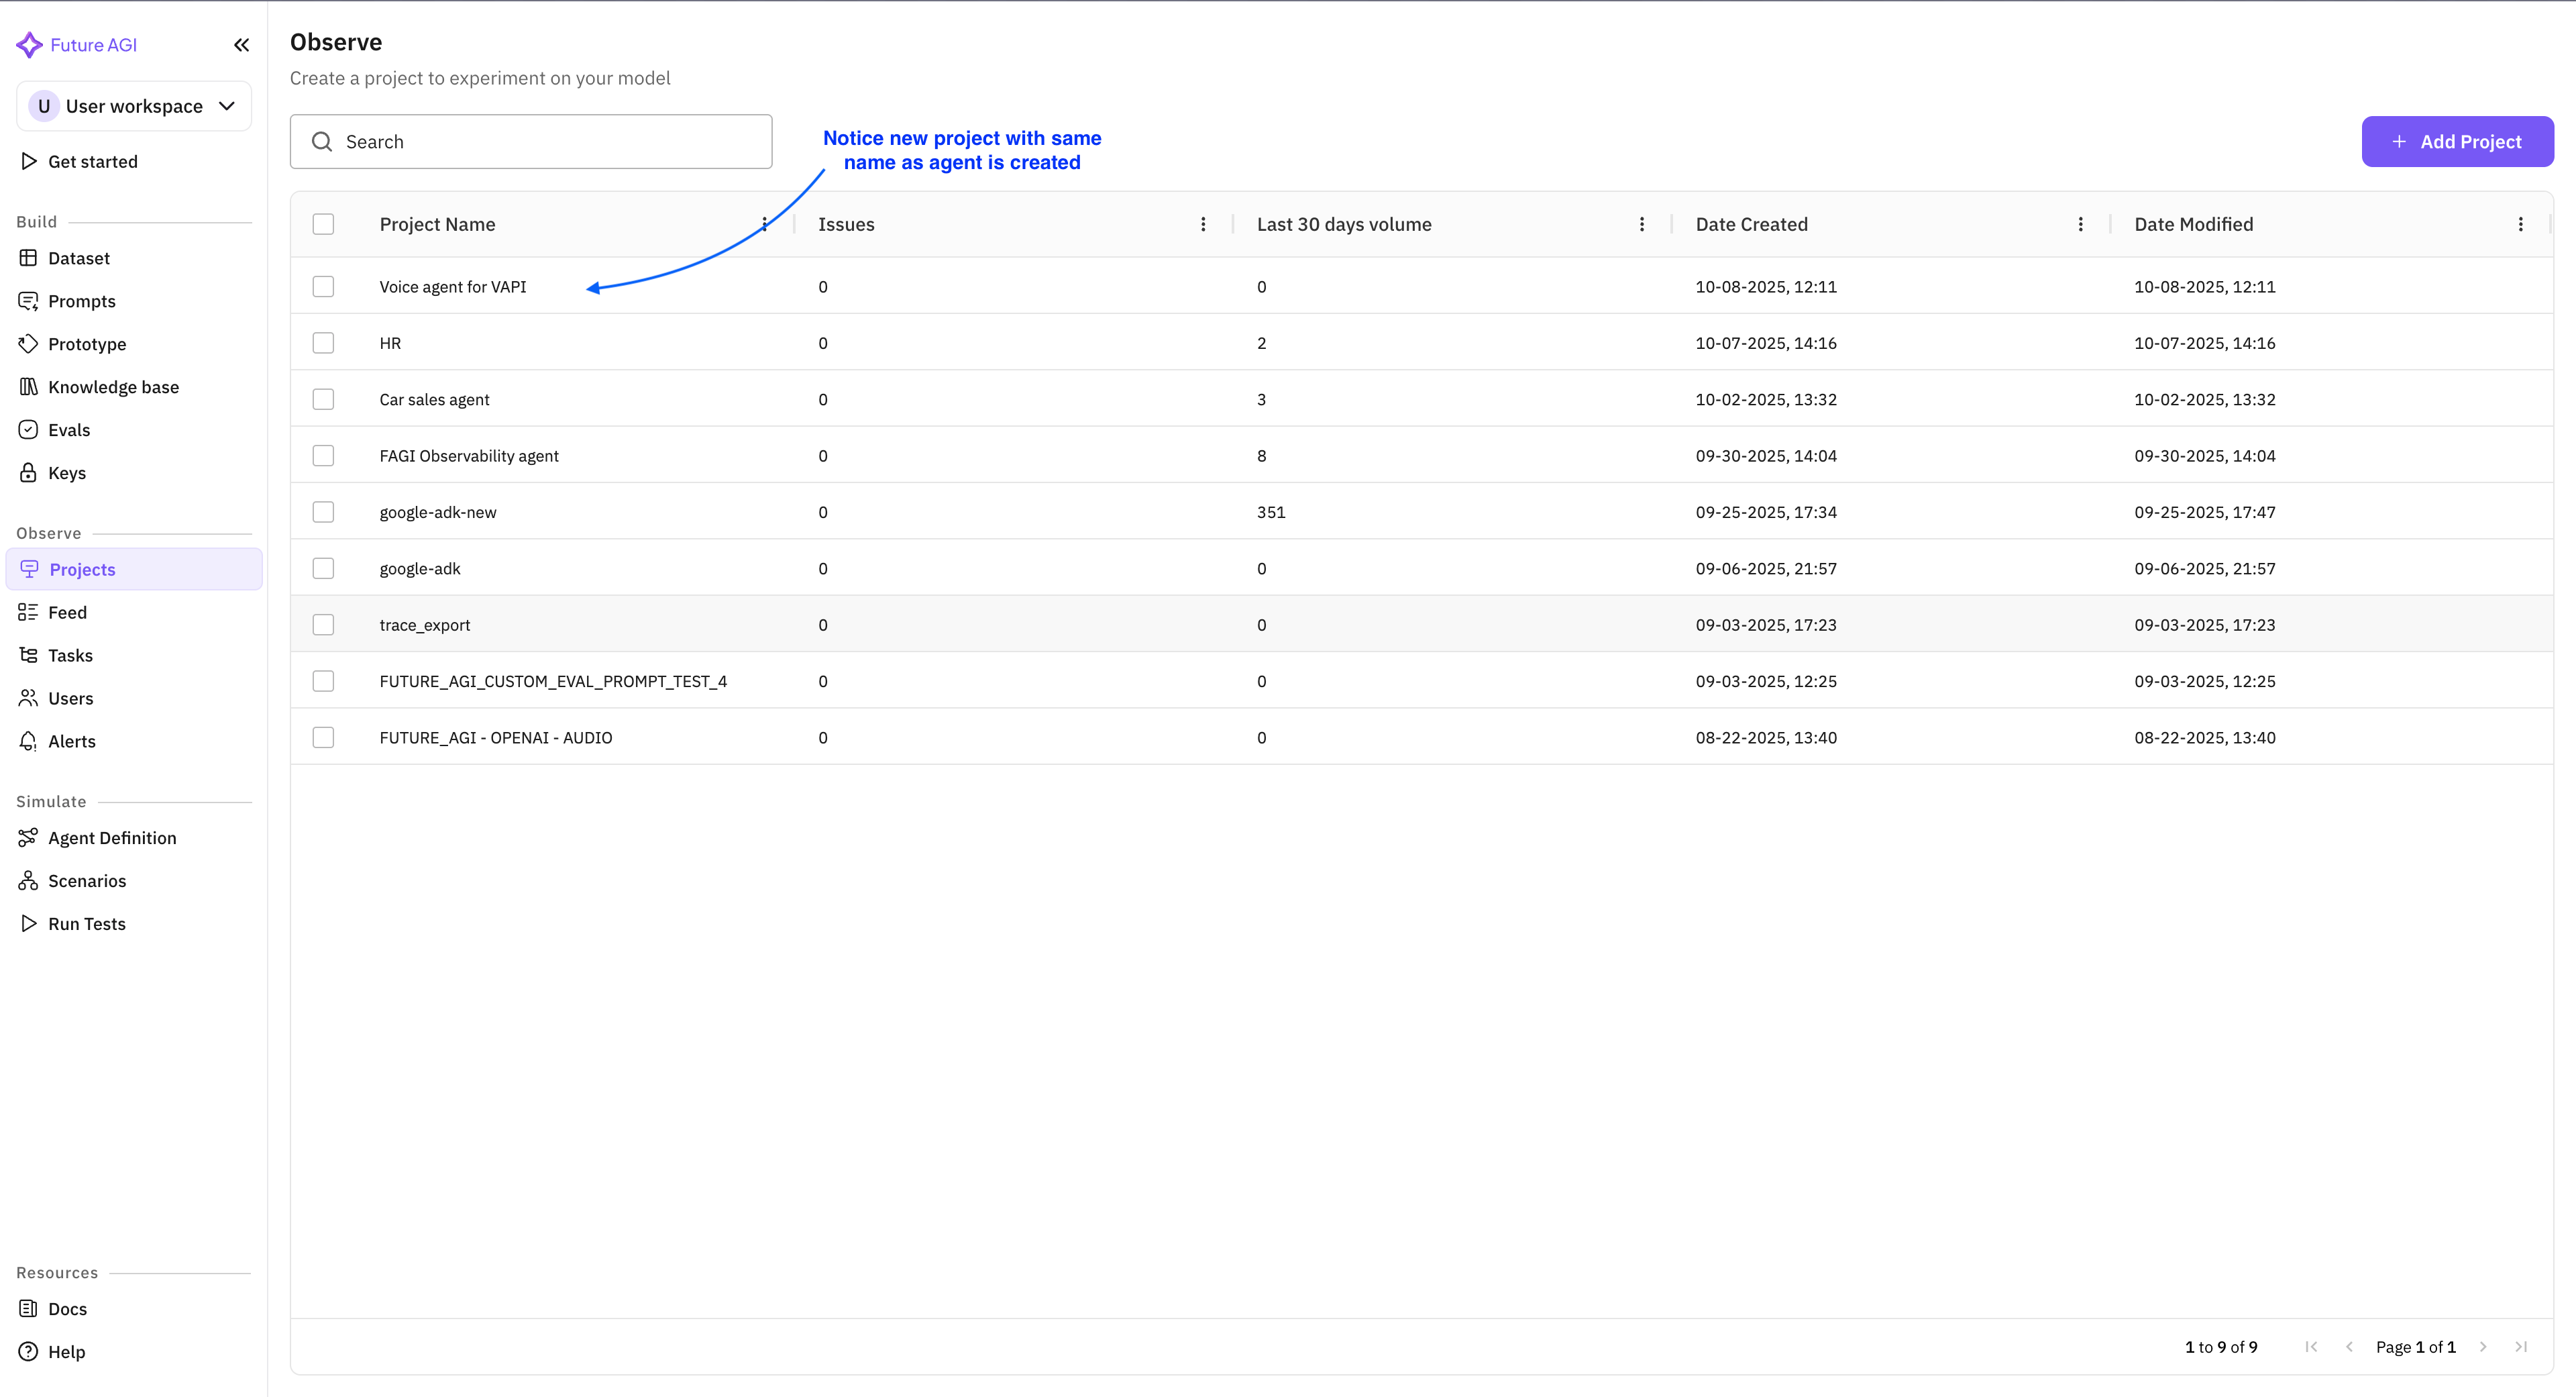
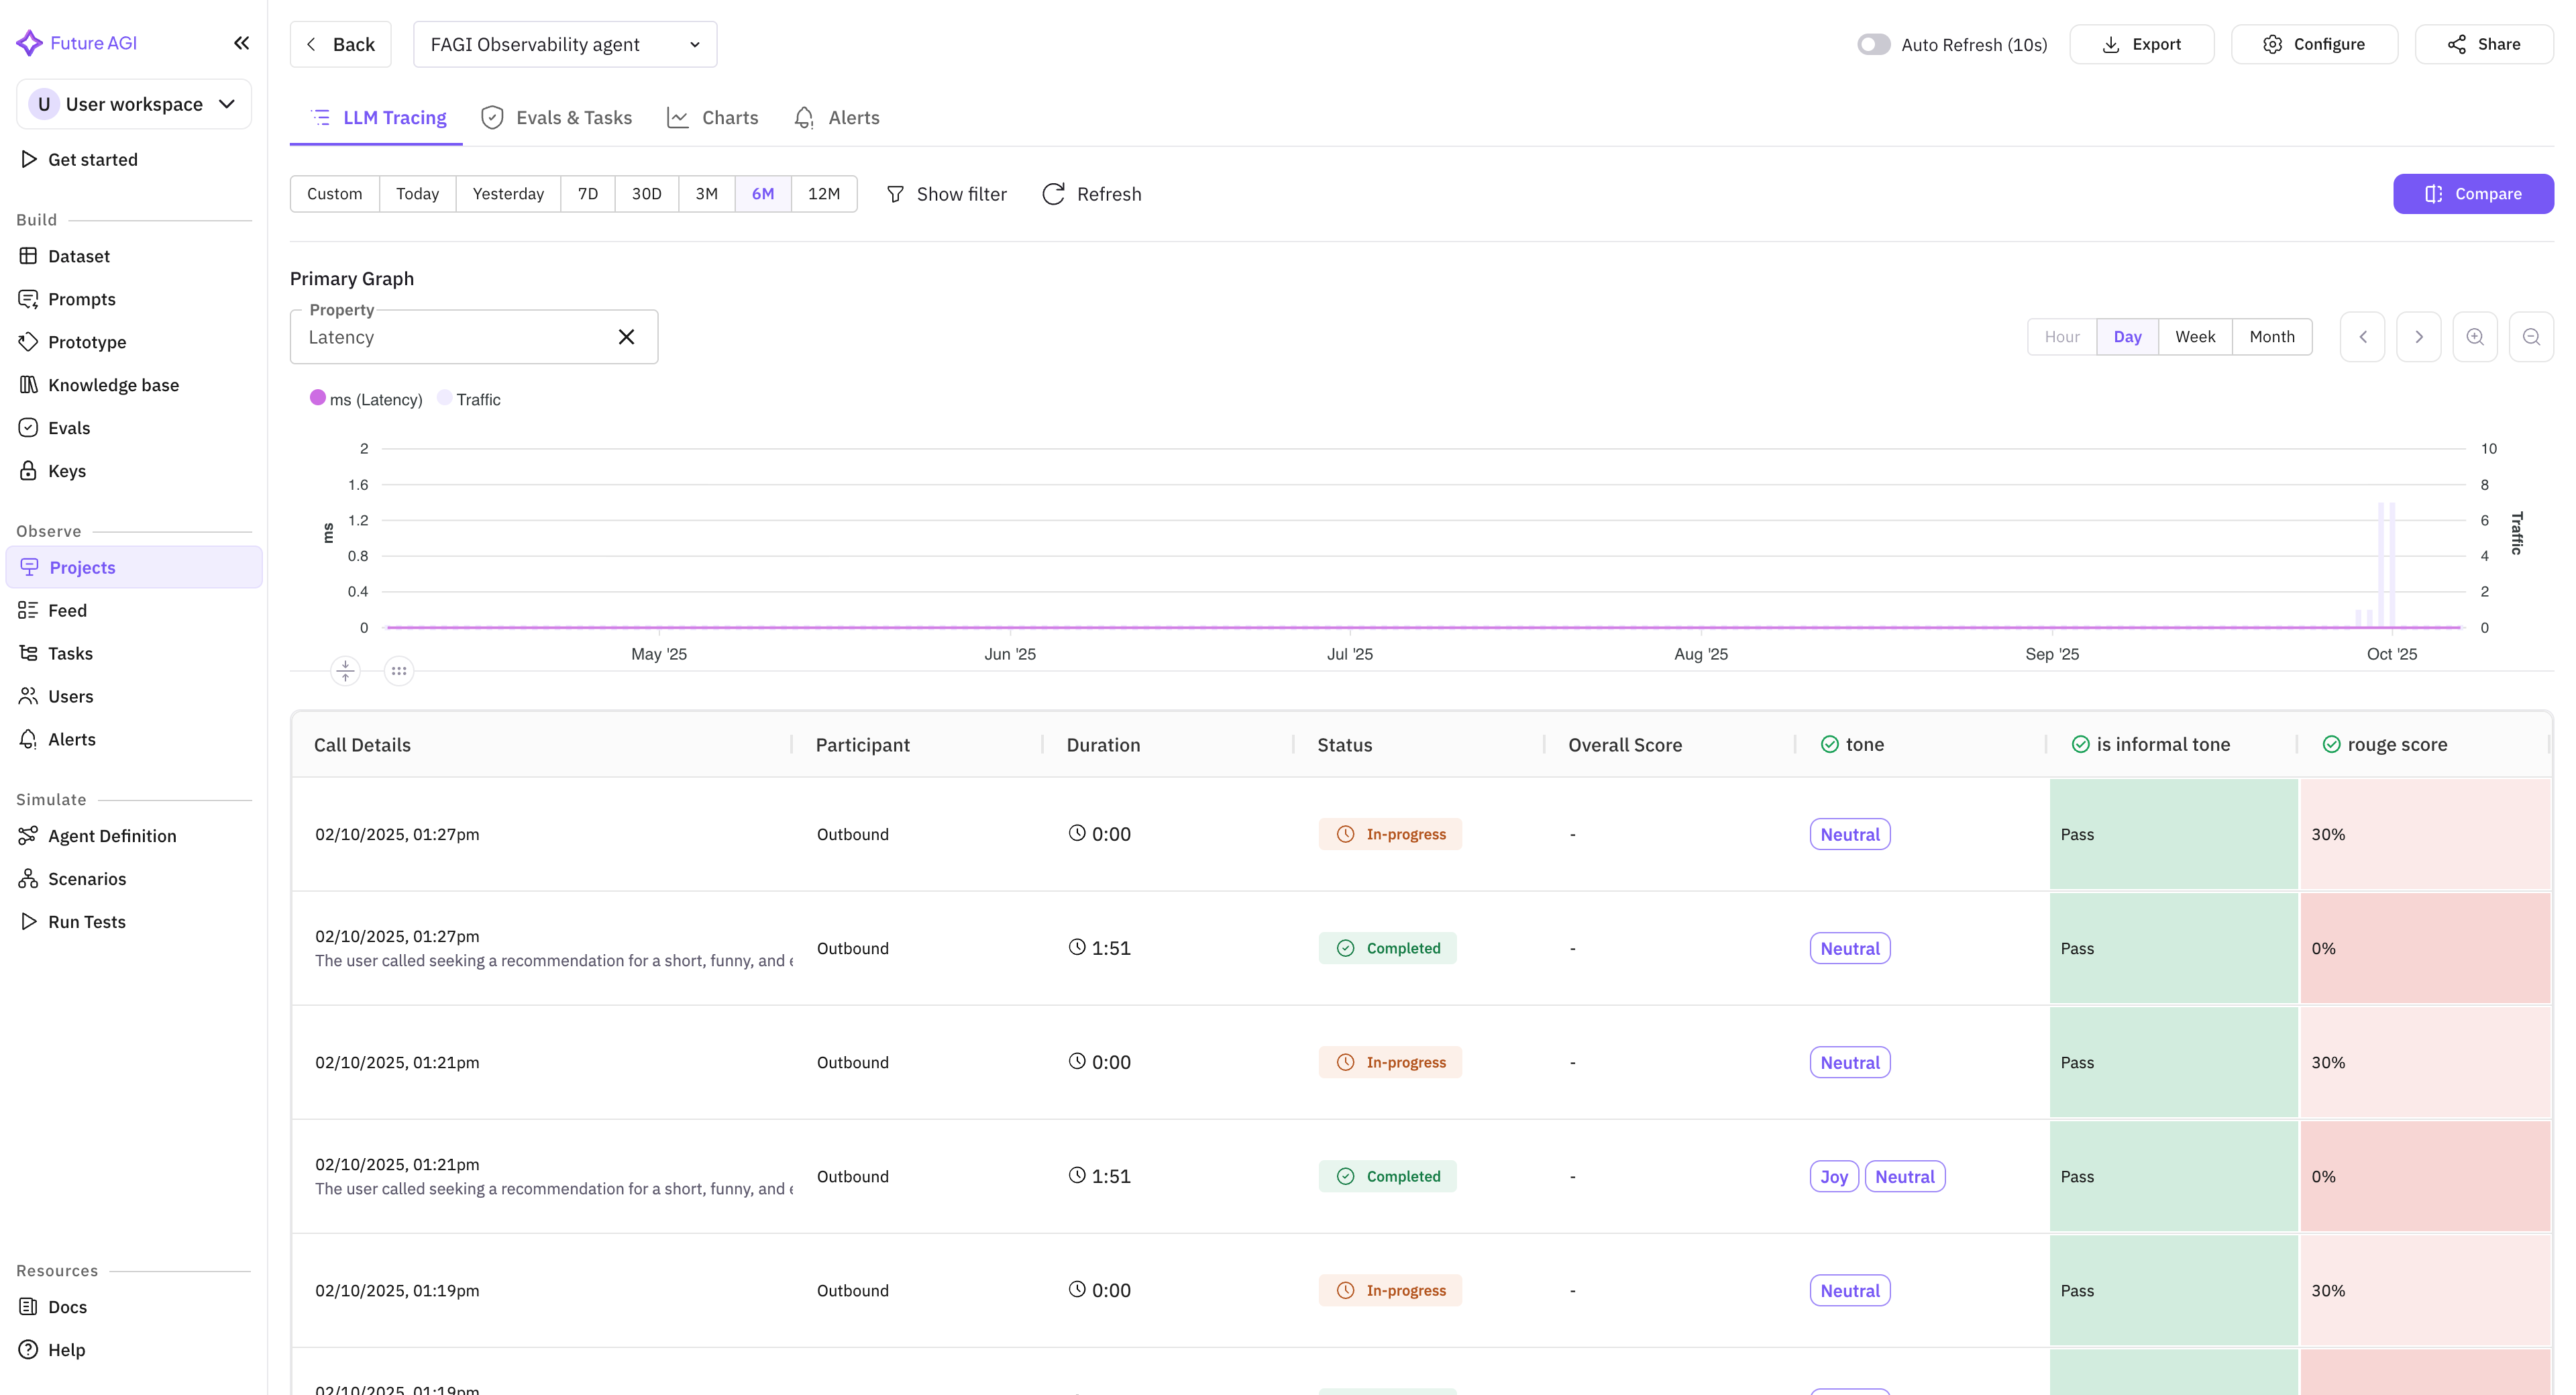
- Clicking on the project takes you inside the project where you can monitor all the call logs made by your voice agent
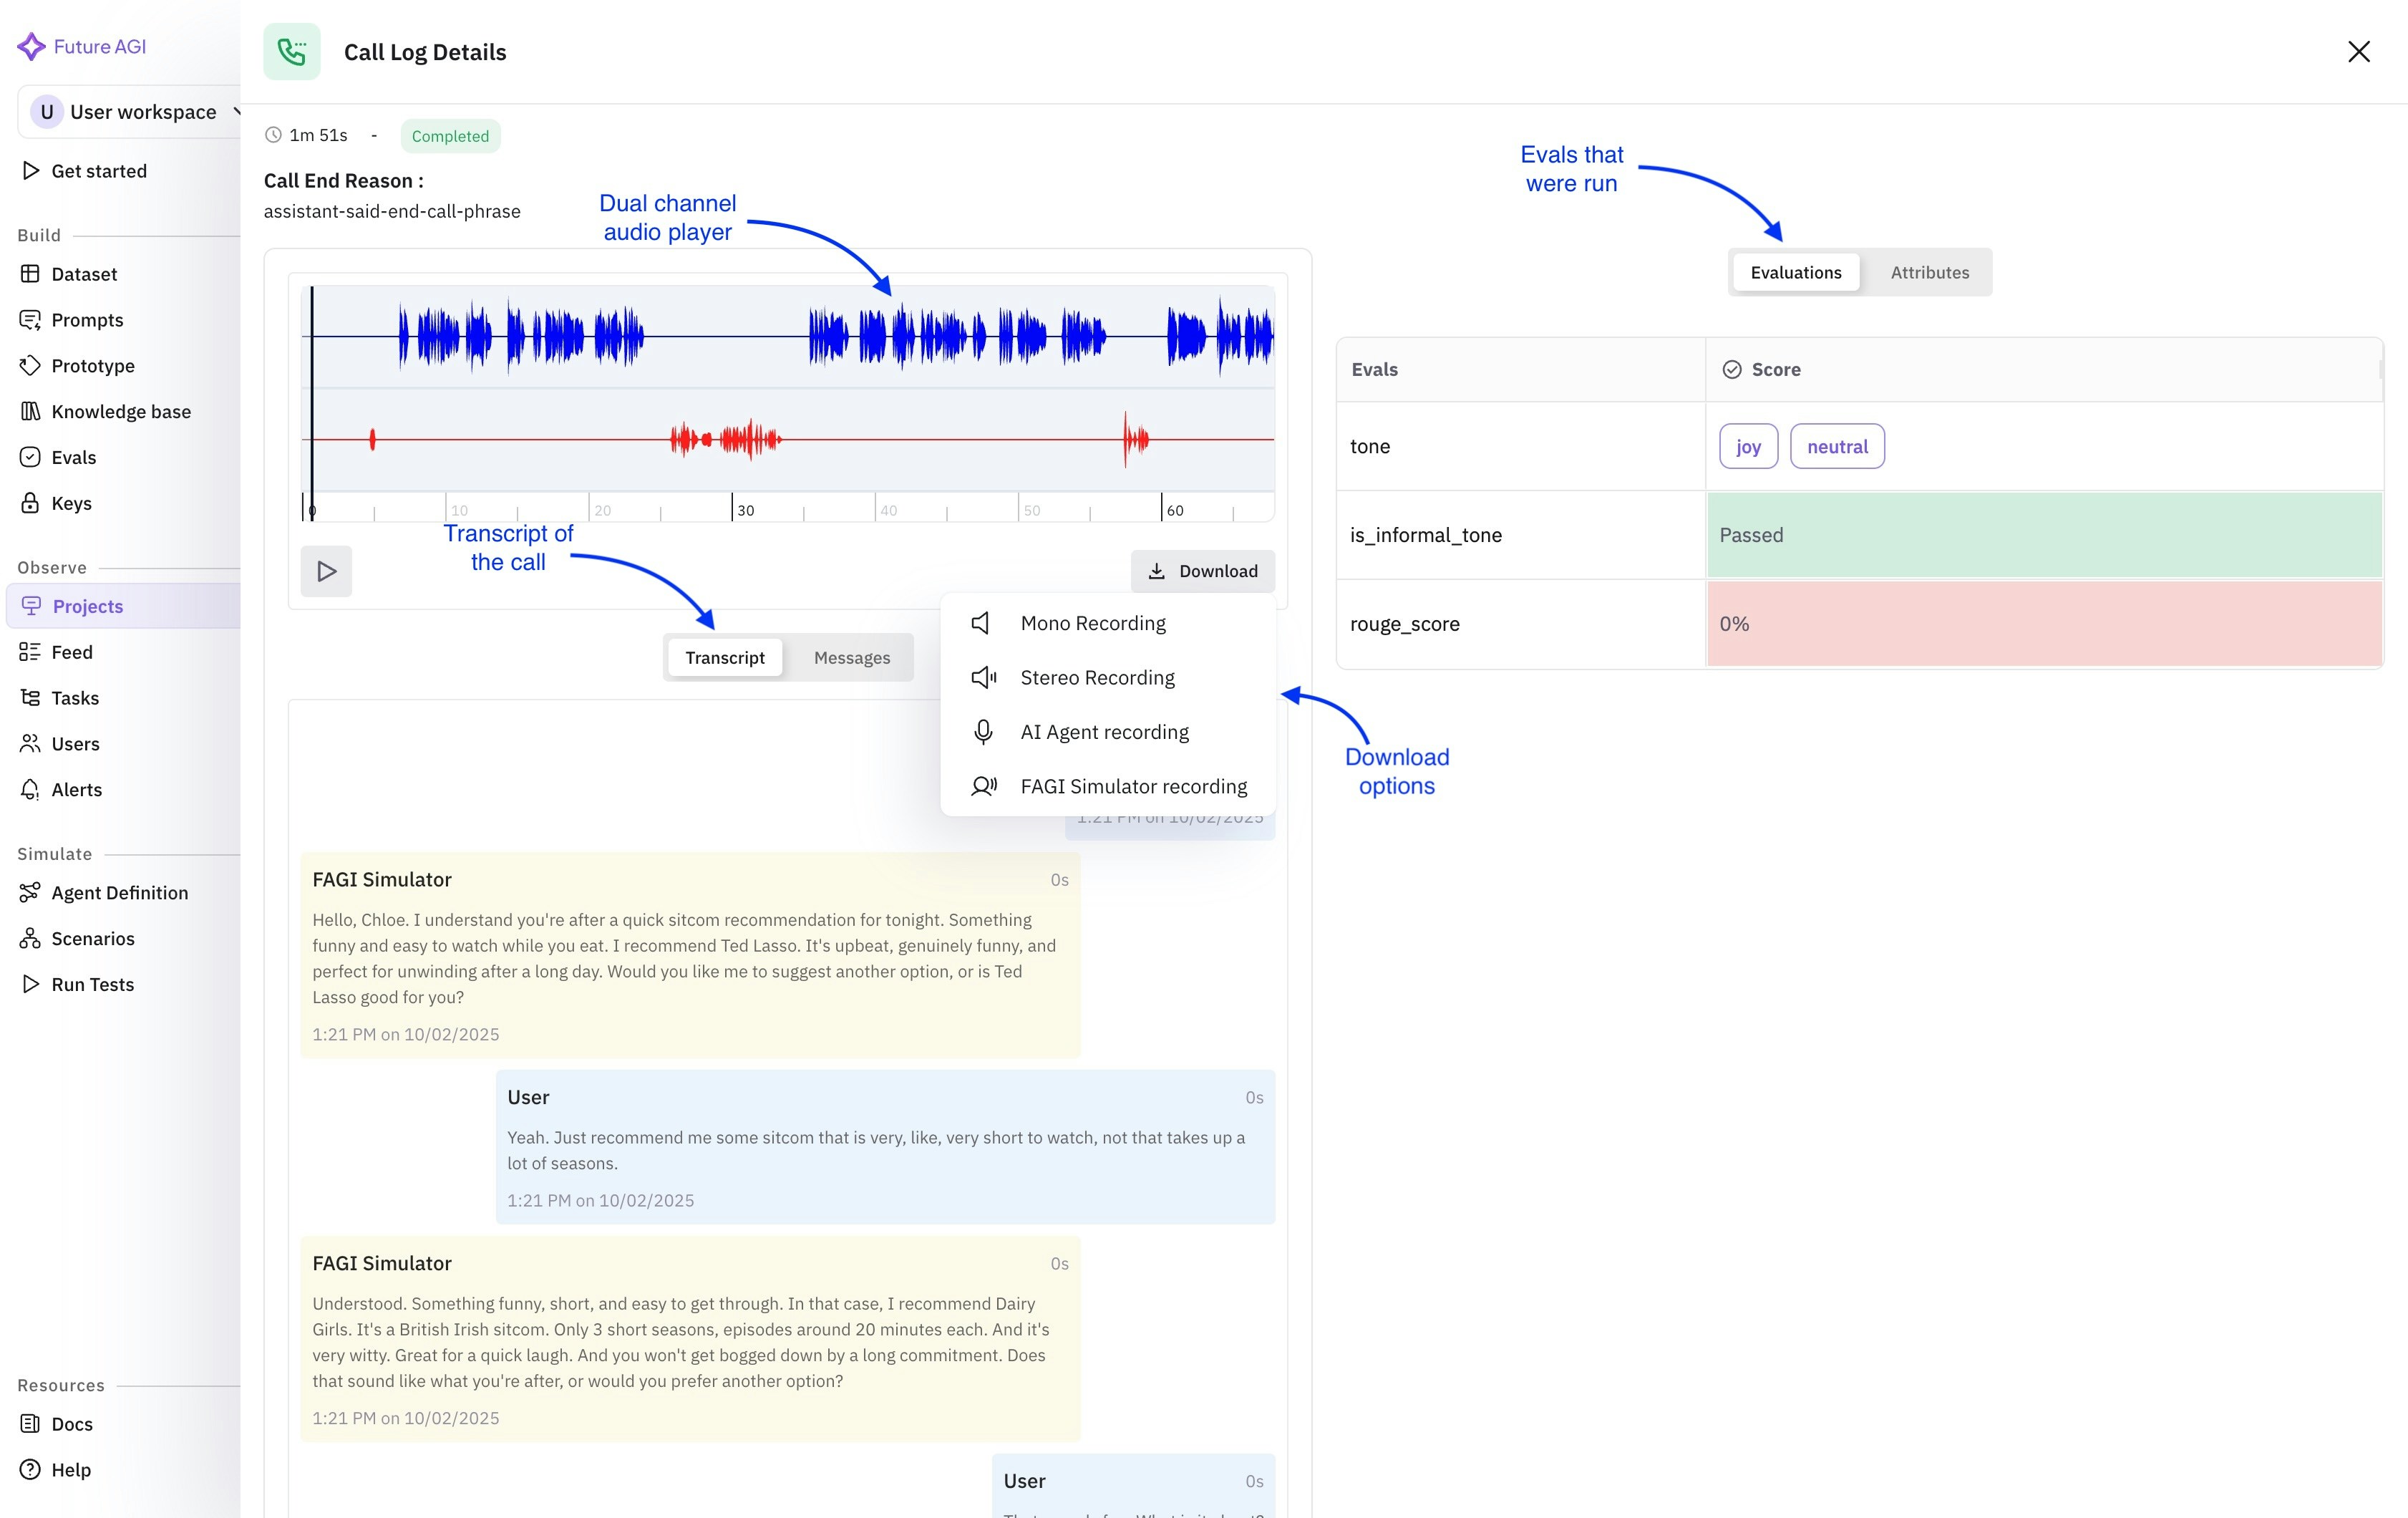
- When you click on any of the call logs, a drawer opens up with all the relevant details captured during the call.
Updating the agent
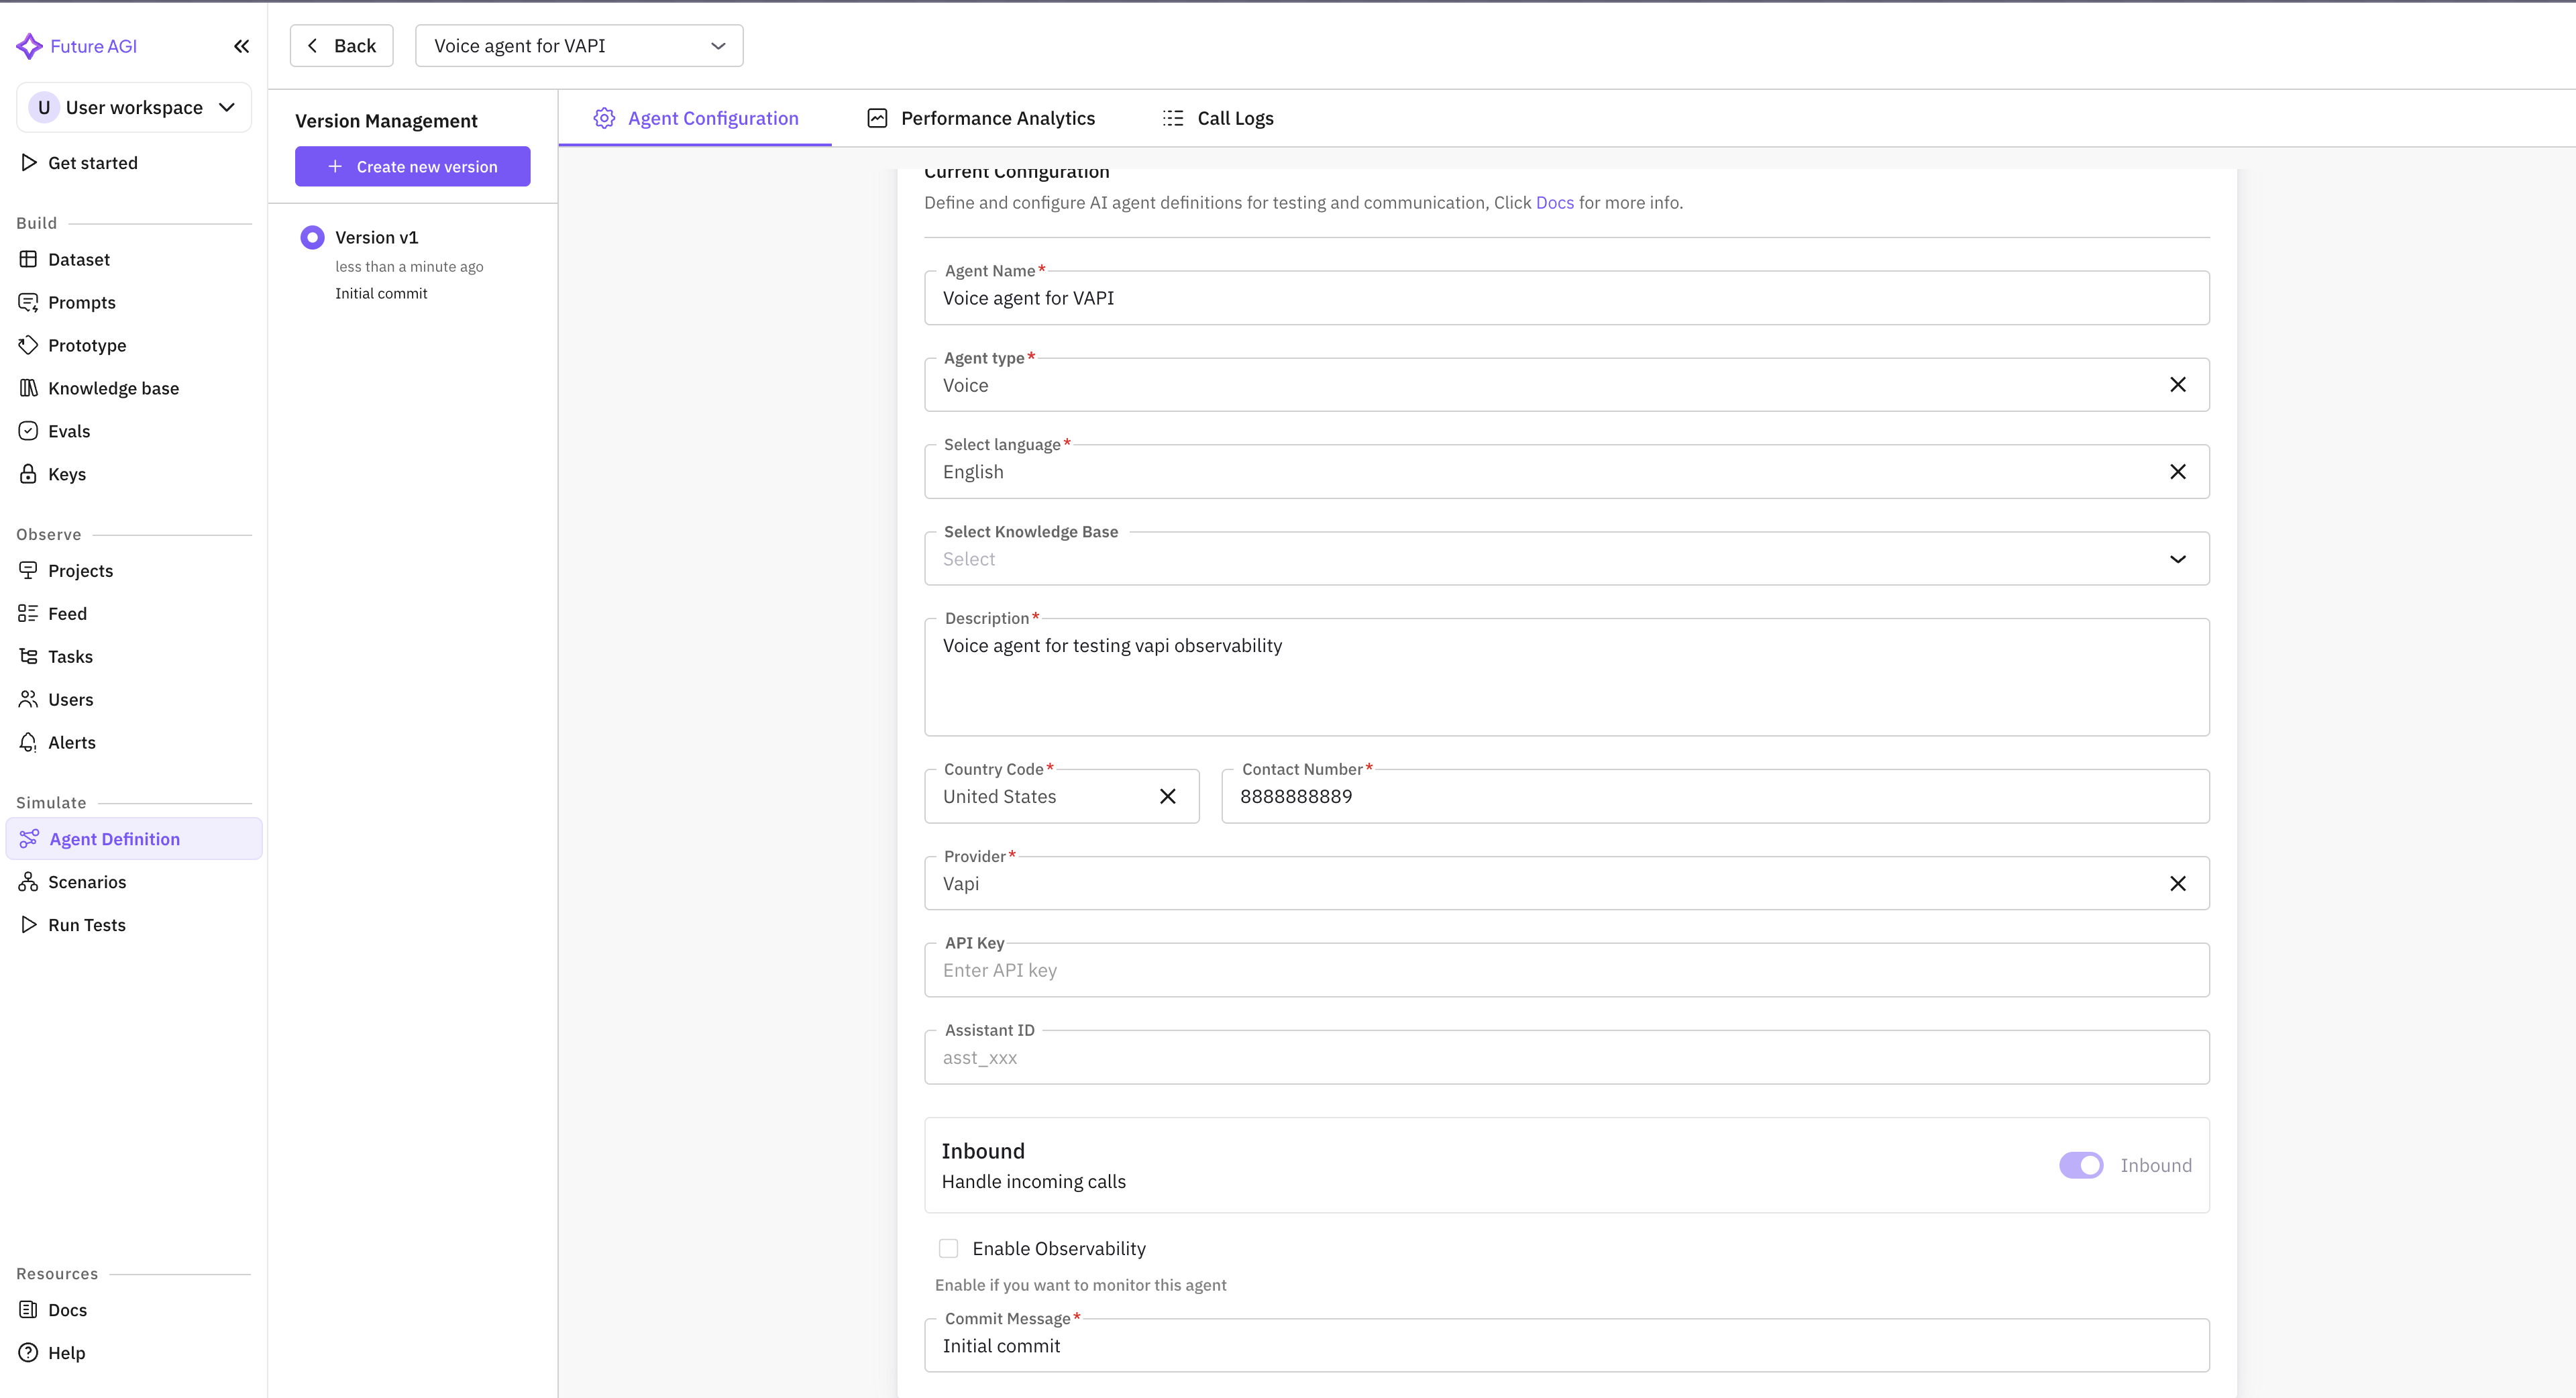
- If you click on the agent definition of your newly created agent, a form opens up with all the details of agent already filled. You can choose to edit any details as you like
- There is one point to note here. If you choose to disable observability, the API key field and the assistant Id field become optional as mentioned earlier. You can see them from the photos attached below
 |
|---|
| Agent with observability disabled |
 |
|---|
| Agent with observability enabled |