Build an AI Agent Workflow
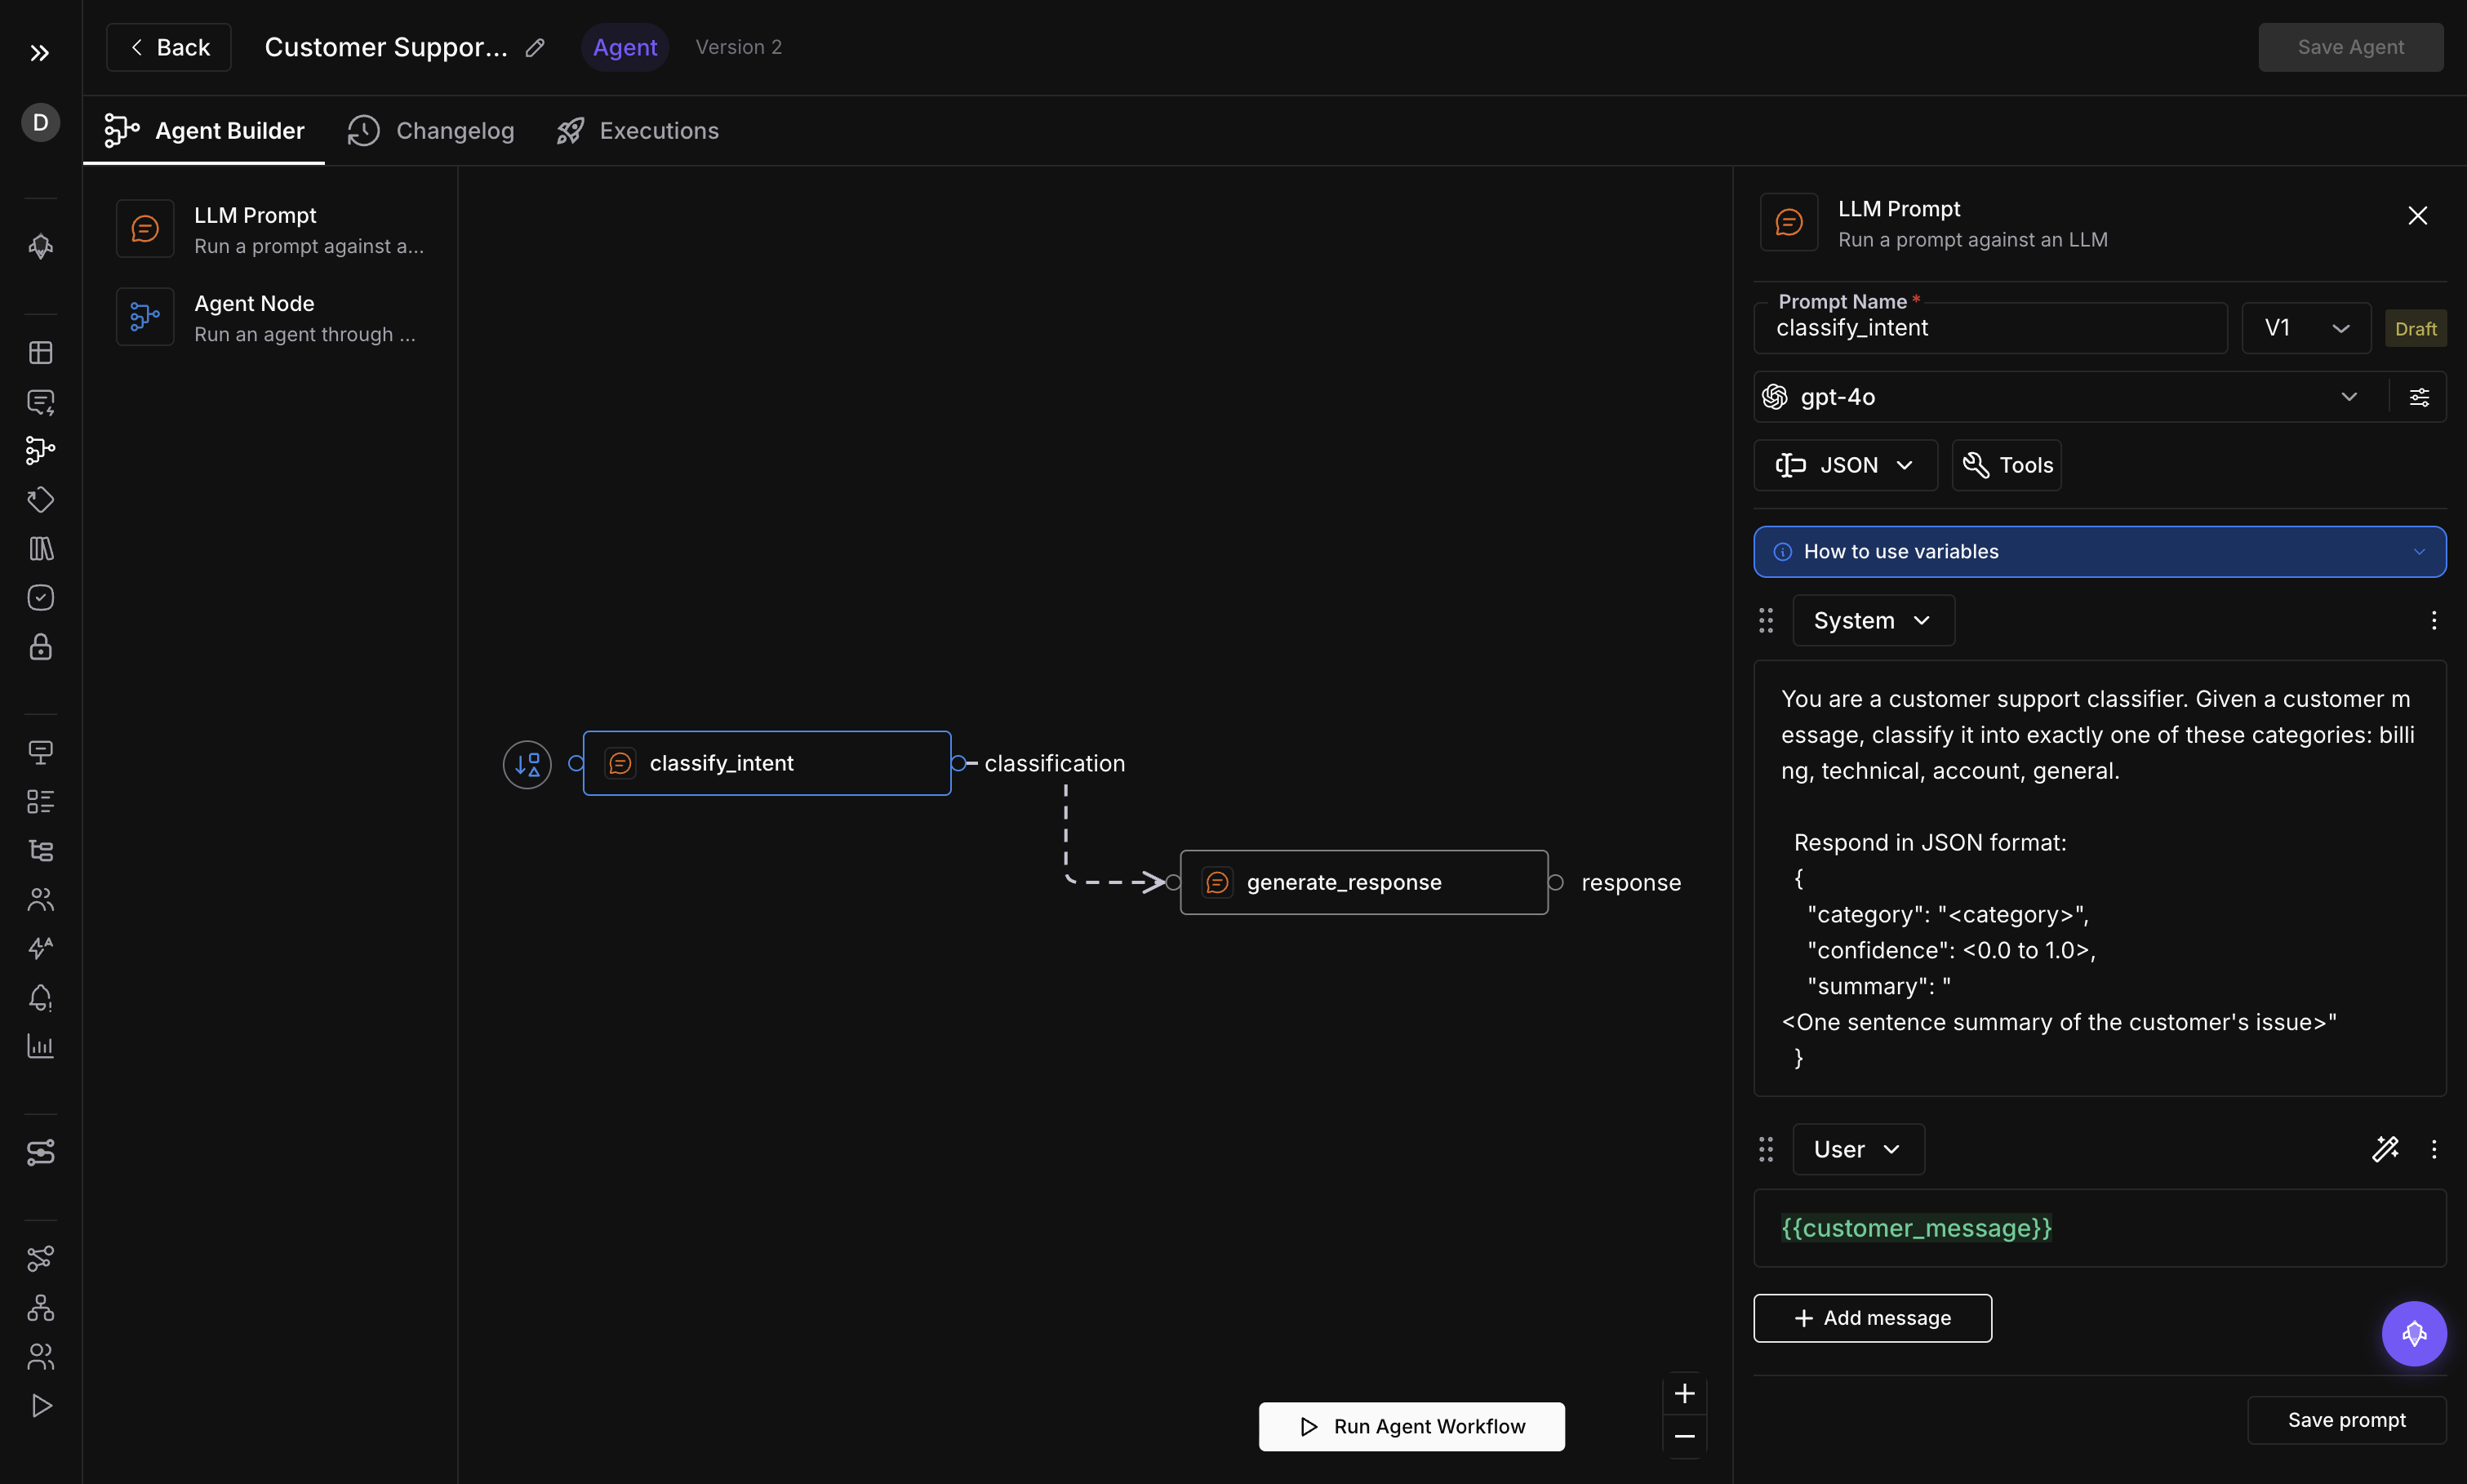
Add LLM Prompt and Agent nodes to the canvas, configure models and parameters, draw edges, and set global variables in Agent Playground.
About
The Agent Builder is the visual graph editor where you assemble your workflow by adding nodes, configuring them, and connecting them with edges. For background on nodes, ports, and edges, see Understanding Agent Playground.
The workspace has three main areas:
- Node Selection Panel (left): available node types to add
- Canvas (center): the graph editor where you arrange and connect nodes
- Node Drawer (right): configuration form for the selected node
Add Nodes
The left panel shows the available node types. You can add nodes in two ways:
- Click a node type to add it to the center of the canvas
- Drag a node type onto the canvas and drop it at the desired position
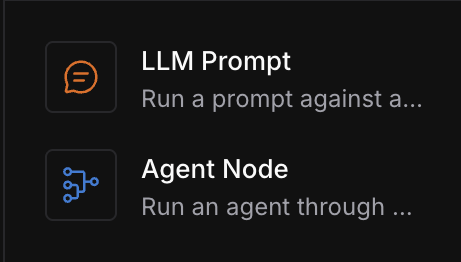
Available Node Types
| Node Type | Purpose |
|---|---|
| LLM Prompt | Execute a prompt against a language model. Configured via Prompt Templates. |
| Agent | Embed another graph as a sub-workflow for modular composition. |
When you add a node, the platform automatically creates its ports based on the node template’s definitions.
Configure Nodes
Click any node on the canvas to open the Node Drawer on the right side. The drawer shows a configuration form specific to the node type.
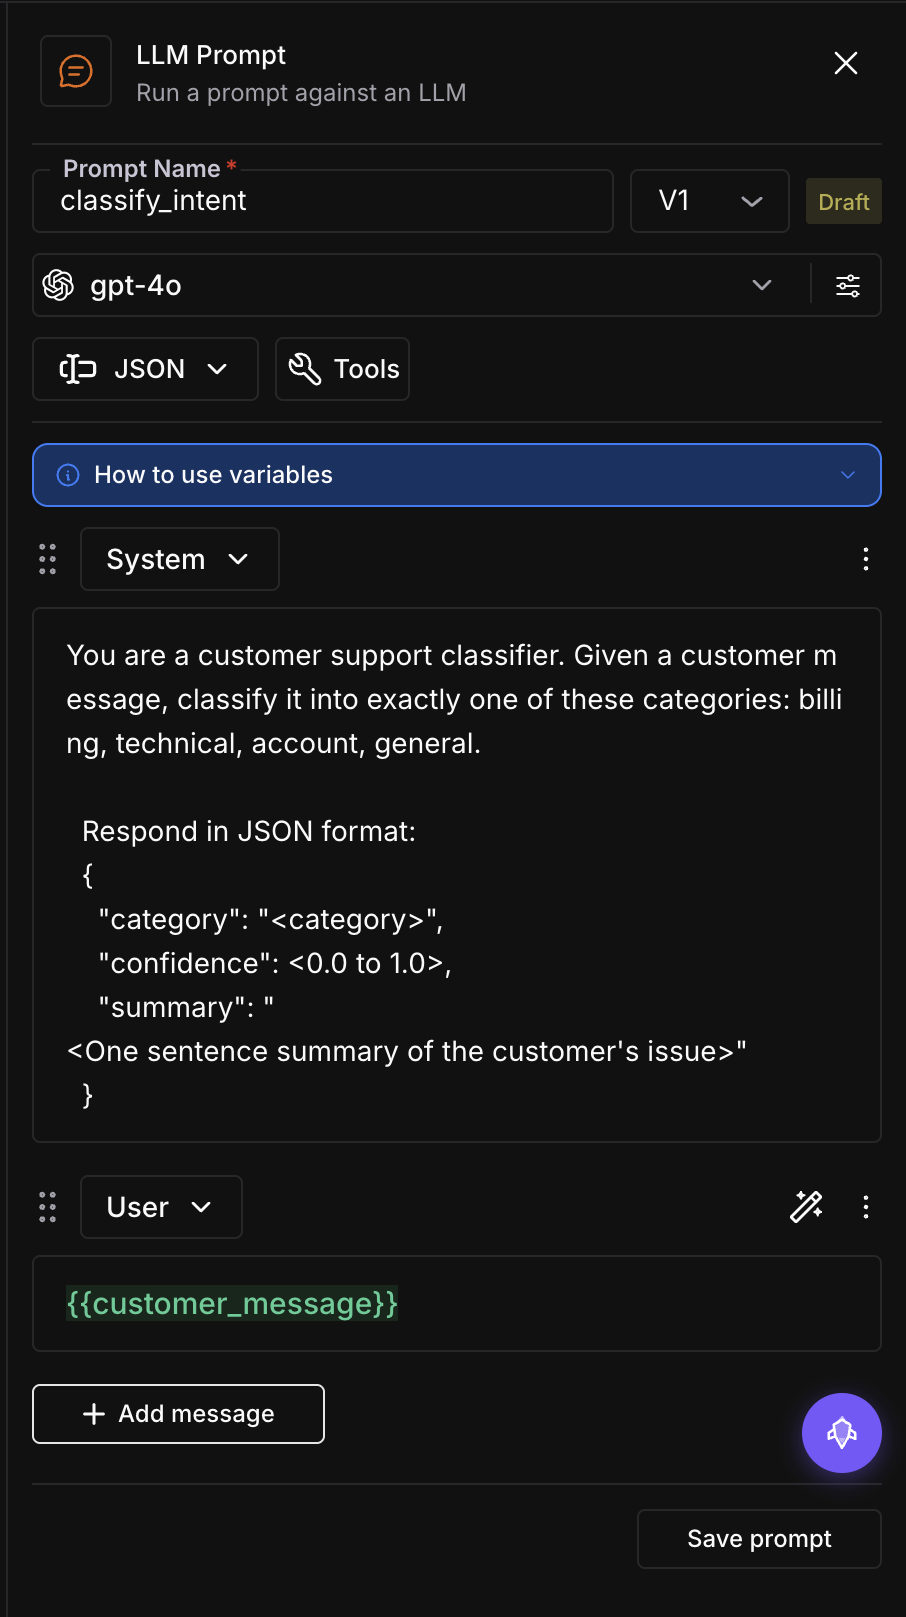
LLM Prompt Node Configuration
| Field | Description |
|---|---|
| Prompt Template | Select a prompt template from Prompt Management. The node’s input ports automatically sync to the template’s {{variables}}. |
| Model | Choose the LLM to call (e.g., GPT-4, Claude, Gemini). |
| Temperature | Controls randomness (0 = deterministic, 1 = creative). |
| Max Tokens | Maximum length of the generated response. |
| Top-p | Nucleus sampling threshold. |
| Response Format | Output as plain text or structured JSON. |
Note
When you change the prompt template, the node’s input ports update automatically to match the new template variables. Existing connections to removed variables are disconnected.
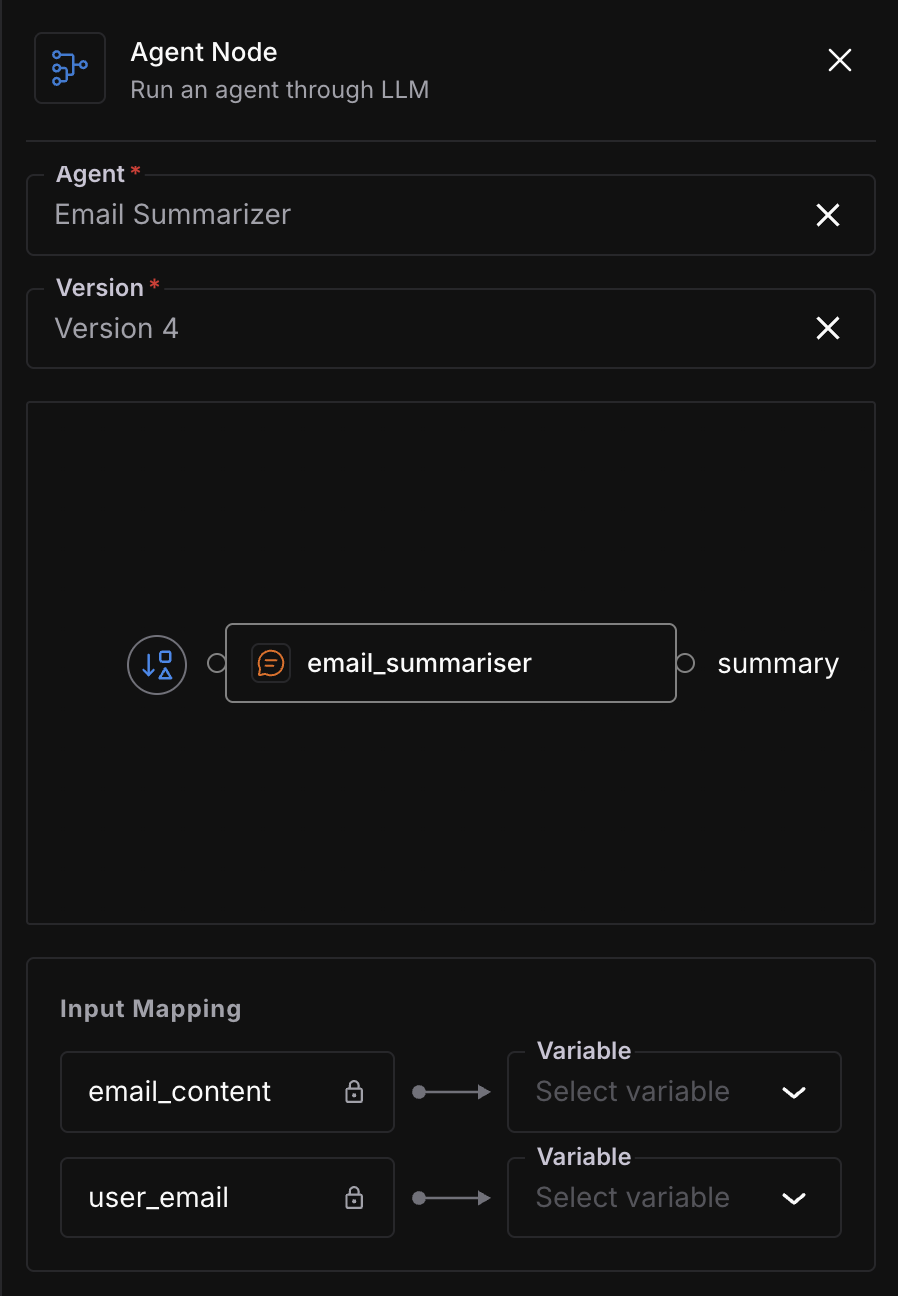
Agent Node Configuration
For Agent (subgraph) nodes, configure:
- Agent - choose which graph to embed as a sub-agent
- Version - select which version of that agent to use
- Input mapping - map variables from the parent graph to the sub-agent’s exposed input ports
Connect Nodes
Create data flow connections by drawing edges between nodes.
Start the connection
Hover over a node’s output handle (the circle on the right side of the node). Your cursor changes to a crosshair.
Draw the edge
Click and drag from the output handle toward the target node’s input handle (the circle on the left side).
Complete the connection
Release the mouse over the target node’s input handle. The platform creates the edge and validates that the port types are compatible.
Connection Rules
- One output to many inputs: an output port can connect to multiple input ports (data is broadcast)
- One input, one source: each input port accepts only one incoming edge
- No cycles: the platform prevents connections that would create loops in the graph
- Type checking: connected ports must have compatible data schemas
To delete an edge, select it and press Delete.
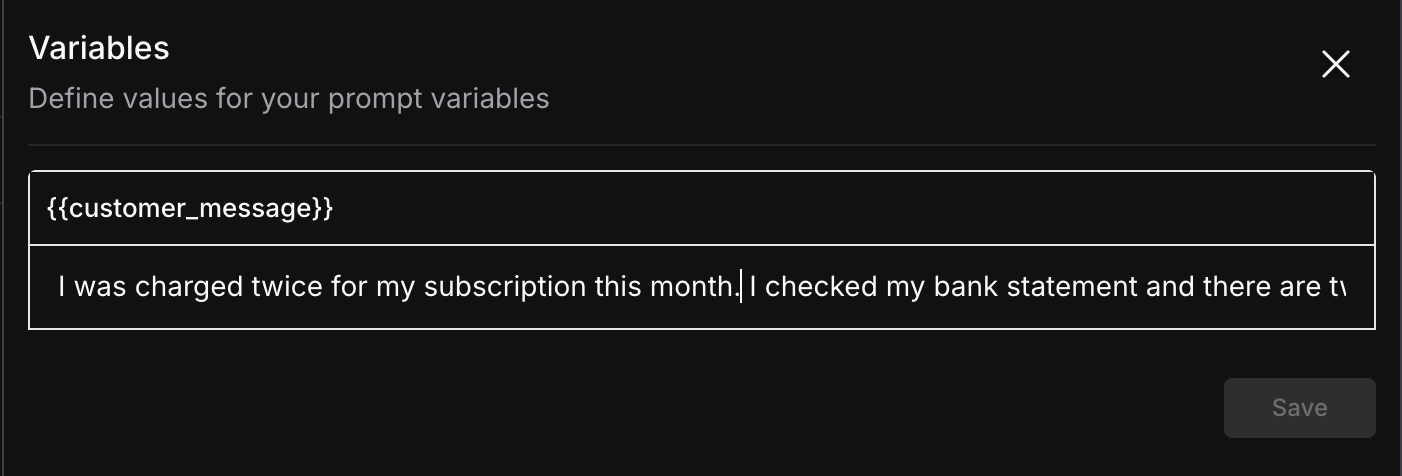
Global Variables
Use the Global Variables panel (accessible from the right side of the builder) to define values for your prompt variables. These are the inputs your workflow needs to run , for example the customer message that gets passed into your first node.
Tips
Tip
Use the + button that appears below a node (when it has no outgoing edge) to quickly add and connect a new node in one step.
Tip
Changes to a draft version are auto-saved as you work. You do not need to manually save after every edit. The platform saves node positions, configurations, and connections automatically.
Warning
If you are viewing a non-draft version, the canvas is read-only. You must create a draft to make changes. The platform will prompt you to create a draft when you try to edit.
Next Steps
- Run & Monitor: Execute your workflow and watch results in real time
- Versions & Execution: Understand version lifecycle and execution model
Questions & Discussion