Connect an MCP server
Give Falcon AI access to a new MCP server, whatever transport and authentication it expects.
This guide adds an MCP server to Falcon AI as a connector, so its tools become available for Falcon AI to call in chat once you turn them on (see MCP Connectors for what a connector is). You name it, point it at the server, choose how Falcon AI talks to it and signs in, then check that the connection actually works before you rely on it in chat.
Before you start, make sure you have access to Workspace Settings in your workspace, the MCP server’s URL, and any credential the server requires, such as an API key or bearer token.
Open the Connectors page
Connectors live on the Falcon AI Connectors page, under Workspace Settings in Settings. Open Settings, then click Falcon AI Connectors in the sidebar to go straight there. Click Add Connector, top right, to open the form; on an empty page the Add your first connector button in the middle opens the same one.
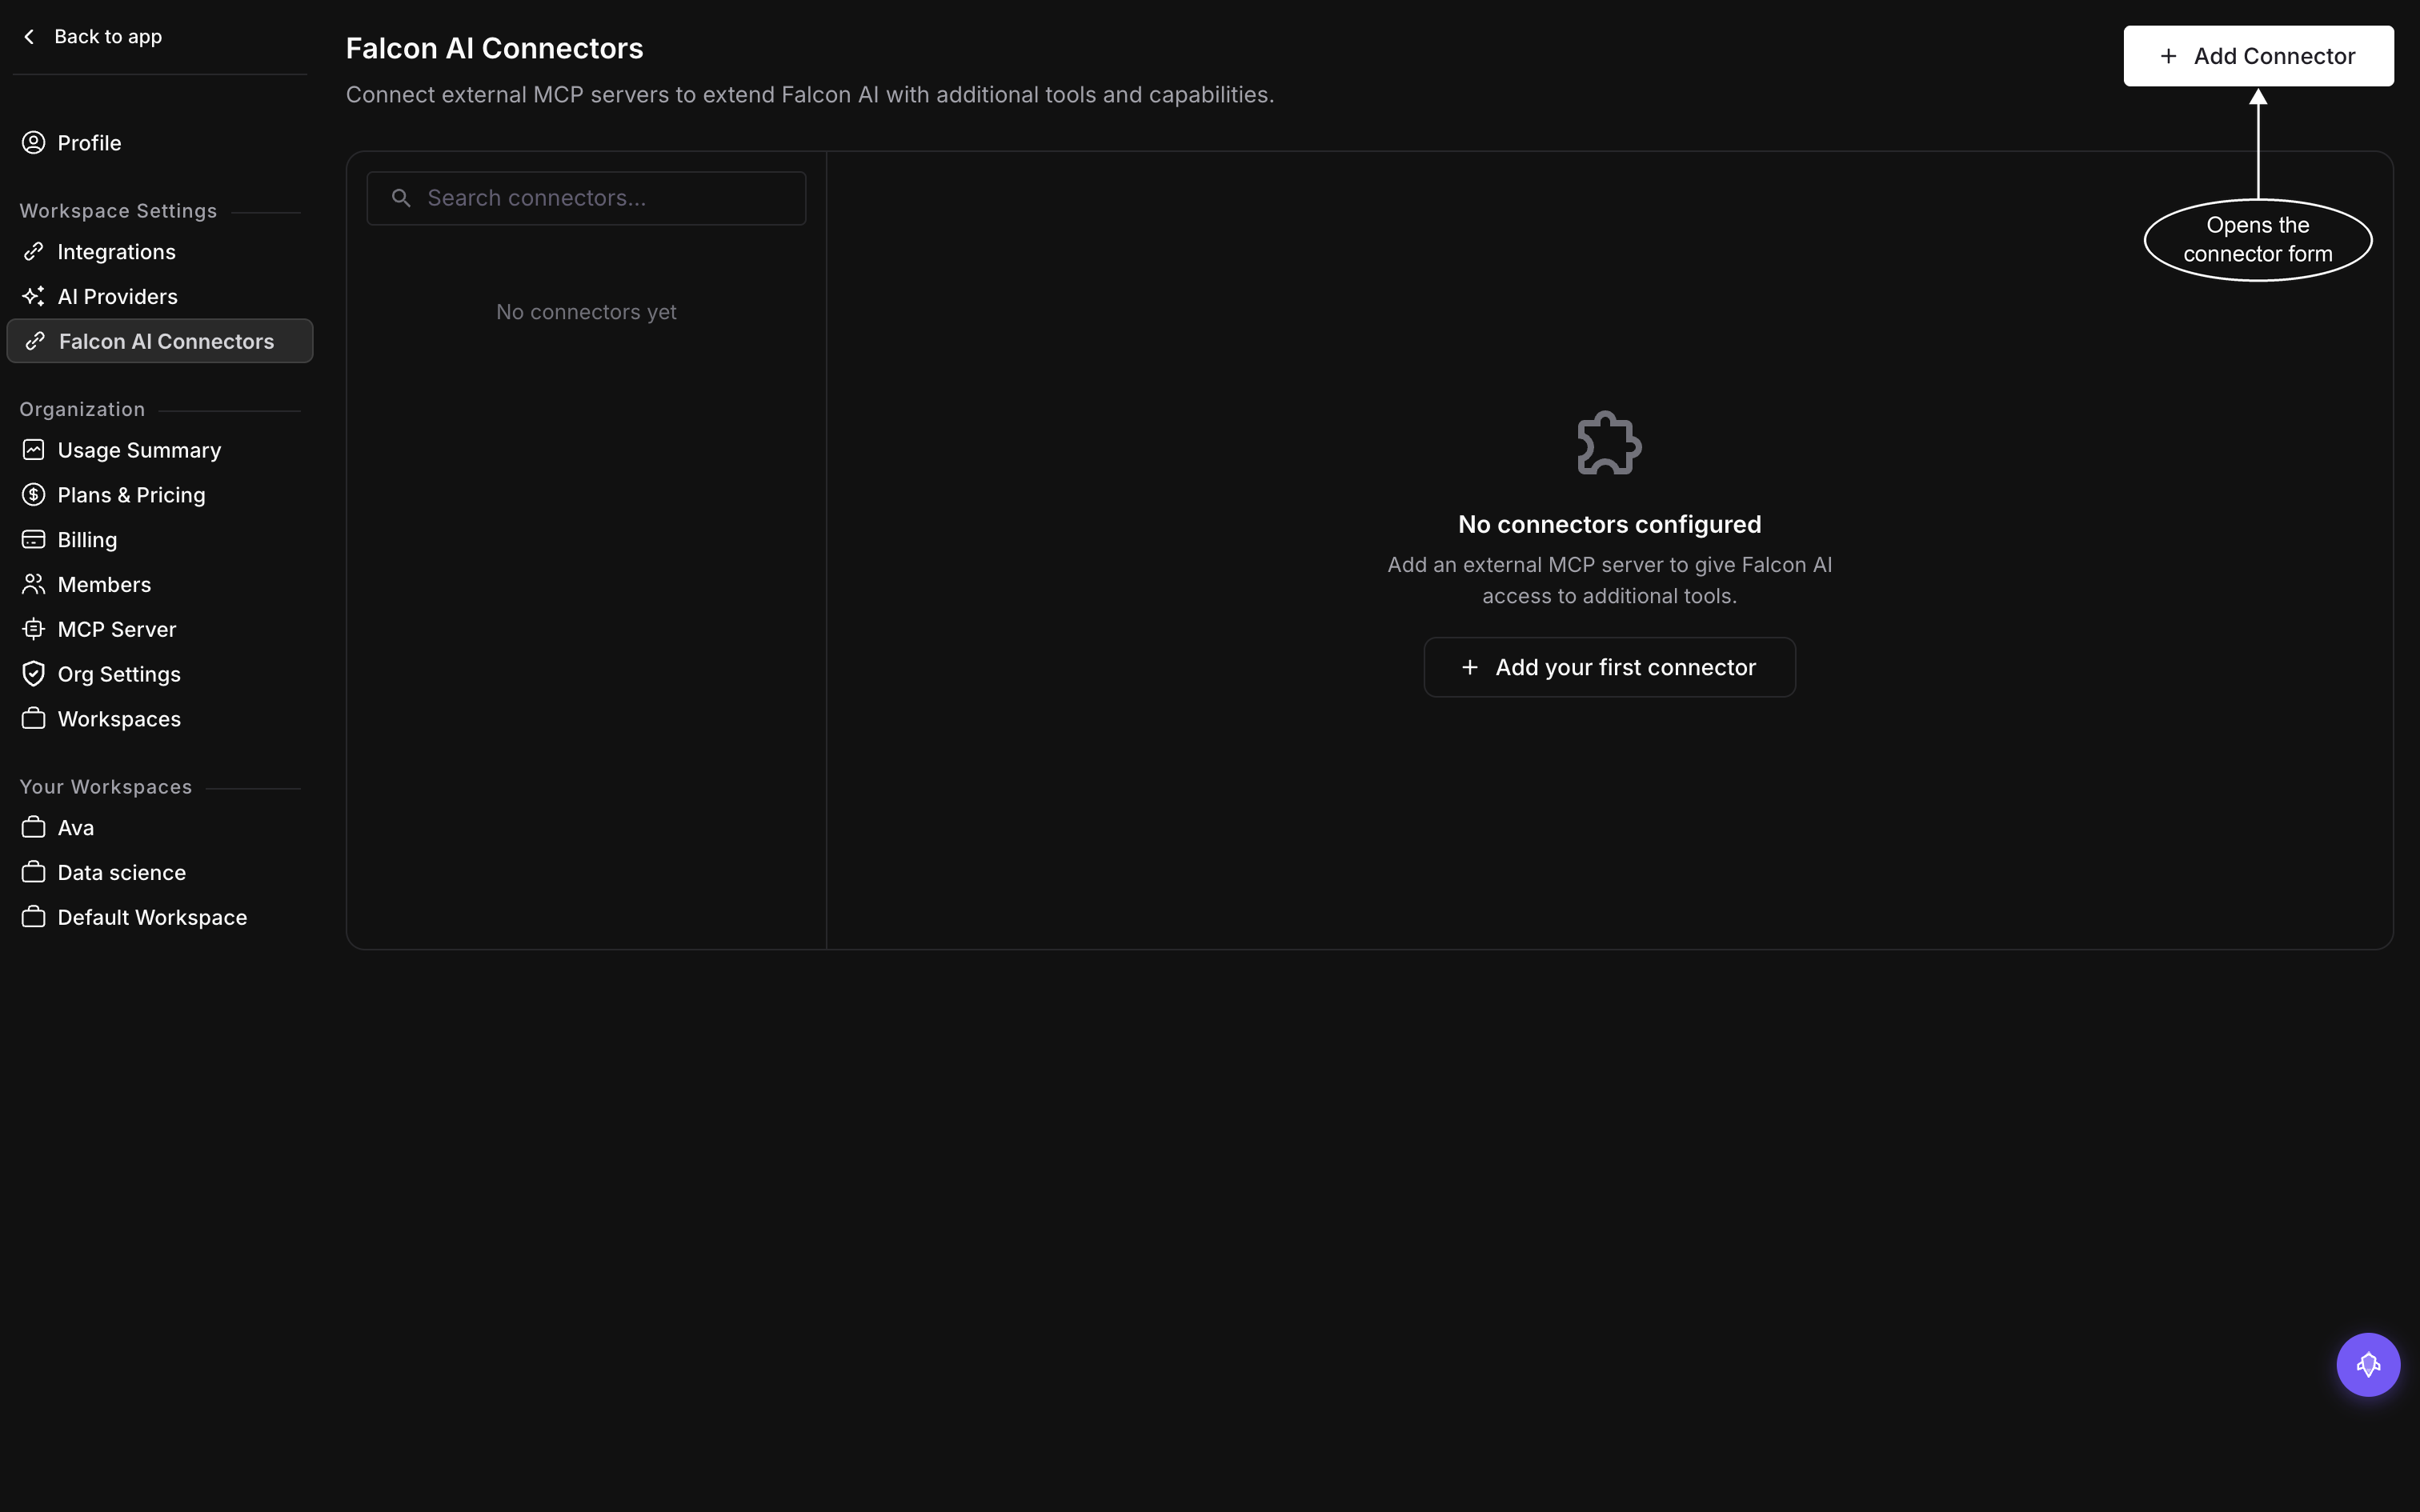
Connectors are a workspace setting, so one you add here is available to everyone in the workspace, not just to you
Note
You can also reach this page from inside a conversation: the chat input’s + menu has a Connectors submenu ending in Manage connectors, and the Customize panel has a Connectors section of its own with an Add connector button.
Name it and point it at the server
Give the connector a Name and its Server URL, the address of the MCP server you’re connecting to. Both fields are required to save.
Note
Connector names must be unique within the workspace. If another connector already uses the name you typed, saving is rejected until you pick a different one.
Choose the transport
Set Transport to how Falcon AI should talk to the server. Streamable HTTP is the normal choice for a current MCP server. Pick SSE (Legacy) instead if you’re connecting to an older server that still expects that transport.
Choose the authentication
Set Authentication to whatever the server expects. The form reveals the fields that method needs:
- None: skips authentication entirely
- API Key: adds Header Name and Header Value fields
- Bearer Token: adds a single Bearer Token field
- OAuth 2.0: no extra fields, you sign in after saving
Fill in whatever fields appear, then click Create to save the connector.
Sign in to an OAuth connector
If you set Authentication to OAuth 2.0, saving the connector doesn’t sign you in. Authentication happens as a separate step. Once saved, select the connector in the list on the left to open its detail pane, where you’ll find Re-authenticate. That’s the button for both your first sign-in and any later ones: click Re-authenticate (it reads Authenticating… while it runs), then approve access in the provider’s own sign-in window. The window closes itself once you approve, handing control back to Falcon AI, and the result lands as Authentication updated. or Authentication failed. If it fails, confirm you approved access in the provider’s window and try again.
Test the connection and discover its tools
With the connector saved and, for OAuth, signed in, select the new connector in the list on the left to open its detail pane. This is where Edit, Discover Tools, Test Connection, and Delete all live, plus Re-authenticate on a connector that signs in through OAuth. Click Test Connection to confirm Falcon AI can reach it. While it runs, the button reads Testing…; it resolves to Connection test succeeded. or Connection test failed.
Once the connection is good, click Discover Tools (it reads Discovering… while it runs) to have the server report what it offers. A successful pass shows something like Discovered 4 tools. A failed one shows Tool discovery failed.
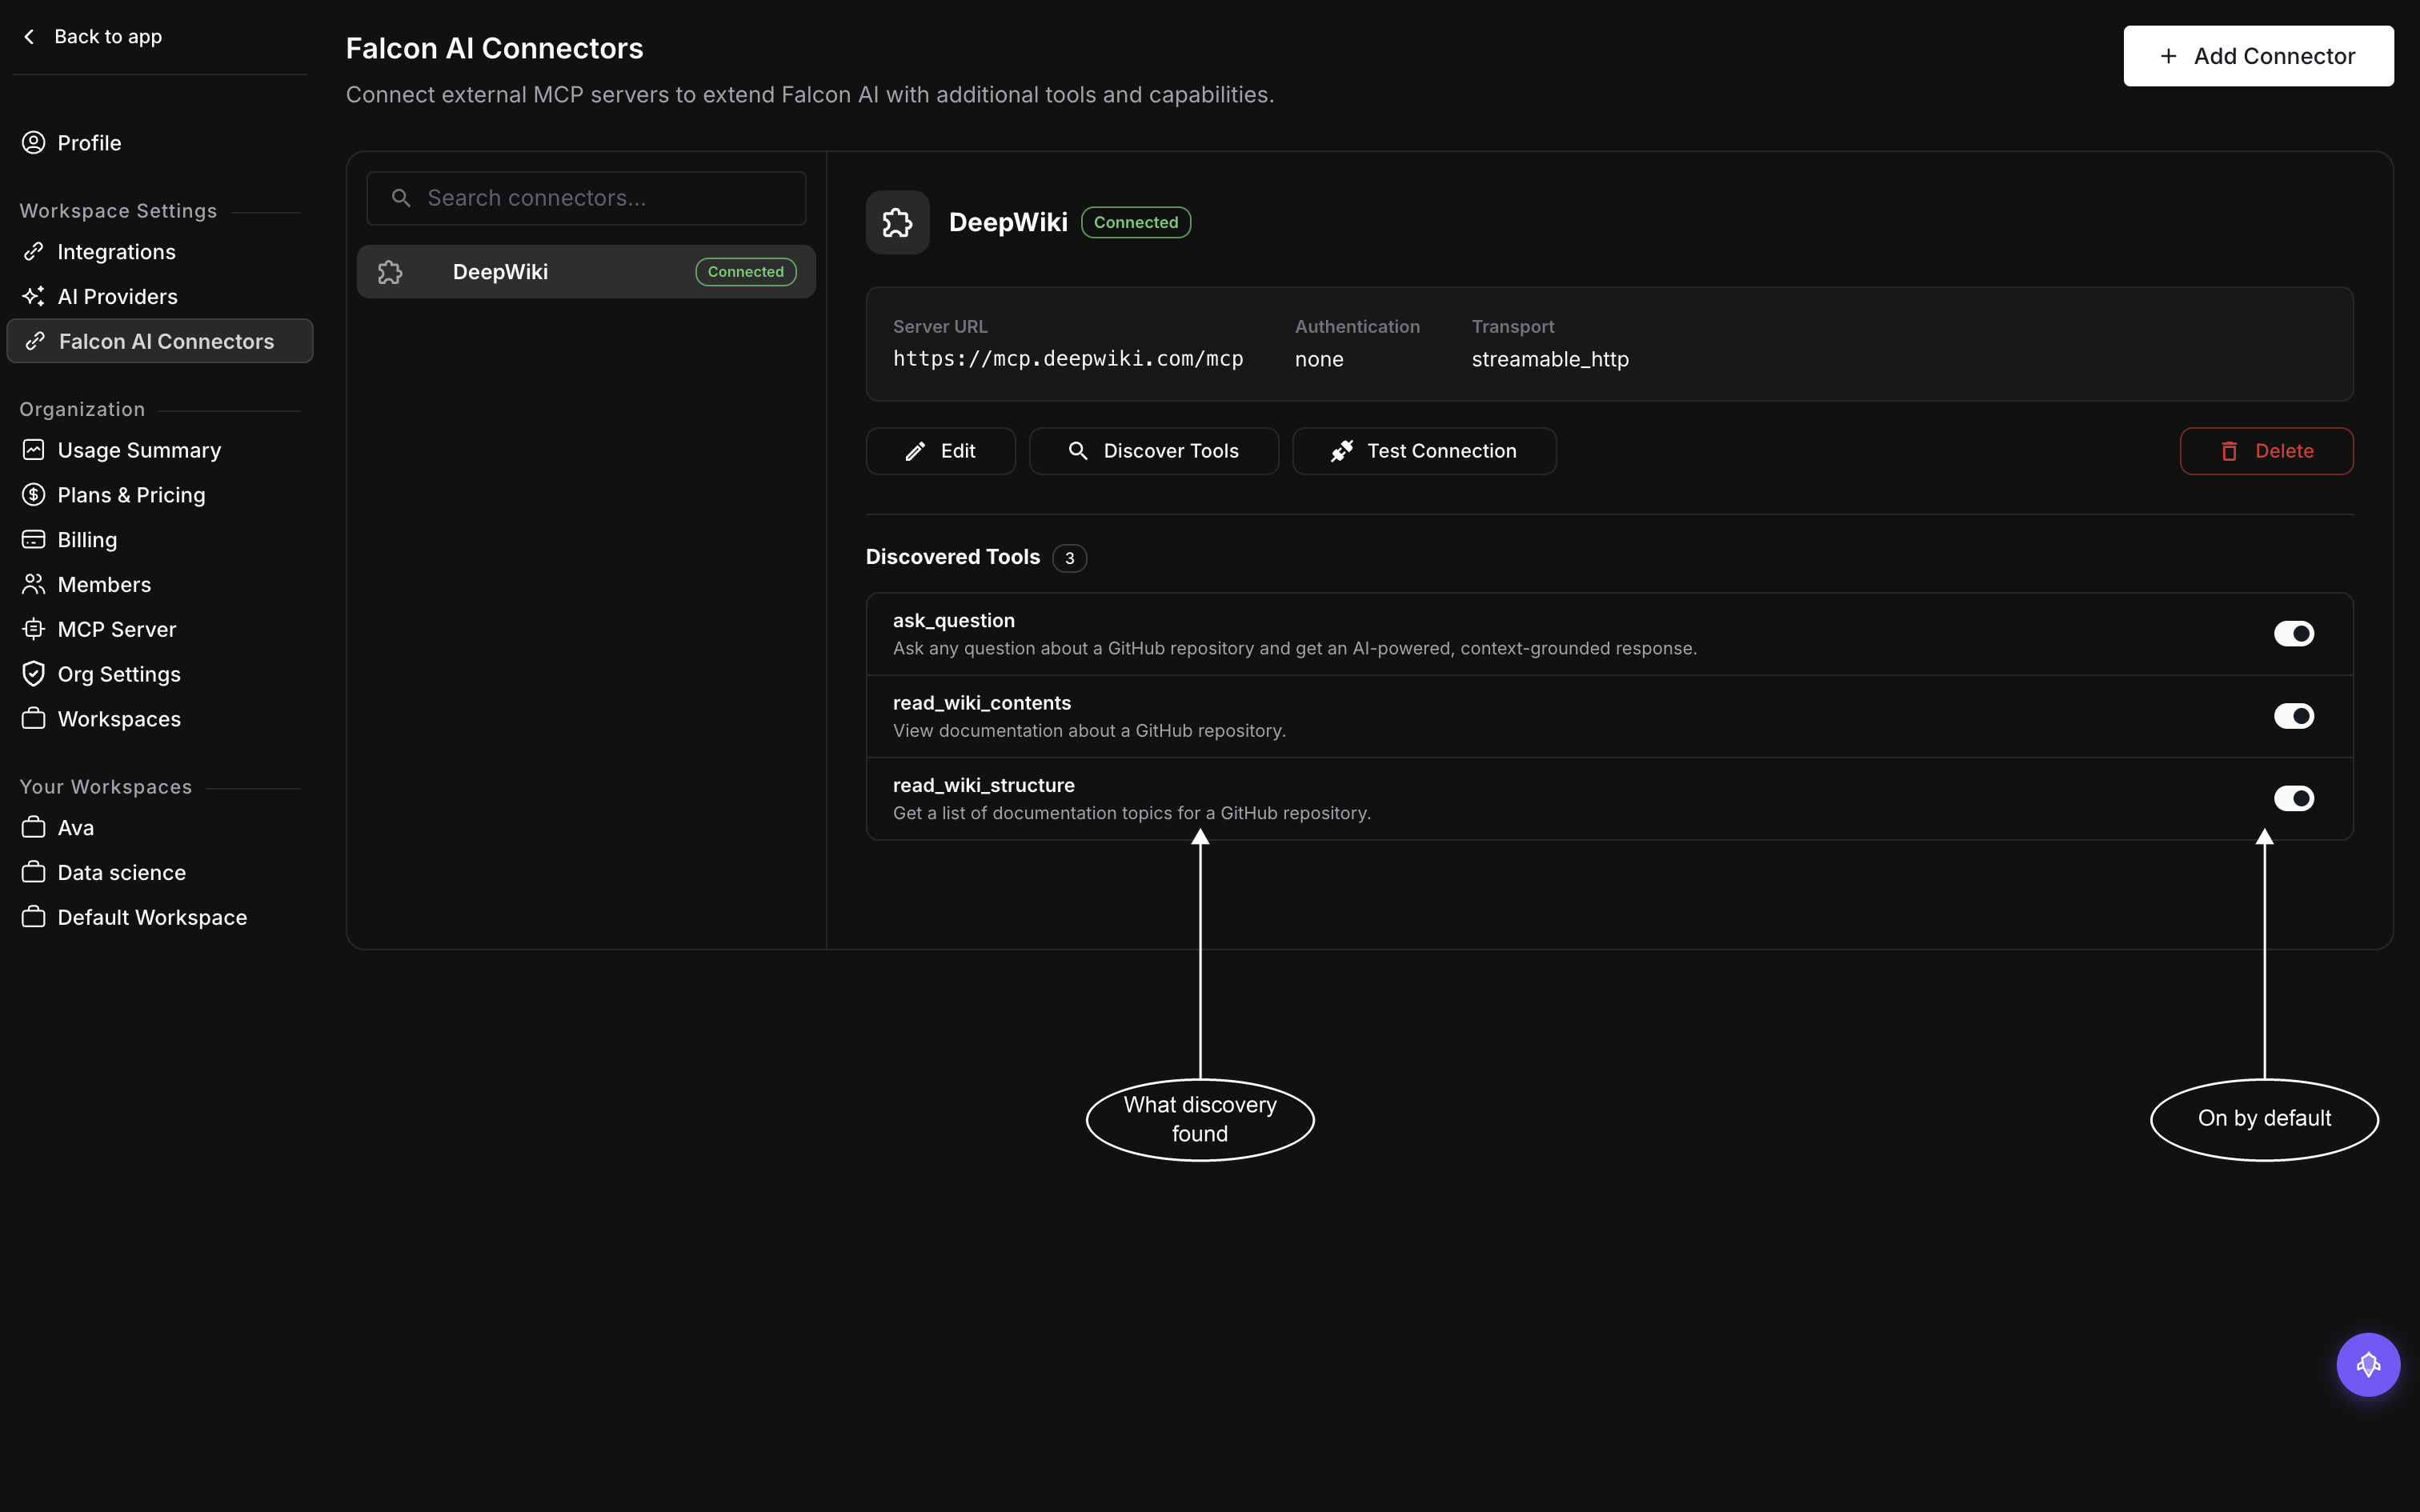
Discovery stores what it found against the connector, so the list is still there when you come back without re-running it
Either failure points back at the form rather than at Falcon AI, so click Edit and re-check three things: the Server URL the server actually listens on, the Transport it expects (an older server given Streamable HTTP fails here rather than at save), and, for API Key, that Header Name matches what the server looks for and not just the credential in Header Value. Save and run Test Connection again.
Narrow down the tools
A successful discovery turns every tool it found on, so Falcon AI can already call all of them. The next step is cutting that set back to the ones you actually want, covered in Choose connector tools.
Edit or delete a connector
Select the connector in the list on the left to open its detail pane, then click Edit to change its name, URL, transport, or authentication, and click Save to save your changes. Re-run Test Connection and Discover Tools afterward to make sure they still match. Click Delete to remove a connector you no longer need.
Note
Delete removes the connector immediately, there’s no confirmation prompt.
Dive deeper
Questions & Discussion