Create Prompt from Scratch in Future AGI Prompt Workbench
Build a new prompt manually in the Prompt Workbench with full control over structure, model, parameters, and variables.
About
A prompt is made up of instructions, context, and variables that tell a model what to do and how to respond. When you build one from scratch, you control every part of it: the system instruction that shapes the model’s behavior, the user message that drives the response, and the variables that make inputs dynamic at runtime.
Use this when you have a clear idea of what the prompt should do, need precise control over structure and parameters, or are working on a use case that no existing template covers.
When to use
- Domain-specific prompts: Your use case doesn’t fit any existing template and requires rules or structure specific to your domain.
- Precise output formatting: You need the model to return a specific schema or structured format and want full control over how the instruction is written.
- Agent prompts with custom tools: You are building an agent that calls your own APIs and want to define the tools and system instruction together from the start.
- Bringing an existing prompt into the Workbench: You have prompt text already written elsewhere and want to move it into the Workbench for versioning and testing.
How to
Navigate to the Prompts Section
From the Future AGI dashboard, locate the navigation panel on the left side of the screen. Under the “Build” section, click on “Prompts” to access the prompts management interface.
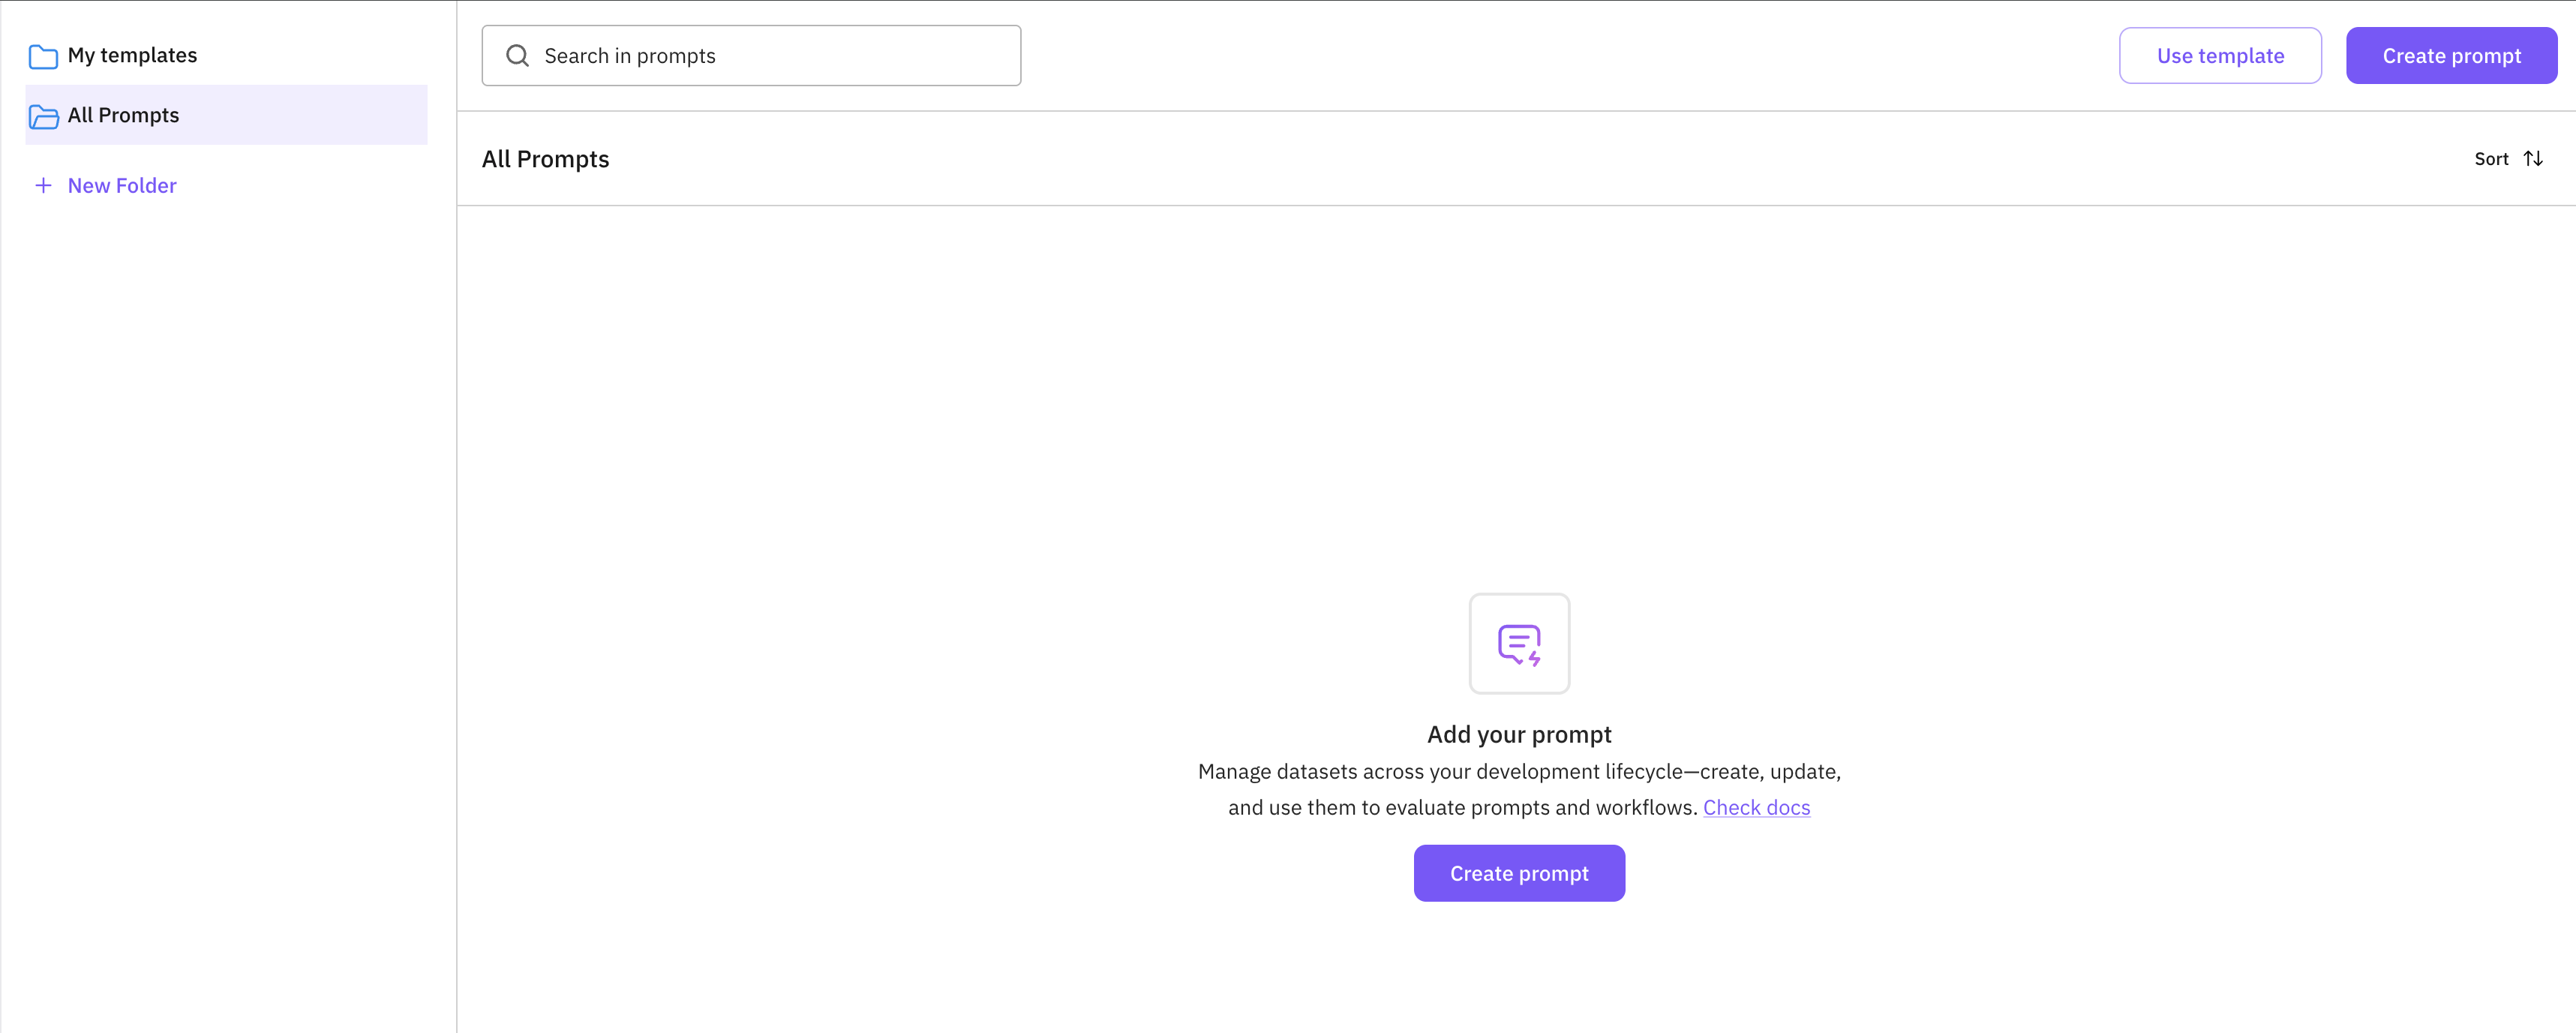
Create a New Prompt
Once in the Prompts section, click on the “Create prompt” button located on the right side of the screen. This will open a modal dialog with prompt creation options.
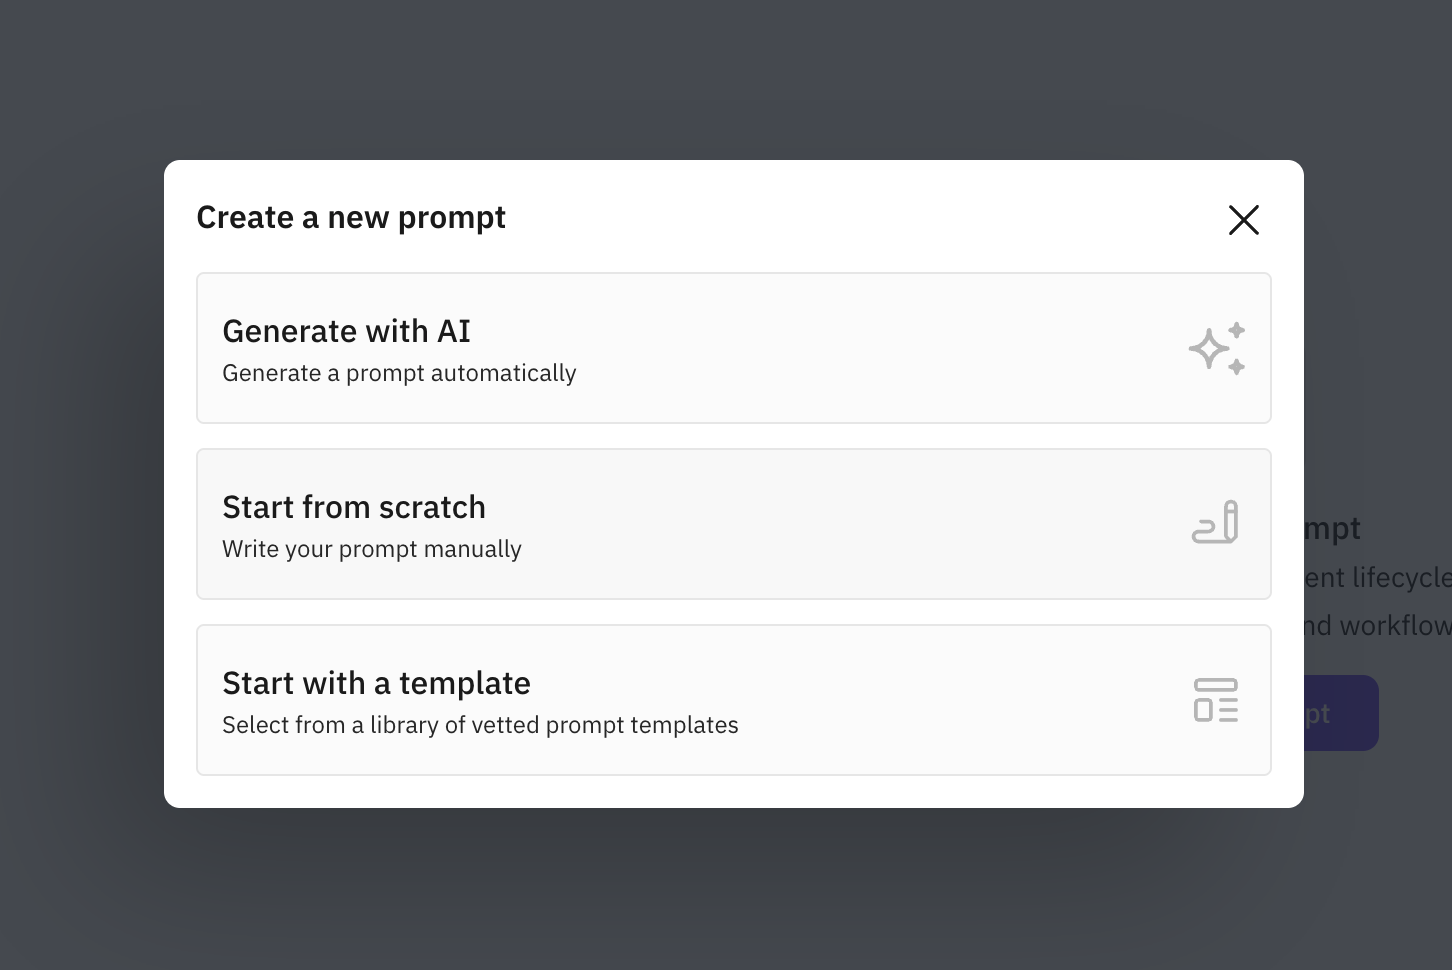
In the “Create a new prompt” modal, you have three options:
- Generate with AI: Automatically generate a prompt using AI
- Start from scratch: Create a prompt manually
- Start with a template: Use a pre-made template
For this guide, select “Start from scratch” to create your prompt manually.
Configure your prompt
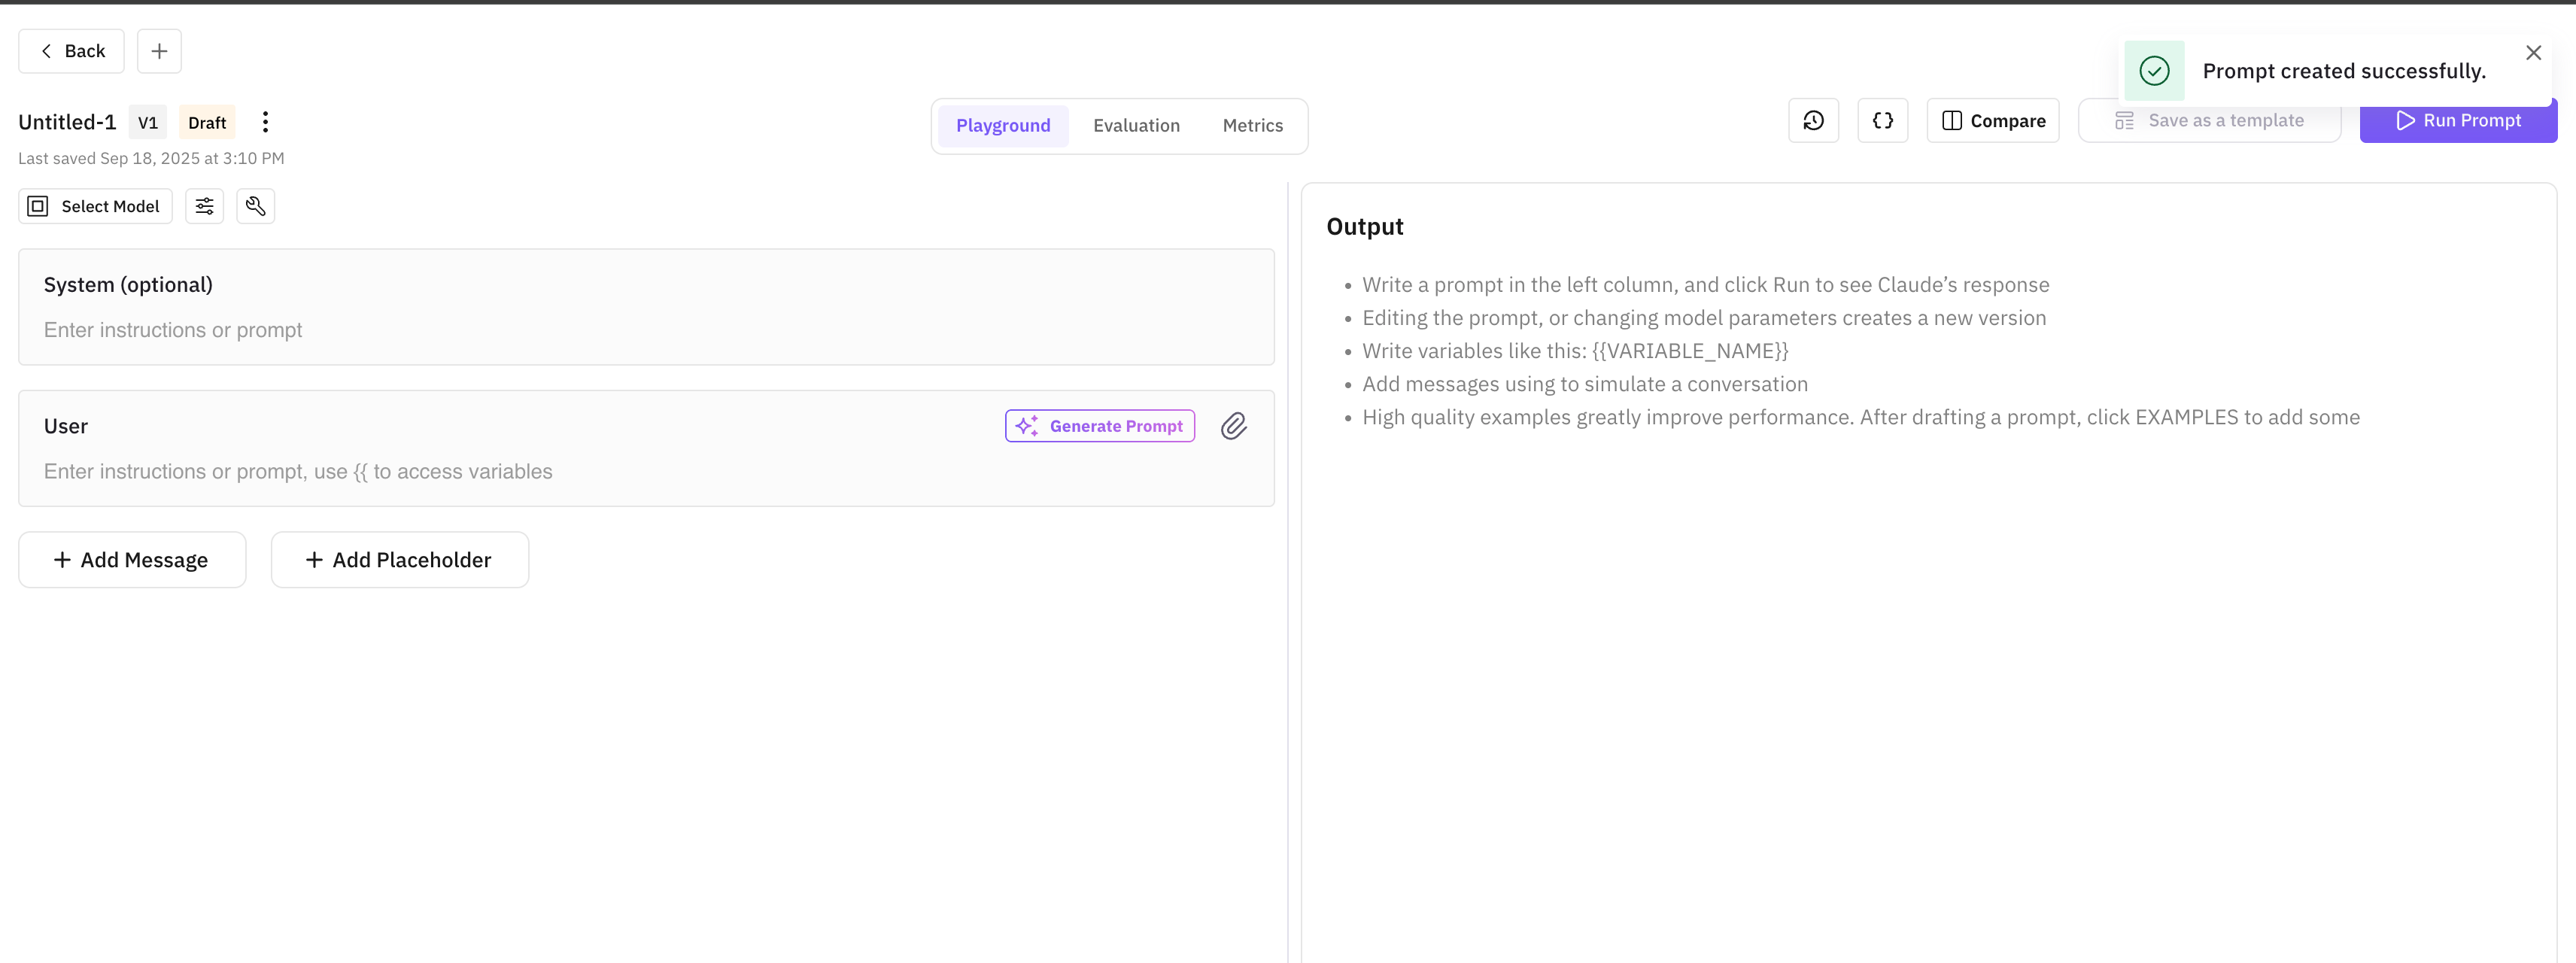
Now you’ll be taken to the prompt editor interface where you can configure various aspects of your prompt:
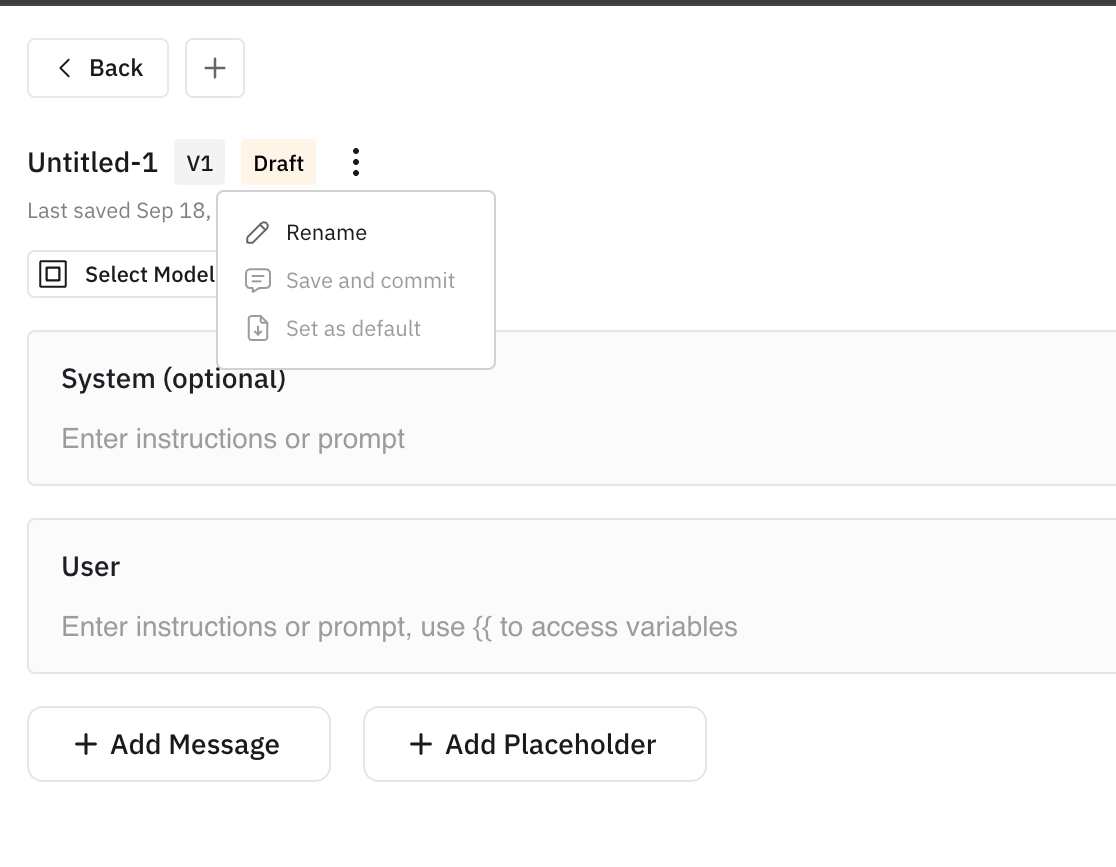
- Rename your prompt: By default, your prompt will be named “Untitled-1”. To rename it, click on the title and enter a more descriptive name that reflects the purpose of the prompt.
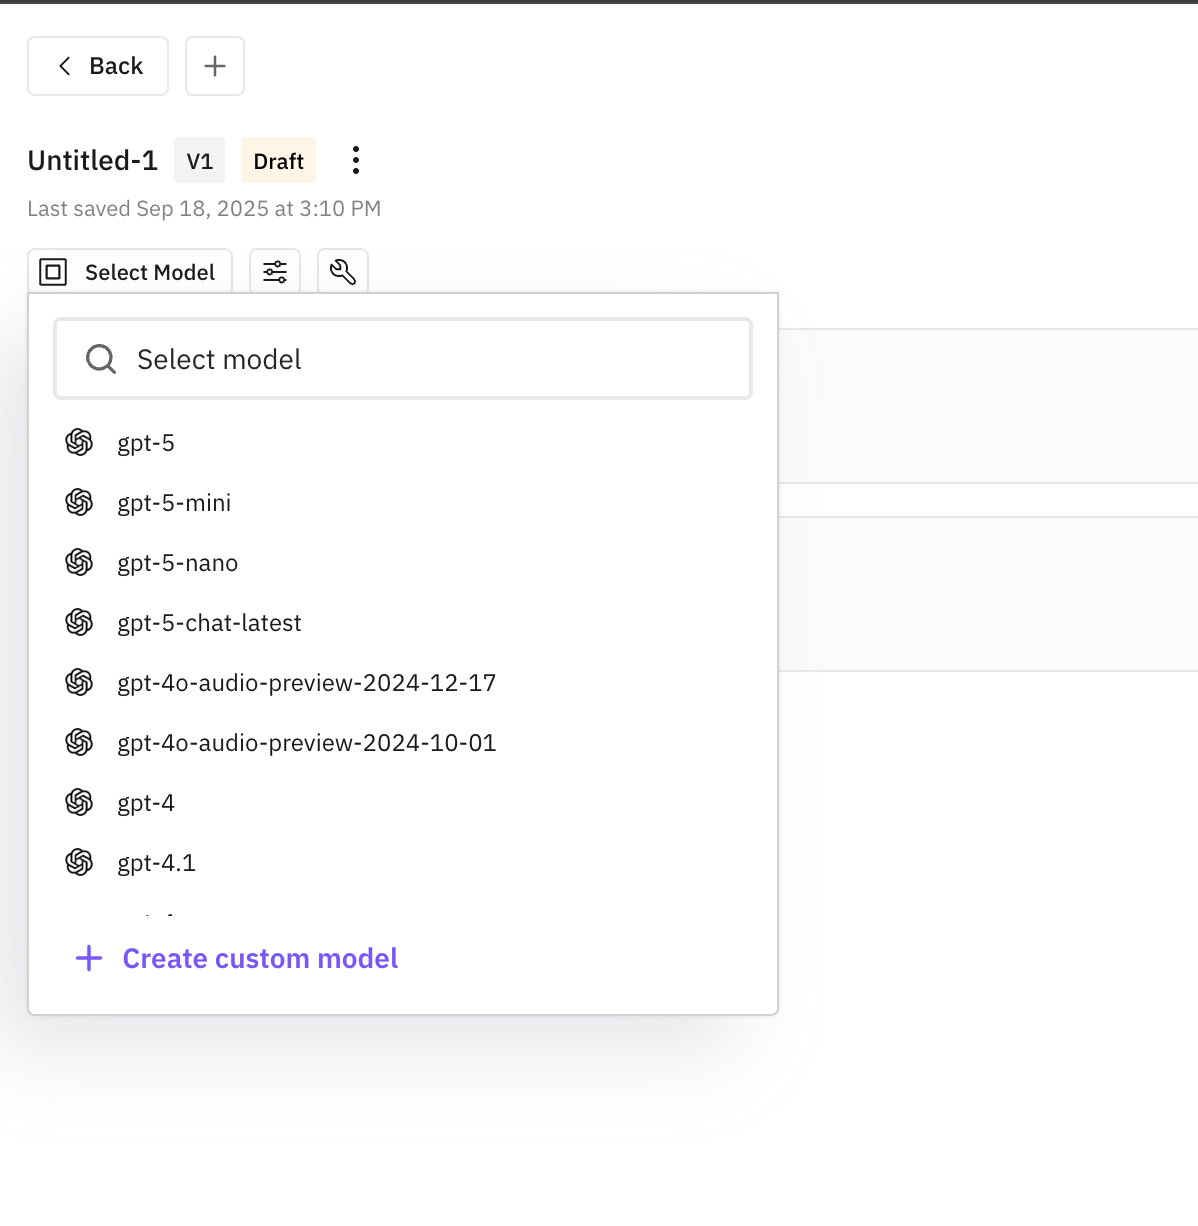
- Choose a model: Click on “Select Model” to choose which AI model you want to use for your prompt. Future AGI offers various models with different capabilities.
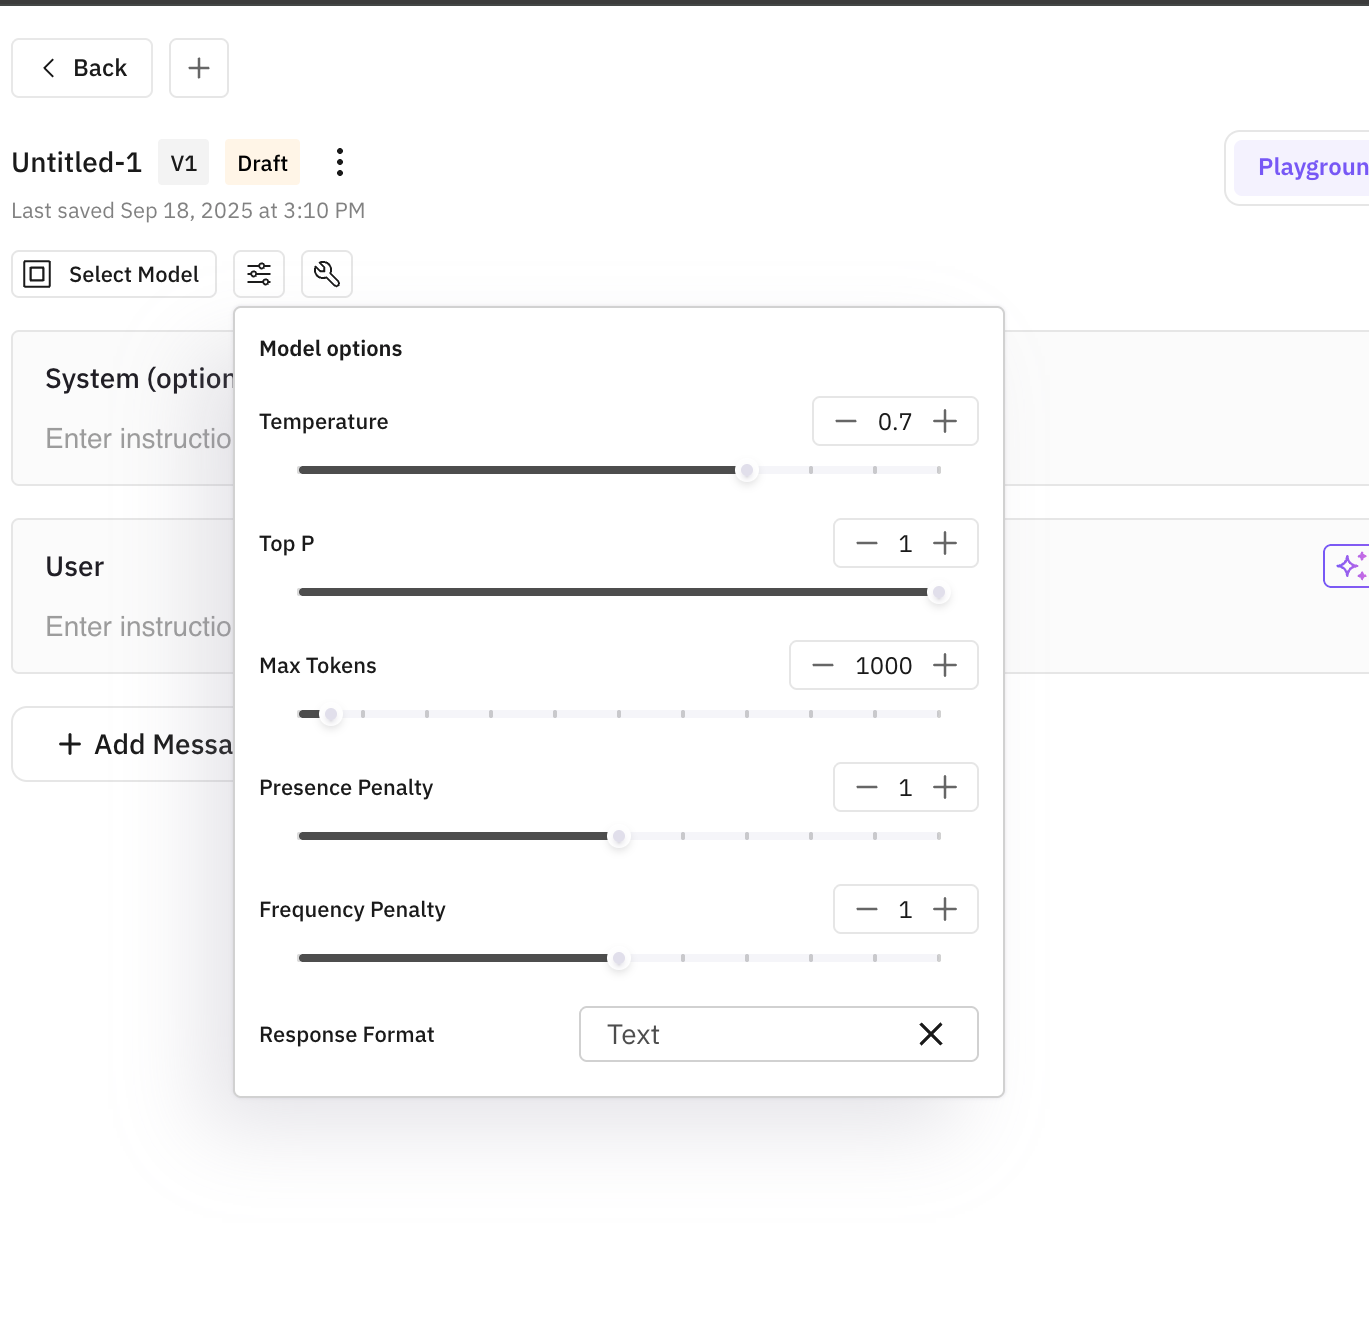
- Configure model parameters: After selecting a model, you can adjust its parameters to fine-tune the AI’s behavior:
- Temperature: Controls randomness (higher values = more creative, lower values = more deterministic)
- Top P: Influences token selection diversity
- Max Tokens: Sets the maximum length of the response
- Presence Penalty: Reduces repetition by penalizing tokens based on their presence
- Frequency Penalty: Reduces repetition by penalizing tokens based on their frequency
- Response Format: Choose the output format (e.g. Text)
Adjust these parameters to get the desired behavior from your AI model.
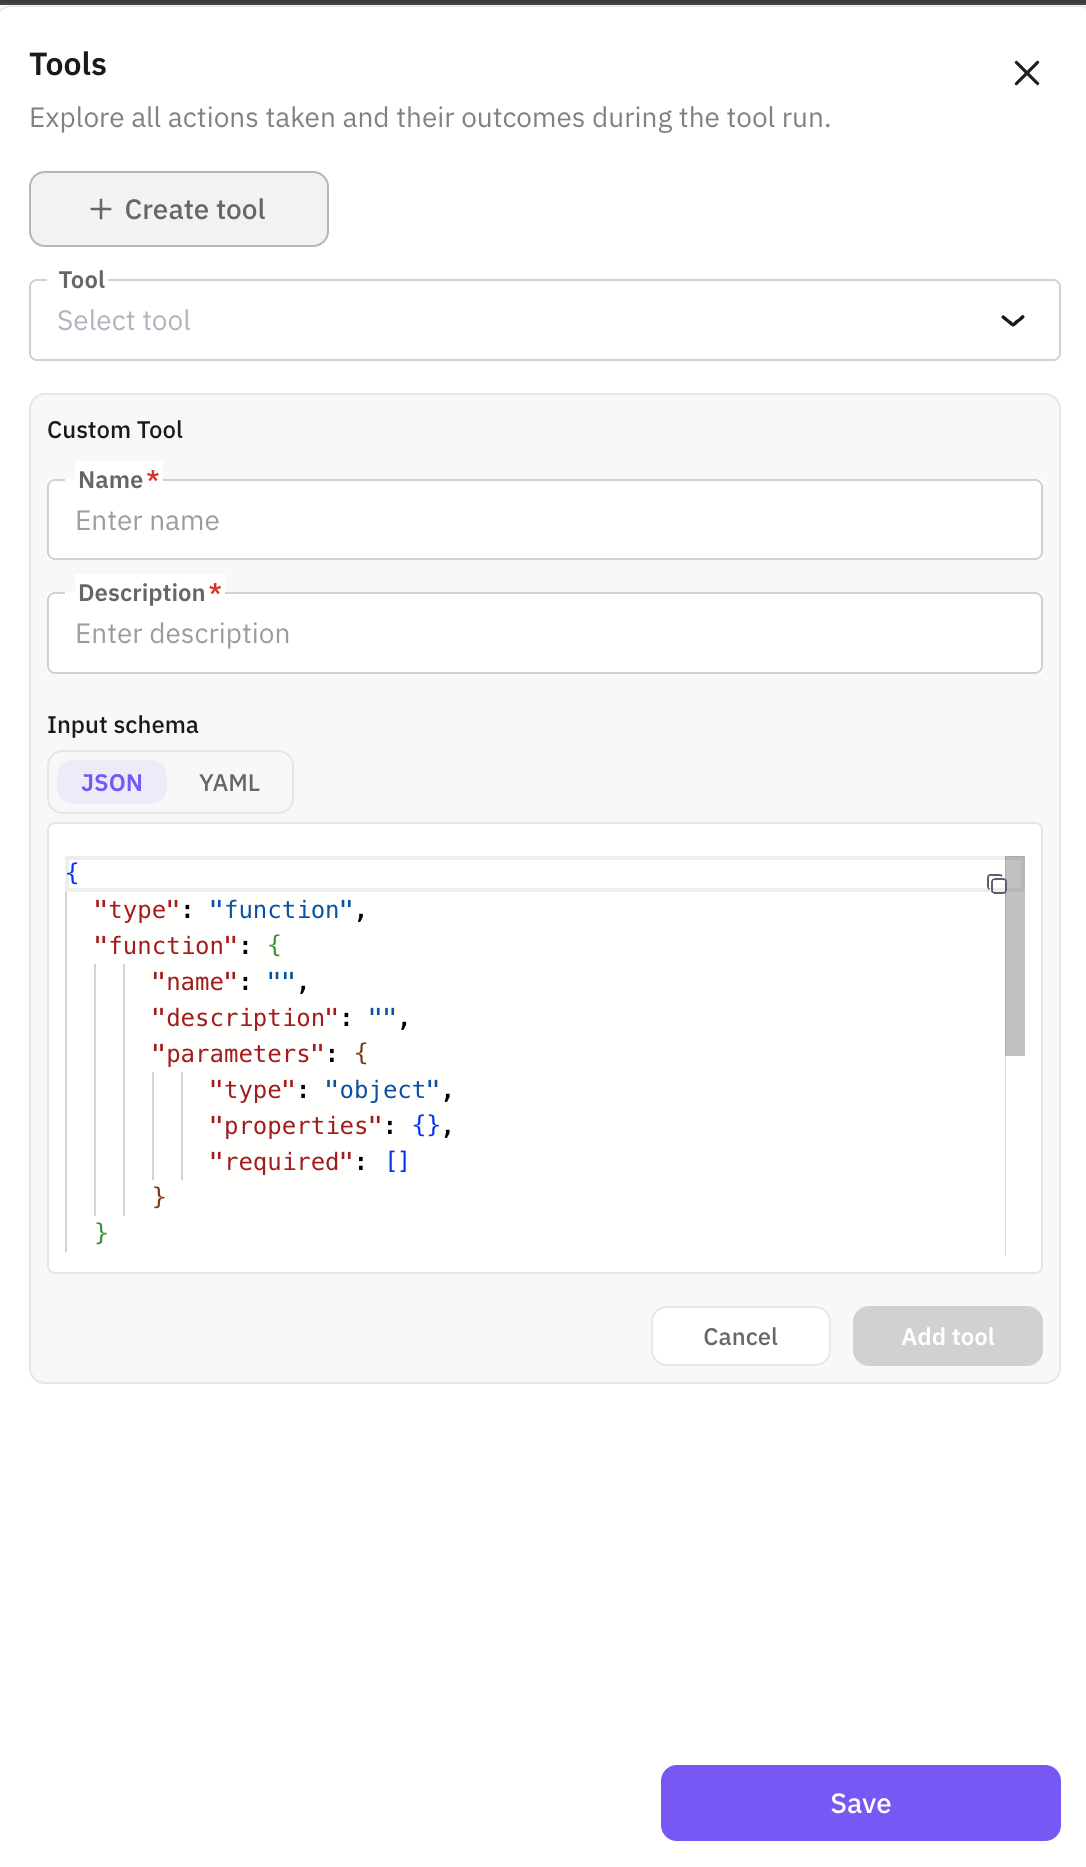
- Add tools (optional): You can enhance your prompt by adding tools that give the AI additional capabilities. To add tools:
- Click on the “Tools” tab in the right panel
- Click “Create tool” to add a new tool
- Configure the tool with a name, description, and input schema
Tools allow your prompt to perform specific actions or access external data sources.
Write and run your prompt
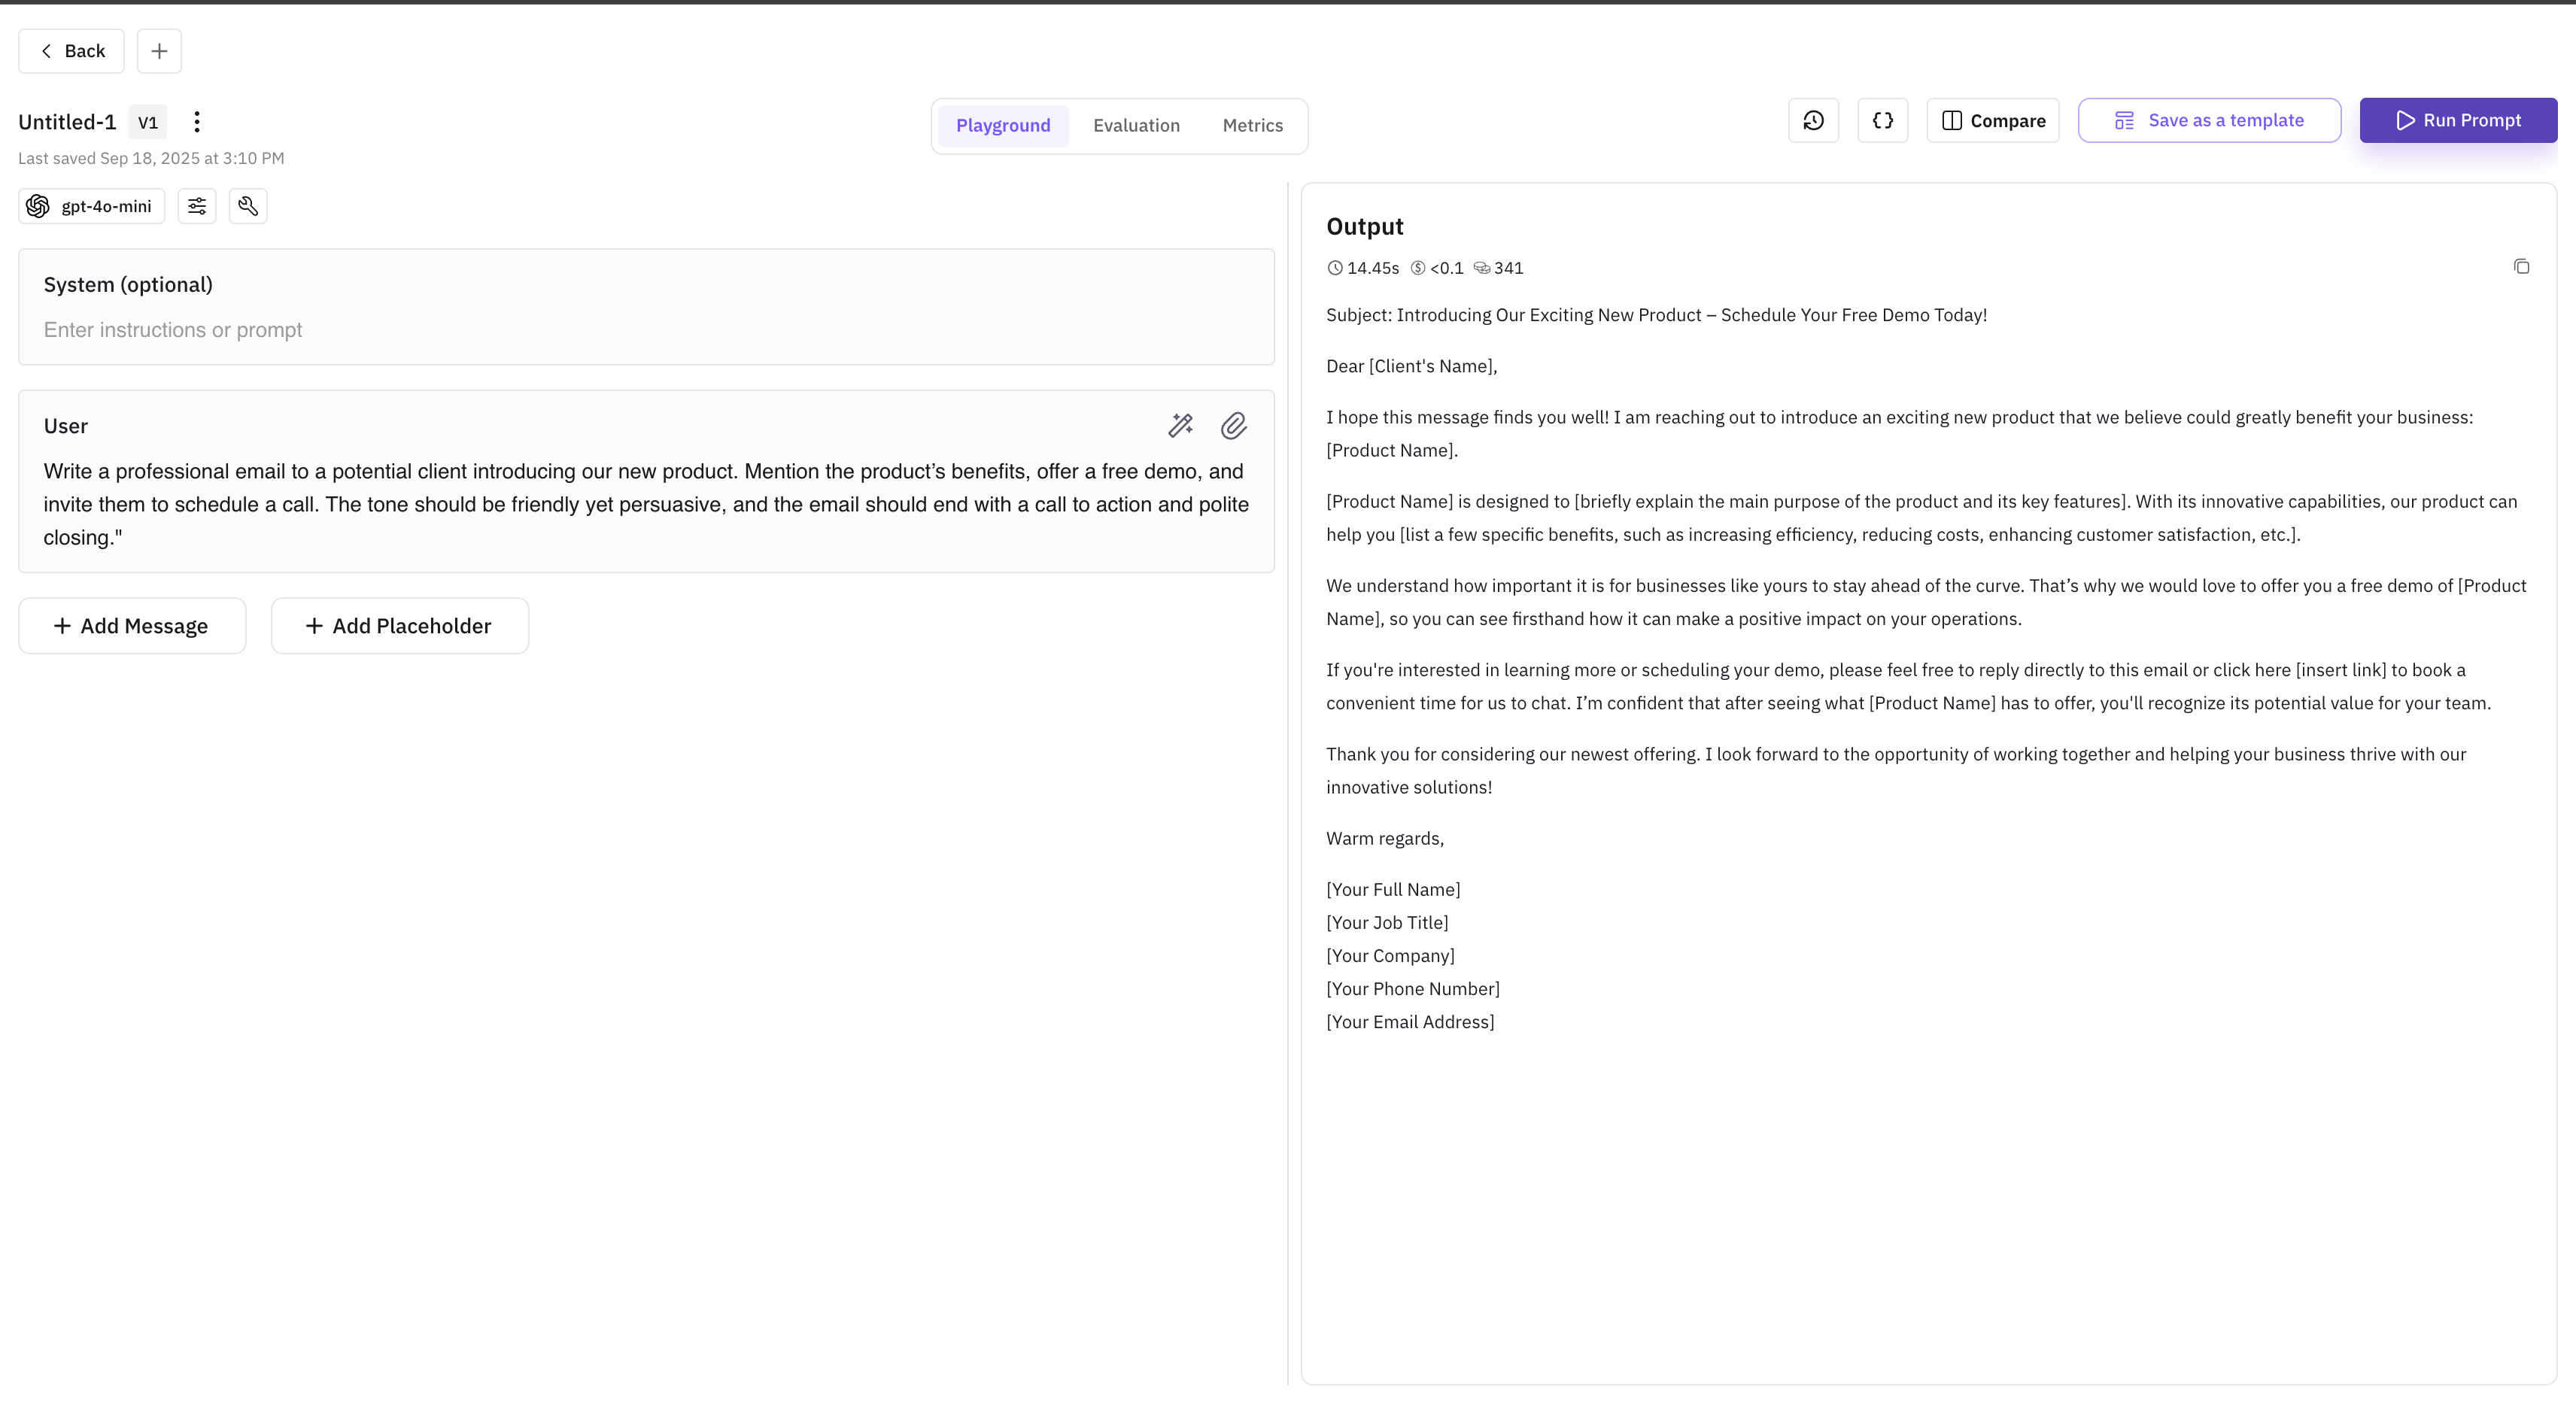
In the prompt editor, you’ll see two main text areas:
- System (optional): Here you can provide system-level instructions that guide the overall behavior of the AI.
- User: This is where you write the actual prompt that will be presented to the AI.
Write your prompt in the appropriate fields. Make it clear, specific, and include any necessary context or examples.
When you’re satisfied with your prompt, click the “Run Prompt” button in the top-right corner to execute it and see the AI’s response.
Optional next steps
After running your prompt, you can:
- Save it as a template: Save the prompt as a template for future use so you or your team can reuse it.
- Iterate and refine: Adjust the prompt or model parameters based on the responses you receive, then run again.
- Create variations: Duplicate the prompt and try different wording or settings to compare approaches.
Next Steps
Create from Template
Start from a pre-built template instead of scratch.
Create with AI
Generate a prompt from a plain-language description.
Link Prompts to Traces
Connect prompts to traces to monitor performance in production.
Prompt SDK
Fetch and use prompts programmatically from your application.
Questions & Discussion