Create an agent
Create a new agent from scratch or a template
Every agent in Agent Playground starts in the same place: a list you open from the sidebar, and a button that drops you onto a blank canvas. This guide gets a new agent onto that canvas and back out again if you ever need to delete it, nothing more.
Note
The example built up across this section is an agent called Invoice Triage. Create yours under that name so later guides line up with what’s on your screen.
Open the list and create an agent
Click Agents in the sidebar to see every agent in the workspace. Clicking anywhere on a row opens that agent, so there’s no separate open button to look for. Once there are more agents than fit on one page, use the Search box above the table to find one by name, and the pagination controls beneath it to page through the rest. If the workspace has no agents yet, the list is replaced by an empty state instead: a Create your first agent heading, the line “Break down complex tasks into sequential steps that build upon each other.” underneath, and a Start creating button in place of Create Agent. It opens the same empty canvas.
Click Create Agent in the top right to start a new one. You land straight on an empty builder canvas for a brand-new agent. That agent already exists as an empty draft the moment the canvas opens.
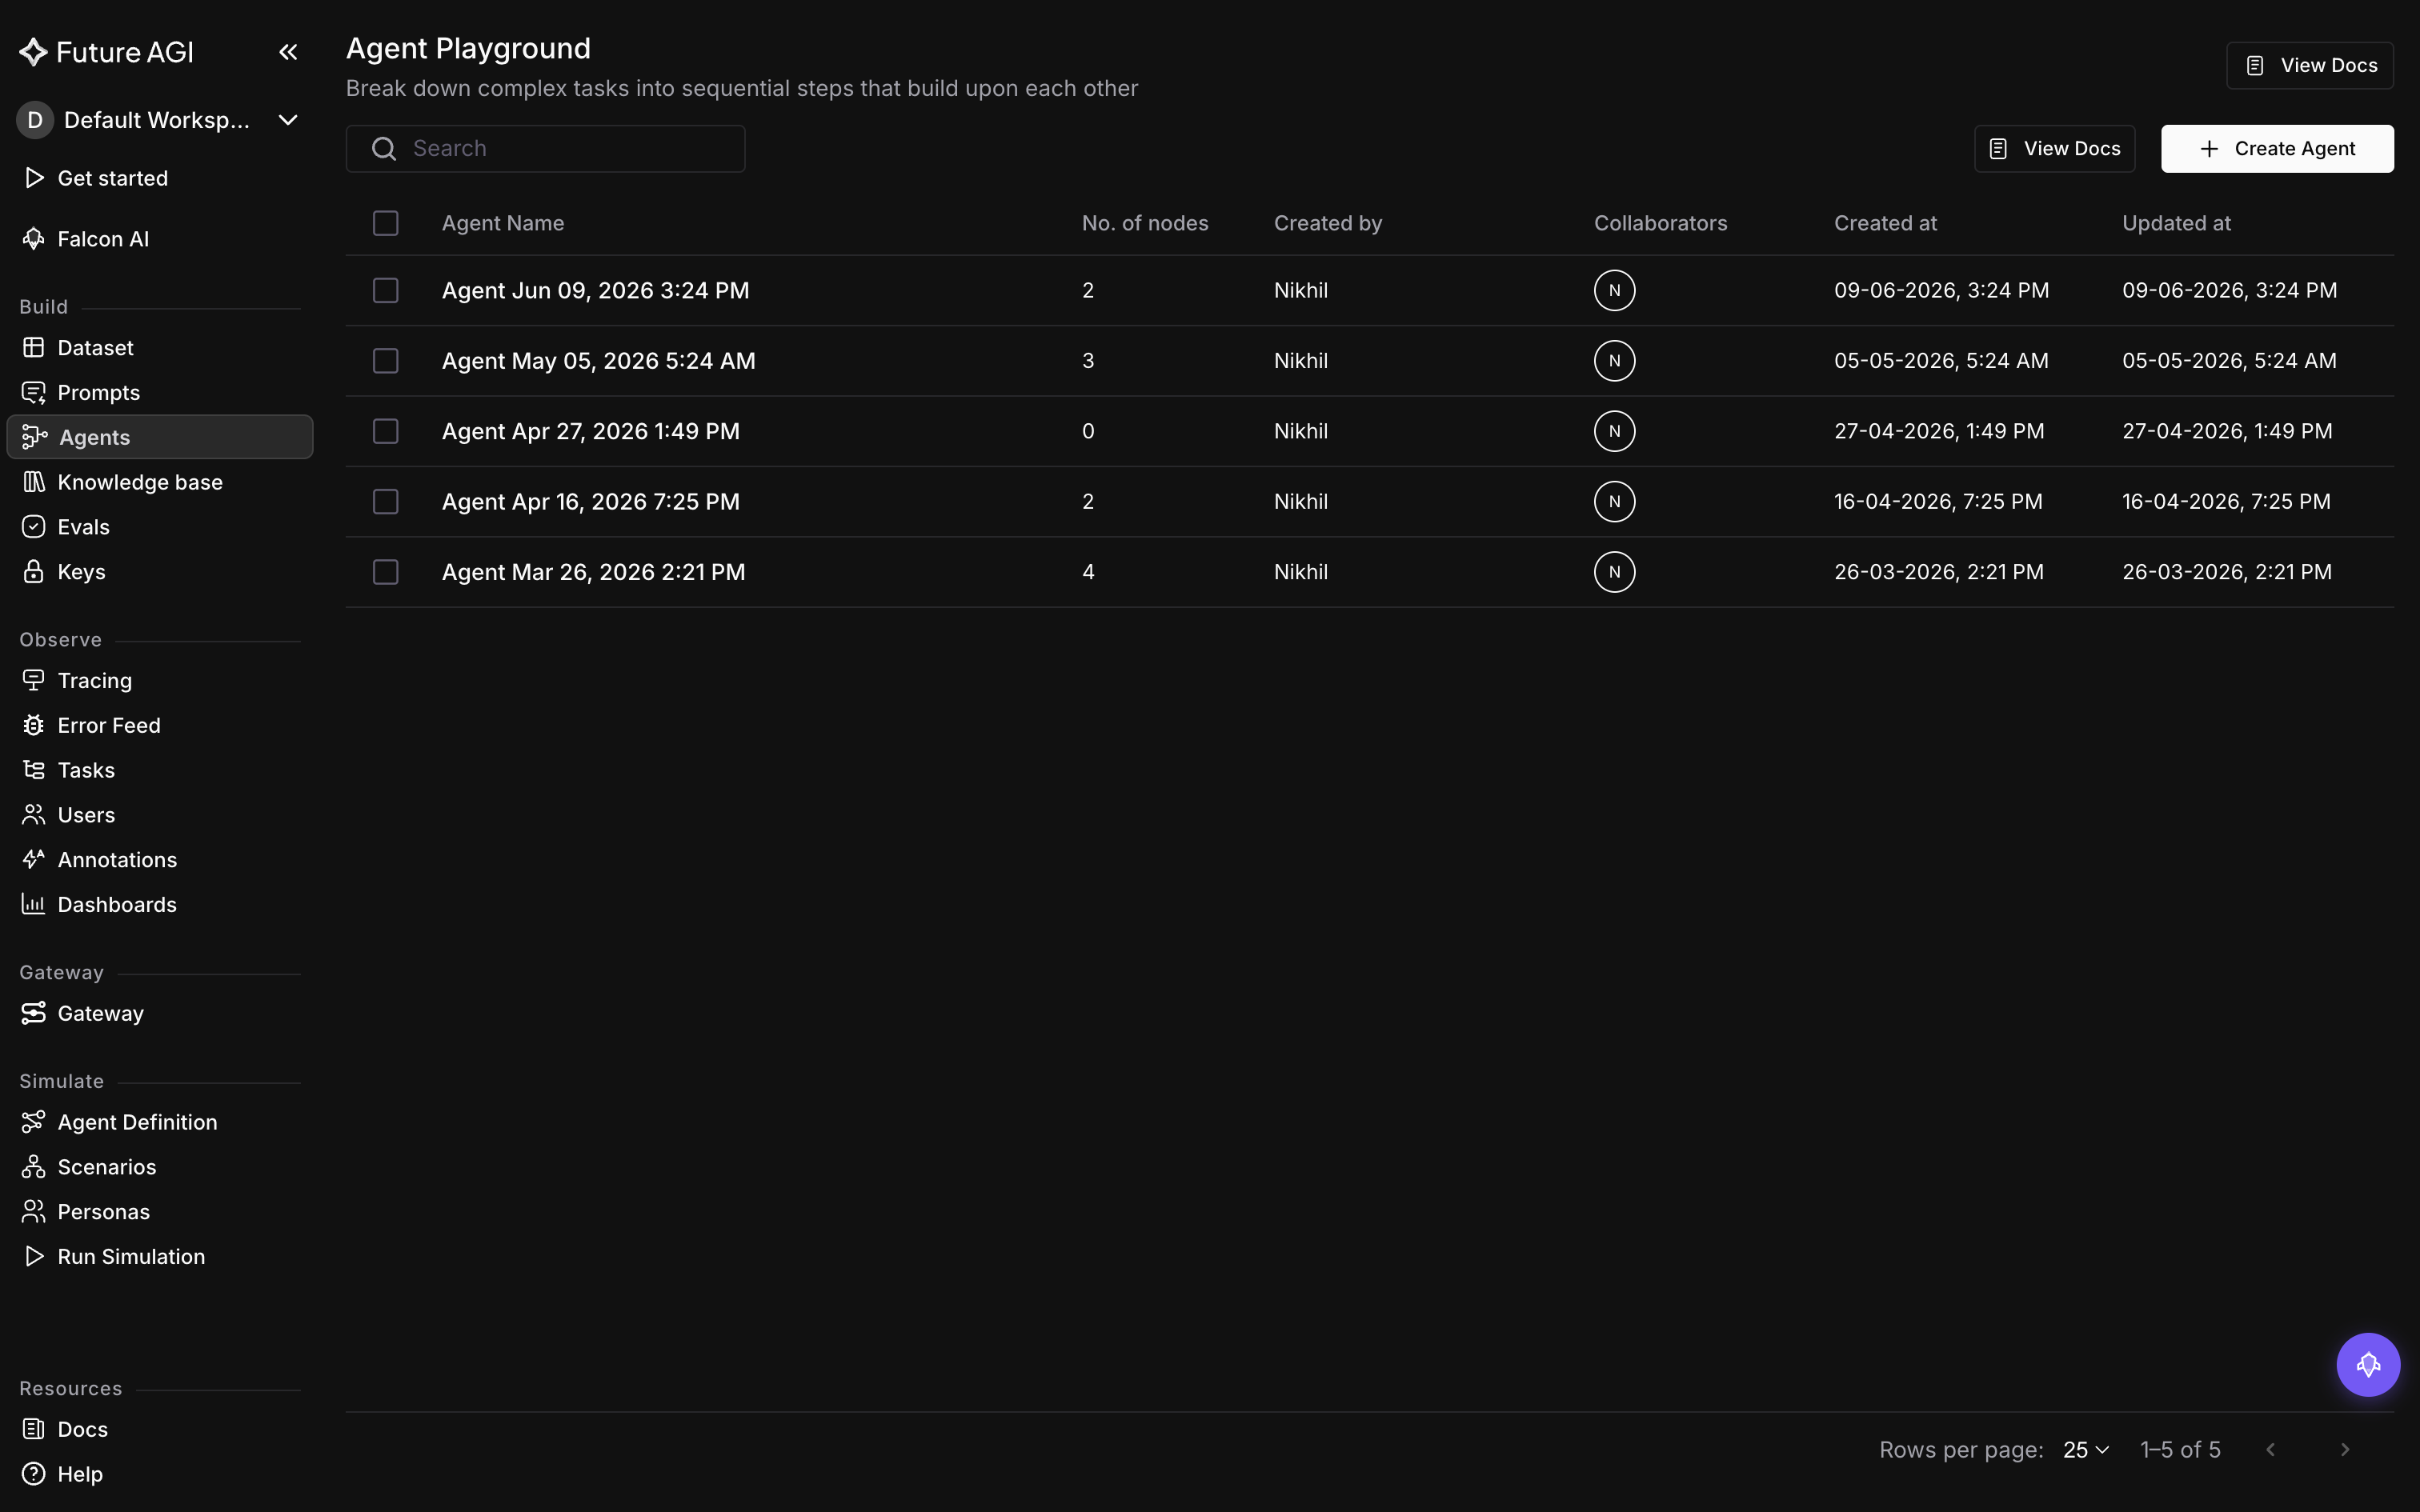
An agent you never renamed keeps its generated timestamp name, which is what the No. of nodes column is for: it’s the only thing in the row that tells you how much is in there
Note
If Create Agent or, later, Delete looks greyed out, hover it: a tooltip explains why, either You don't have permission to create agents. or You don't have permission to delete agents.
Name your agent
The new agent already has a name at the top of the canvas, auto-generated from the timestamp, like Agent Aug 11, 2026 4:52 PM. Click the edit icon next to it, type Invoice Triage, and press Enter to save it before you start building.
Choose how to start
The canvas offers two ways to build the same agent: node by node, or from a template.
Build node by node
Click Add first node to open the node picker and start building the canvas yourself.
Start from a template
Use the or start from a template link instead to open a drawer titled Agent Templates, with a Search templates box at the top for finding one by name. A template is the quicker start when your agent fits a common use case like writing, coding, or research. Pick one and it loads a ready-made agent onto the canvas in place of the empty one, then continue from Build a workflow to keep building on what it gave you.
Note
A Stop control appears while a template is loading; using it warns that stopping now will erase your progress and restart the setup.
Remove agents you no longer need
Back in the agent list, tick the checkbox on one or more rows. The header above the list swaps to a count of how many you’ve picked, like 3 Selected, with Delete and Cancel next to it.
Press Delete, and a confirmation dialog titled Delete agents asks Are you sure you want to delete 3 agents?. Click Delete to remove them for good, or Cancel to back out and keep them.
Deleting an agent fails when another agent’s node still references one of its versions: the error names both the agent you tried to delete and the agent whose node depends on it. Open that referencing agent, find the node pointing to the version you’re trying to remove, and repoint or delete that node first. See Versions & execution for more on how those references work.
Dive deeper
Questions & Discussion