Scenarios
Scenarios defines the test cases, customer profiles, and conversation flows that your AI agent will encounter during simulations.
What it is
A scenario is a structured test case that simulates real-world interactions your agent will face in Simulate. Each scenario includes personas (who the customer is), situations (context and circumstances), and outcomes (expected results and success criteria). You can create scenarios manually or use automatic generation. Run tests use scenarios to drive voice or chat simulations against your agent so you can measure performance and improve over time.
Creating a scenario
Navigate to Simulate → Scenarios → Add scenario, then choose how you want to create the scenario. The platform supports four types; pick the one that fits your use case.
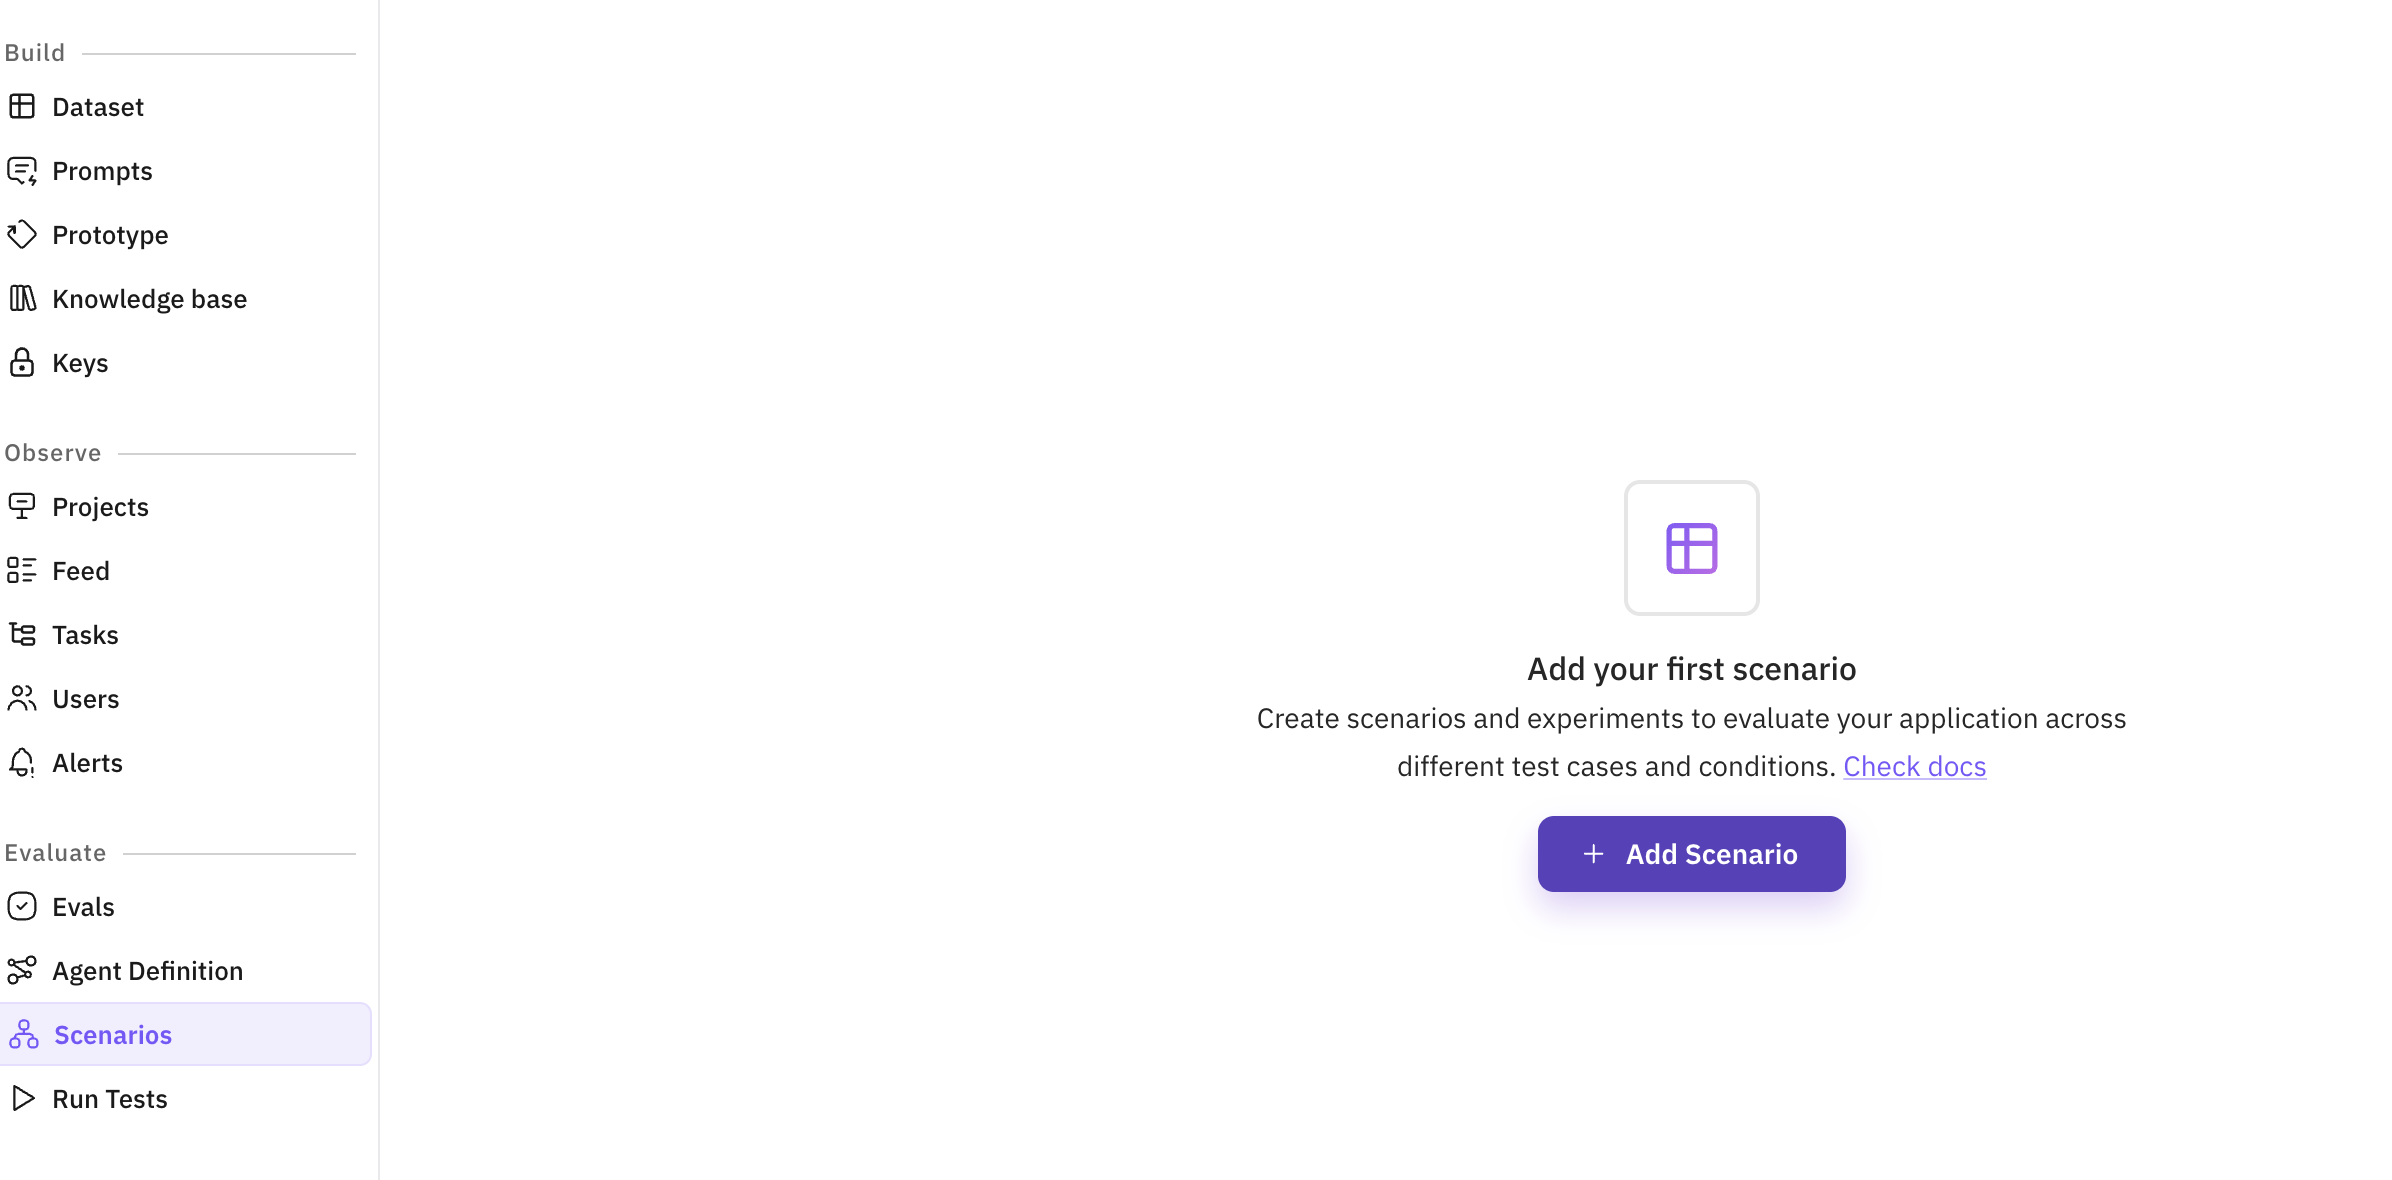
Navigate to Scenarios
In the sidebar, open Simulate and click Scenarios. You’ll see the list of existing scenarios. Click Add scenario (or equivalent) to create a new one.
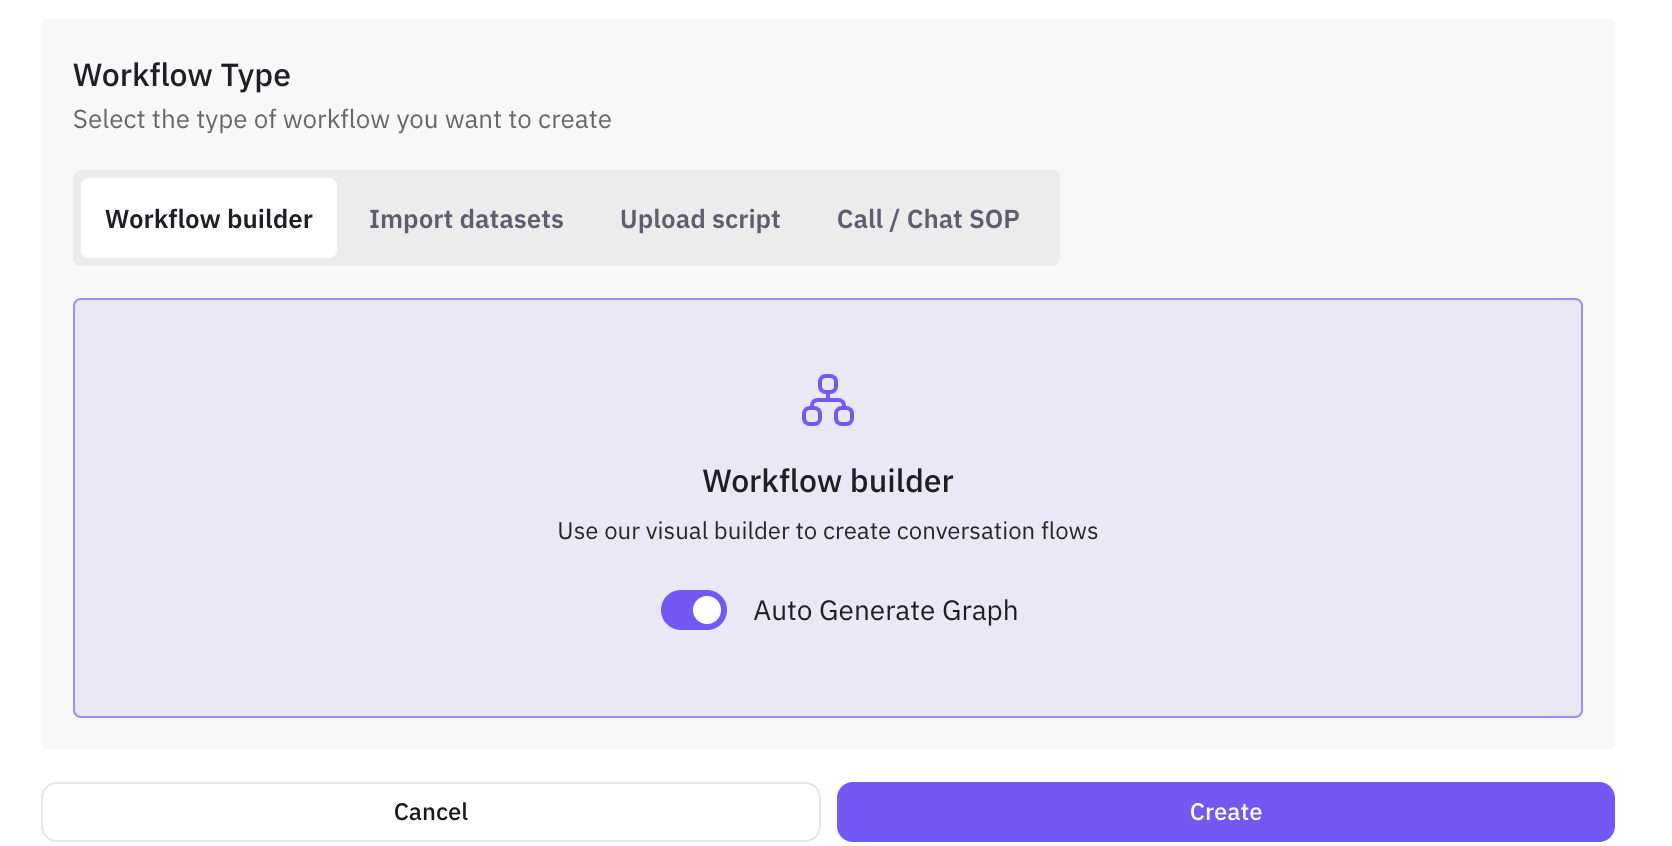
Choose scenario type
Select one of the four scenario types. Each type has a different way of defining test cases and conversation flows.

Choose your scenario type:
What it is: Build or auto-generate conversation flows with a visual graph. Best for comprehensive test suites with multiple paths and branches.
Option A – Auto-generate
Enable Auto Generate Graph
Enable Auto Generate Graph, then select Agent definition, set Number of rows, and provide a Scenario description.
Generate
Click Generate. The system creates conversation paths, personas, situations, and outcomes automatically.
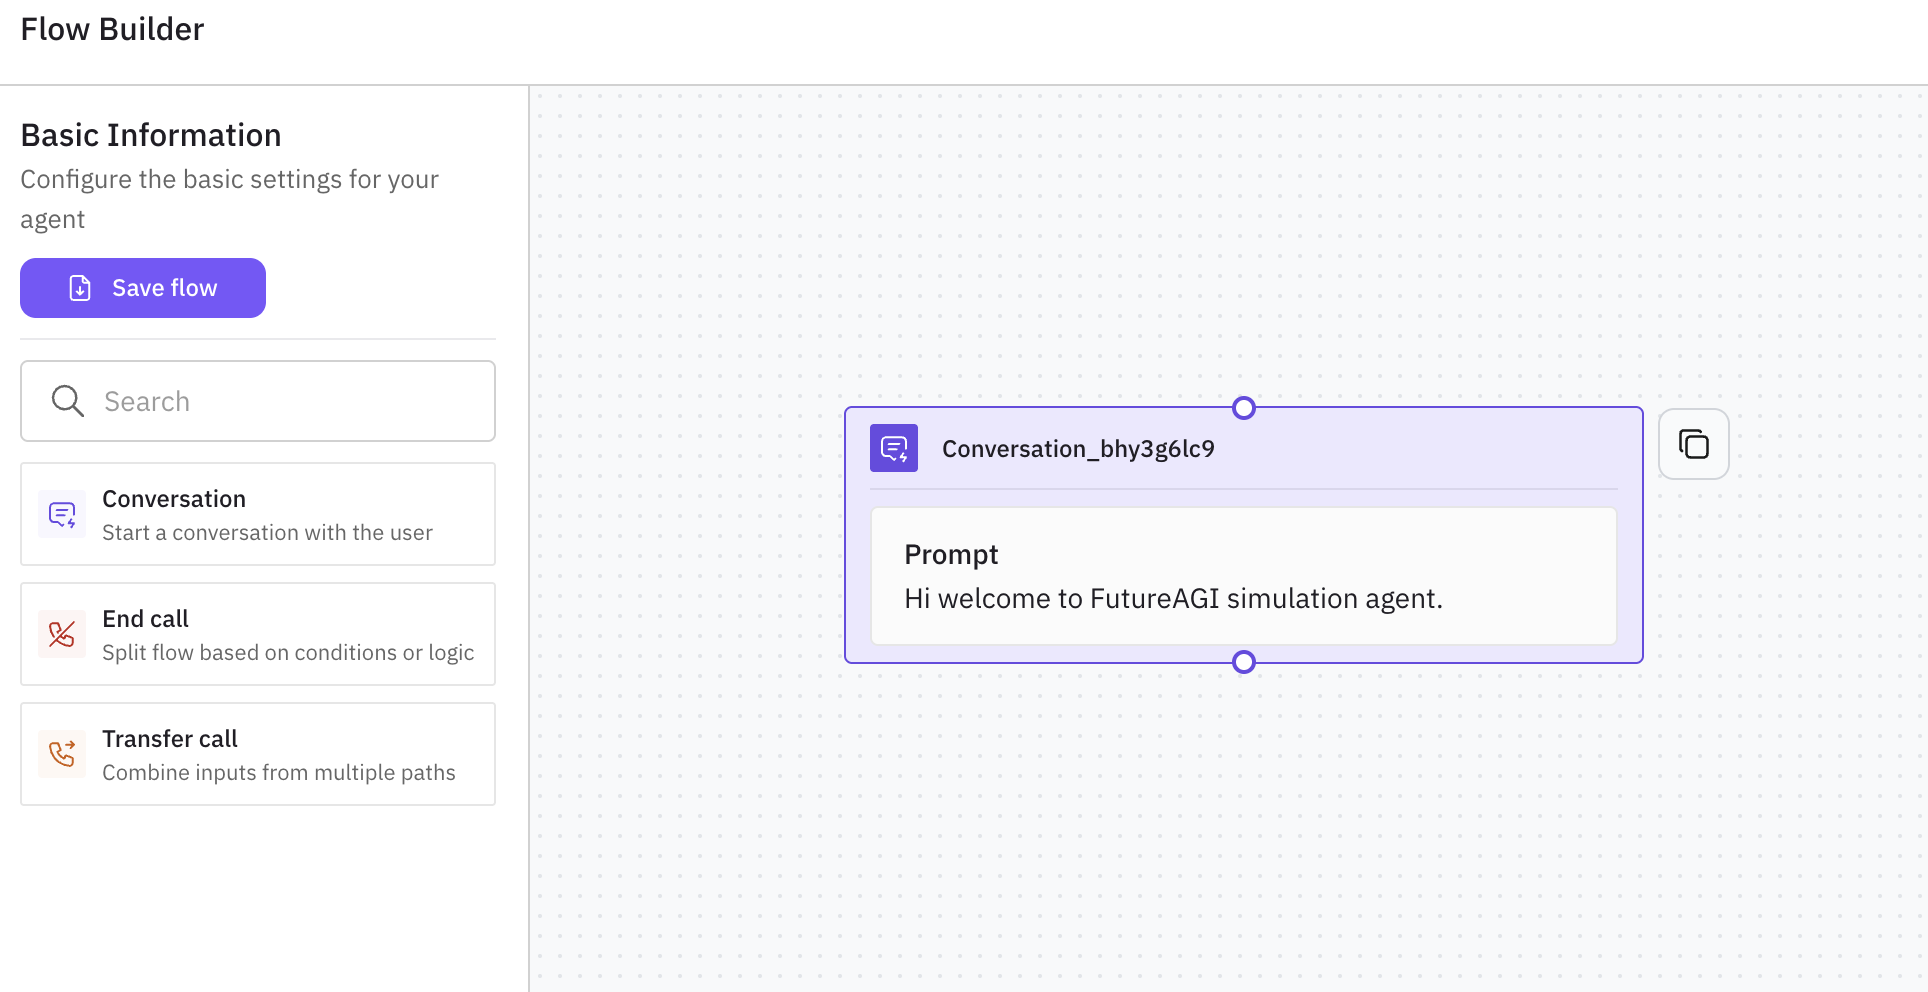
Option B – Manual graph
Add nodes
Add nodes from the palette: Conversation (purple, start/continue conversations), End call (red, end or branch), Transfer call (orange, transfer or merge paths).
Connect and configure
Connect nodes with edges, then click each node to configure prompts, messages, and conditions.
Save
Save the graph. It will be used when you run tests with this scenario.
What it is: Use a table (CSV, Excel, or synthetic data) to define many test cases. Good when you have or want structured customer profiles and variables.
Select Dataset type
Select Dataset as the scenario type.
Add data
Upload a file, use a sample dataset, or Generate synthetic data (number of records, demographics, insurance types, objection patterns, etc.).
Map columns
Map columns to scenario variables if needed. Save to create the scenario.
Tip
What it is: Paste or upload a call script (customer and agent lines). The system builds a graph and generates personas, situations, and outcomes from the script. Ideal for compliance or specific dialogue tests.
Select Upload Script
Select Upload Script (or Script) as the scenario type. Choose Agent definition, set Number of rows, and add a Scenario description.
Add script content
Paste or upload your Script content (e.g. TXT, DOCX, PDF). Use lines like Customer: … and Agent: …; you can add [EXPECTED: …] for outcomes.

Save
Save; the system parses the script into nodes and generates scenario rows.
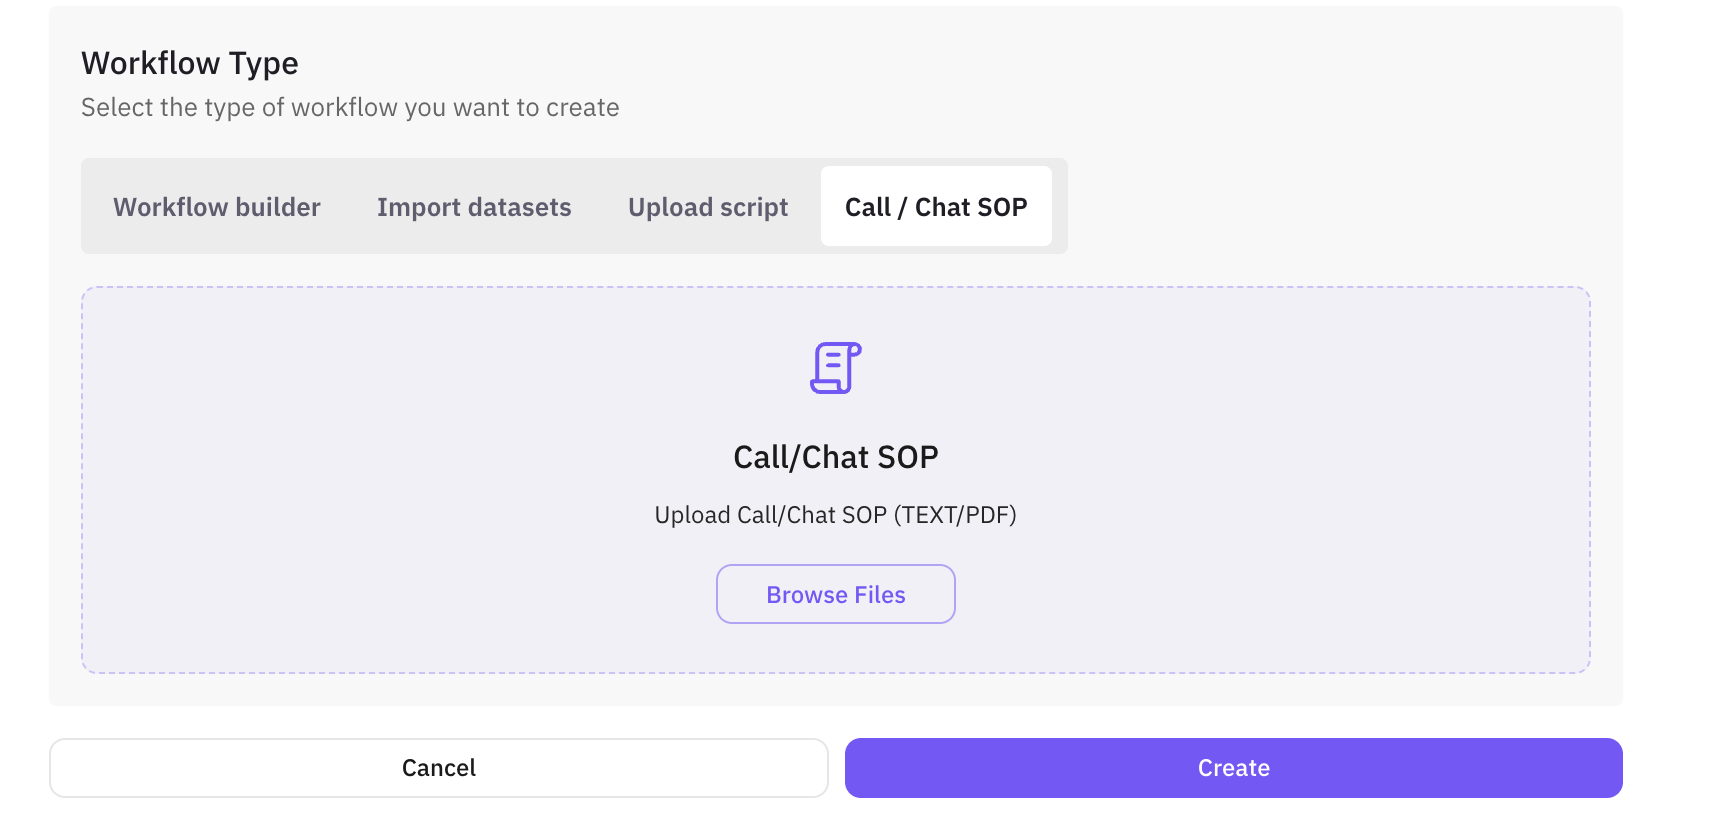
What it is: Define a Standard Operating Procedure (steps and expectations). The system turns the SOP into a graph and scenario rows. Good for consistency, compliance, and training.
Select Call / Chat SOP
Select Call / Chat SOP as the scenario type. Choose Agent definition, Number of rows, and Scenario description.
Enter SOP content
Enter SOP content as numbered steps (e.g. Greeting and verification → Incident details → Assessment and next steps).
Save
Save; the system builds the graph and scenarios from the SOP.
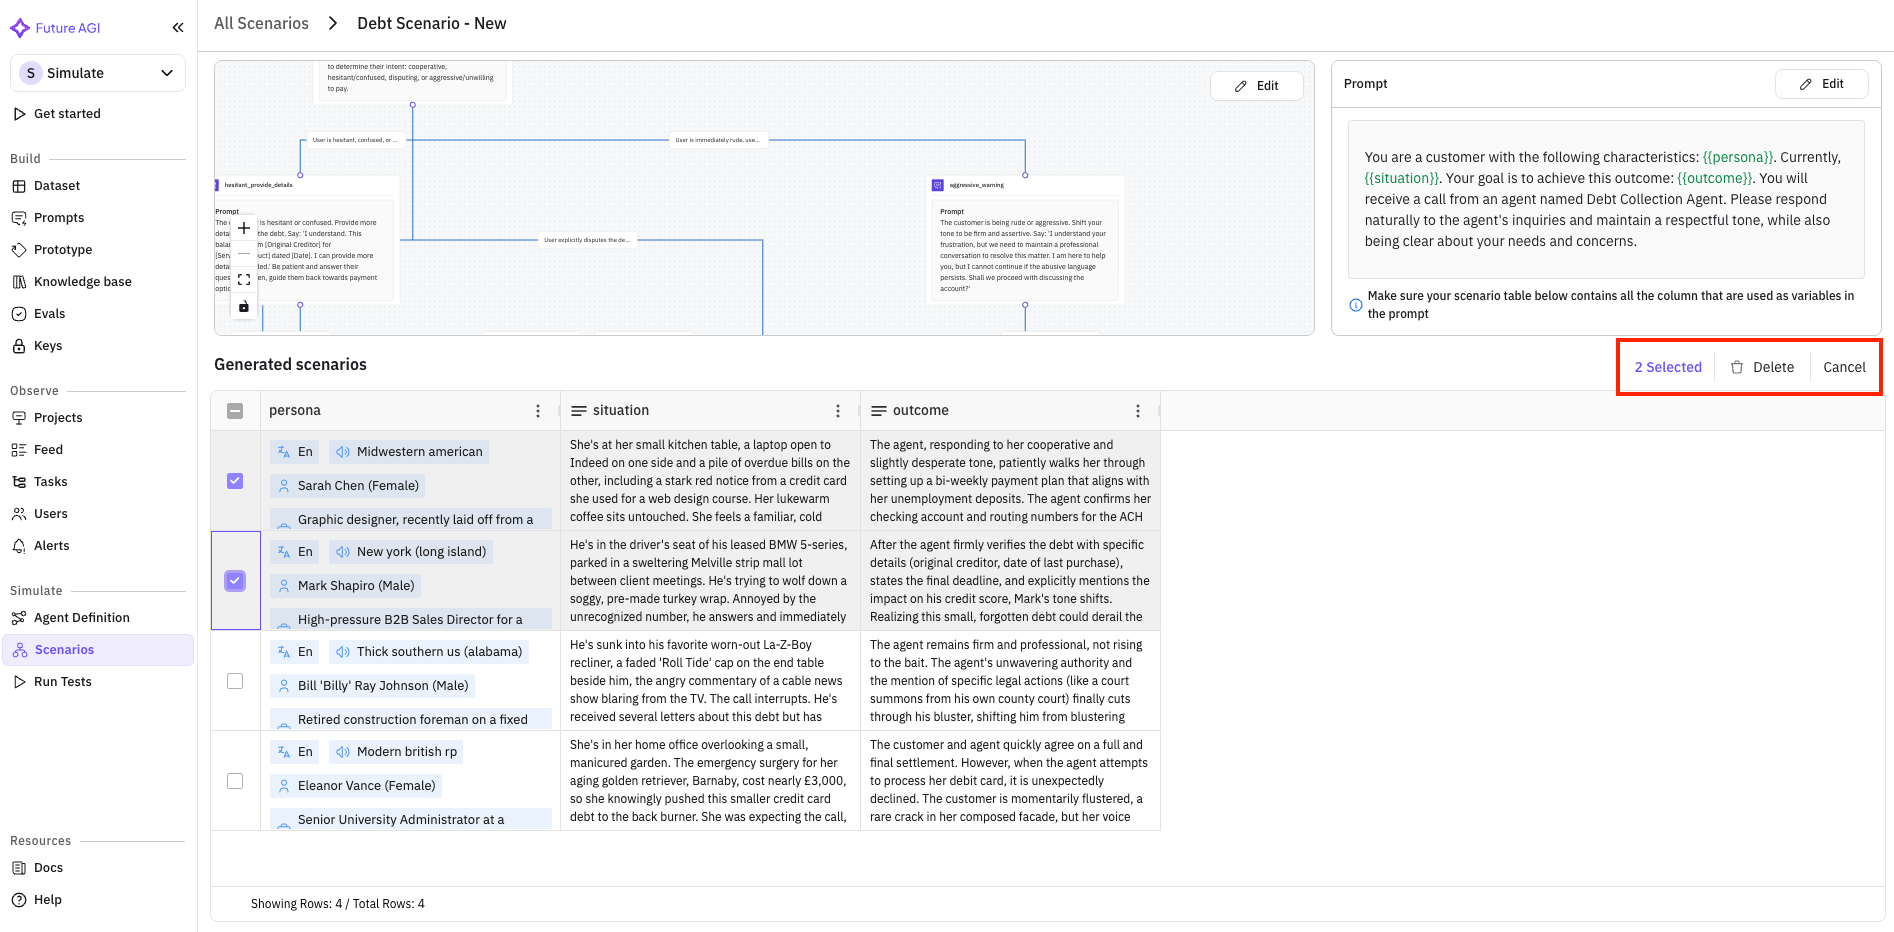
After creating: Scenario detail view
When you open a scenario from the list, you see the scenario detail screen. Here you can view the graph (if any), the scenario table, and the simulator prompt; edit the graph or prompt; and add or remove rows. Use this view to refine test cases before running tests.
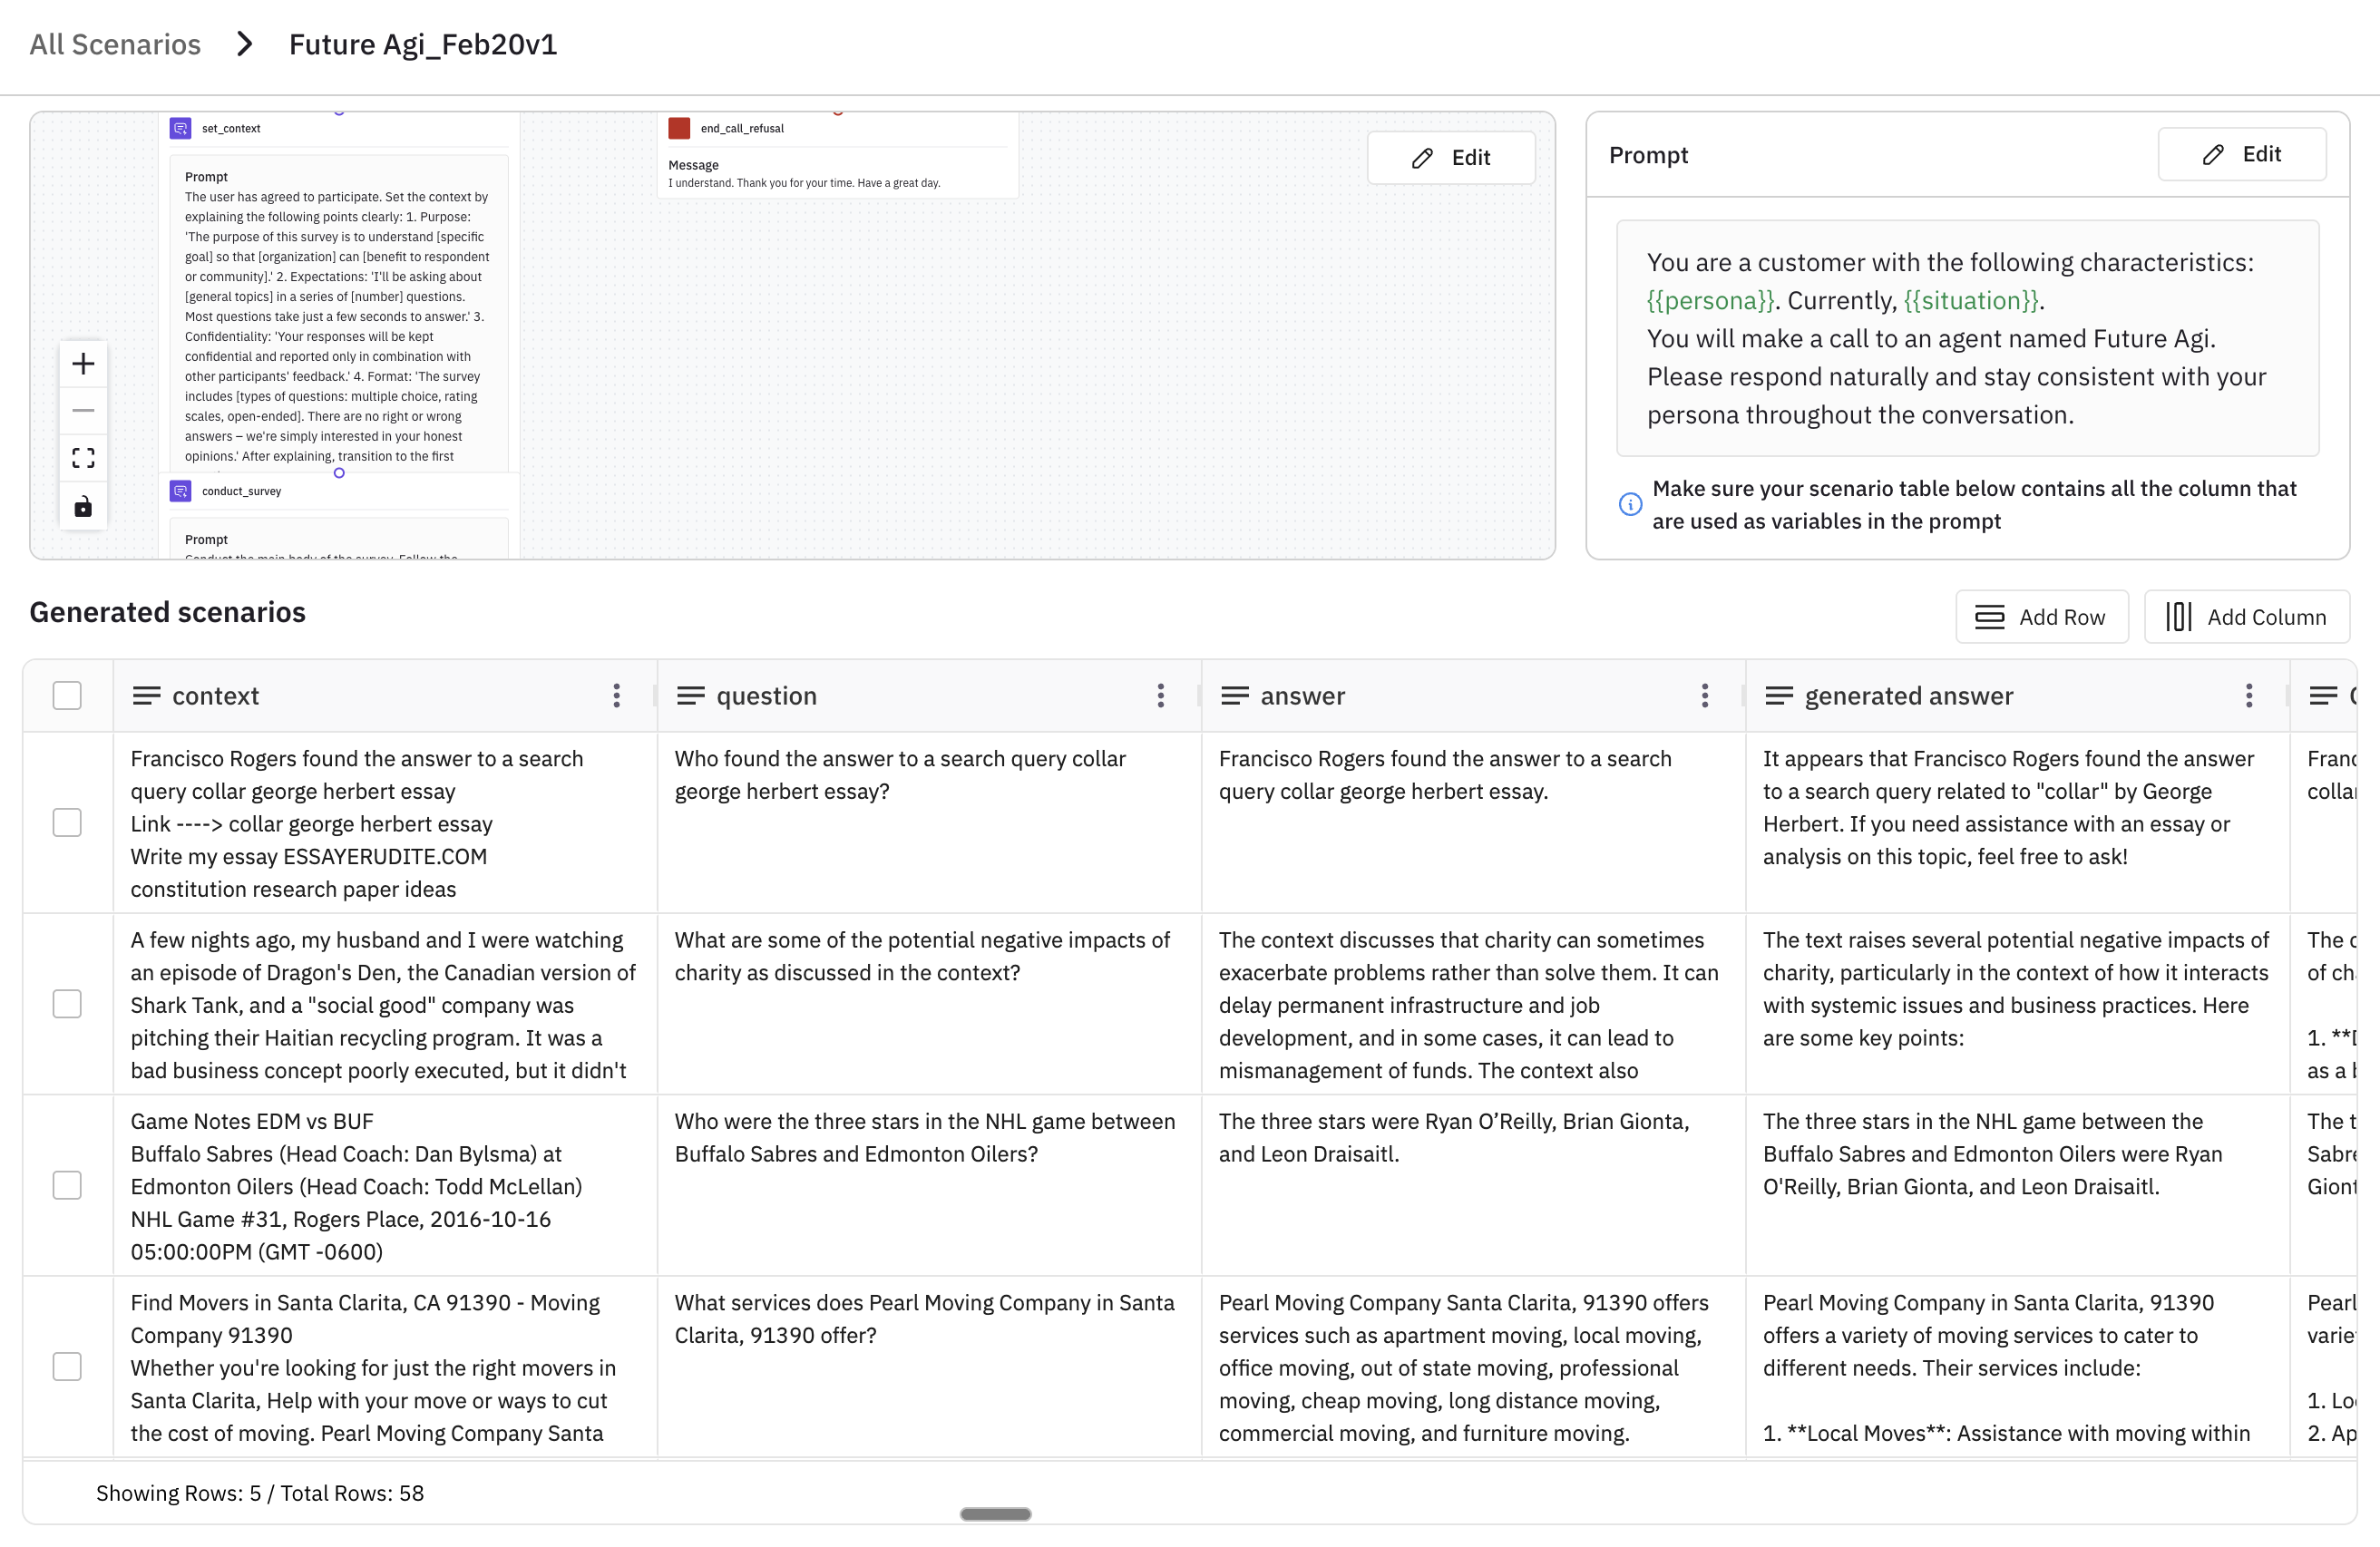
Layout:
- Scenario list / breadcrumb – Navigate back to the scenario list or switch scenarios.
- Graph (if applicable) – Visual workflow; use Edit graph to change nodes and connections.
- Scenario table – Rows = test cases; columns = variables (persona, situation, outcome, etc.). Use Add rows or delete selected rows to change the set of test cases.
- Simulator prompt – The prompt used to drive the simulator; use Edit prompt to change it and reference row columns with
{{column_name}}.
What you see: The detail view shows the graph (for workflow/script/SOP scenarios), the scenario table (all rows and columns), and the simulator prompt used when running tests. The graph summarizes the conversation flow; the table holds the concrete test cases (personas, situations, outcomes); the prompt tells the simulator how to behave and can pull values from the table via {{column_name}}.
What you can do: Use this as the home view to understand the scenario, then switch to Edit graph, Edit prompt, or Scenario table tabs to make changes.
What it is: The workflow editor for scenarios that have a graph. You can add, delete, and edit nodes and change connections between them.
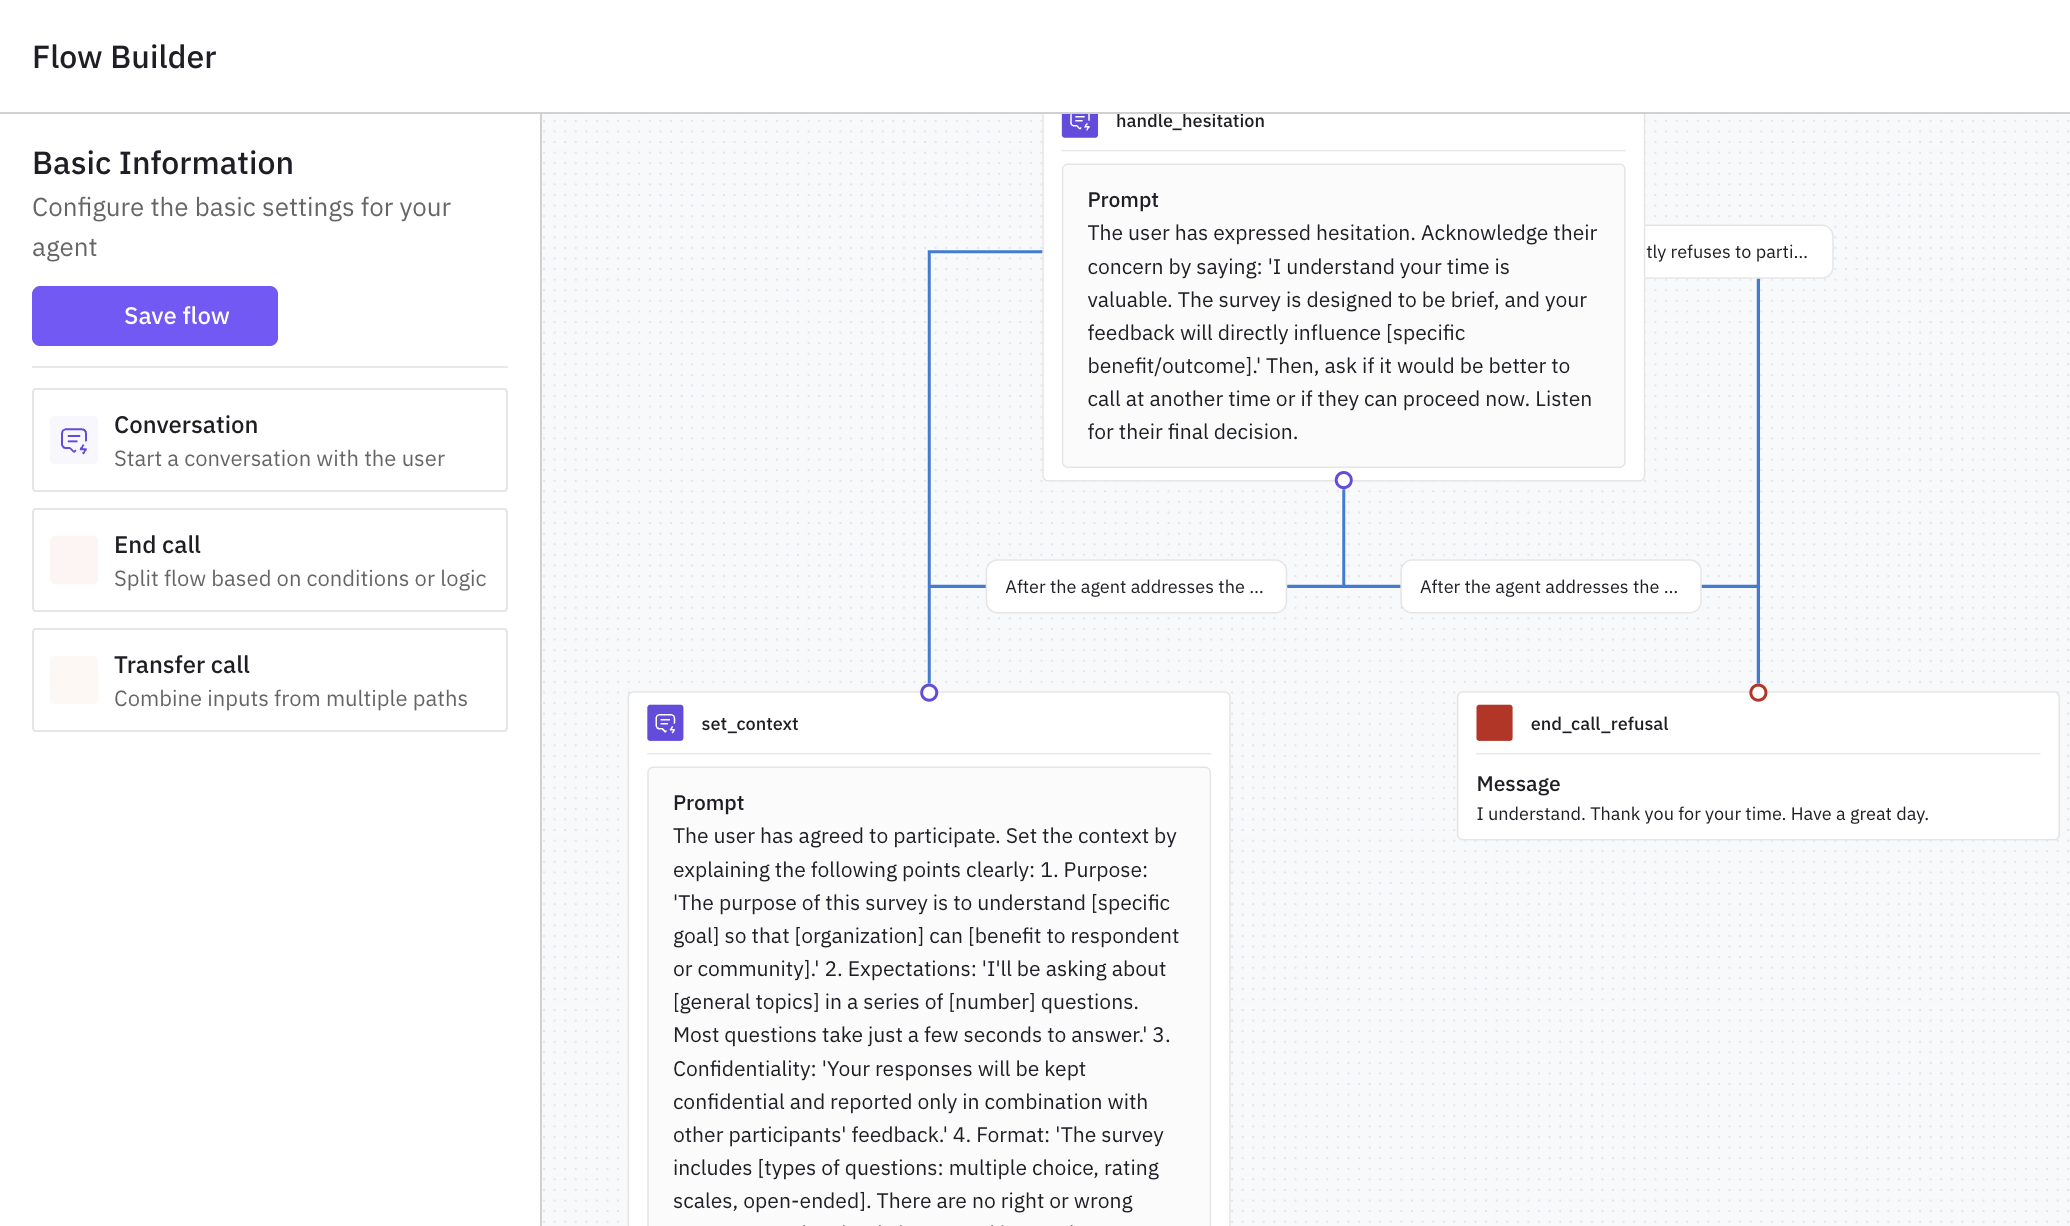
Process:
Open the editor
On the scenario detail page, click Edit graph. The interactive workflow editor opens with the current graph.
Change the graph
Add nodes from the palette (Conversation, End call, Transfer call), delete nodes you don’t need, and drag edges to connect or reconnect nodes. Click a node to edit its configuration (prompts, messages, conditions).
Save
Save your changes. The updated graph is used when you run tests with this scenario.
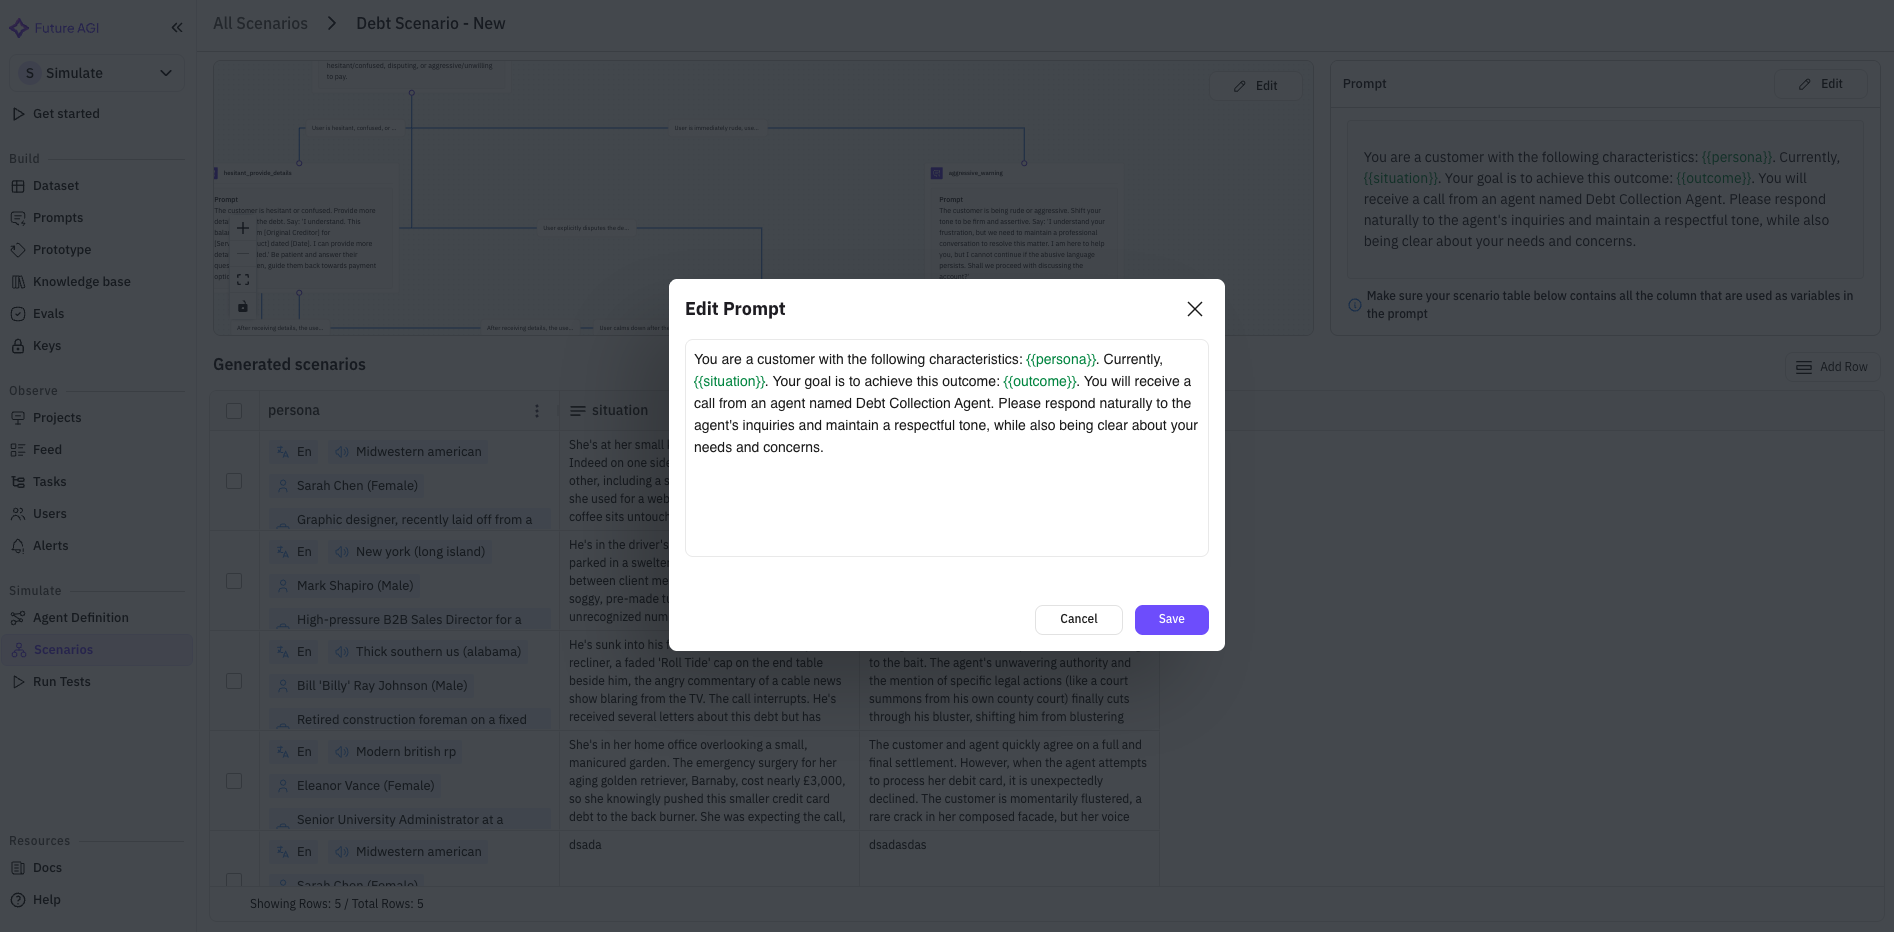
What it is: The simulator prompt controls how the simulator agent behaves during the test. You can reference scenario table columns so each row gets personalized behavior (e.g. {{customer_name}}, {{objection_type}}).
What you see: In the prompt editor, variables that match a column in the scenario table are highlighted (e.g. green = column exists; red = column missing and should be added or generated). Ensure every variable you use in the prompt exists as a column in the scenario table.
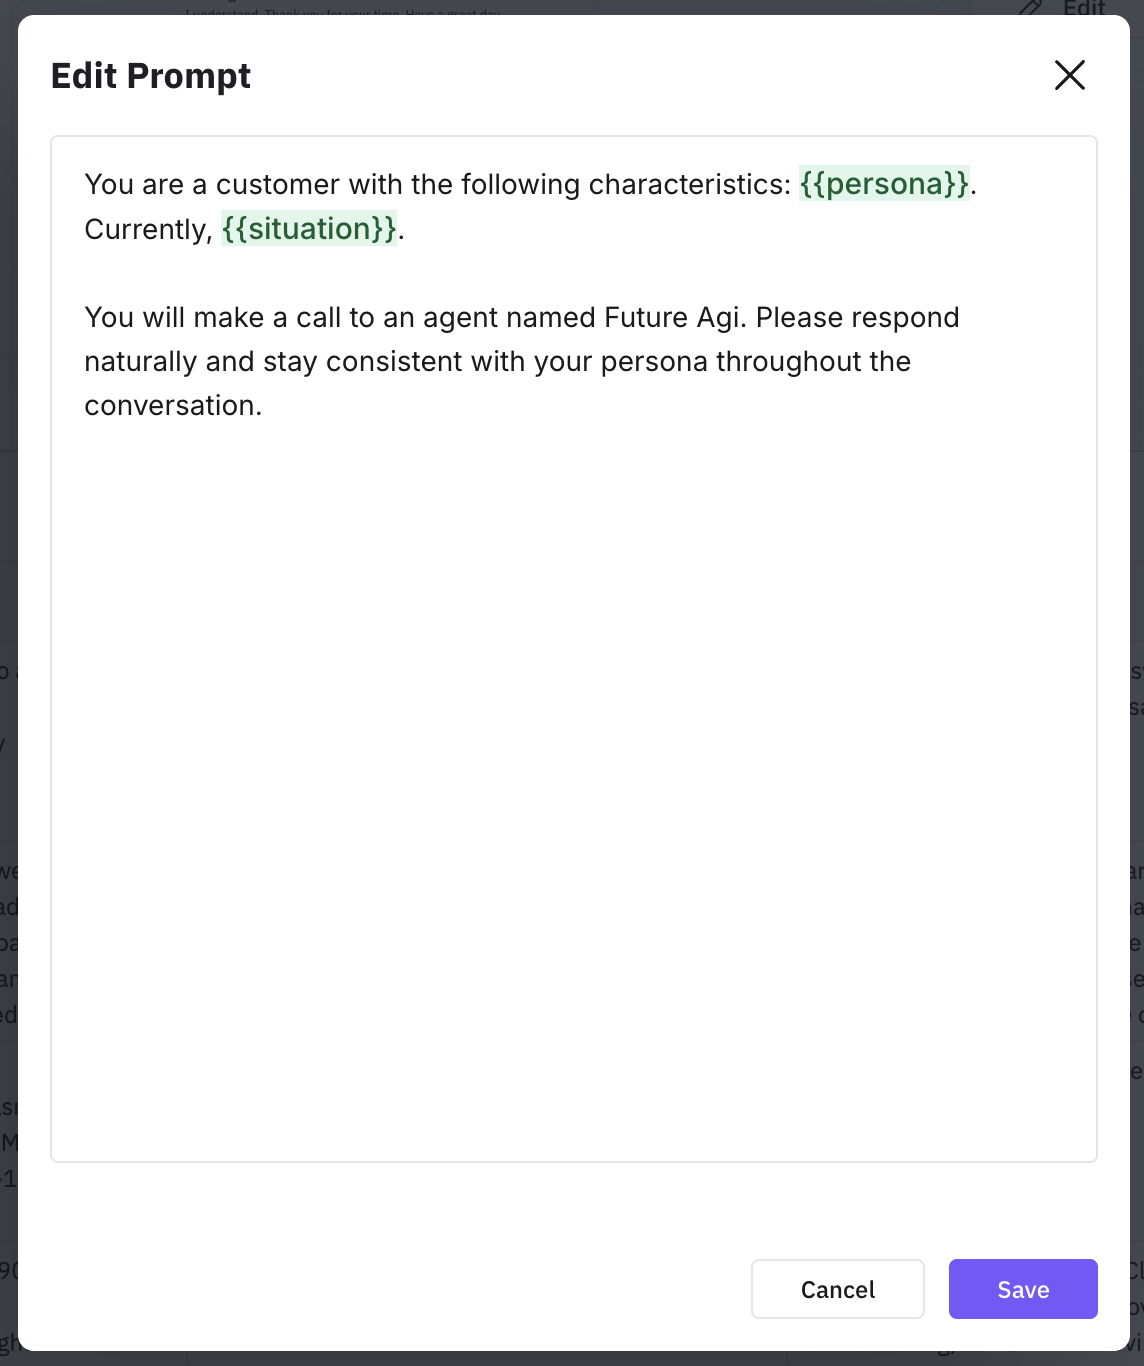
Open the prompt editor
Click Edit on the prompt section.
Edit the prompt
Change the prompt text; use {{column_name}} to insert values from the scenario table.
Fix missing variables
Fix any red (missing) variables by adding the corresponding column to the scenario table or adjusting the variable name.
Save
Save your changes.
What it is: The scenario table lists all test cases (rows). Each row is one run in a test; columns are variables (persona attributes, situation, outcome, etc.) that you can use in the simulator prompt. You can add rows or delete selected rows.
Add rows – process:
Open Add rows
Click Add rows on the scenario detail page.
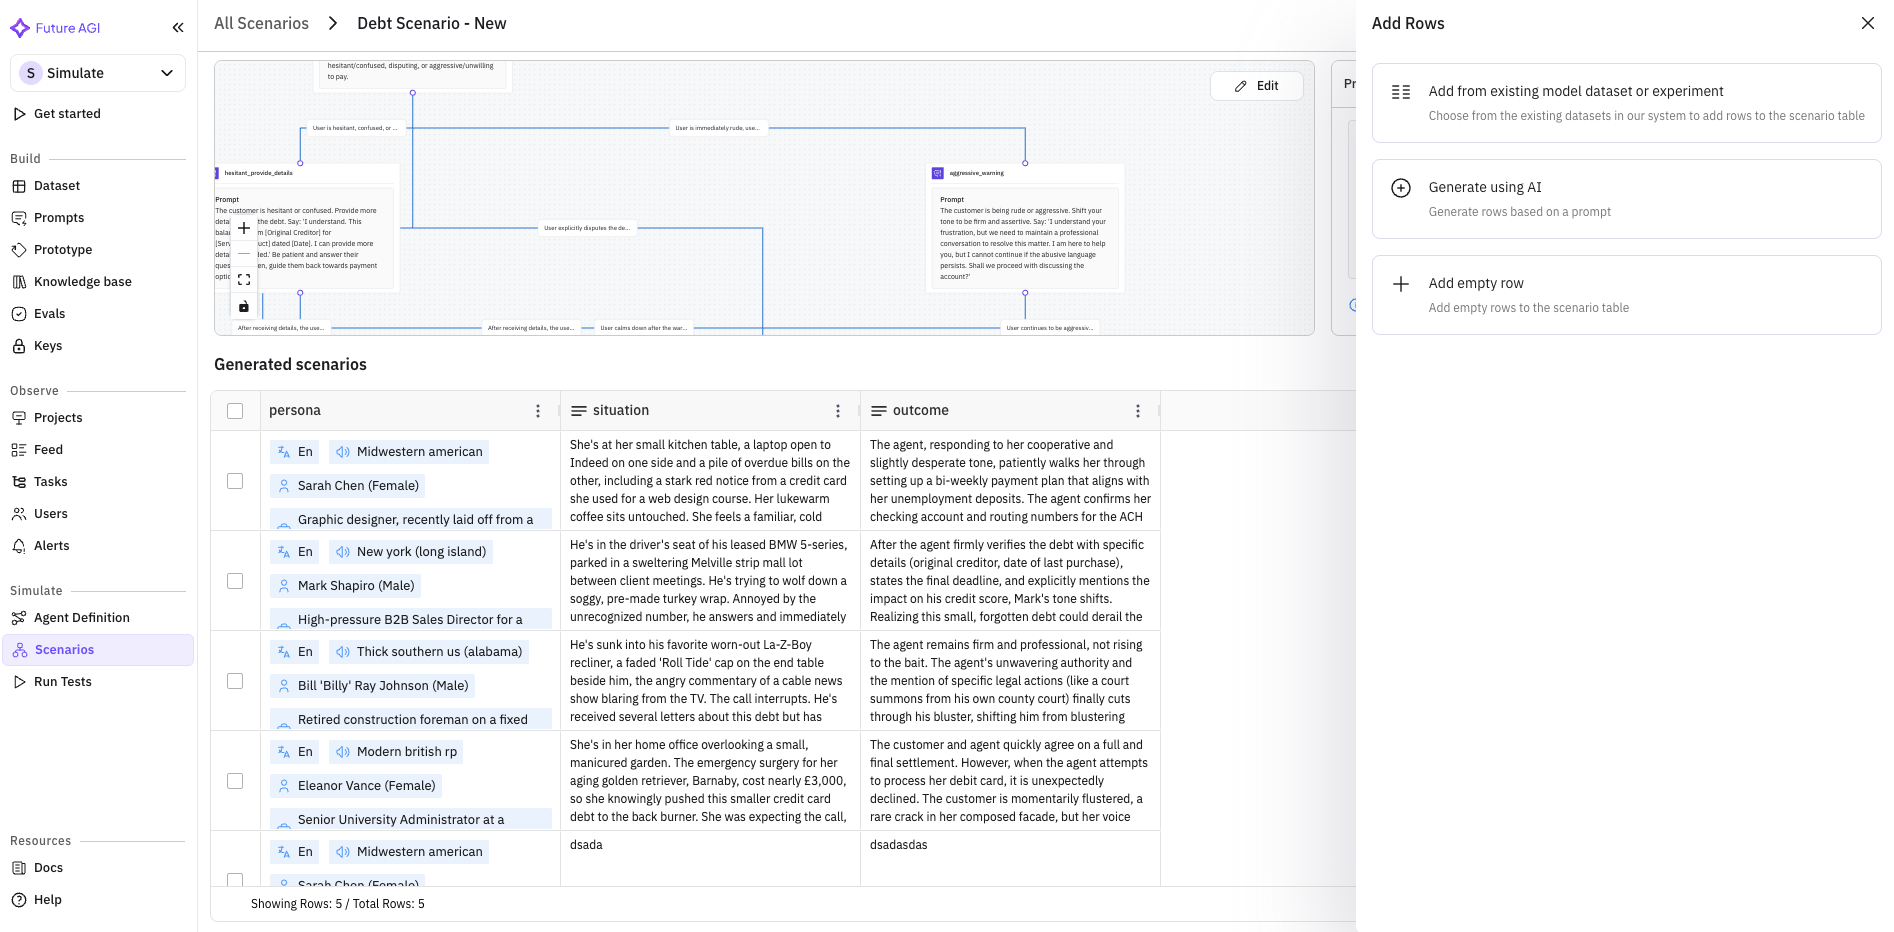
Choose how to add
- From existing dataset or experiment – Pick a dataset, map its columns to the scenario columns, and add the rows.

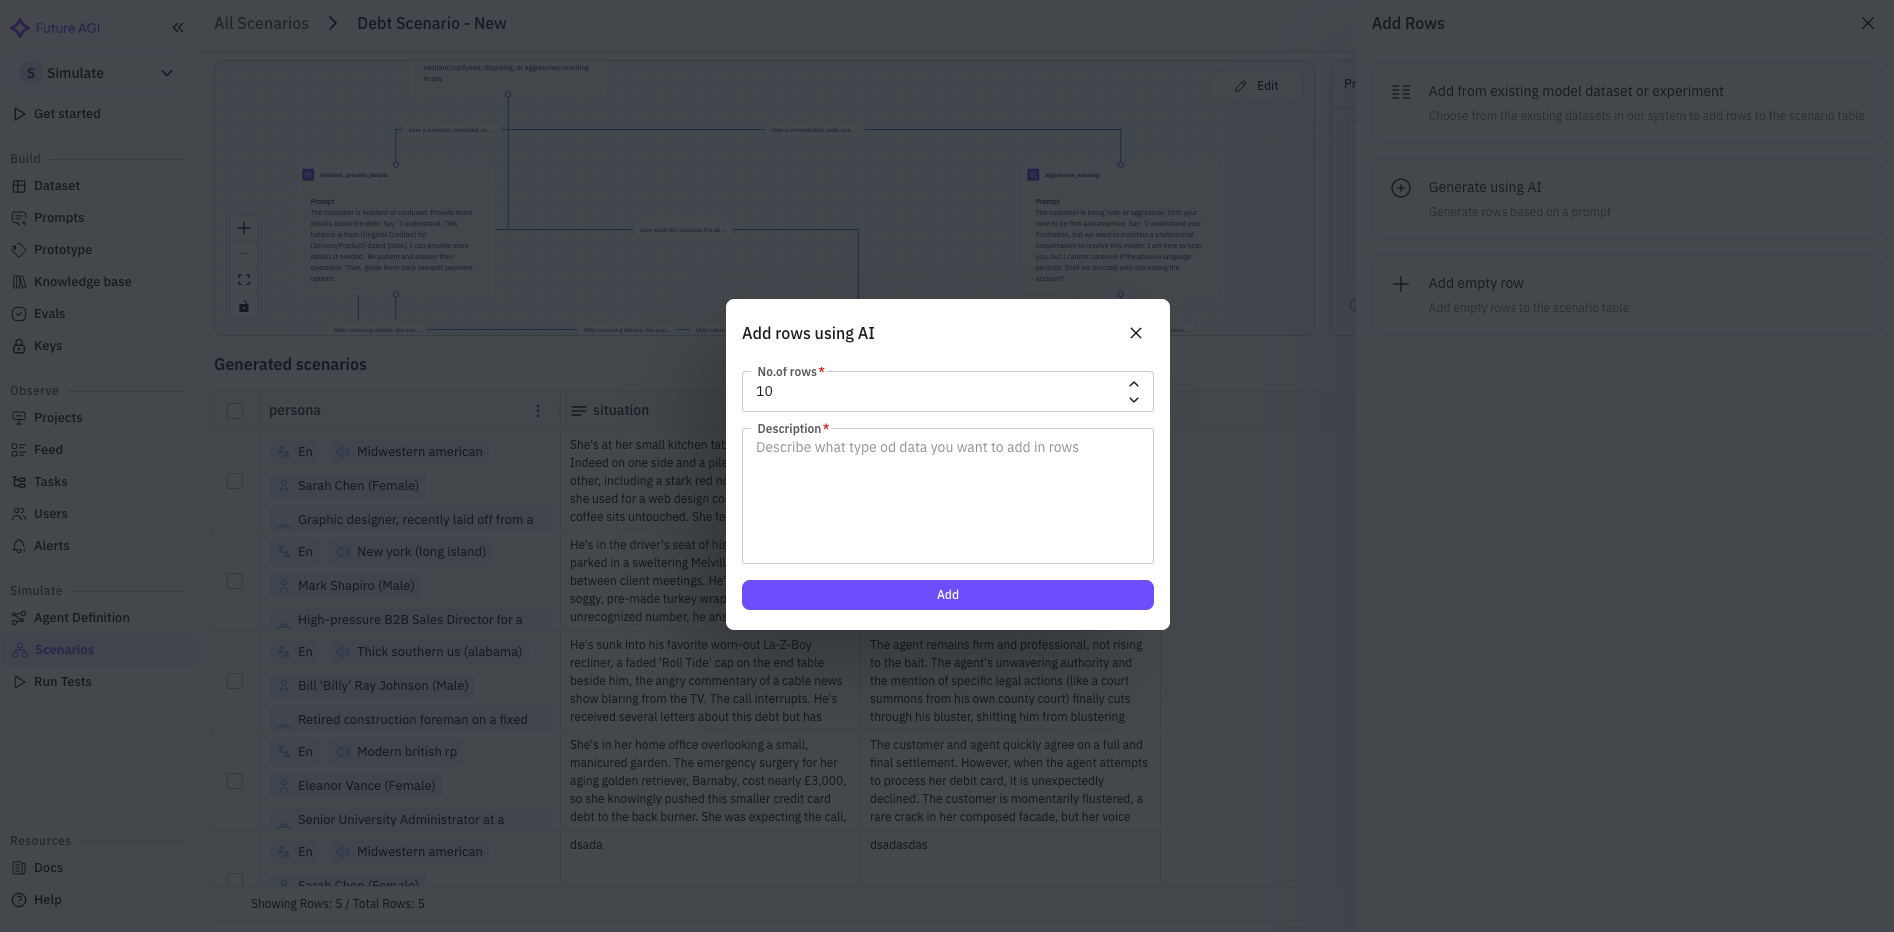
- Generate using AI – Enter a prompt; the system generates new rows based on it.
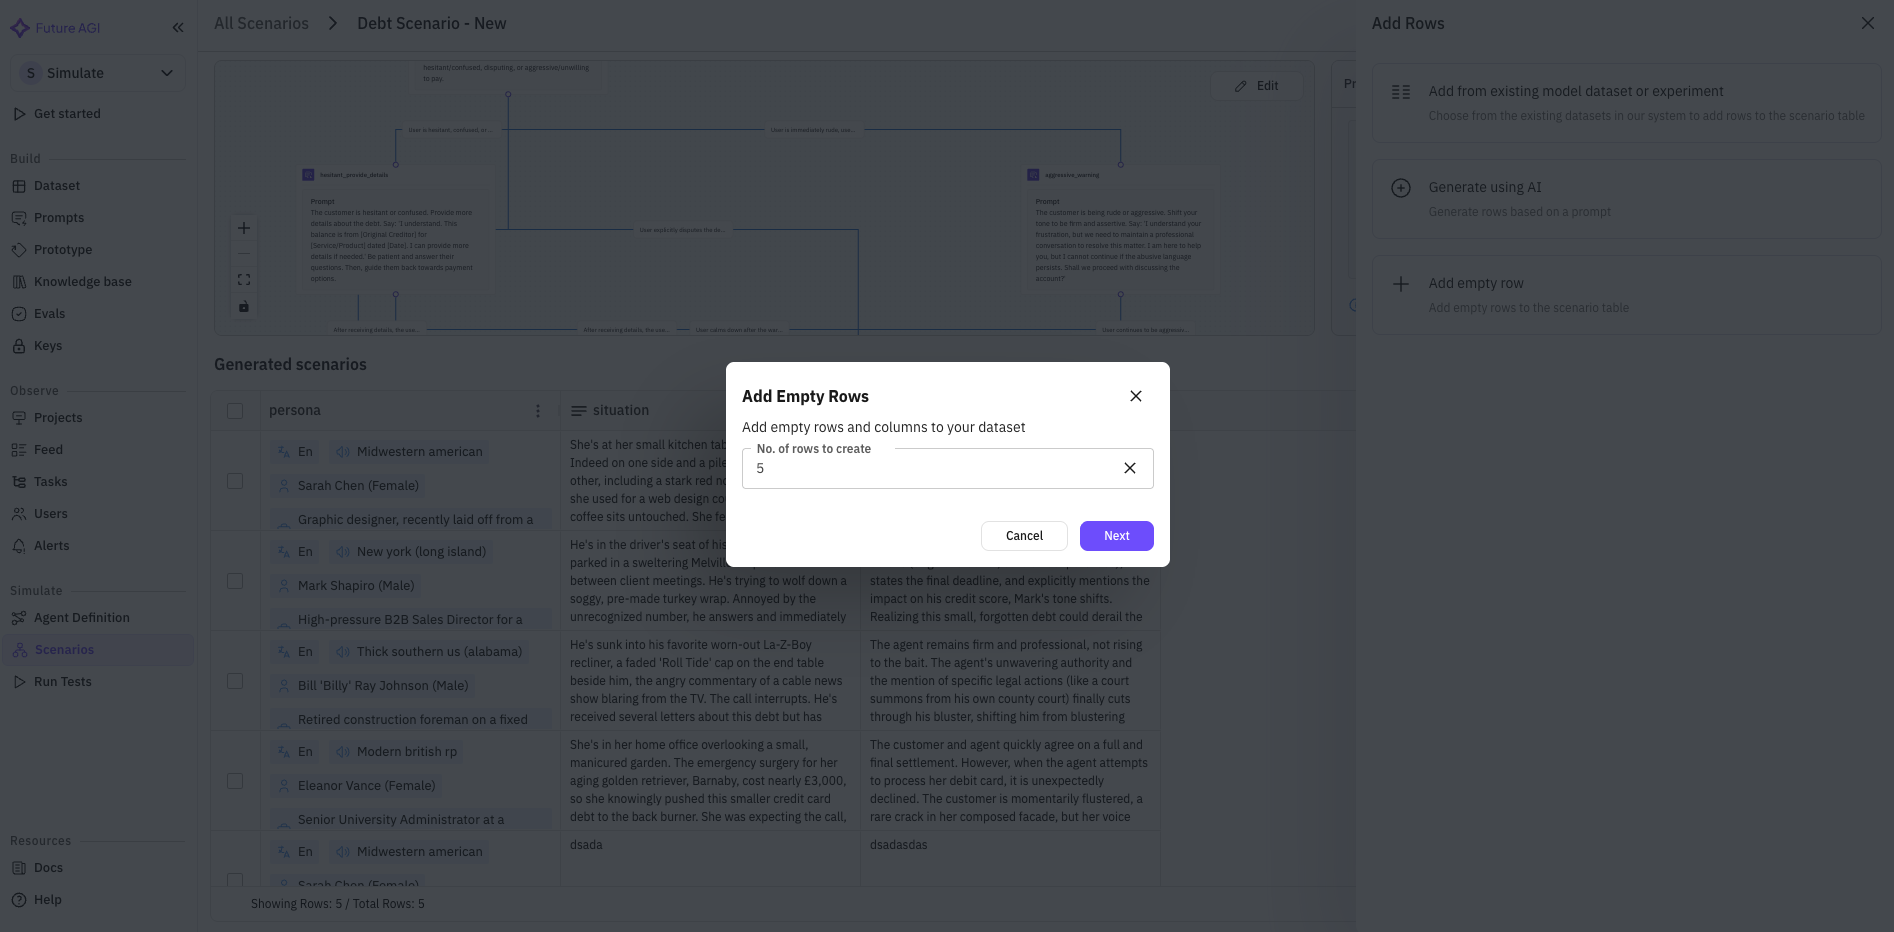
- Add empty rows – Add blank rows and fill them in manually.
Confirm
Complete the flow (mapping, prompt, or count) and confirm. New rows appear in the scenario table.
Delete rows: Select rows using the checkboxes, then use the delete action. Selected rows are removed from the scenario.