Adding Annotations to Dataset Rows in Future AGI
Annotations are essential for refining datasets, evaluating model outputs, and improving the quality of AI-generated responses.
About
Annotations let you add human labels to dataset rows so you can evaluate model outputs, build training or evaluation data, and improve quality. You create annotation views on a dataset: each view defines which columns are shown as context (static fields), which columns hold the content to annotate (response fields), and which label (e.g. sentiment, score, free text) is used. Annotators (workspace members you assign) fill in labels per row. For categorical labels, you can optionally use auto-annotation to get suggestions based on your existing labels.
When to use
- Sentiment analysis: Categorical labels (e.g. Positive, Negative, Neutral) to measure tone of model outputs.
- Factuality check: Boolean or text labels to validate whether the output is grounded in the source.
- Toxicity review: Categorical labels to flag harmful, biased, or unsafe responses.
- Relevance scoring: Numeric (or star) labels to rate how well the response addresses the query.
- Grammar / style edits: Text labels to provide corrections or rewritten versions.
- Prompt comparison: Categorical or numeric labels to compare responses from different prompt variants.
How to
Select a dataset
Go to Datasets from the dashboard and open the dataset you want to annotate. If you don’t have a dataset yet, create or upload one first.

Open the annotation interface
Inside the dataset view, open the Annotations tab or button (near the top or side of the data table). This opens the interface for managing annotation views and labels.
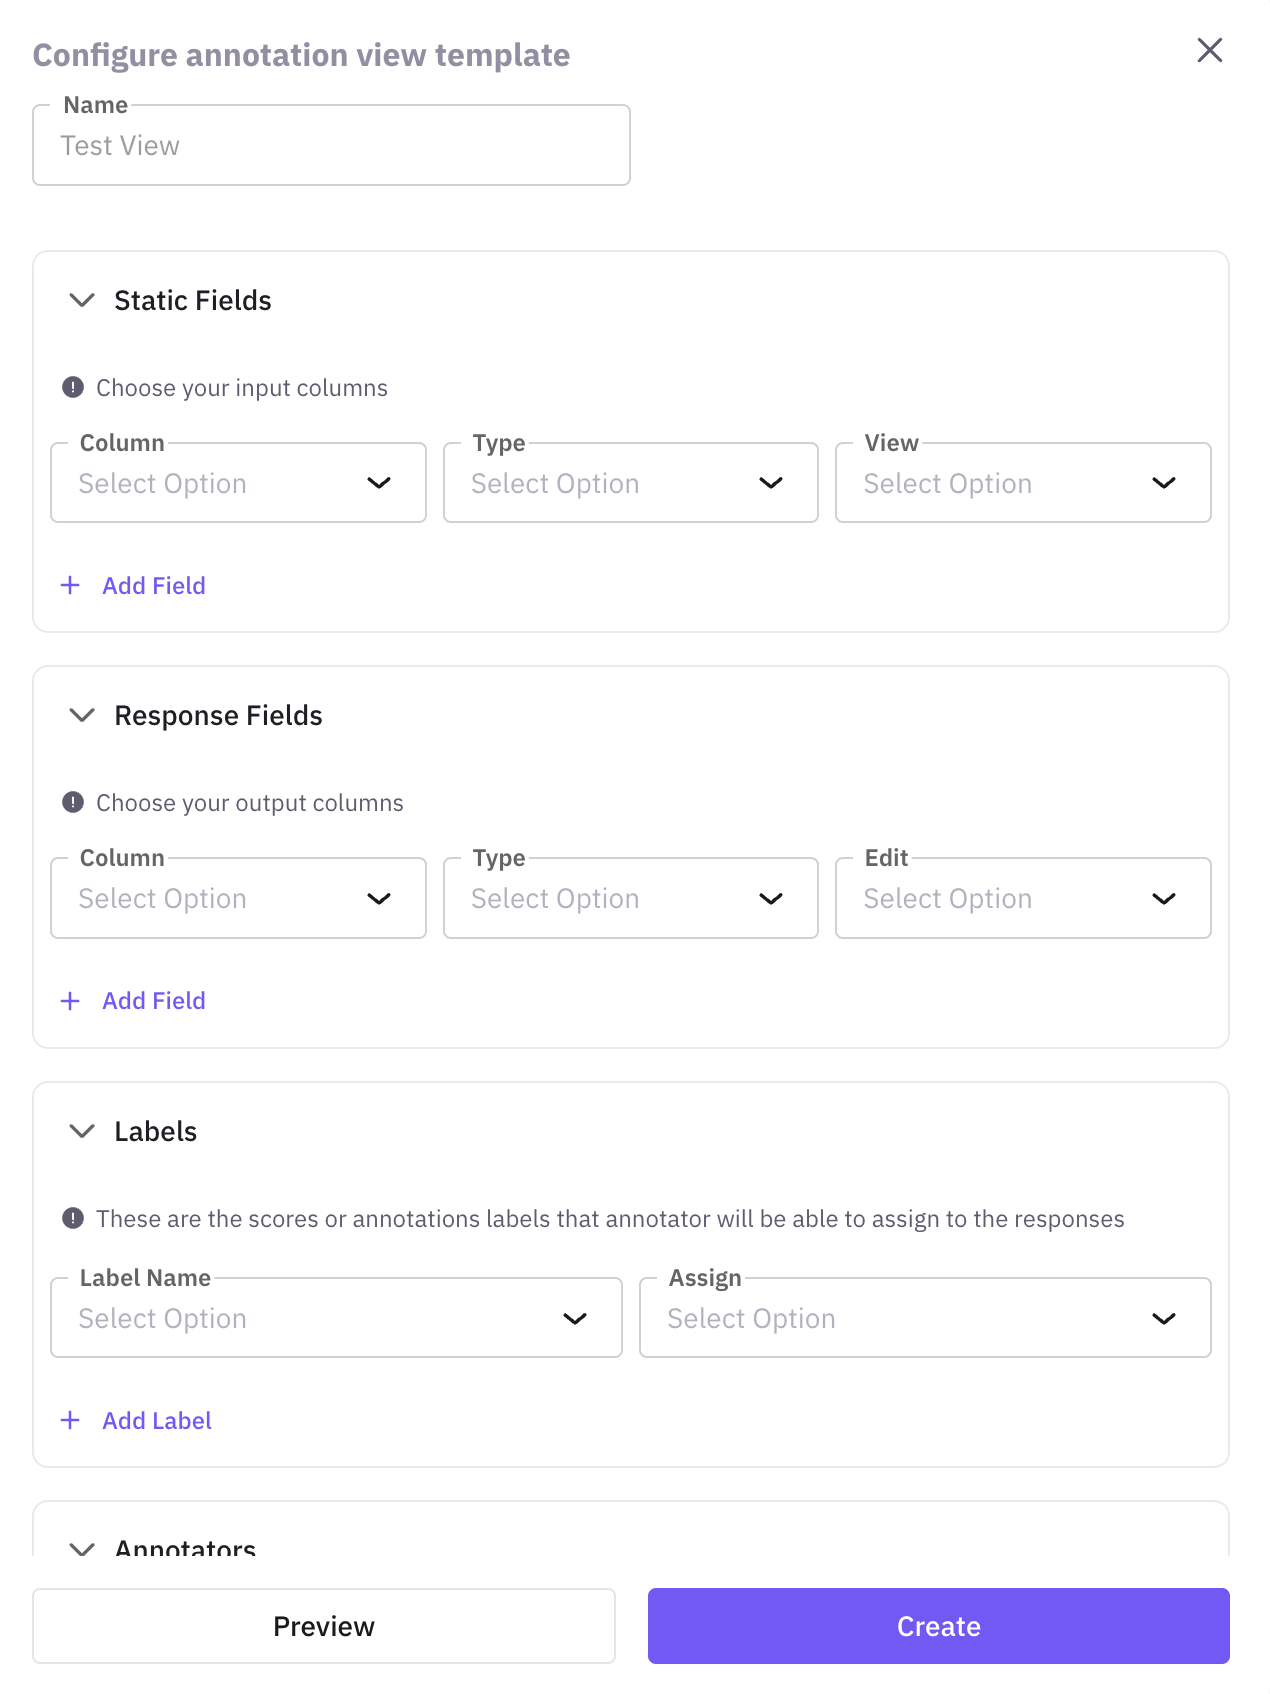
Create an annotation view
An annotation view defines what you annotate and how. Click Create New View, give the view a Name (e.g. “Sentiment Labels”, “Fact Check Ratings”), and save. You will configure static fields, response fields, and the label in a later step.
Define labels
Labels define the type and possible values for your annotations. Click Create New Label if you don’t have one. Give the label a Name (e.g. “Sentiment”, “Accuracy Score”) and choose a Type: Categorical (predefined options, e.g. Positive, Negative, Neutral), Numeric (scale with min/max, e.g. 1–5), Text (free-form feedback or corrections), Star (1–5 stars), or Thumbs up/down (pass/fail). Click Save to create the label.
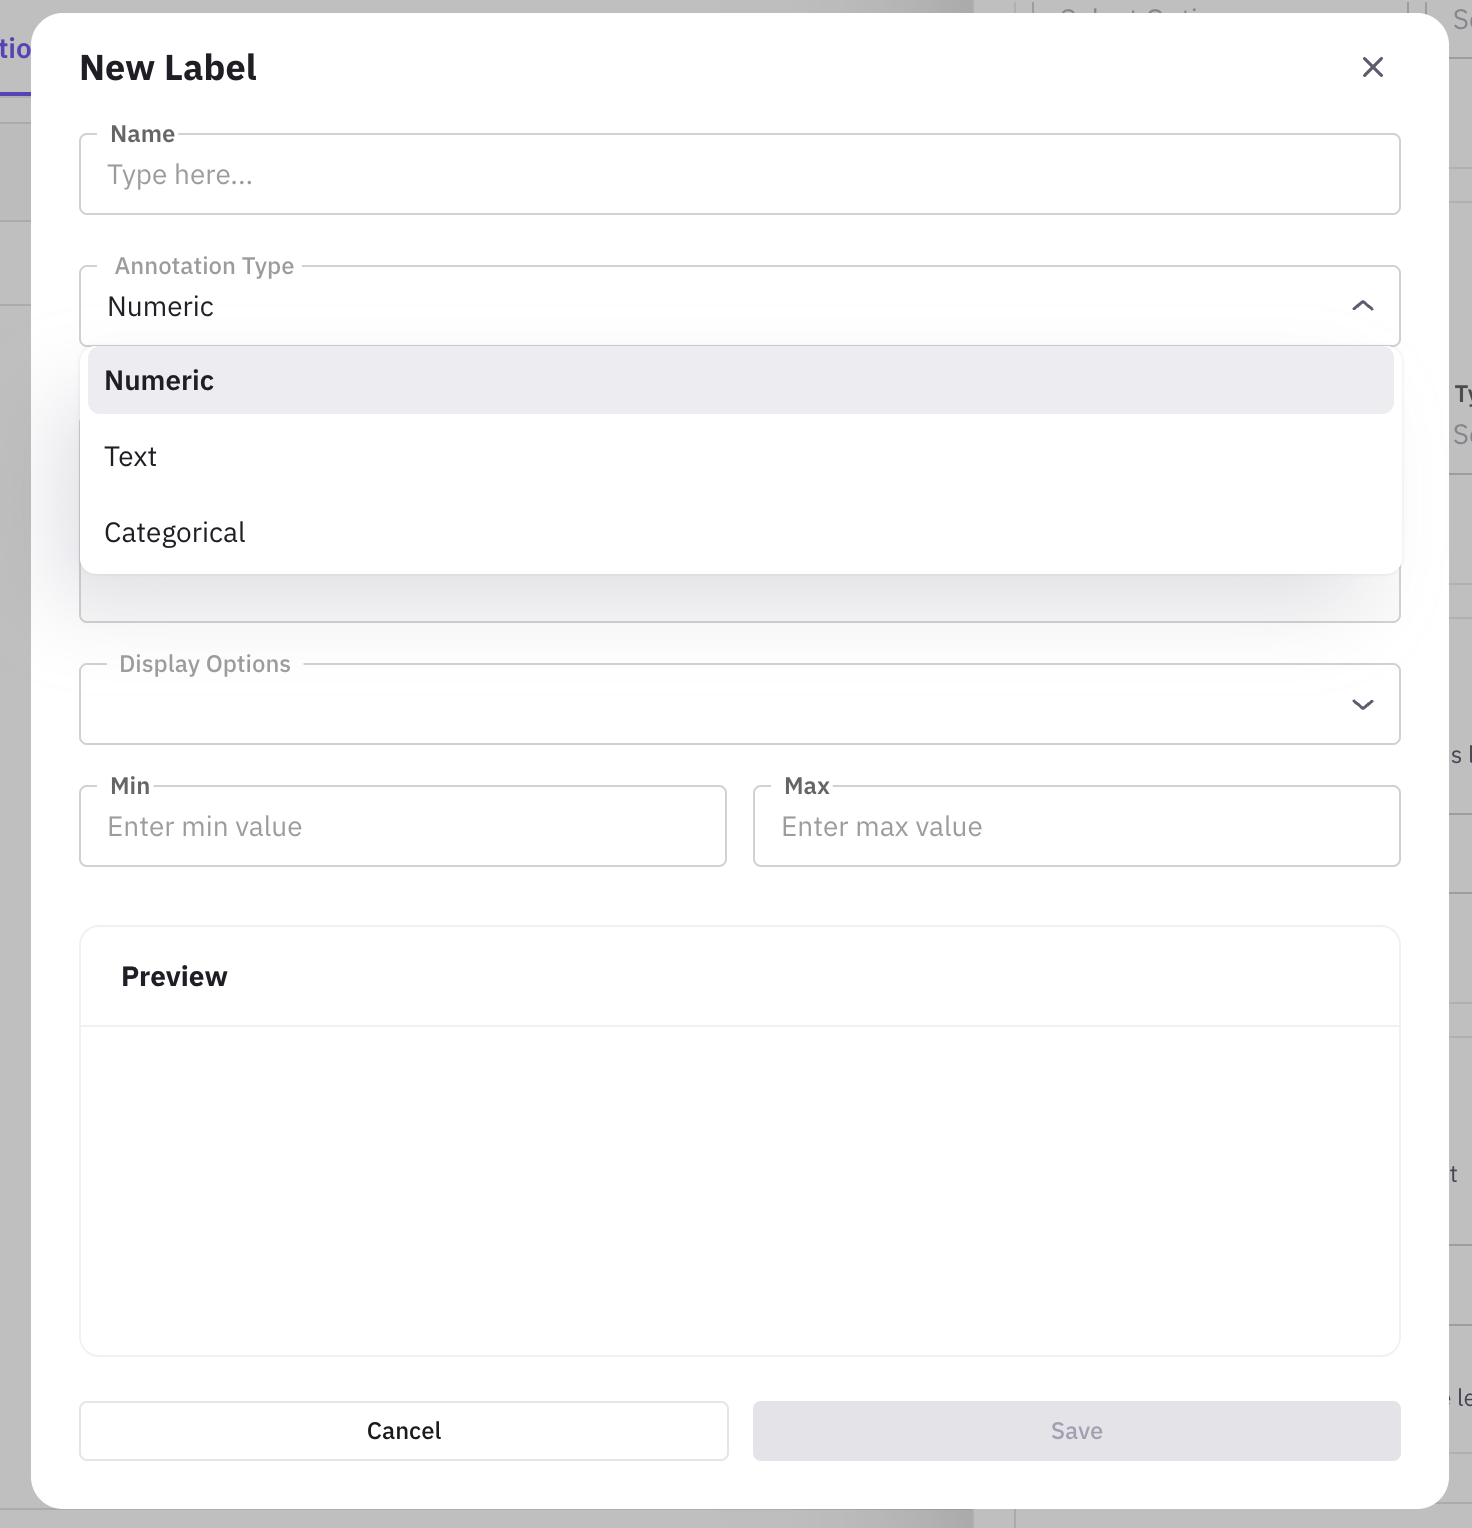 Auto-annotation (Categorical only): Enable Auto-Annotation and the platform learns from your manual labels and suggests labels for unannotated rows. You can accept or override suggestions.
Configure the annotation view
In the view, connect fields and the label: Static fields (columns for context, e.g. user query), Response fields (columns to annotate, e.g. model output), Label (the label from the previous step). Preview and click Save.
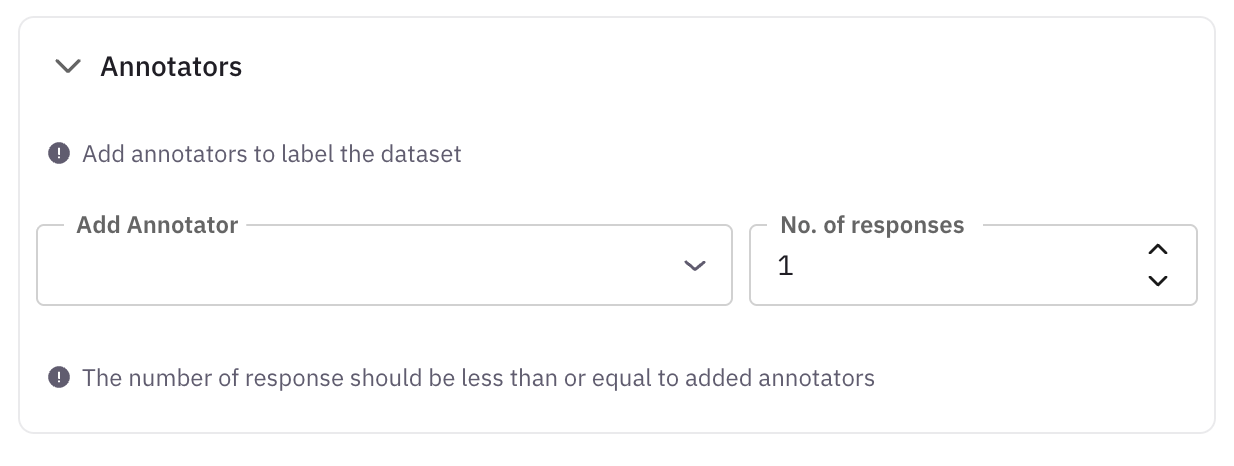
Assign annotators
In the annotation view settings, open the Annotators section and add workspace members who will annotate in this view.
Review and edit annotations
Open the annotation view and move through the dataset rows. Click an existing annotation to change it. Changes are saved automatically (or via Save if the UI shows it). You can review and override auto-annotation suggestions here as well.
Annotation Queues
For structured, multi-annotator annotation campaigns with progress tracking, assignment strategies, and inter-annotator agreement metrics, use Annotation Queues. Queues let you organize annotation work across traces, spans, sessions, dataset rows, prototypes, and simulations.
Annotation Queues
Learn about annotation queues, labels, and the full annotation workflow
Annotations Quickstart
Get started with annotation queues in 5 minutes
Next Steps
Add Rows to Dataset
Add individual records or bulk import data rows to your dataset
Add Columns to Dataset
Extend your dataset structure with additional data fields
Run Prompts
Test and execute prompts against your dataset entries
Experiments
Design and run controlled experiments to compare approaches
Create New Dataset
Create another dataset using SDK, file upload, or synthetic generation
Questions & Discussion