Creating a Dataset in Future AGI from Files, SDK, or Traces
Create a dataset from CSV, Hugging Face, production traces, or synthetic generation. Use it as the container for prompts, evals, and experiments.
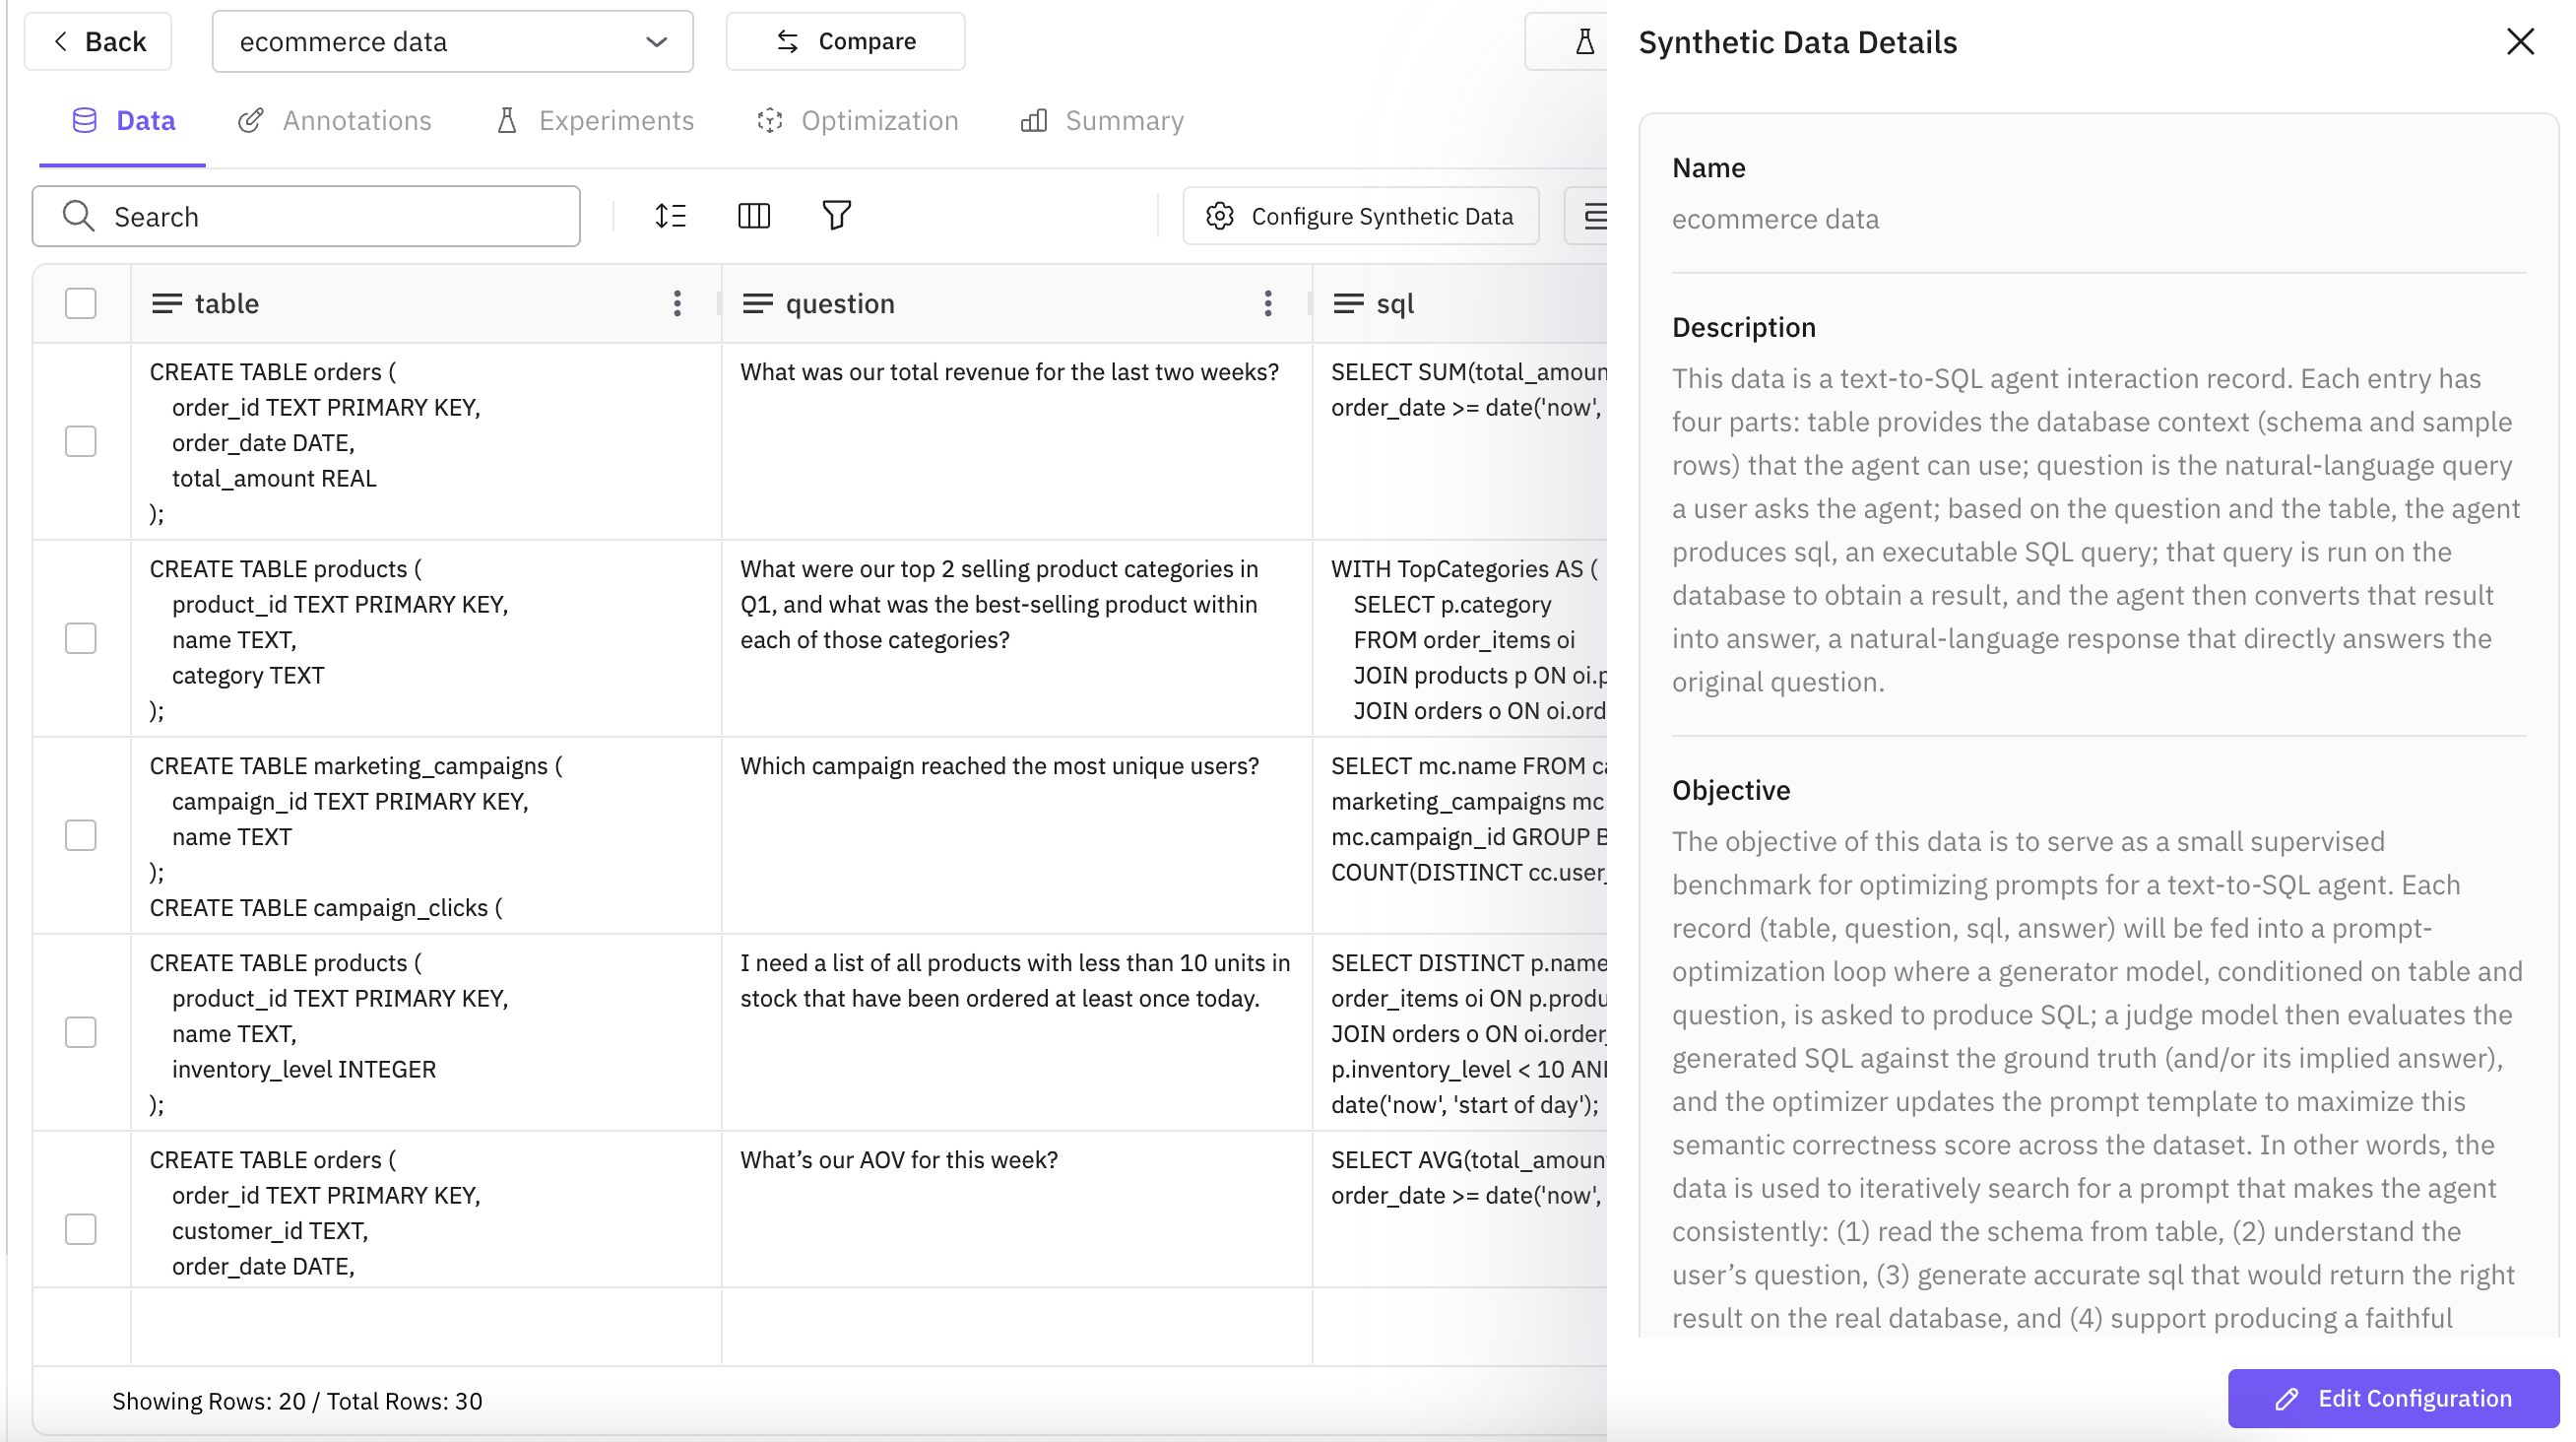
About
Creating a new dataset adds a blank table (or a table filled from a source) under your organization. You get a dataset with a name and optional columns/rows that you can then use for run prompt, evals, experiments, and optimization. The dataset is the container; you can keep editing it after creation.
When to use
- Evaluate a prompt or model: You need a set of inputs and (optionally) expected outputs or scores. Creating a dataset gives you that table so you can run prompts and evals on it.
- Reuse production data: You have traces/spans from your app and want to turn them into eval data. Creating a dataset from Observe turns selected traces into rows.
- Import existing data: You already have test cases in CSV/Excel or on Hugging Face. Creating a dataset from file or Hugging Face imports that data so you don’t have to type it in.
- Generate test data: You don’t have real data yet but know the kind of examples you need. Creating a synthetic dataset generates rows for you.
- Branch from an experiment: You ran an experiment and want to keep that snapshot as a standalone dataset to edit or reuse. Creating a dataset from that experiment copies it into a new dataset.
How to
Choose how you want to create your dataset:
Use SDK to import your data to Future AGI.
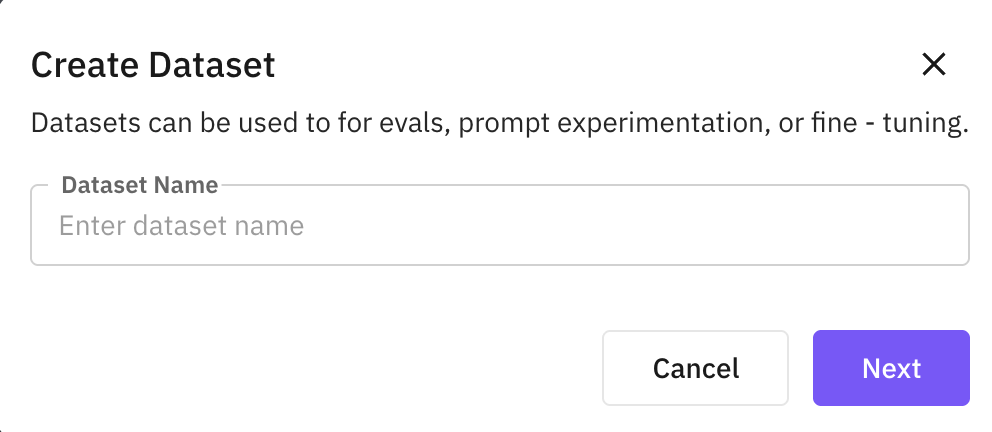
Assign Dataset Name
Assign a name to your dataset and click on “Next” to proceed.
Add Rows via SDK
Use the code snippet below to add rows to your dataset.
# pip install futureagi

import os
from fi.datasets import Dataset
from fi.datasets.types import (
    Cell,
    Column,
    DatasetConfig,
    DataTypeChoices,
    ModelTypes,
    Row,
    SourceChoices,
)

# Set environment variables
os.environ["FI_API_KEY"] = "<fi_api_key>"
os.environ["FI_SECRET_KEY"] = "<fi_secret_key>"

# Get existing dataset
config = DatasetConfig(name="my-dataset", model_type= ModelTypes.GENERATIVE_LLM)
dataset = Dataset(dataset_config=config)
dataset = Dataset.get_dataset_config("my-dataset")

# Define columns
columns = [
    Column(
        name="user_query",
        data_type=DataTypeChoices.TEXT,
        source=SourceChoices.OTHERS
    ),
    Column(
        name="response_quality",
        data_type=DataTypeChoices.INTEGER,
        source=SourceChoices.OTHERS
    ),
    Column(
        name="is_helpful",
        data_type=DataTypeChoices.BOOLEAN,
        source=SourceChoices.OTHERS
    )
]

# Define rows
rows = [
    Row(
        order=1,
        cells=[
            Cell(column_name="user_query", value="What is machine learning?"),
            Cell(column_name="response_quality", value=8),
            Cell(column_name="is_helpful", value=True)
        ]
    ),
    Row(
        order=2,
        cells=[
            Cell(column_name="user_query", value="Explain quantum computing"),
            Cell(column_name="response_quality", value=9),
            Cell(column_name="is_helpful", value=True)
        ]
    )
]

try:
    # Add columns and rows to dataset
    dataset = dataset.add_columns(columns=columns)
    dataset = dataset.add_rows(rows=rows)
    print("✓ Data added successfully")

except Exception as e:
    print(f"Failed to add data: {e}")
import { Dataset, DataTypeChoices, createRow, createCell } from "@future-agi/sdk";
process.env["FI_API_KEY"] = "<fi_api_key>";
process.env["FI_SECRET_KEY"] = "<fi_secret_key>";
async function main() {
try {
const dsName = "my-dataset";
// 1) Open the dataset (fetch if it exists, create if not)
const dataset = await Dataset.open(dsName);
// 2) Define columns
const columns = [
{ name: "user_query", dataType: DataTypeChoices.TEXT },
{ name: "response_quality", dataType: DataTypeChoices.INTEGER },
{ name: "is_helpful", dataType: DataTypeChoices.BOOLEAN },
];
// 3) Define rows
const rows = [
createRow({
cells: [
createCell({ columnName: "user_query", value: "What is machine learning?" }),
createCell({ columnName: "response_quality", value: 8 }),
createCell({ columnName: "is_helpful", value: true }),
],
}),
createRow({
cells: [
createCell({ columnName: "user_query", value: "Explain quantum computing" }),
createCell({ columnName: "response_quality", value: 9 }),
createCell({ columnName: "is_helpful", value: true }),
],
}),
];
// 4) Add columns and rows
await dataset.addColumns(columns);
await dataset.addRows(rows);
console.log("✓ Data added successfully");
} catch (err) {
console.error("Failed to add data:", err);
}
}
main();
curl --request POST \
  --url https://api.futureagi.com/model-hub/develops/<dataset_id>/add_columns/ \
  --header 'X-Api-Key: <fi_api_key>' \
  --header 'X-Secret-Key: <fi_secret_key>' \
  --header 'content-type: application/json' \
  --data '{
    "new_columns_data": [
      {
        "name": "user_query",
        "data_type": "text"
      },
      {
        "name": "response_quality",
        "data_type": "integer"
      },
      {
        "name": "is_helpful",
        "data_type": "boolean"
      }
    ]
  }'
Note
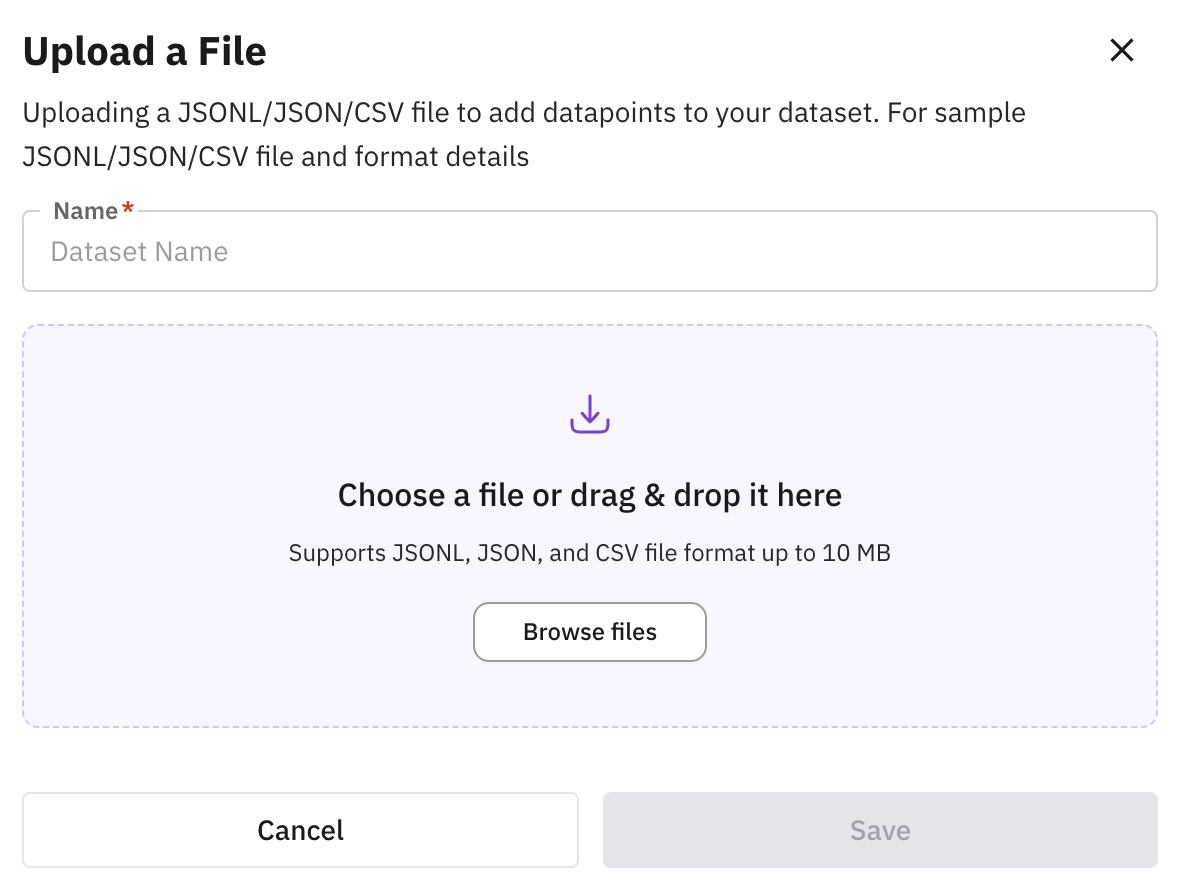
Upload CSV, JSON or JSONL files to create a dataset.
Synthetically generate data and perform experimentations on it.
Add Details
Provide basic details about the dataset you want to generate.
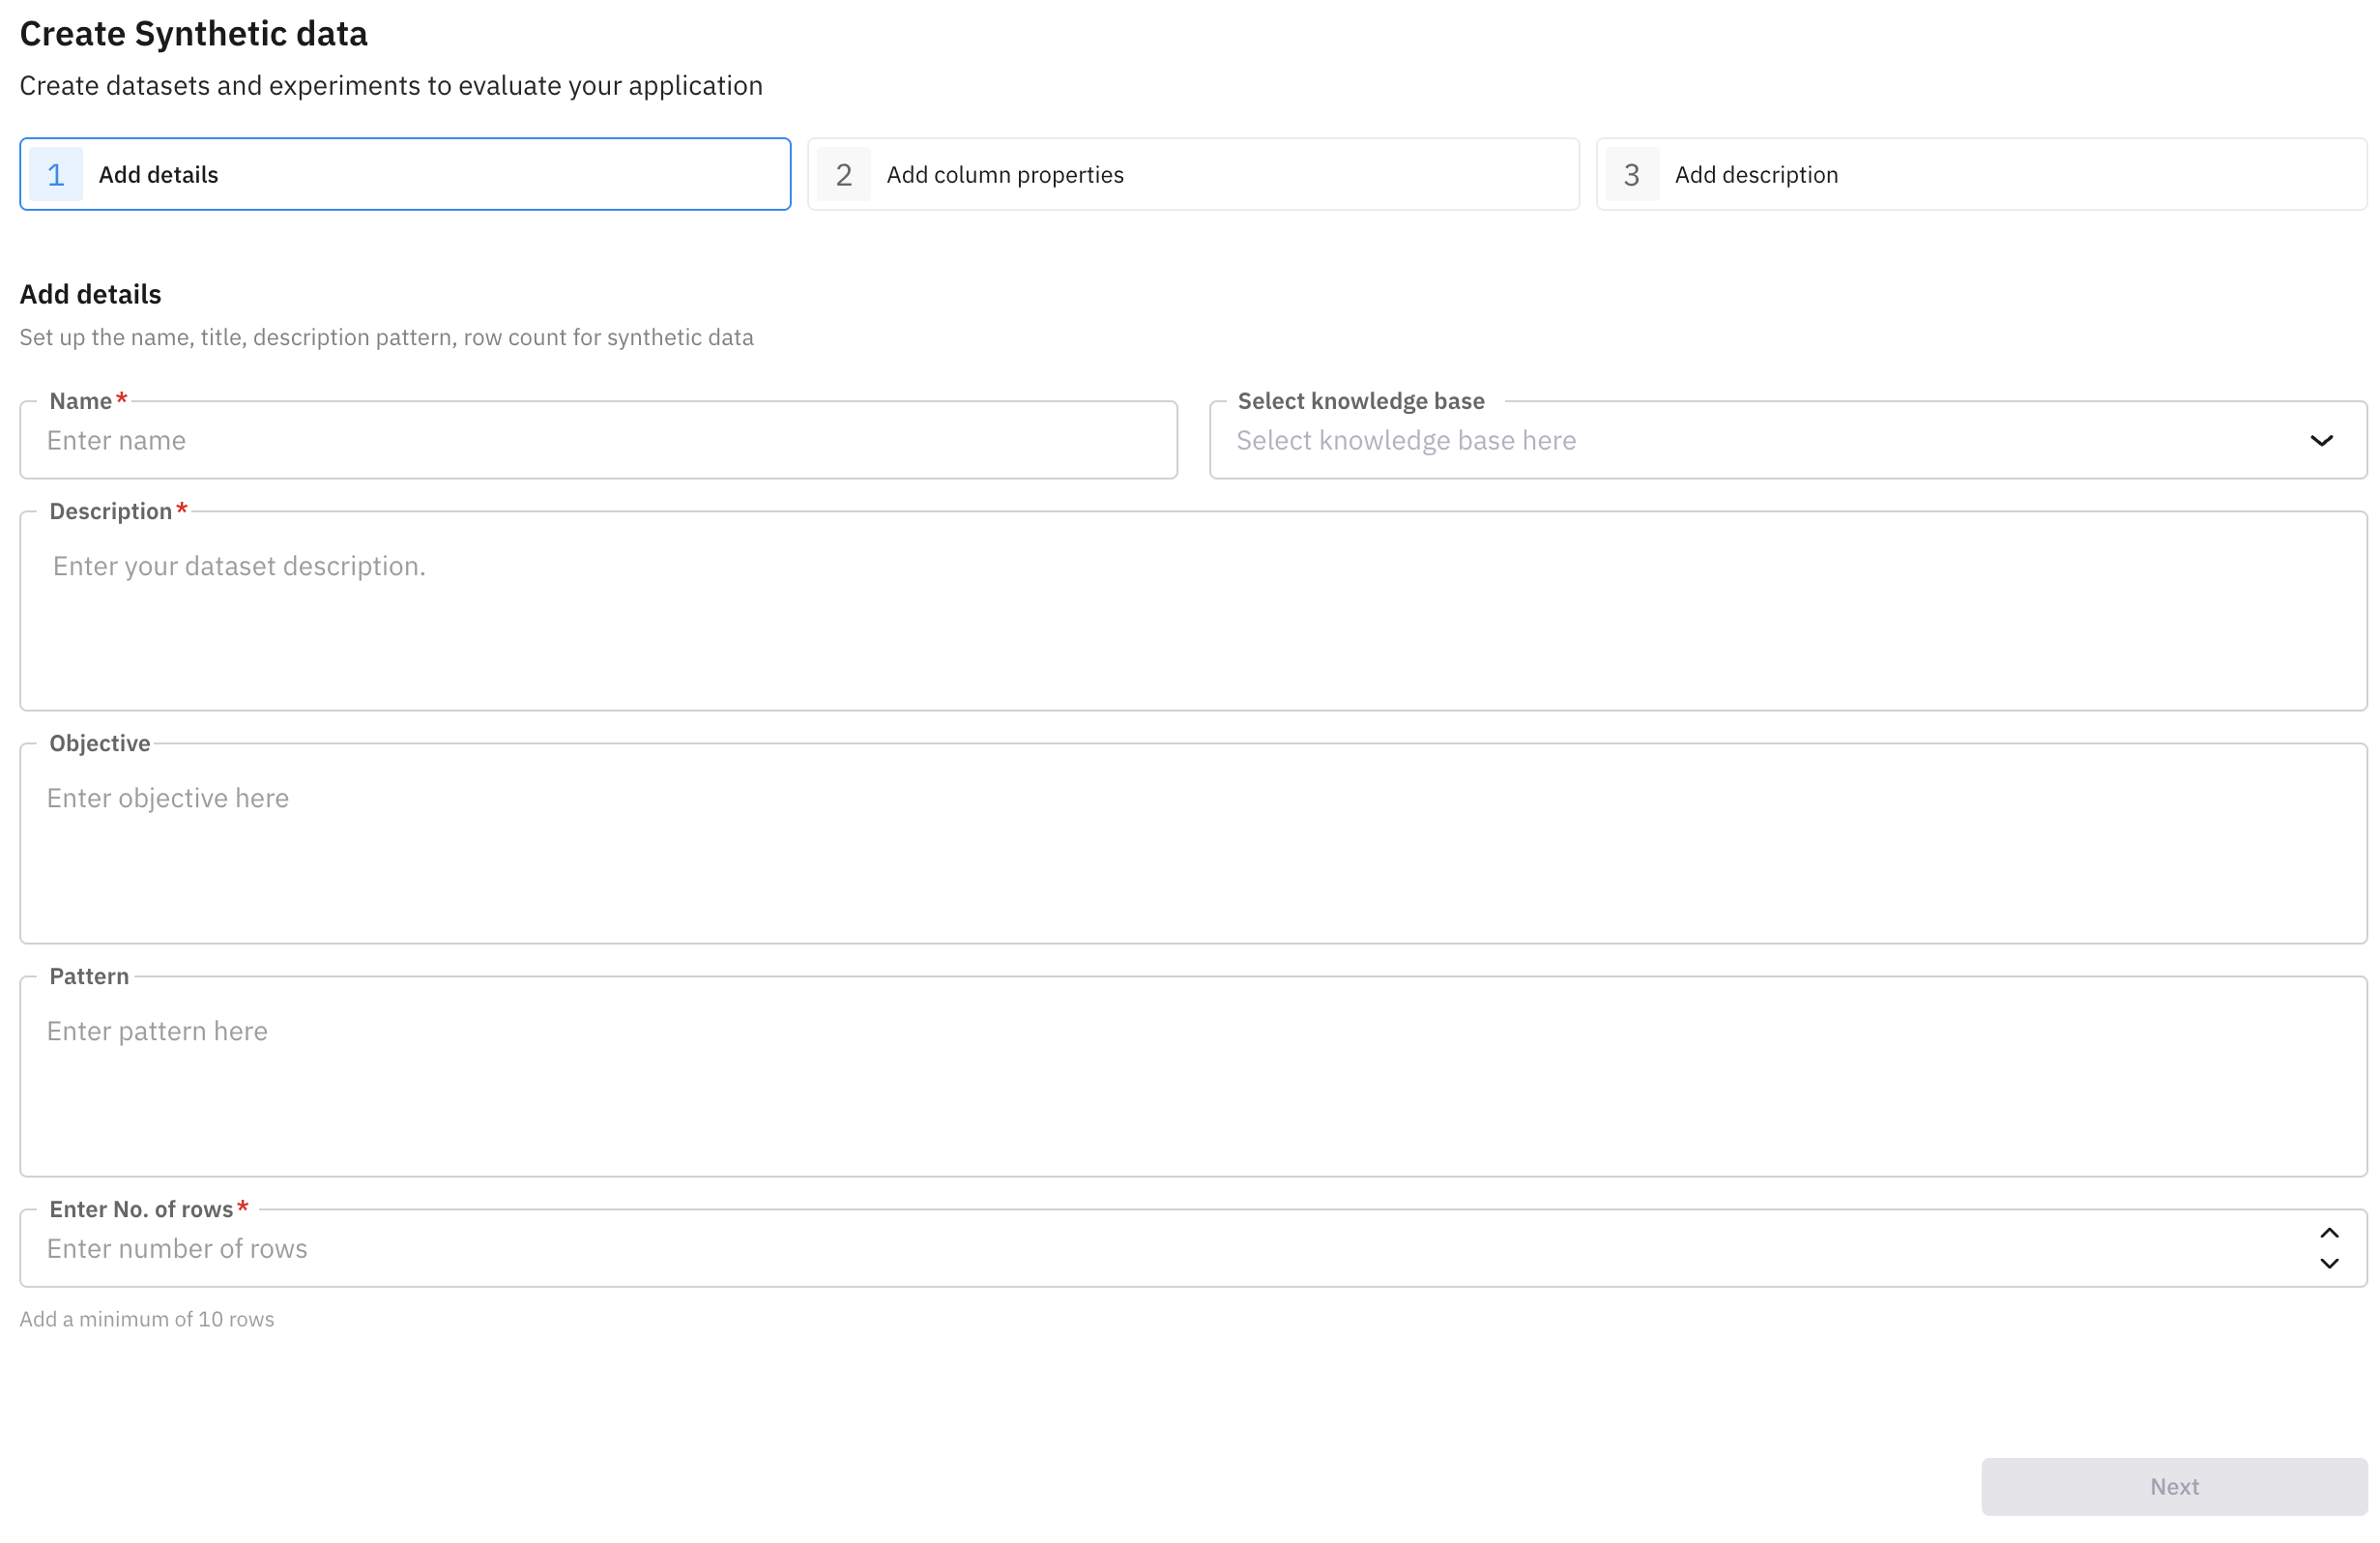
| Property | Description |
|---|---|
| Name | Name of the dataset |
| Knowledge Base (optional) | Select which knowledge base you want to use. |
| Description | Describe the dataset you want to generate |
| Objective (optional) | Use case of the dataset |
| Pattern (optional) | Style, tone or behavioral traits of the generated dataset |
| No. of Rows | Row count of the generated dataset (min 10 rows) |
Add Column Properties
Define column types and properties
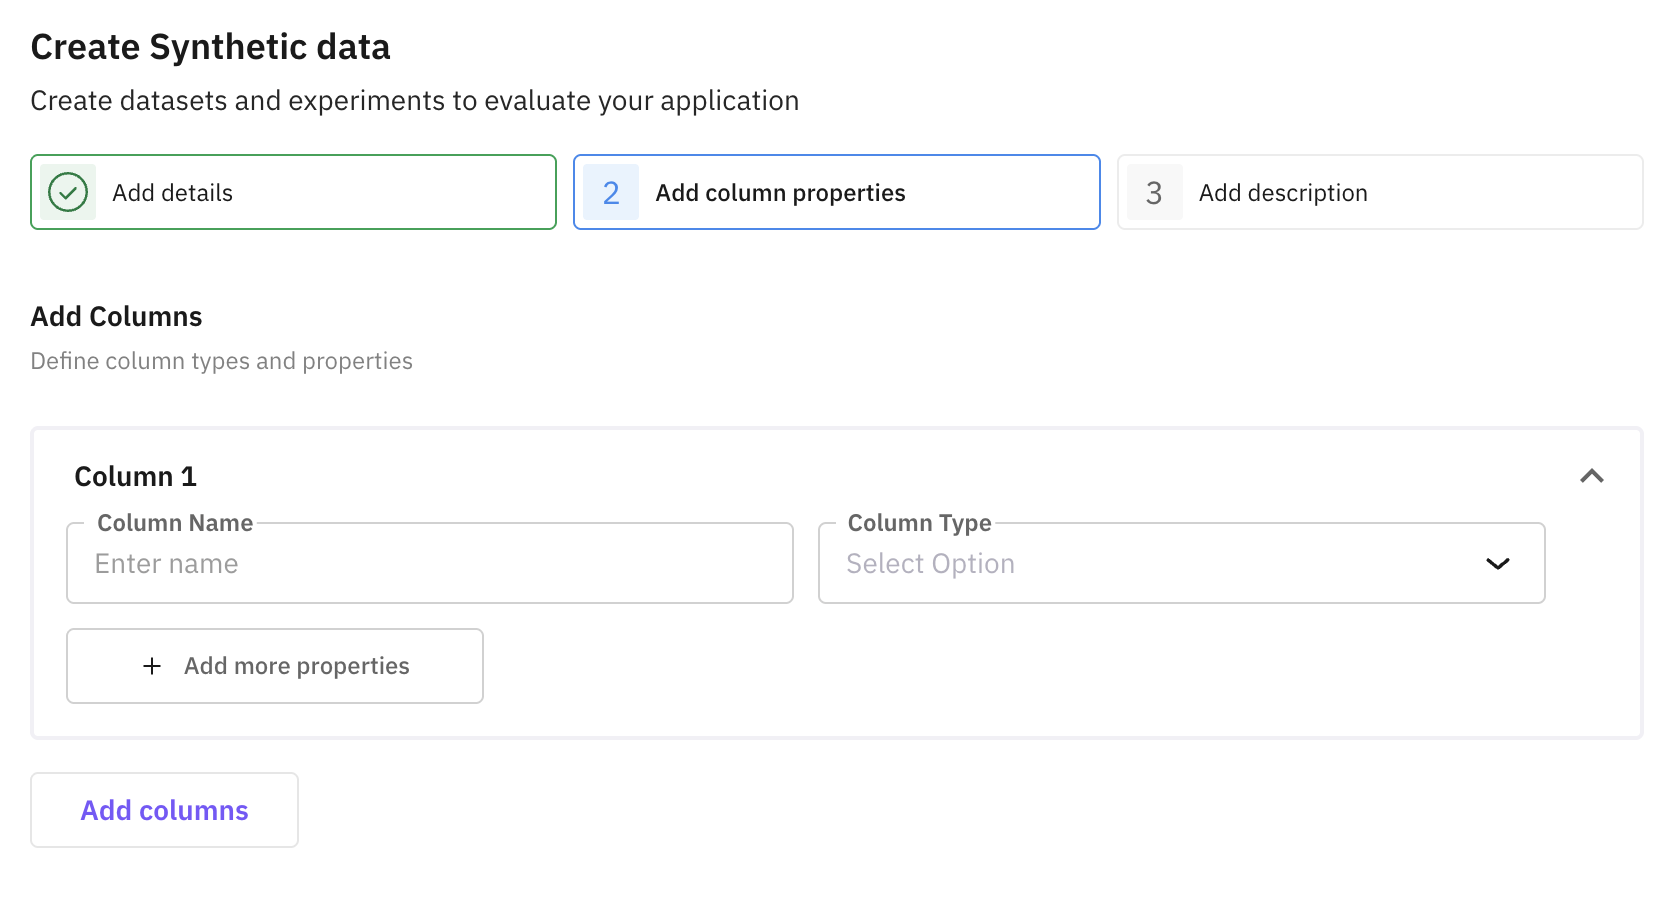
| Property | Description |
|---|---|
| Column Name | Name of the column |
| Column Type | Choose the type of the column (available types: text, boolean, integer, float, json, array, datetime) |
Add Description
Now add description for each column. Describe in detail what values you want in this column.

Create Dataset
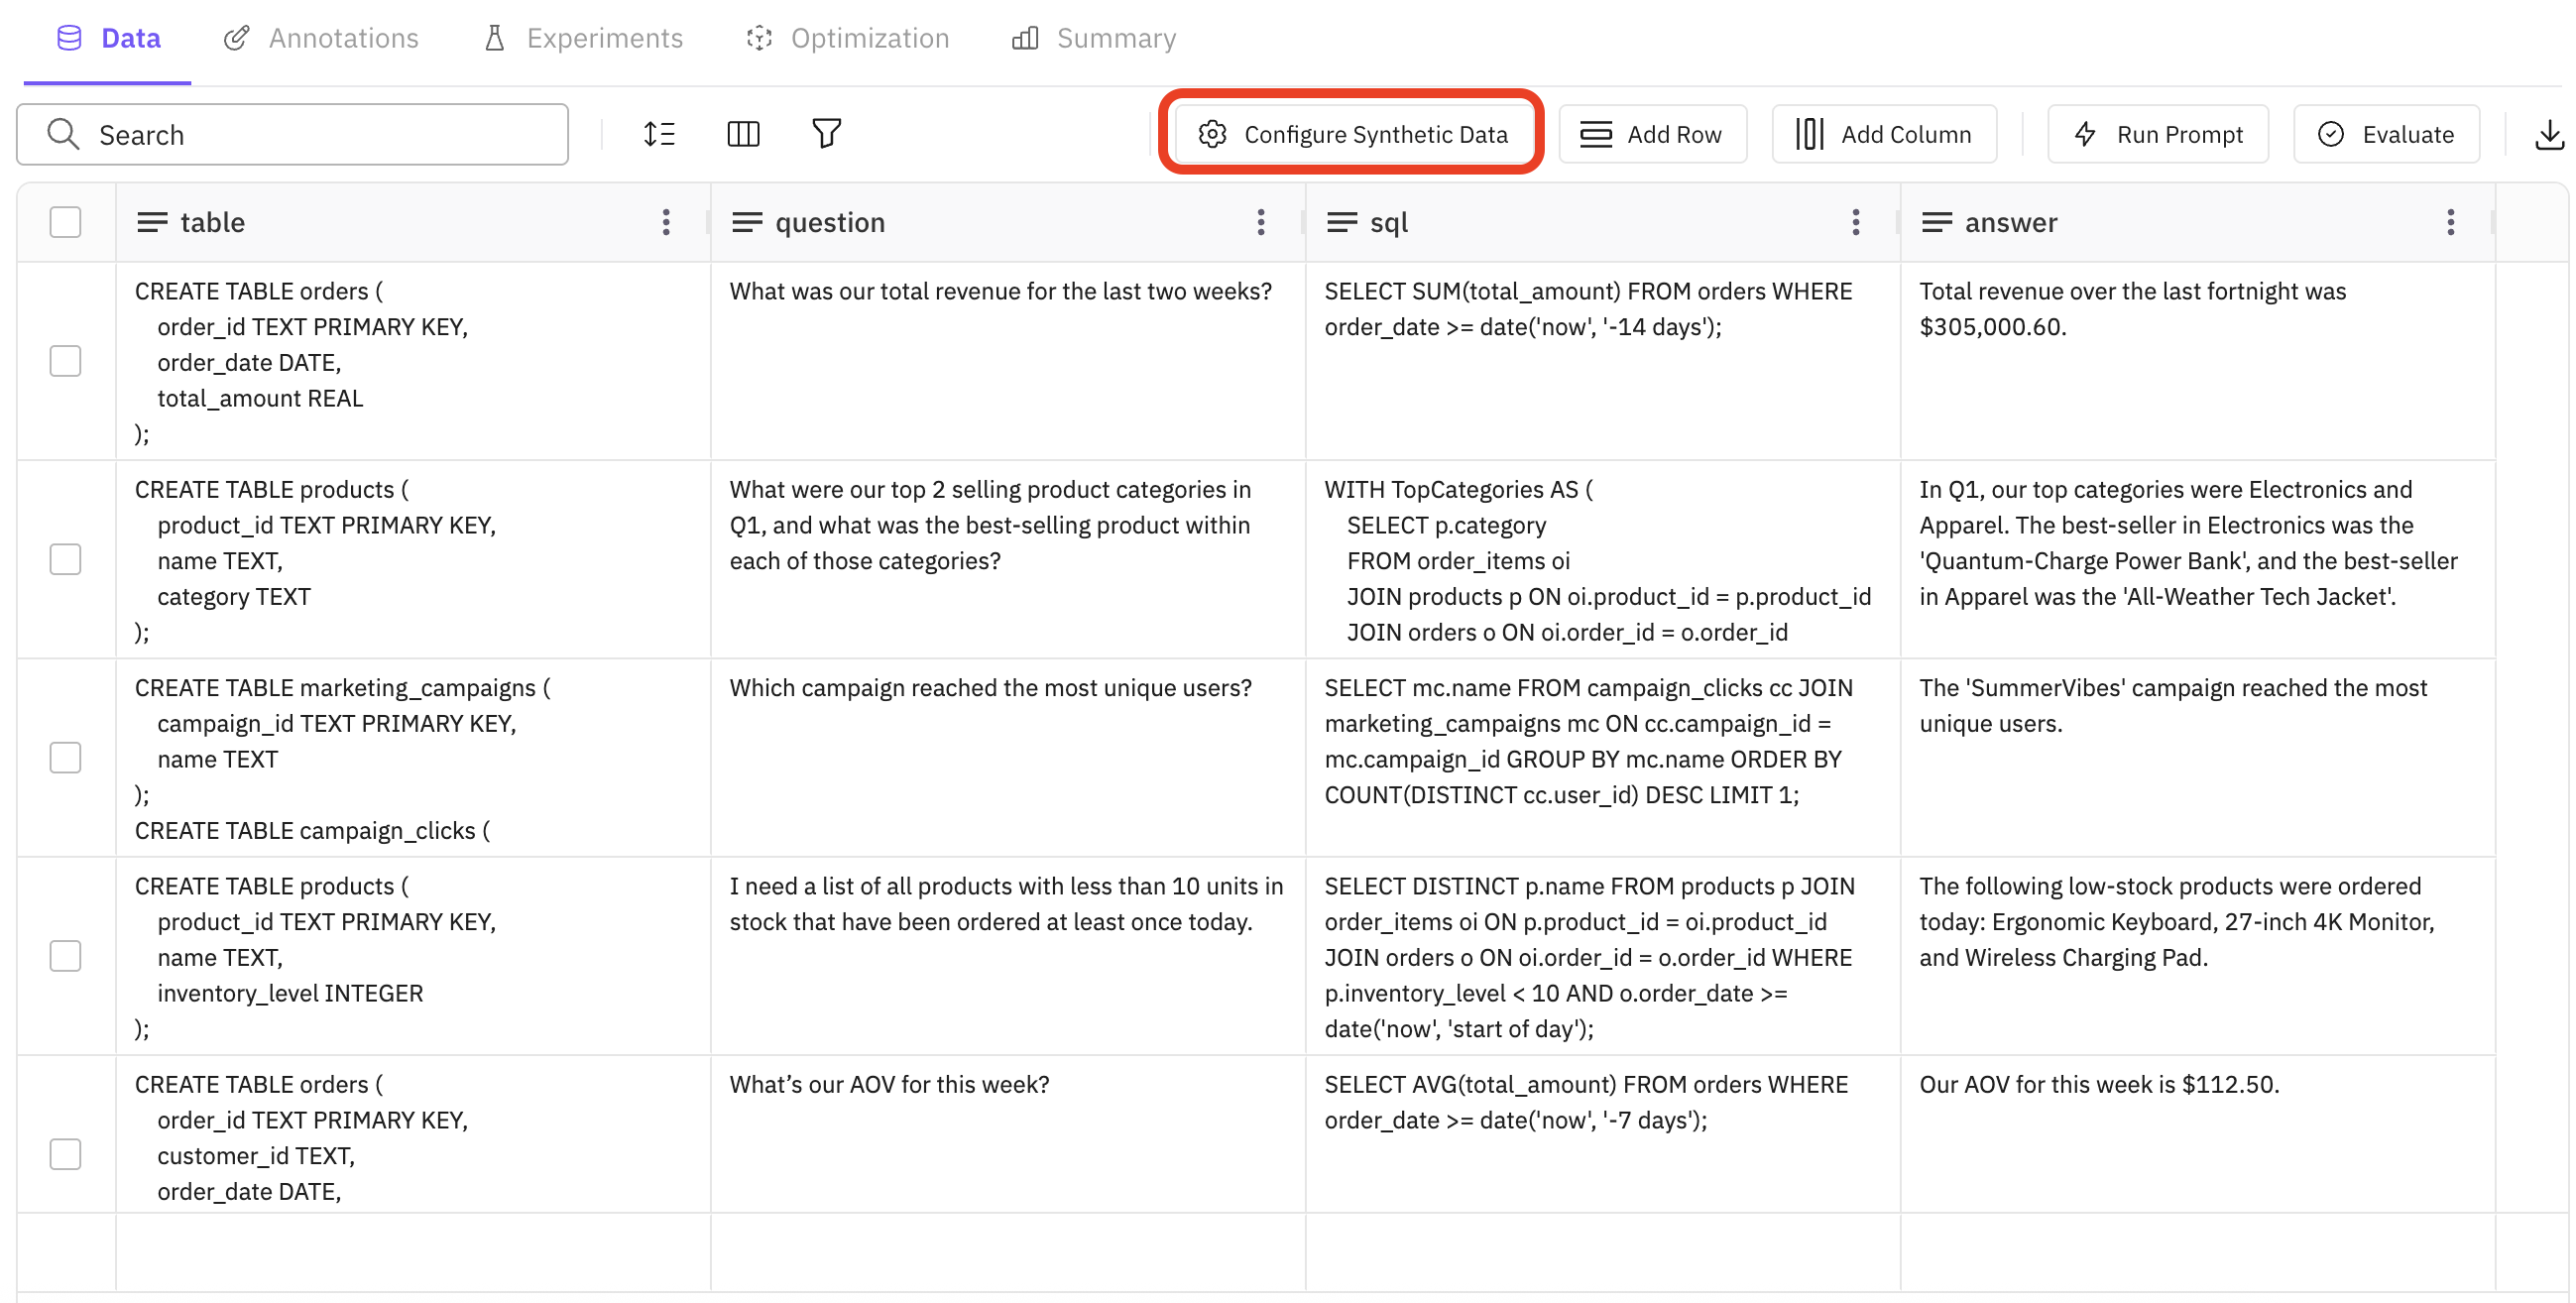
Click on “Create Dataset” button to generate the dataset. Your synthetic dataset will be generated in a few seconds and will be available in your dataset dashboard.
If you are not satisfied with the generated dataset, you can click on “Configure Synthetic Data” button. It will allow you to edit the fields and generate the dataset again.
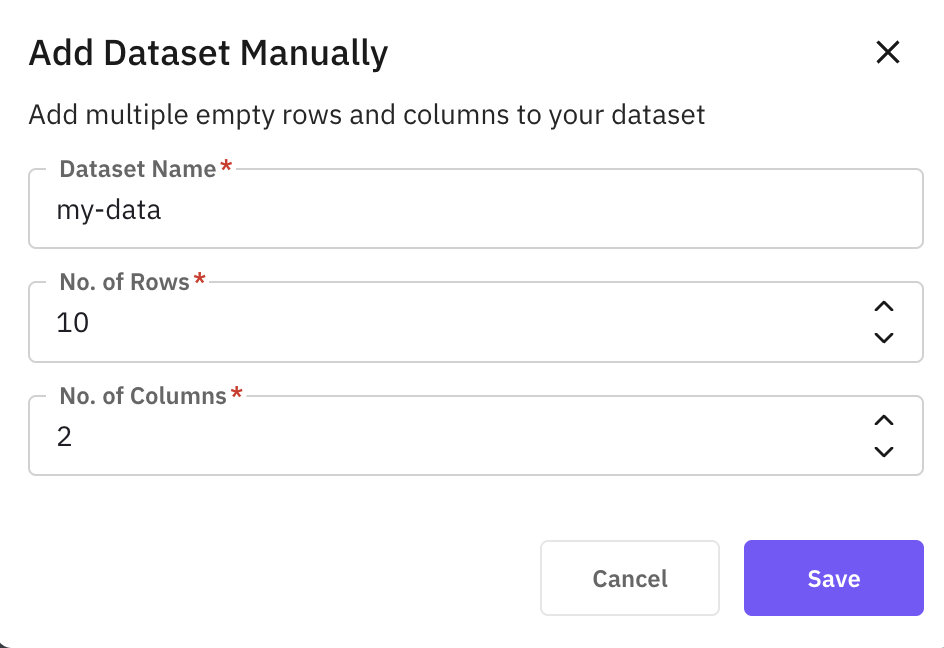
Manually create dataset from scratch.
Provide Basic Details
To proceed with creating dataset manually from scratch, provide the name you want to assign and the number of columns and rows you want.
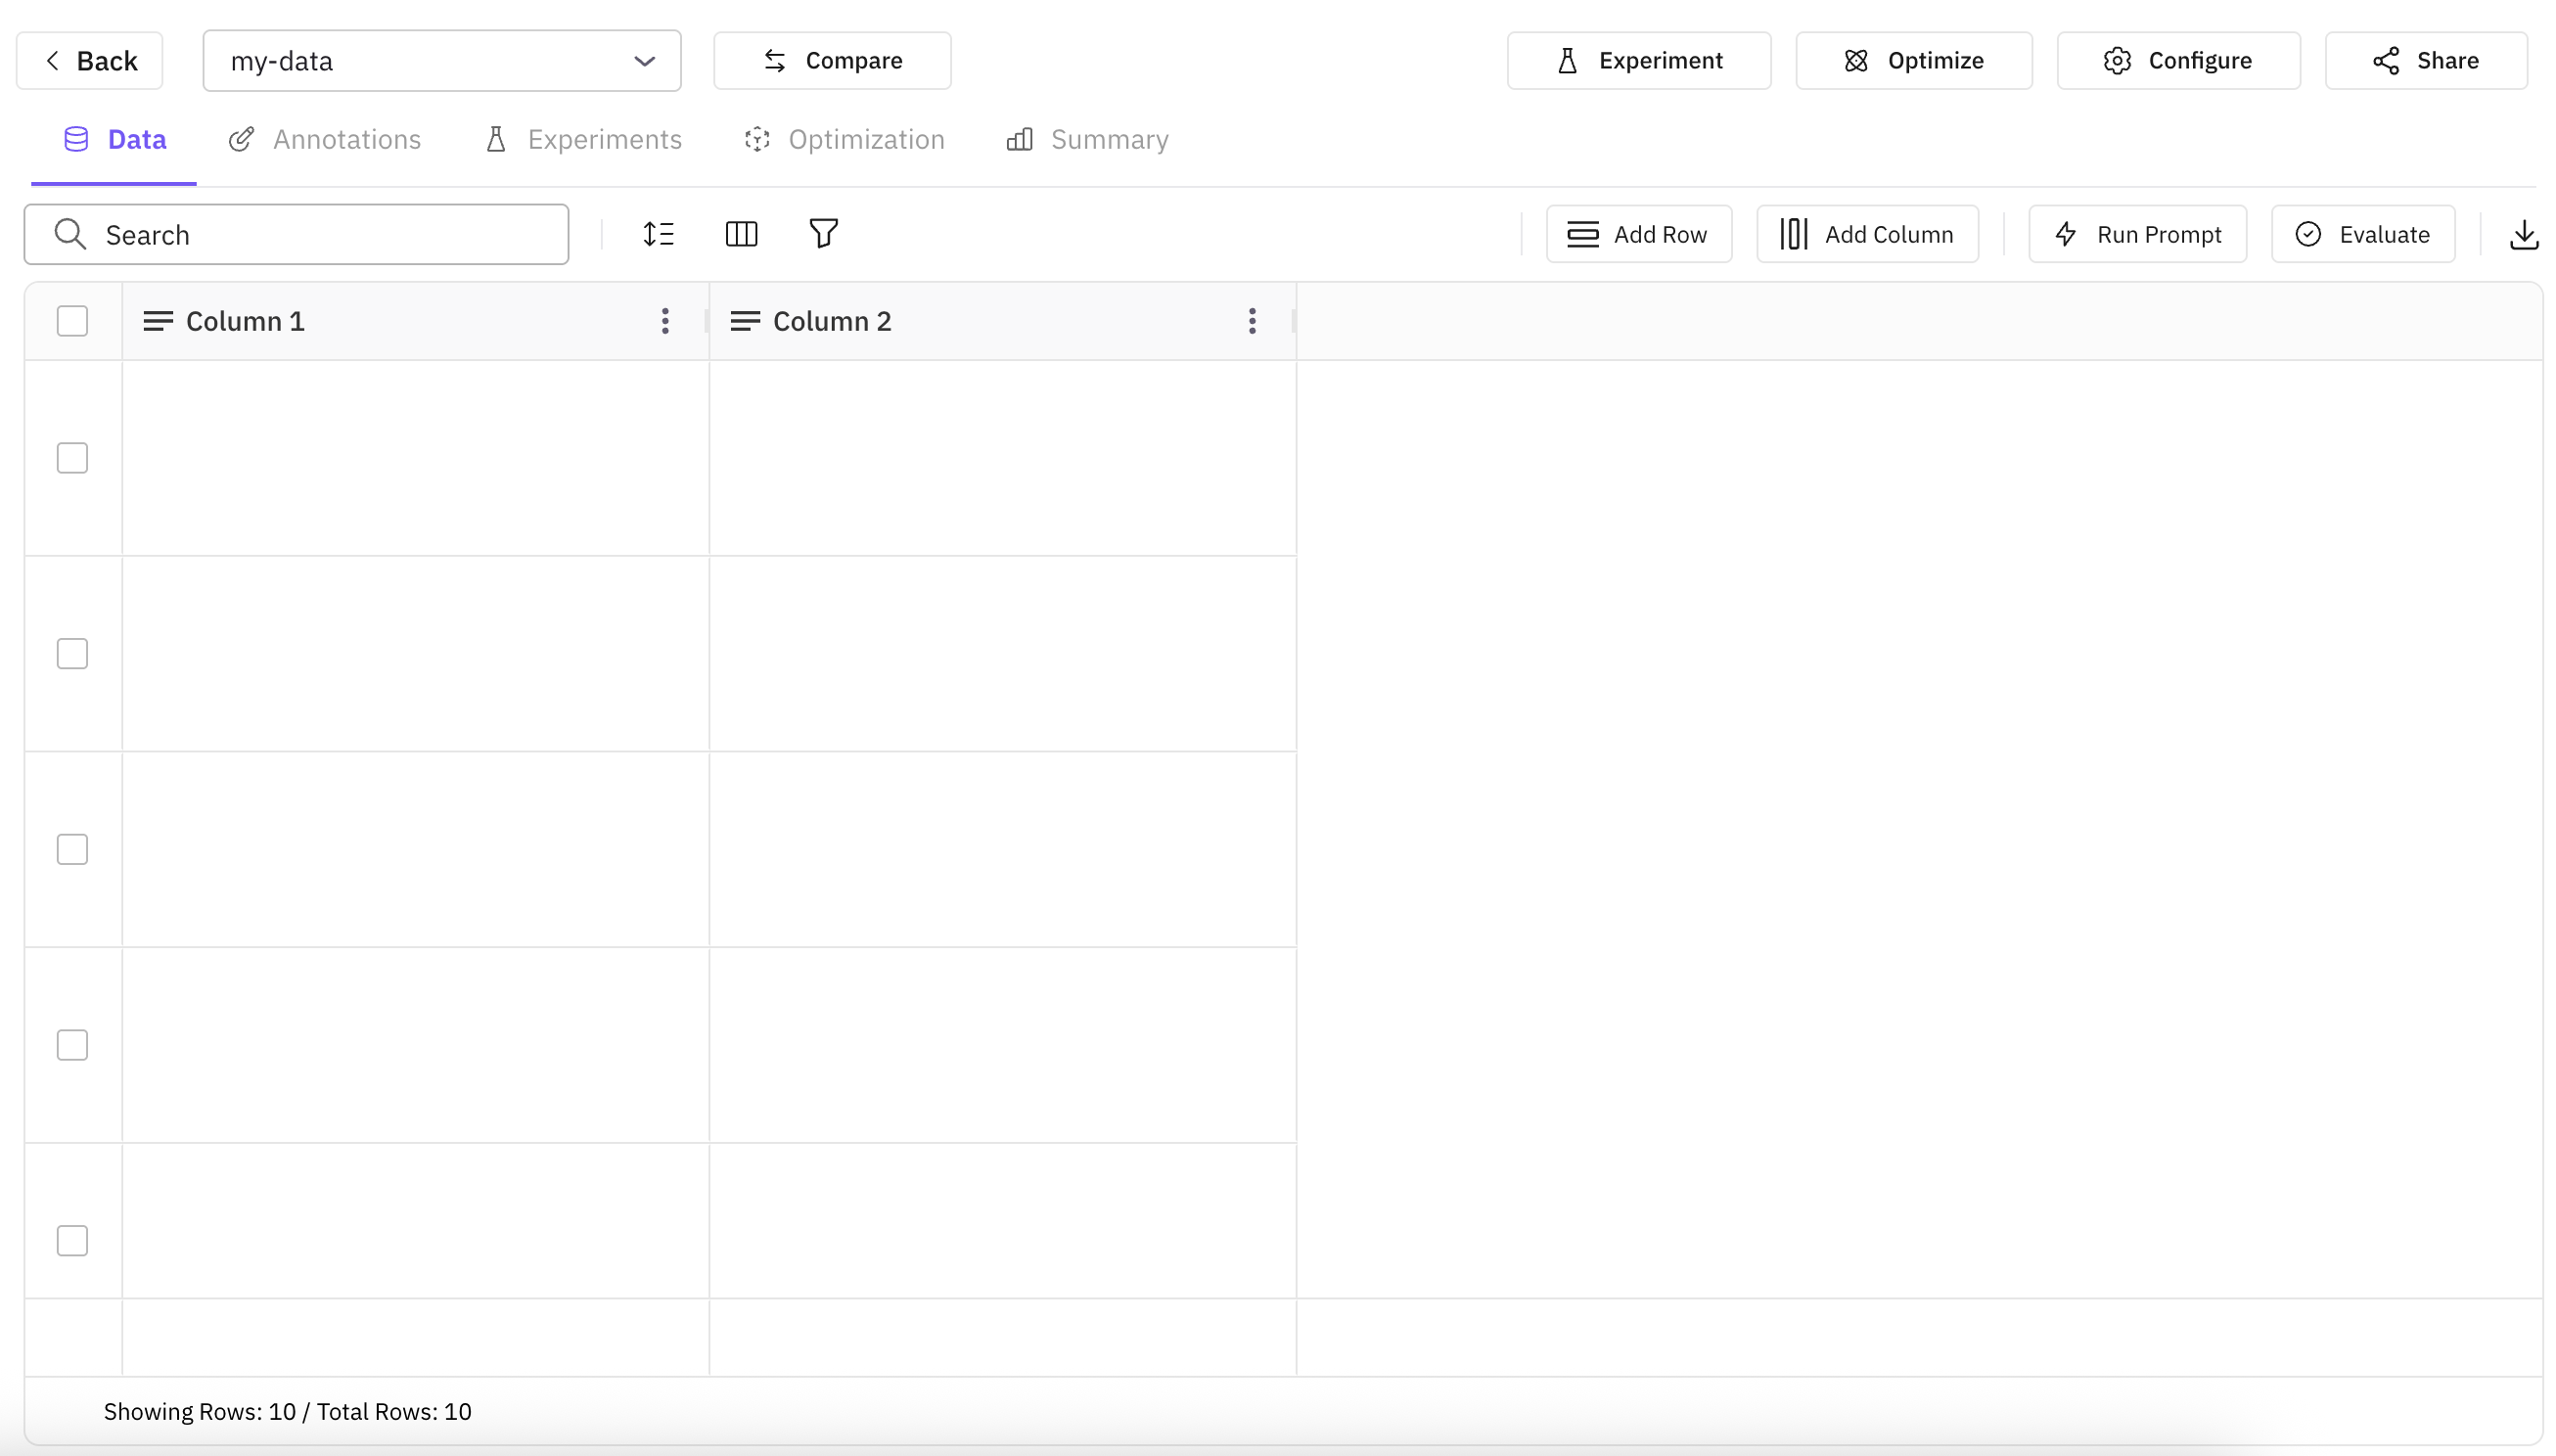
 This creates an empty dataset with the name you assigned and empty rows and columns.
Populating the dataset
You can populate the dataset by double-tapping over the empty cell you want to populate. It will open an editor where you can provide the details you want to fill in that cell.
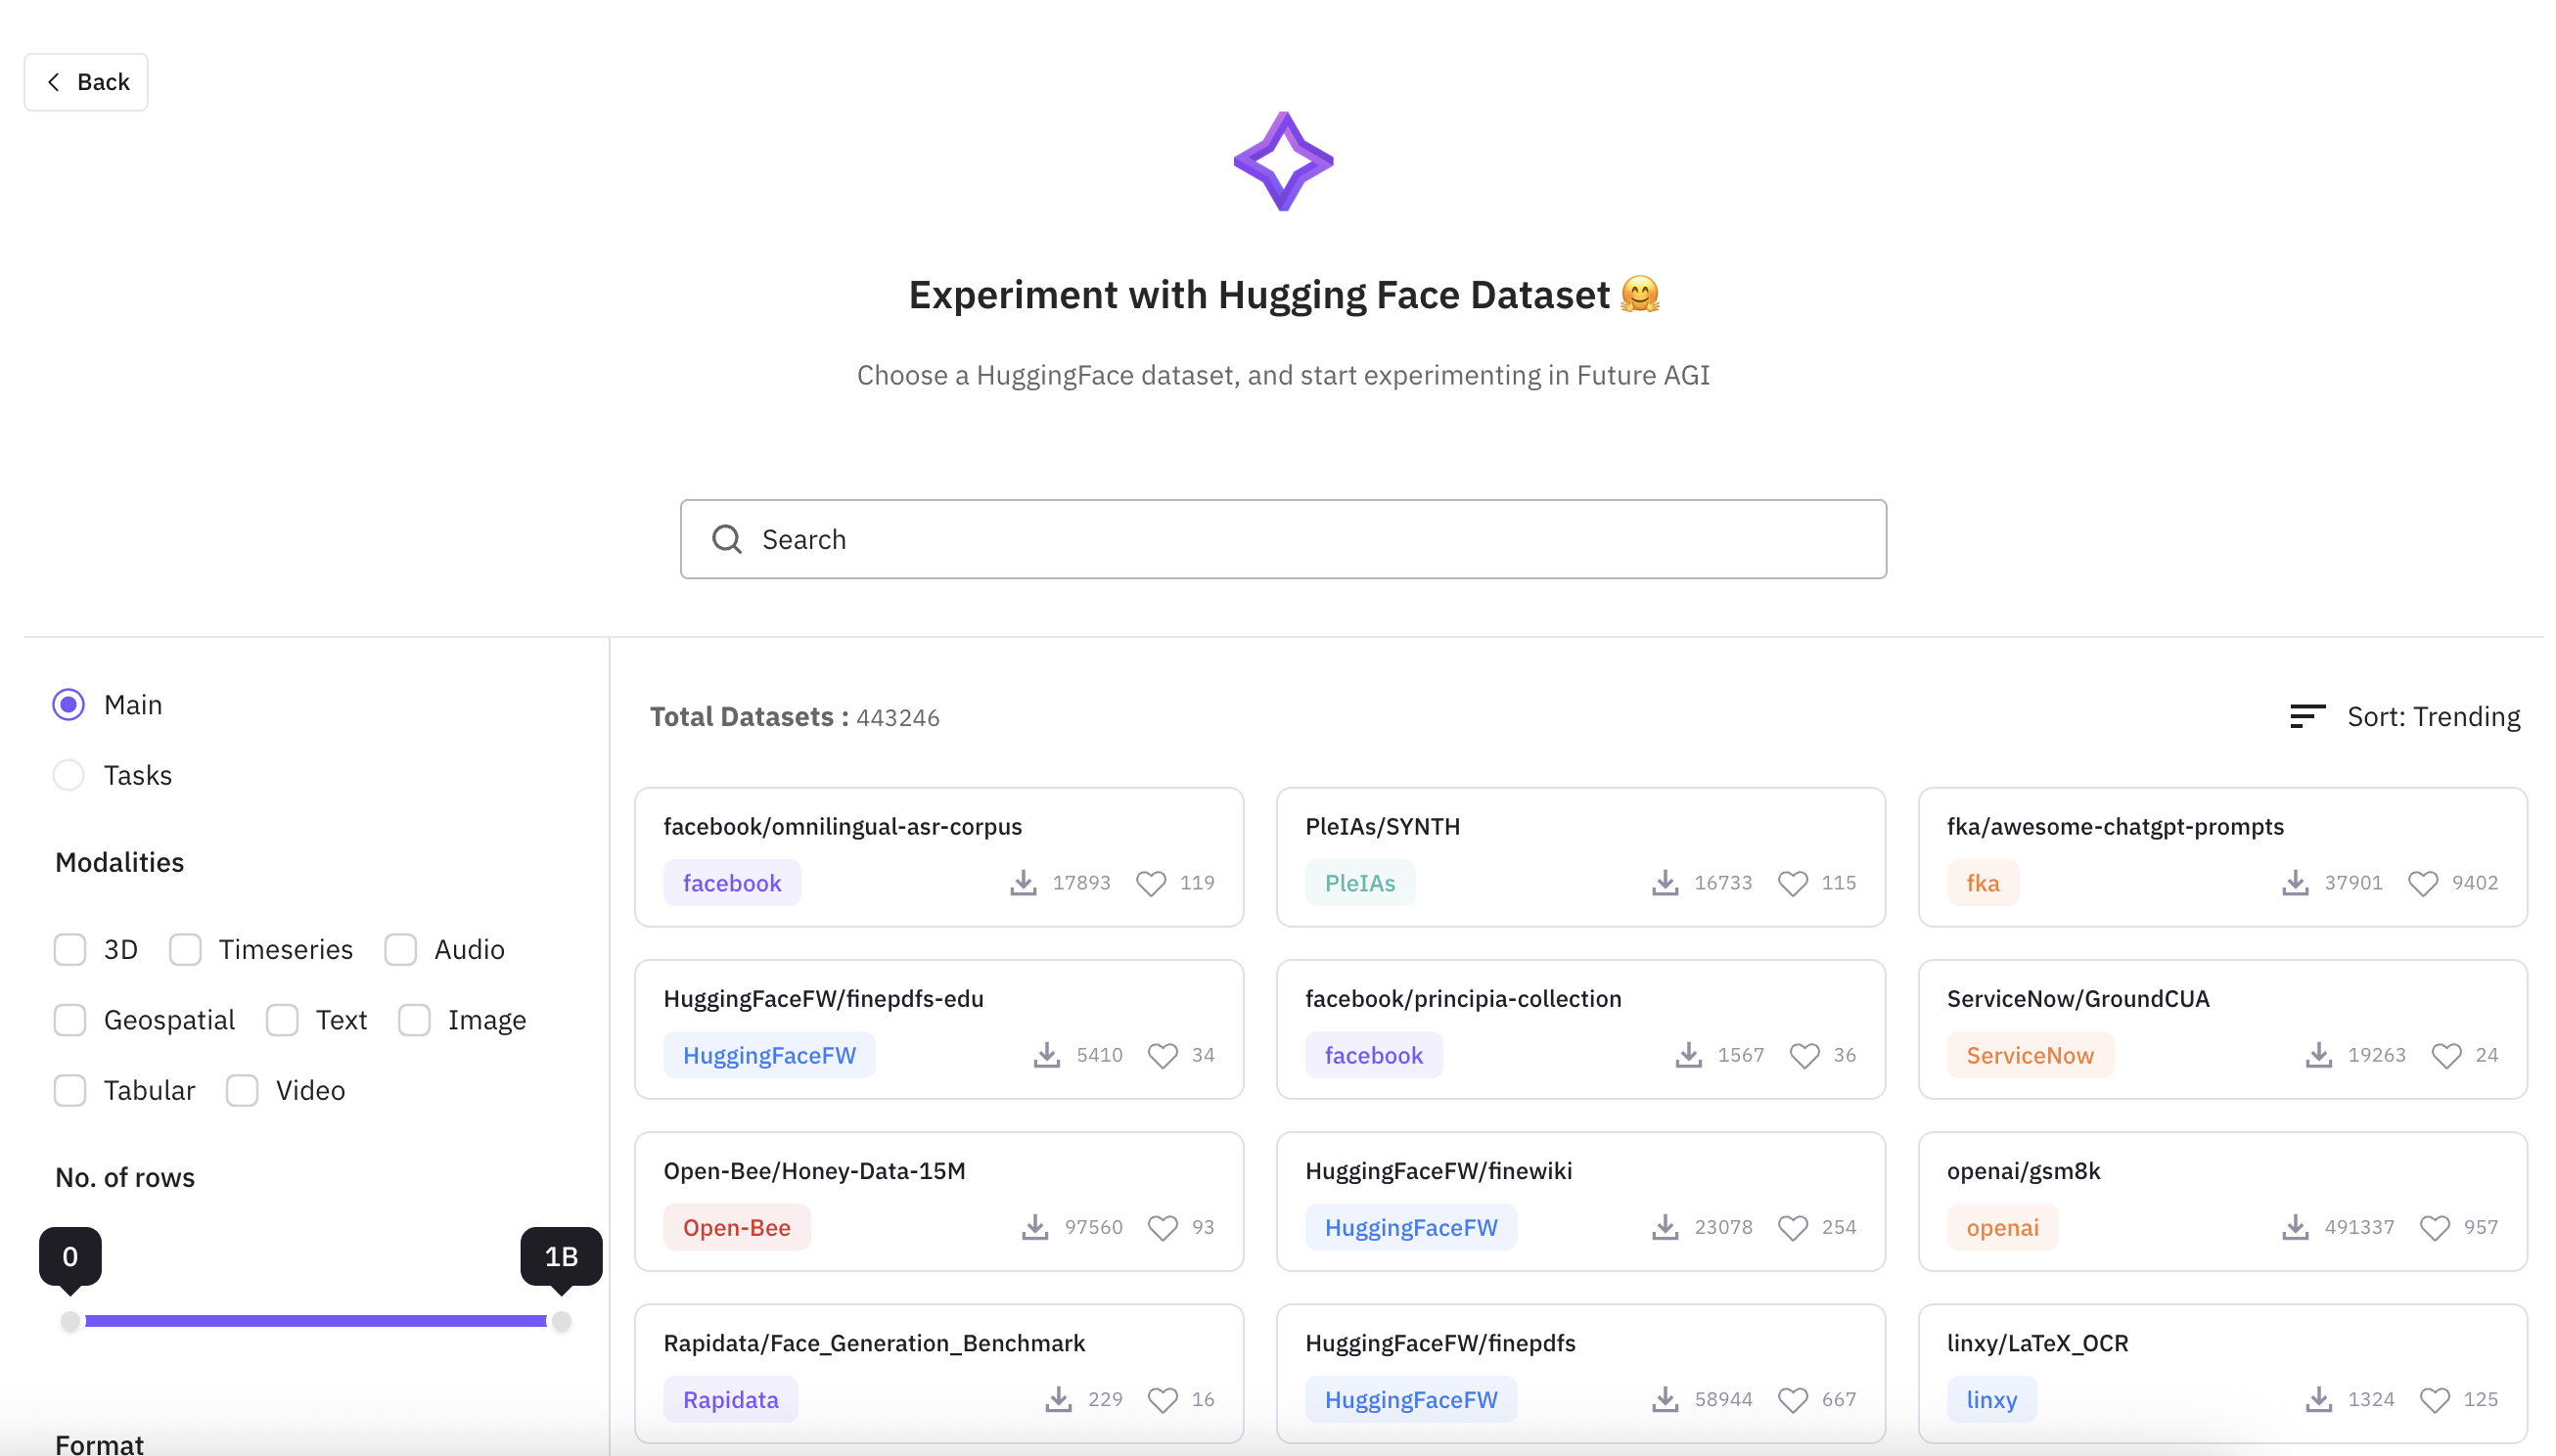
Search Hugging Face Dataset
Search for the dataset you want to import from Hugging Face. You can even refine the search by using flters given on left side.
Import Dataset
Once you have selected the dataset you want to import, click on that dataset and it will open a panel where you can select what subset and split you want to import.
You can also select the number of rows you want to import. By default, it will import all the rows.
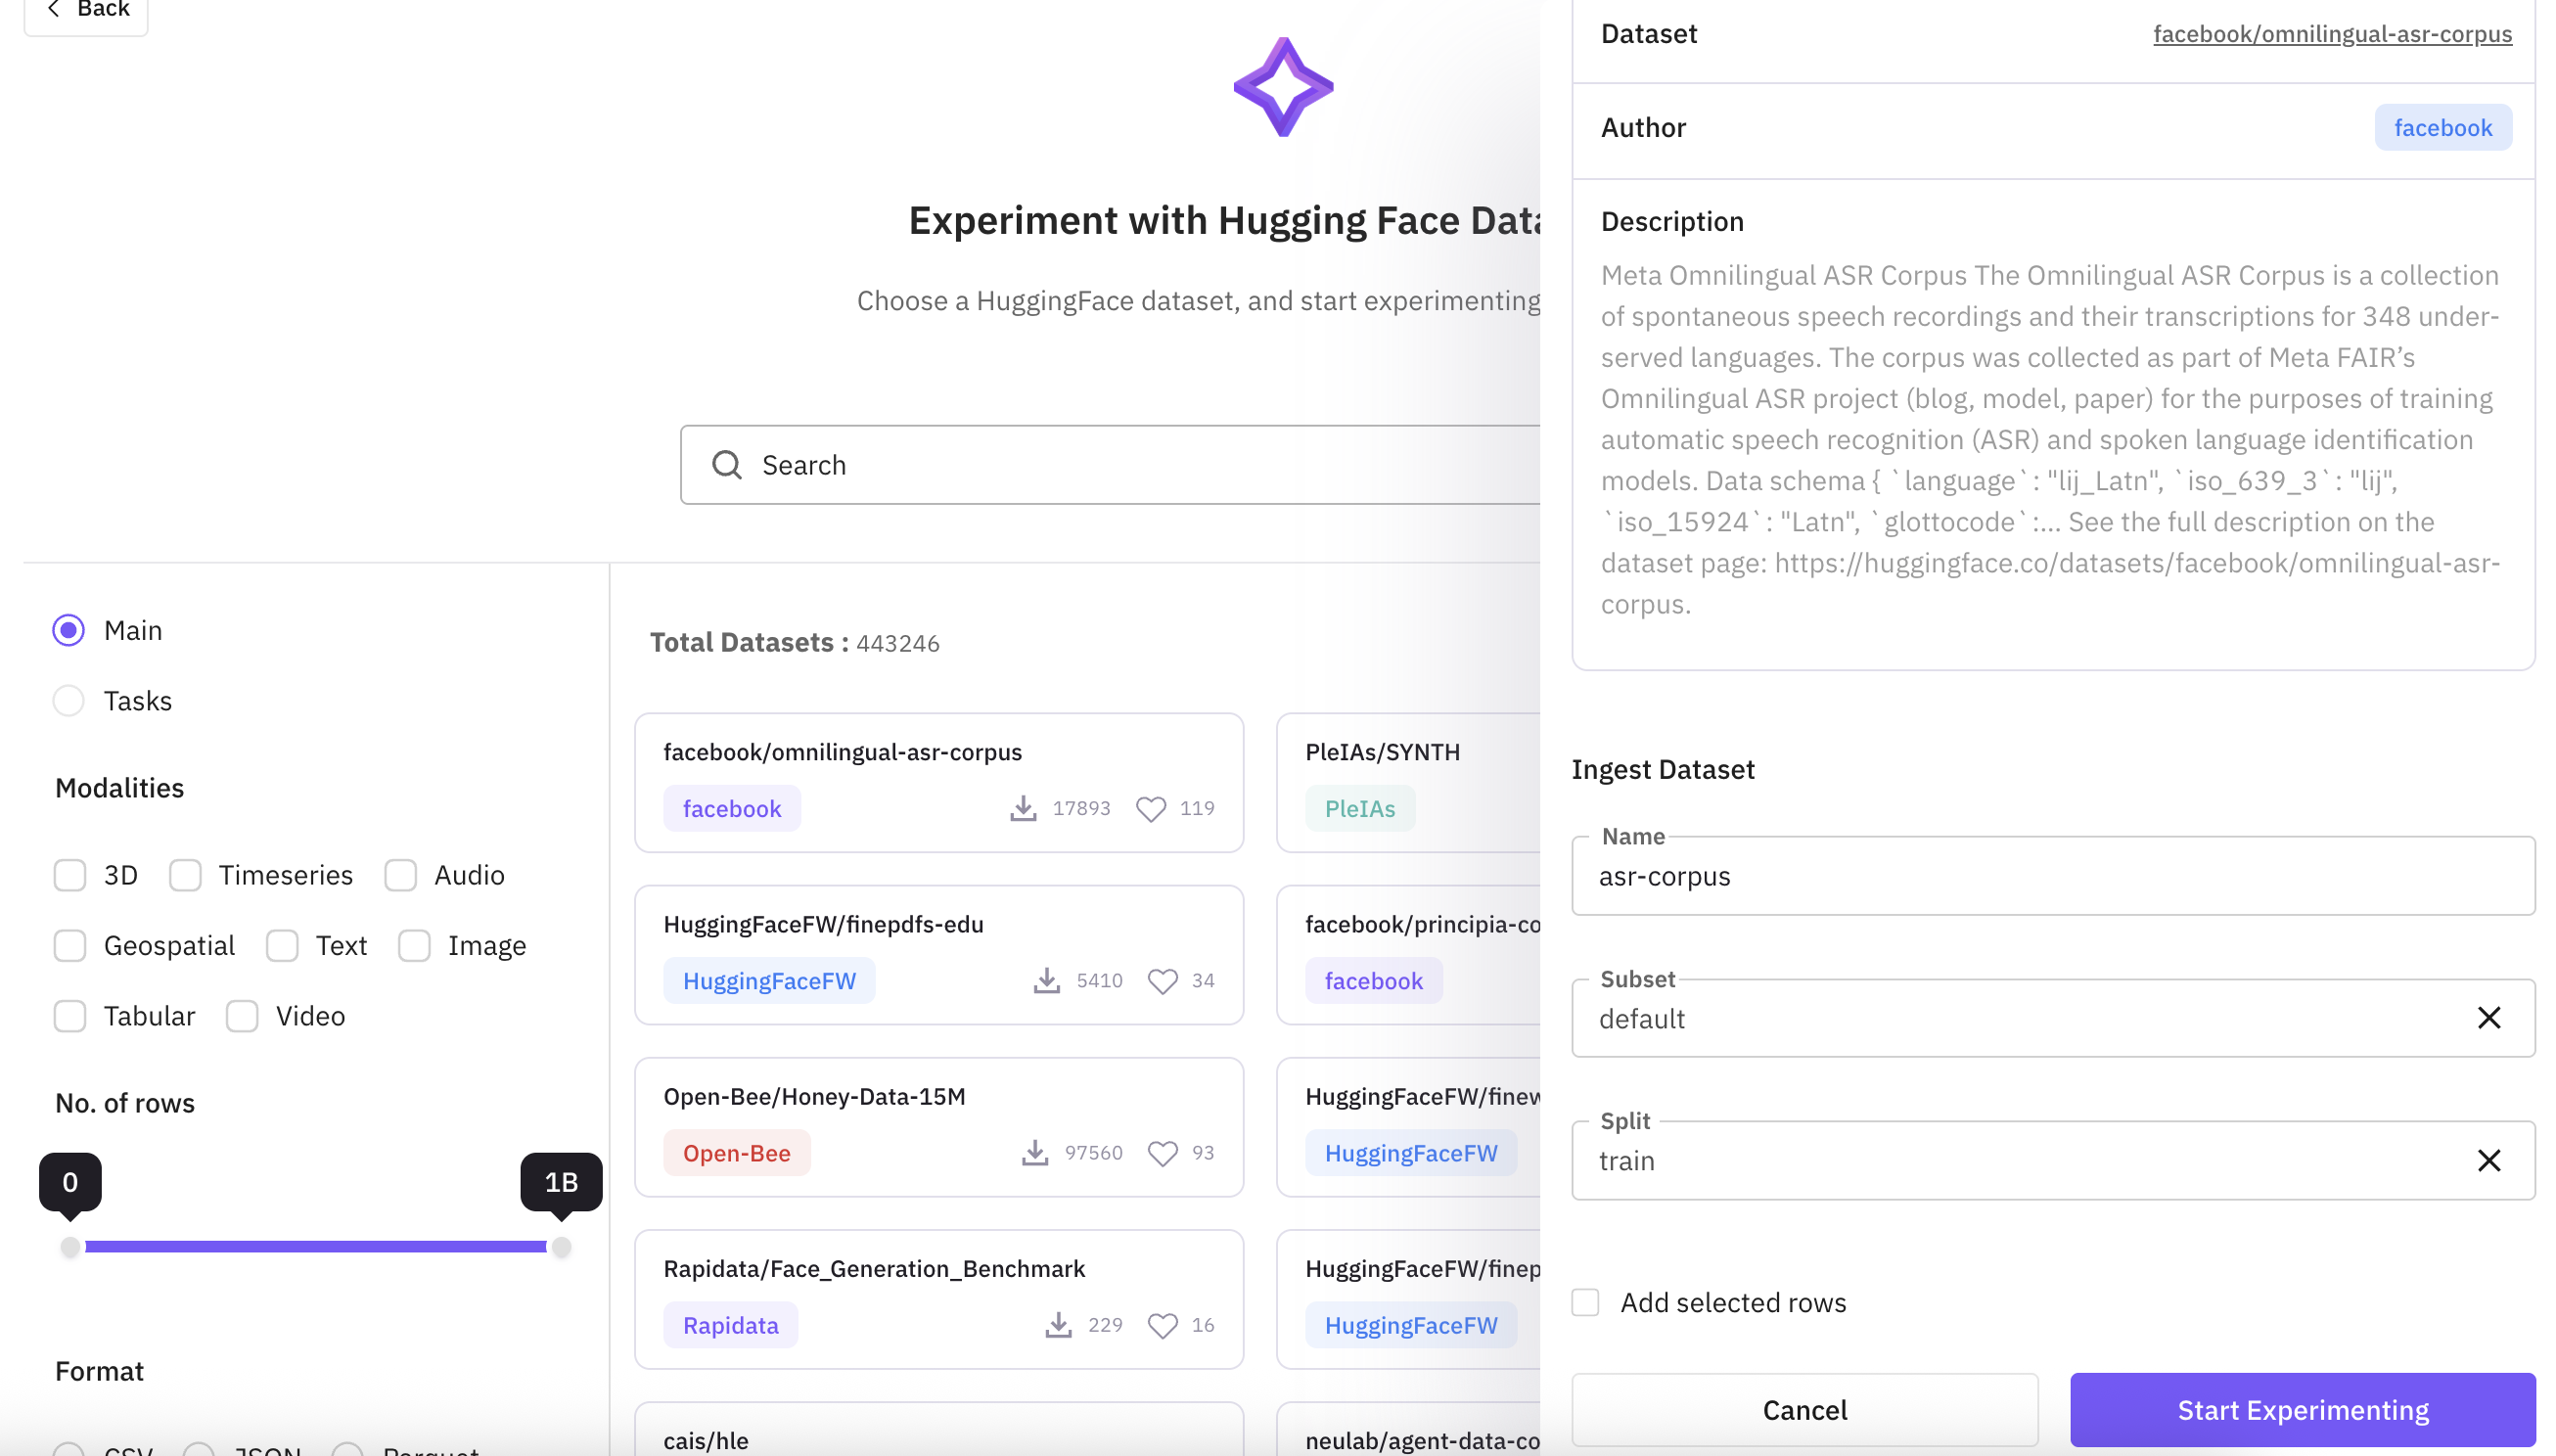
Click on “Start Experimenting” button and it will start importing the dataset and you will be able to see it in your dataset dashboard.
You can create a subset from an existing dataset.
Choose the existing dataset
Assign a name to this dataset and choose the existing dataset from the dropdown you want to create a subset from.
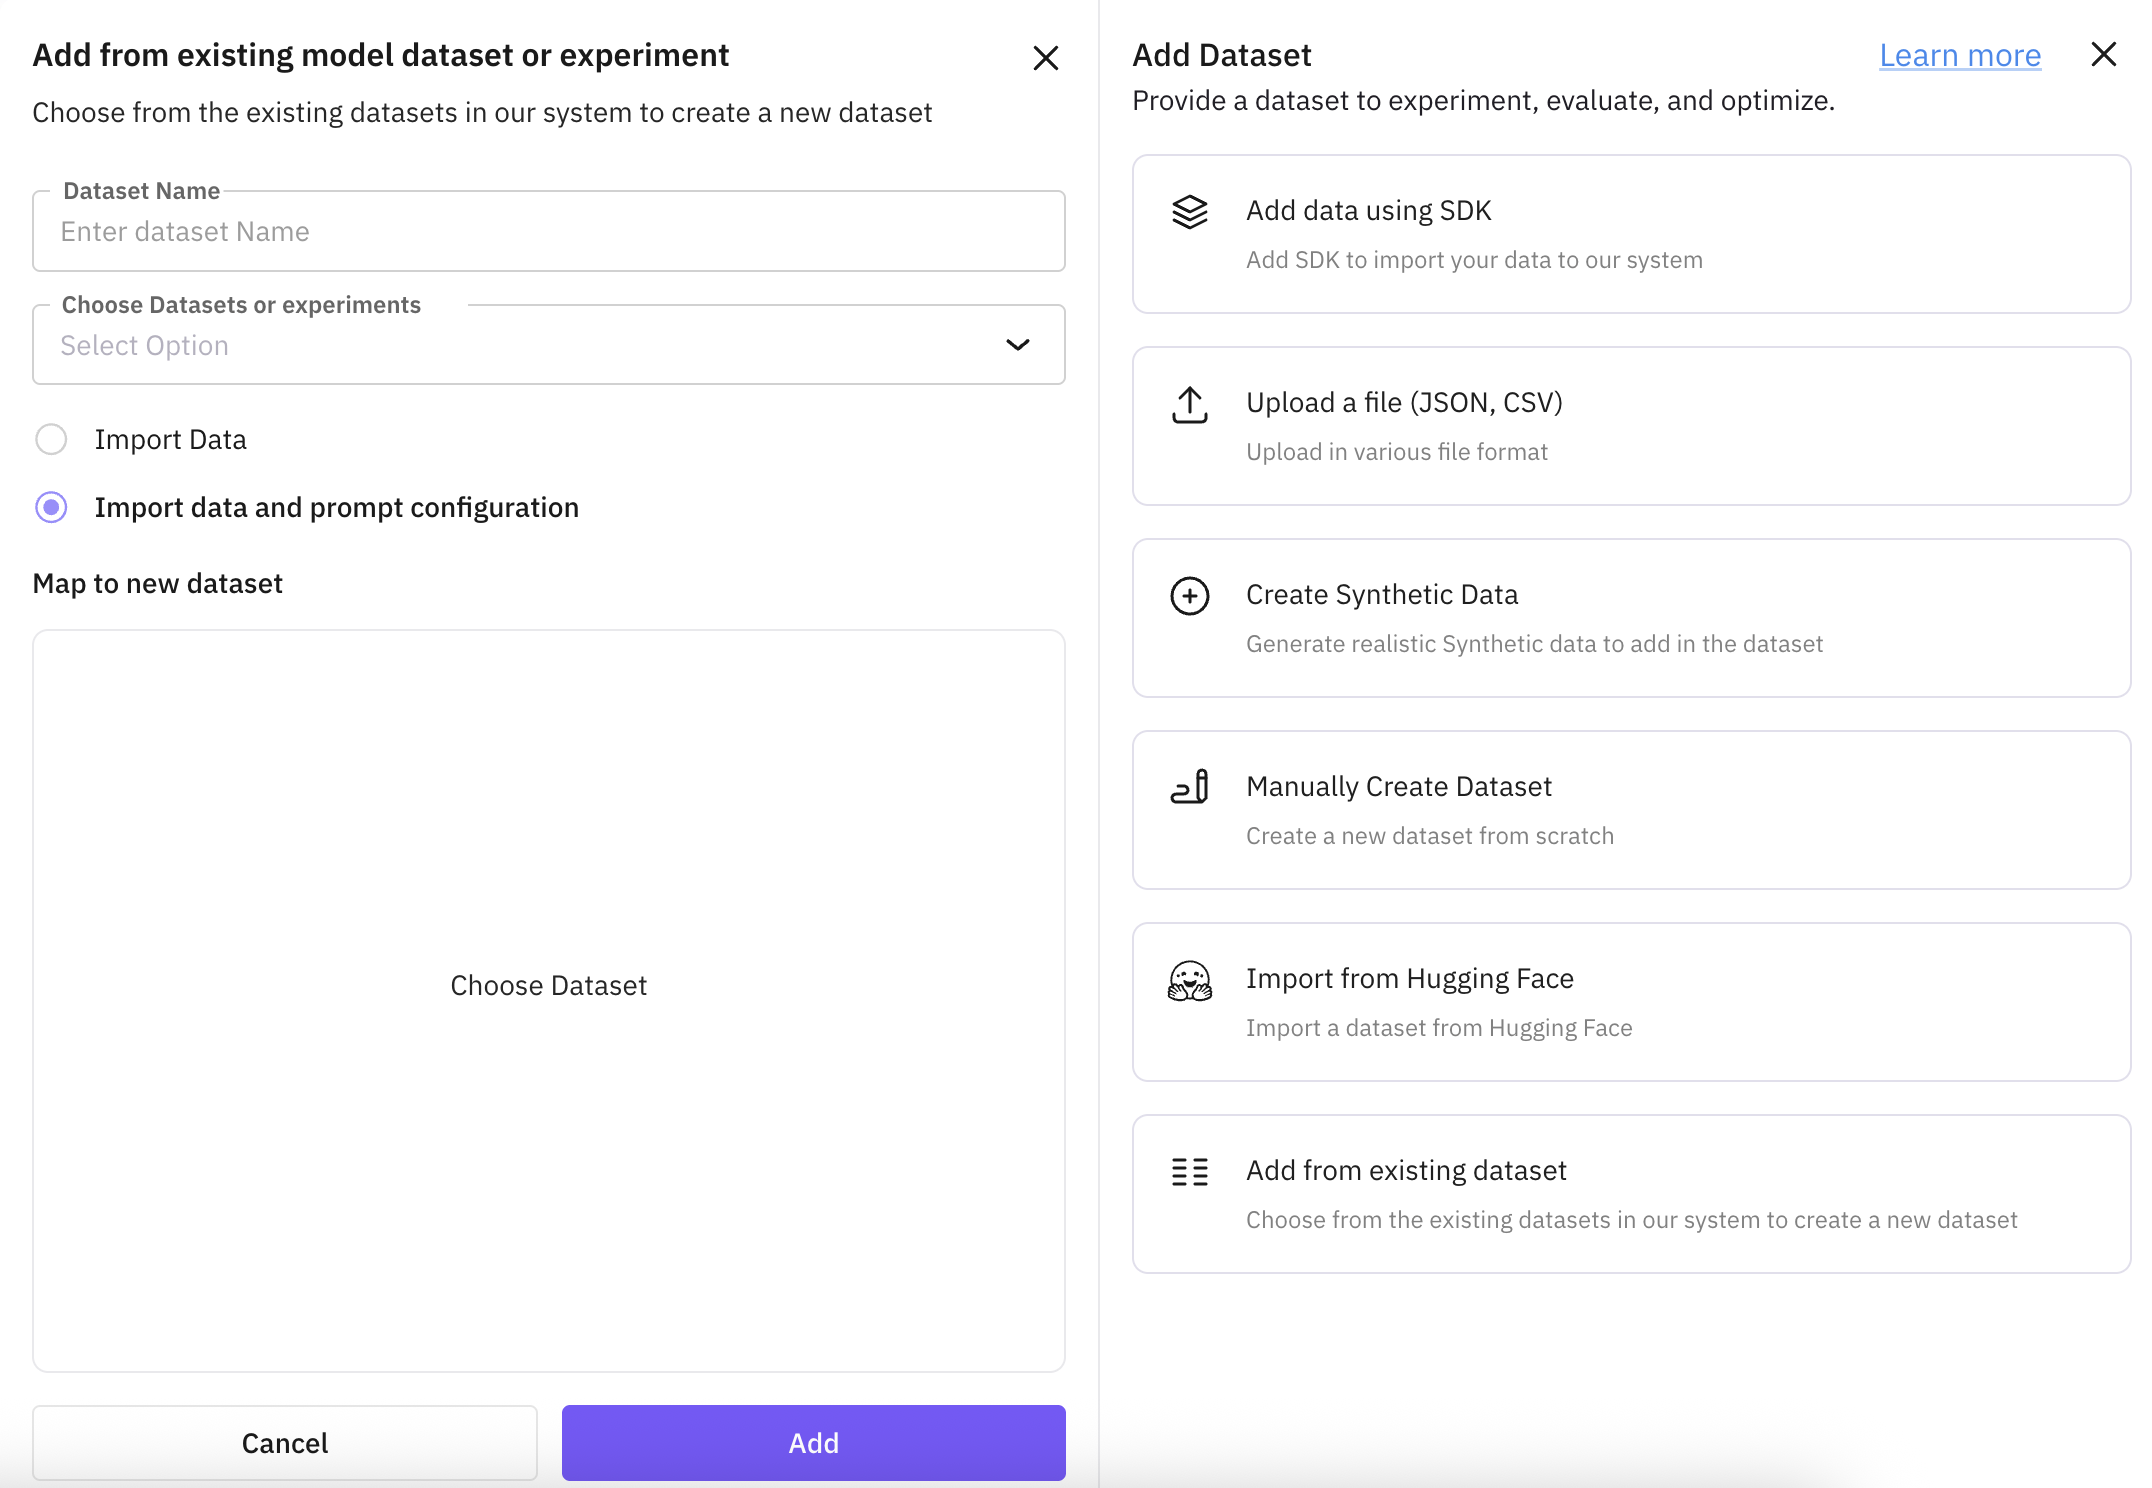 It allows you to import the dataset in two ways:
- Import Data: It will only import the original columns from the existing dataset.
- Import Data and Prompt Configuration: Along with original column, it will also import the prompt columns from that dataset.
Map the columns
You can choose what columns you want to use from that existing dataset and also you can assign a new name to the columns you want to use.

Import the dataset
Click on “Add” button and it will create a new dataset in your dataset dashboard.
Next Steps
Add Rows to Dataset
Add individual records or bulk import data rows to your dataset
Add Columns to Dataset
Extend your dataset structure with additional data fields
Run Prompts
Test and execute prompts against your dataset entries
Experiments
Design and run controlled experiments to compare approaches
Annotate Dataset
Add metadata and annotations to enrich your dataset
Questions & Discussion