Route your first LLM request
Route your first LLM call through Agent Command Center by changing two lines in the OpenAI SDK
Routing your LLM requests through Future AGI is as simple as changing two lines in the OpenAI SDK. This page guides you on how to get started with Agent Command Center, the gateway that adds routing, caching, guardrails, and cost tracking to every request
We recommend pointing your existing OpenAI SDK at the gateway, as it’s the quickest way to get set up, keeps your code unchanged, and works with any OpenAI-compatible client
You can switch providers later without touching your code, too
Prerequisites
- A Future AGI account
- Python 3.11
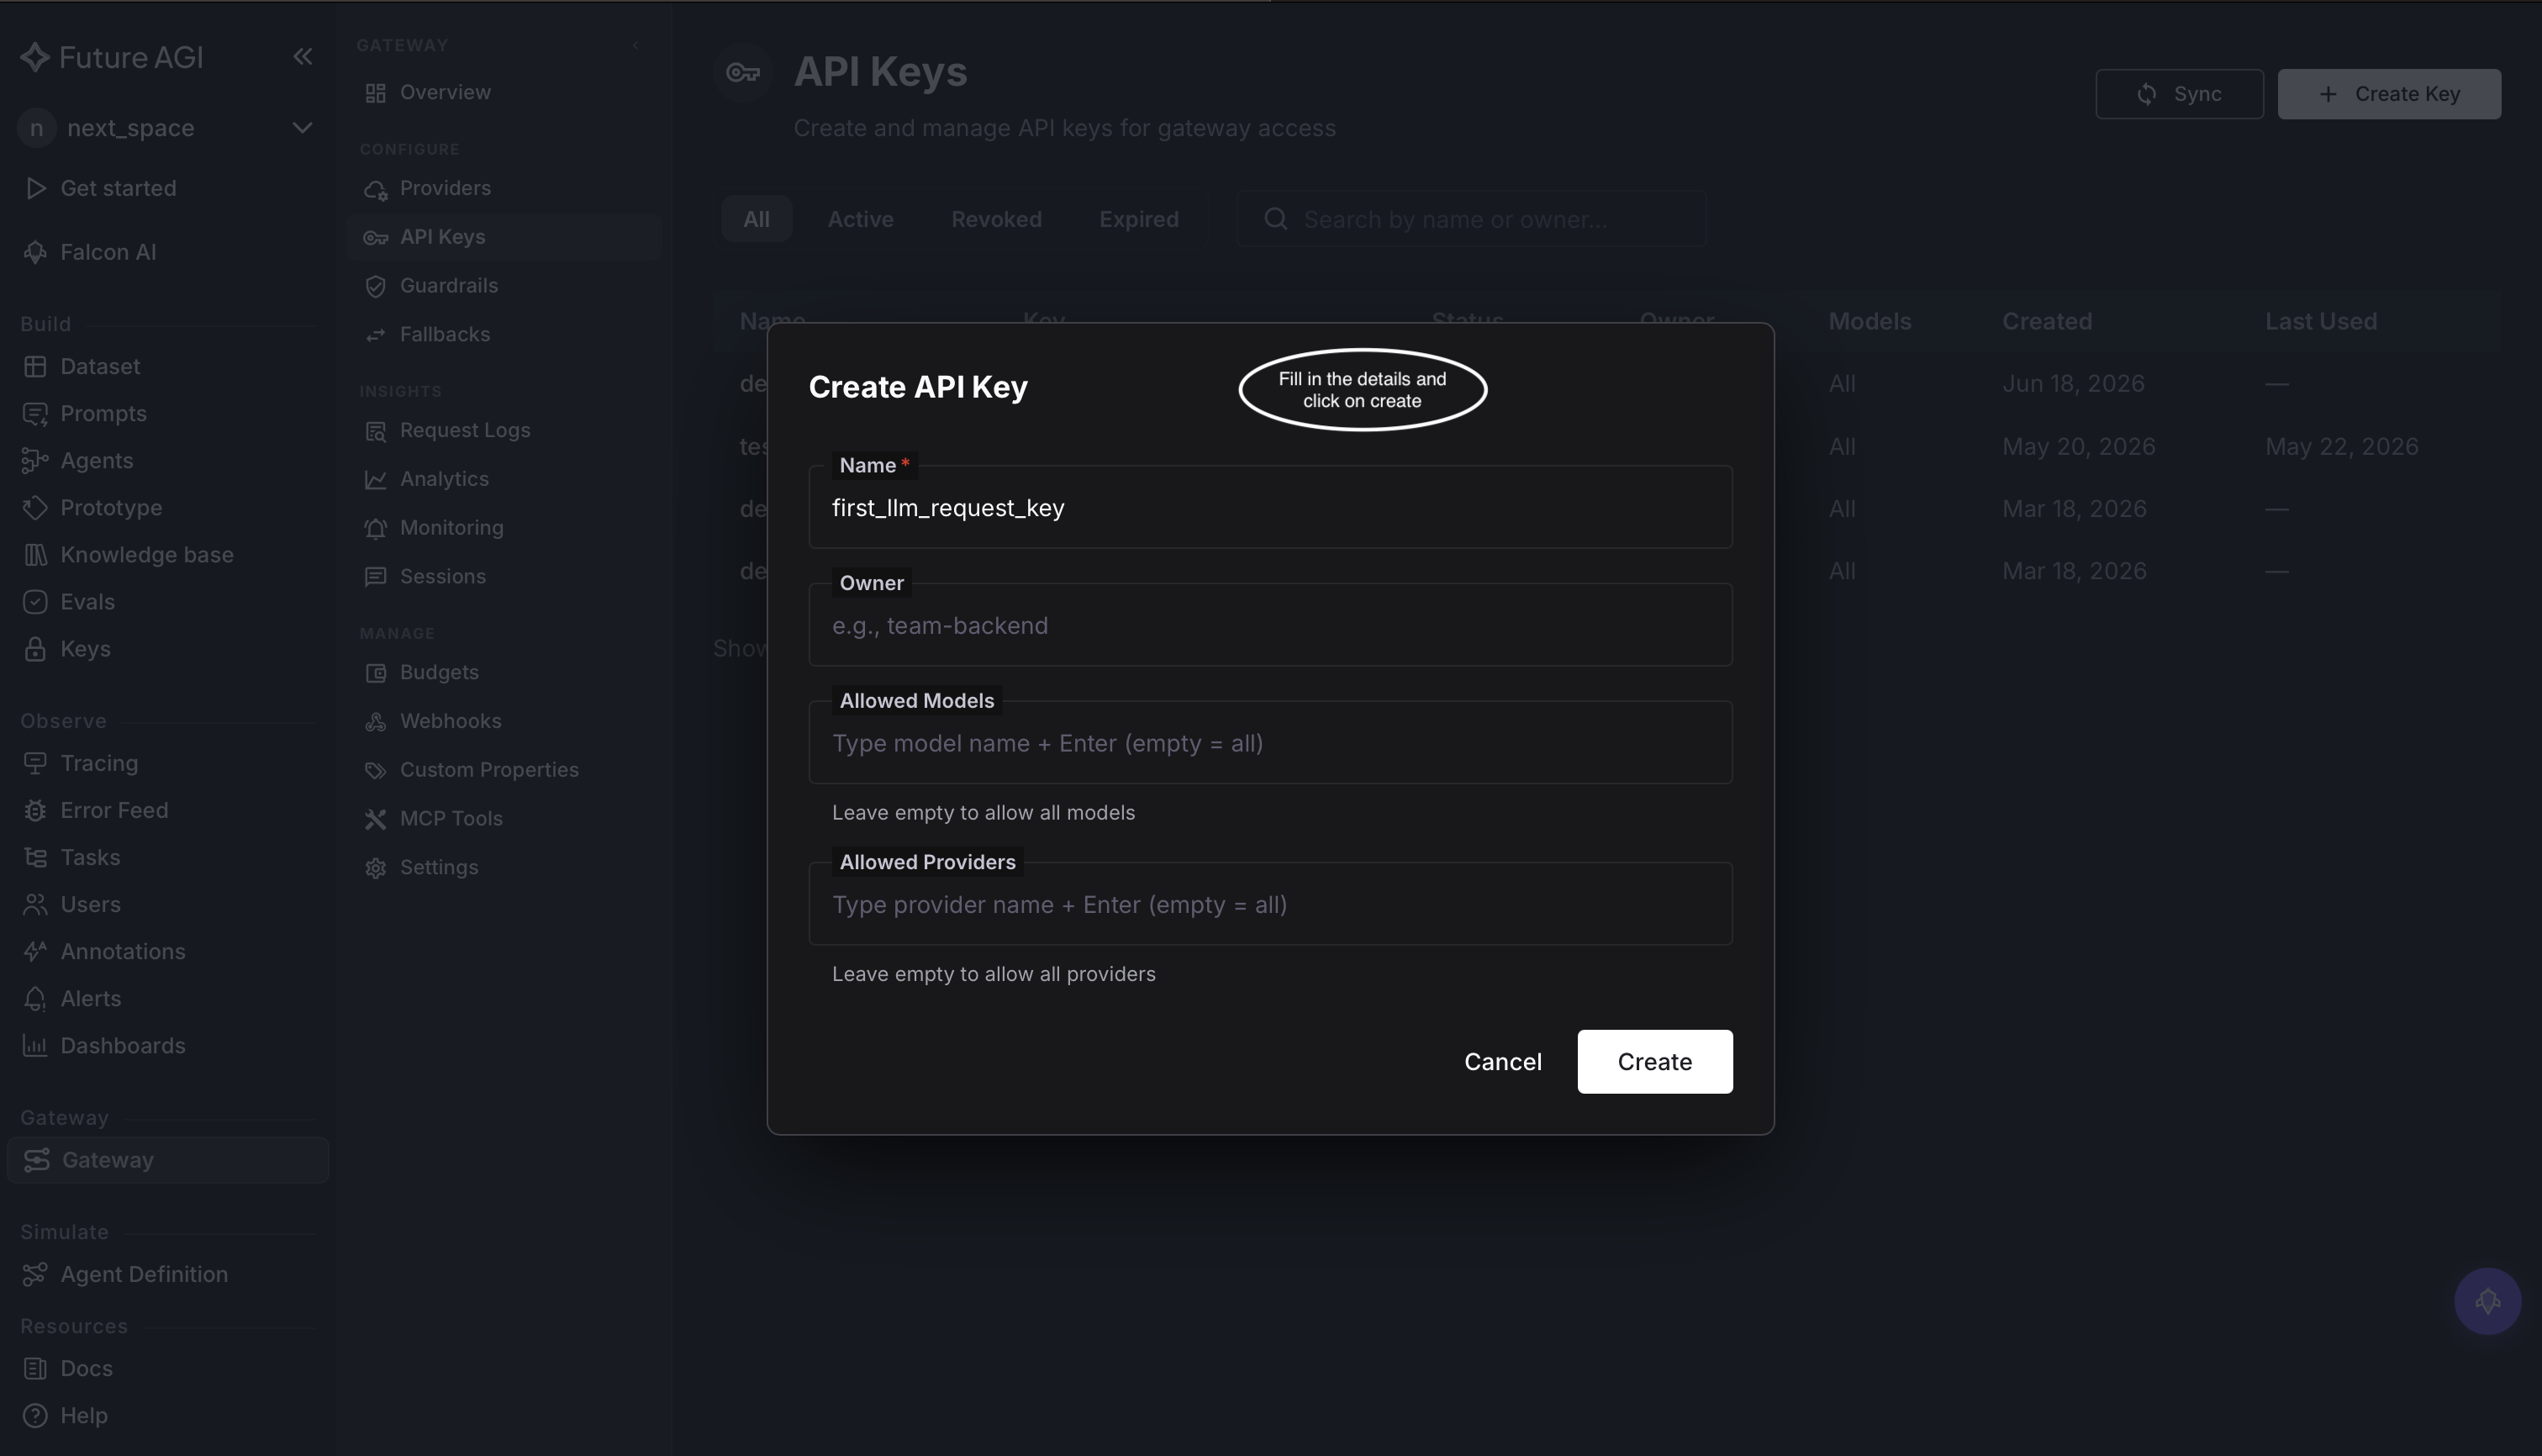
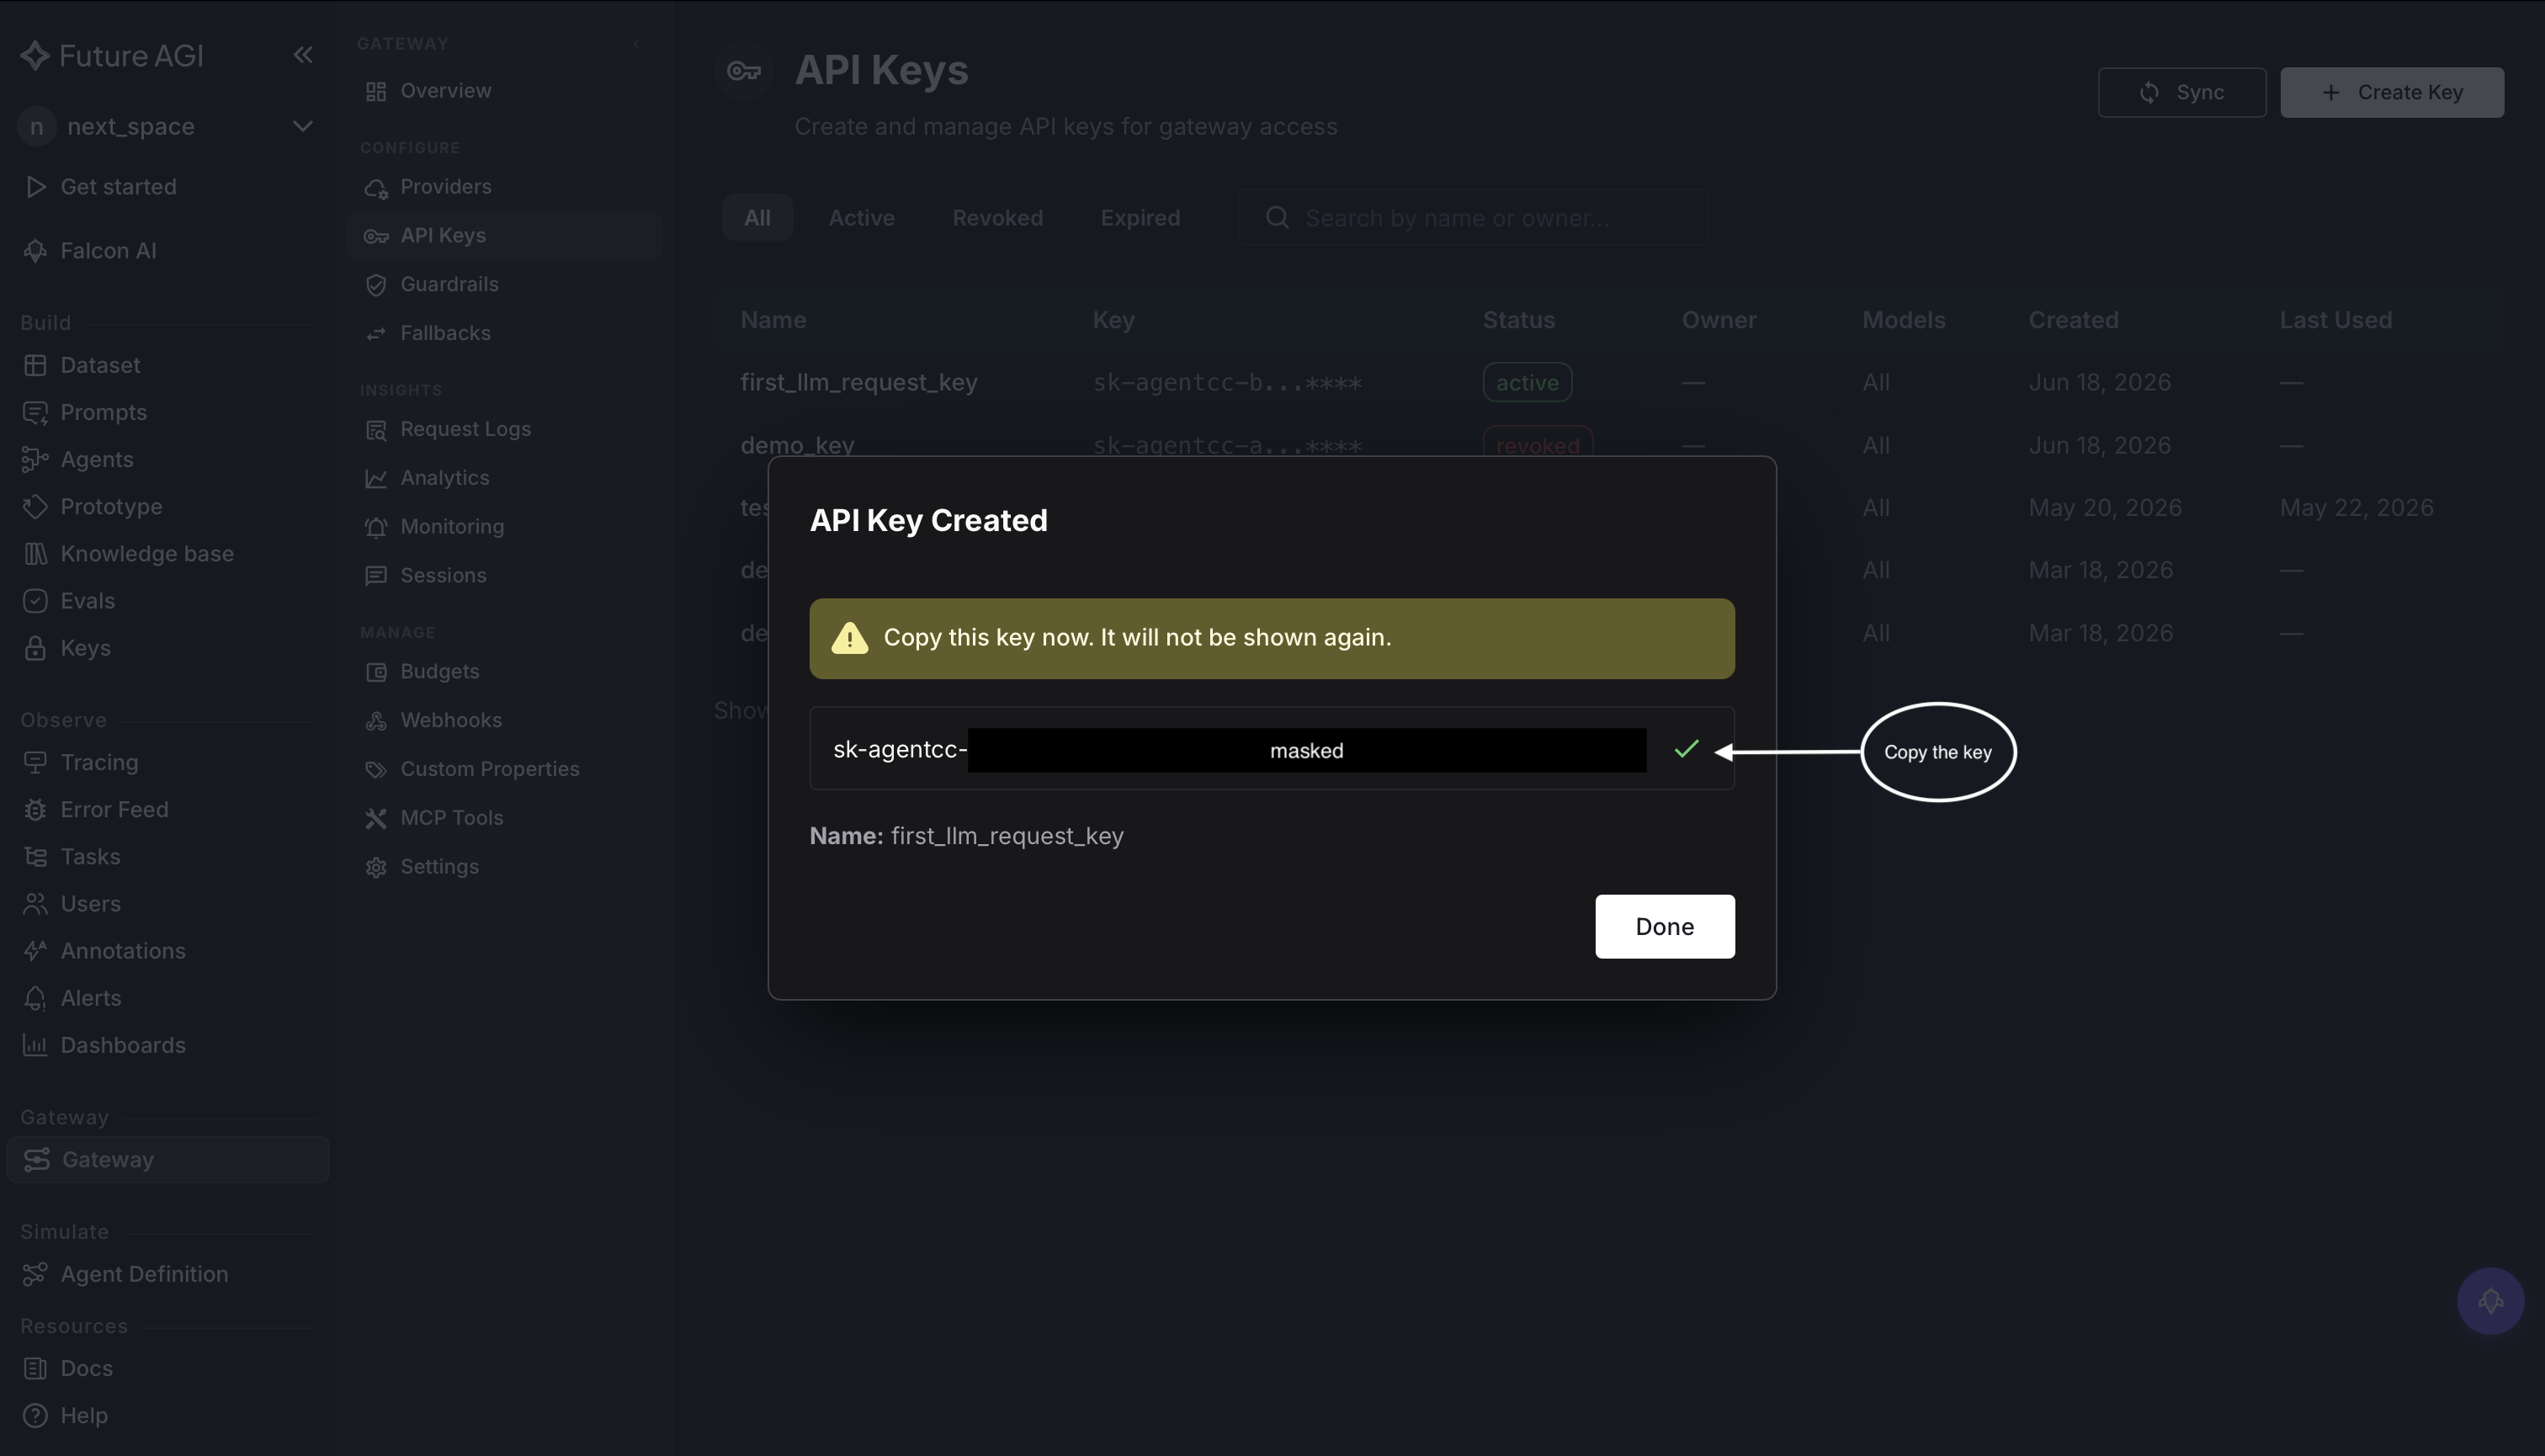
1. Create your API key
Create an Agent Command Center API key in Dashboard → Settings → API Keys and copy the value that starts with sk-agentcc-:
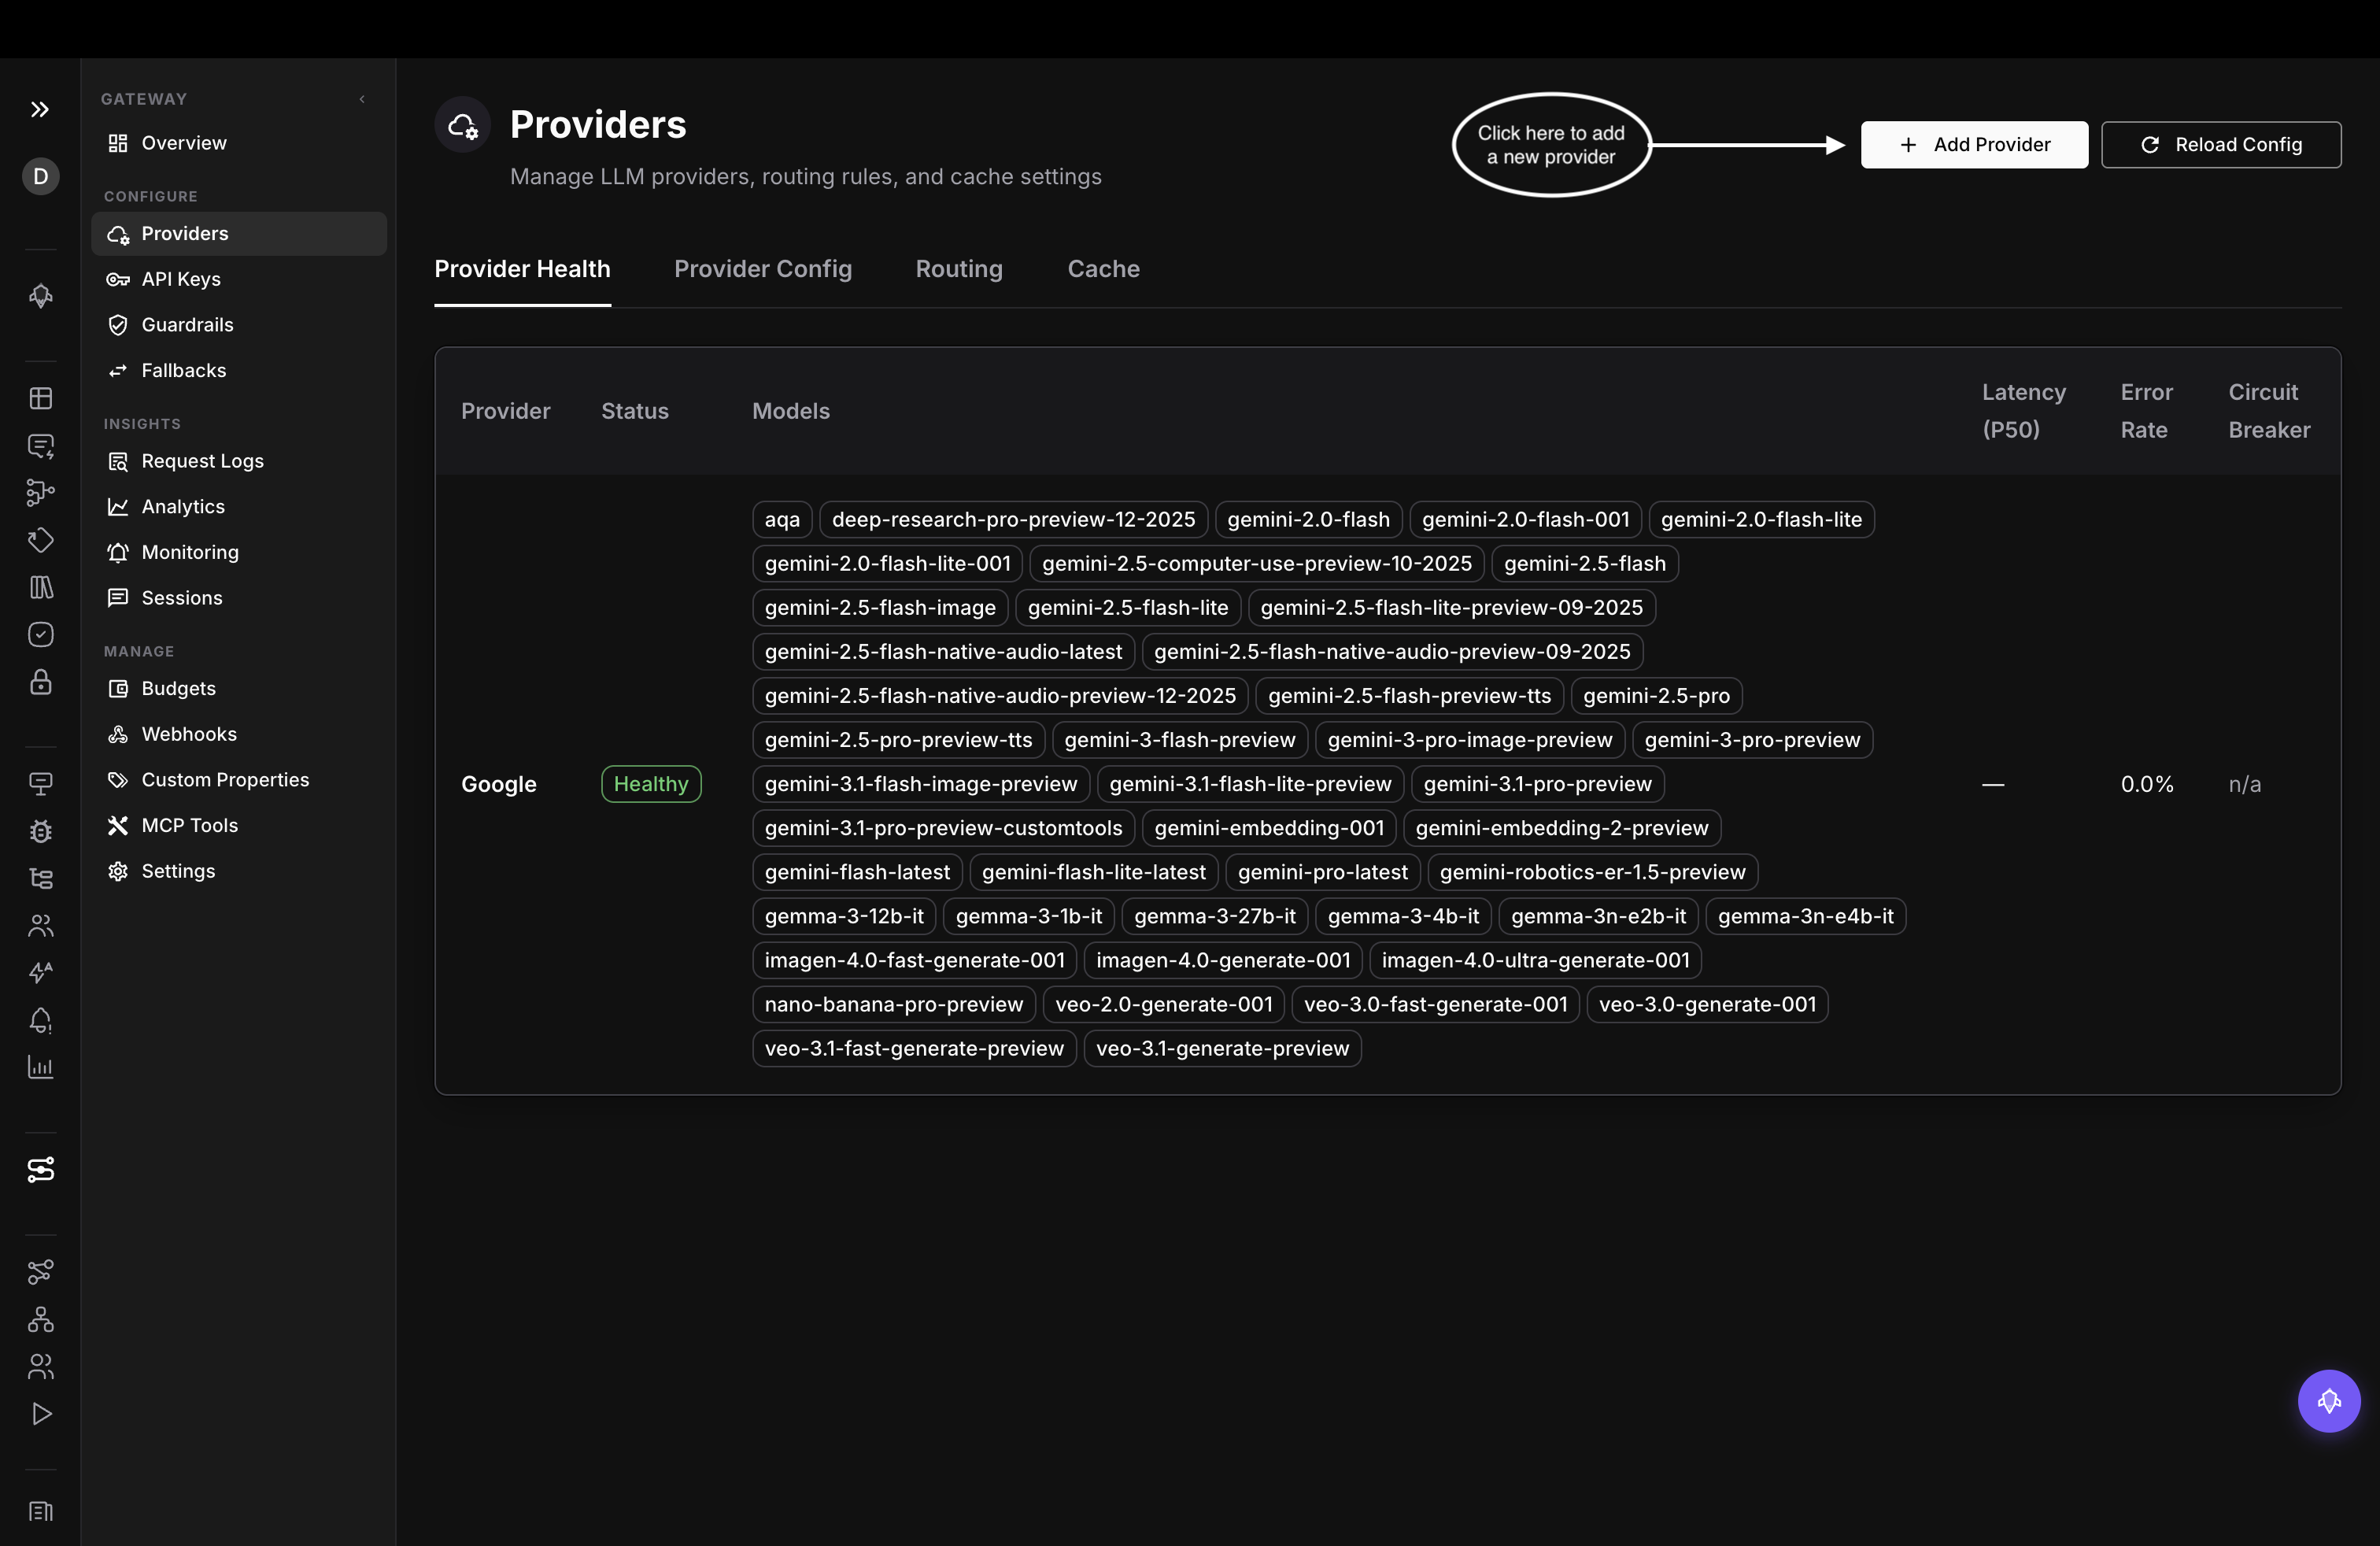
2. Add a provider
The gateway routes each request to a provider you’ve connected, so add at least one
- Open Agent Command Center → Providers to see your connected providers:
- Click Add provider, choose a provider, and paste its API key. Then select which of its models to expose through the gateway:
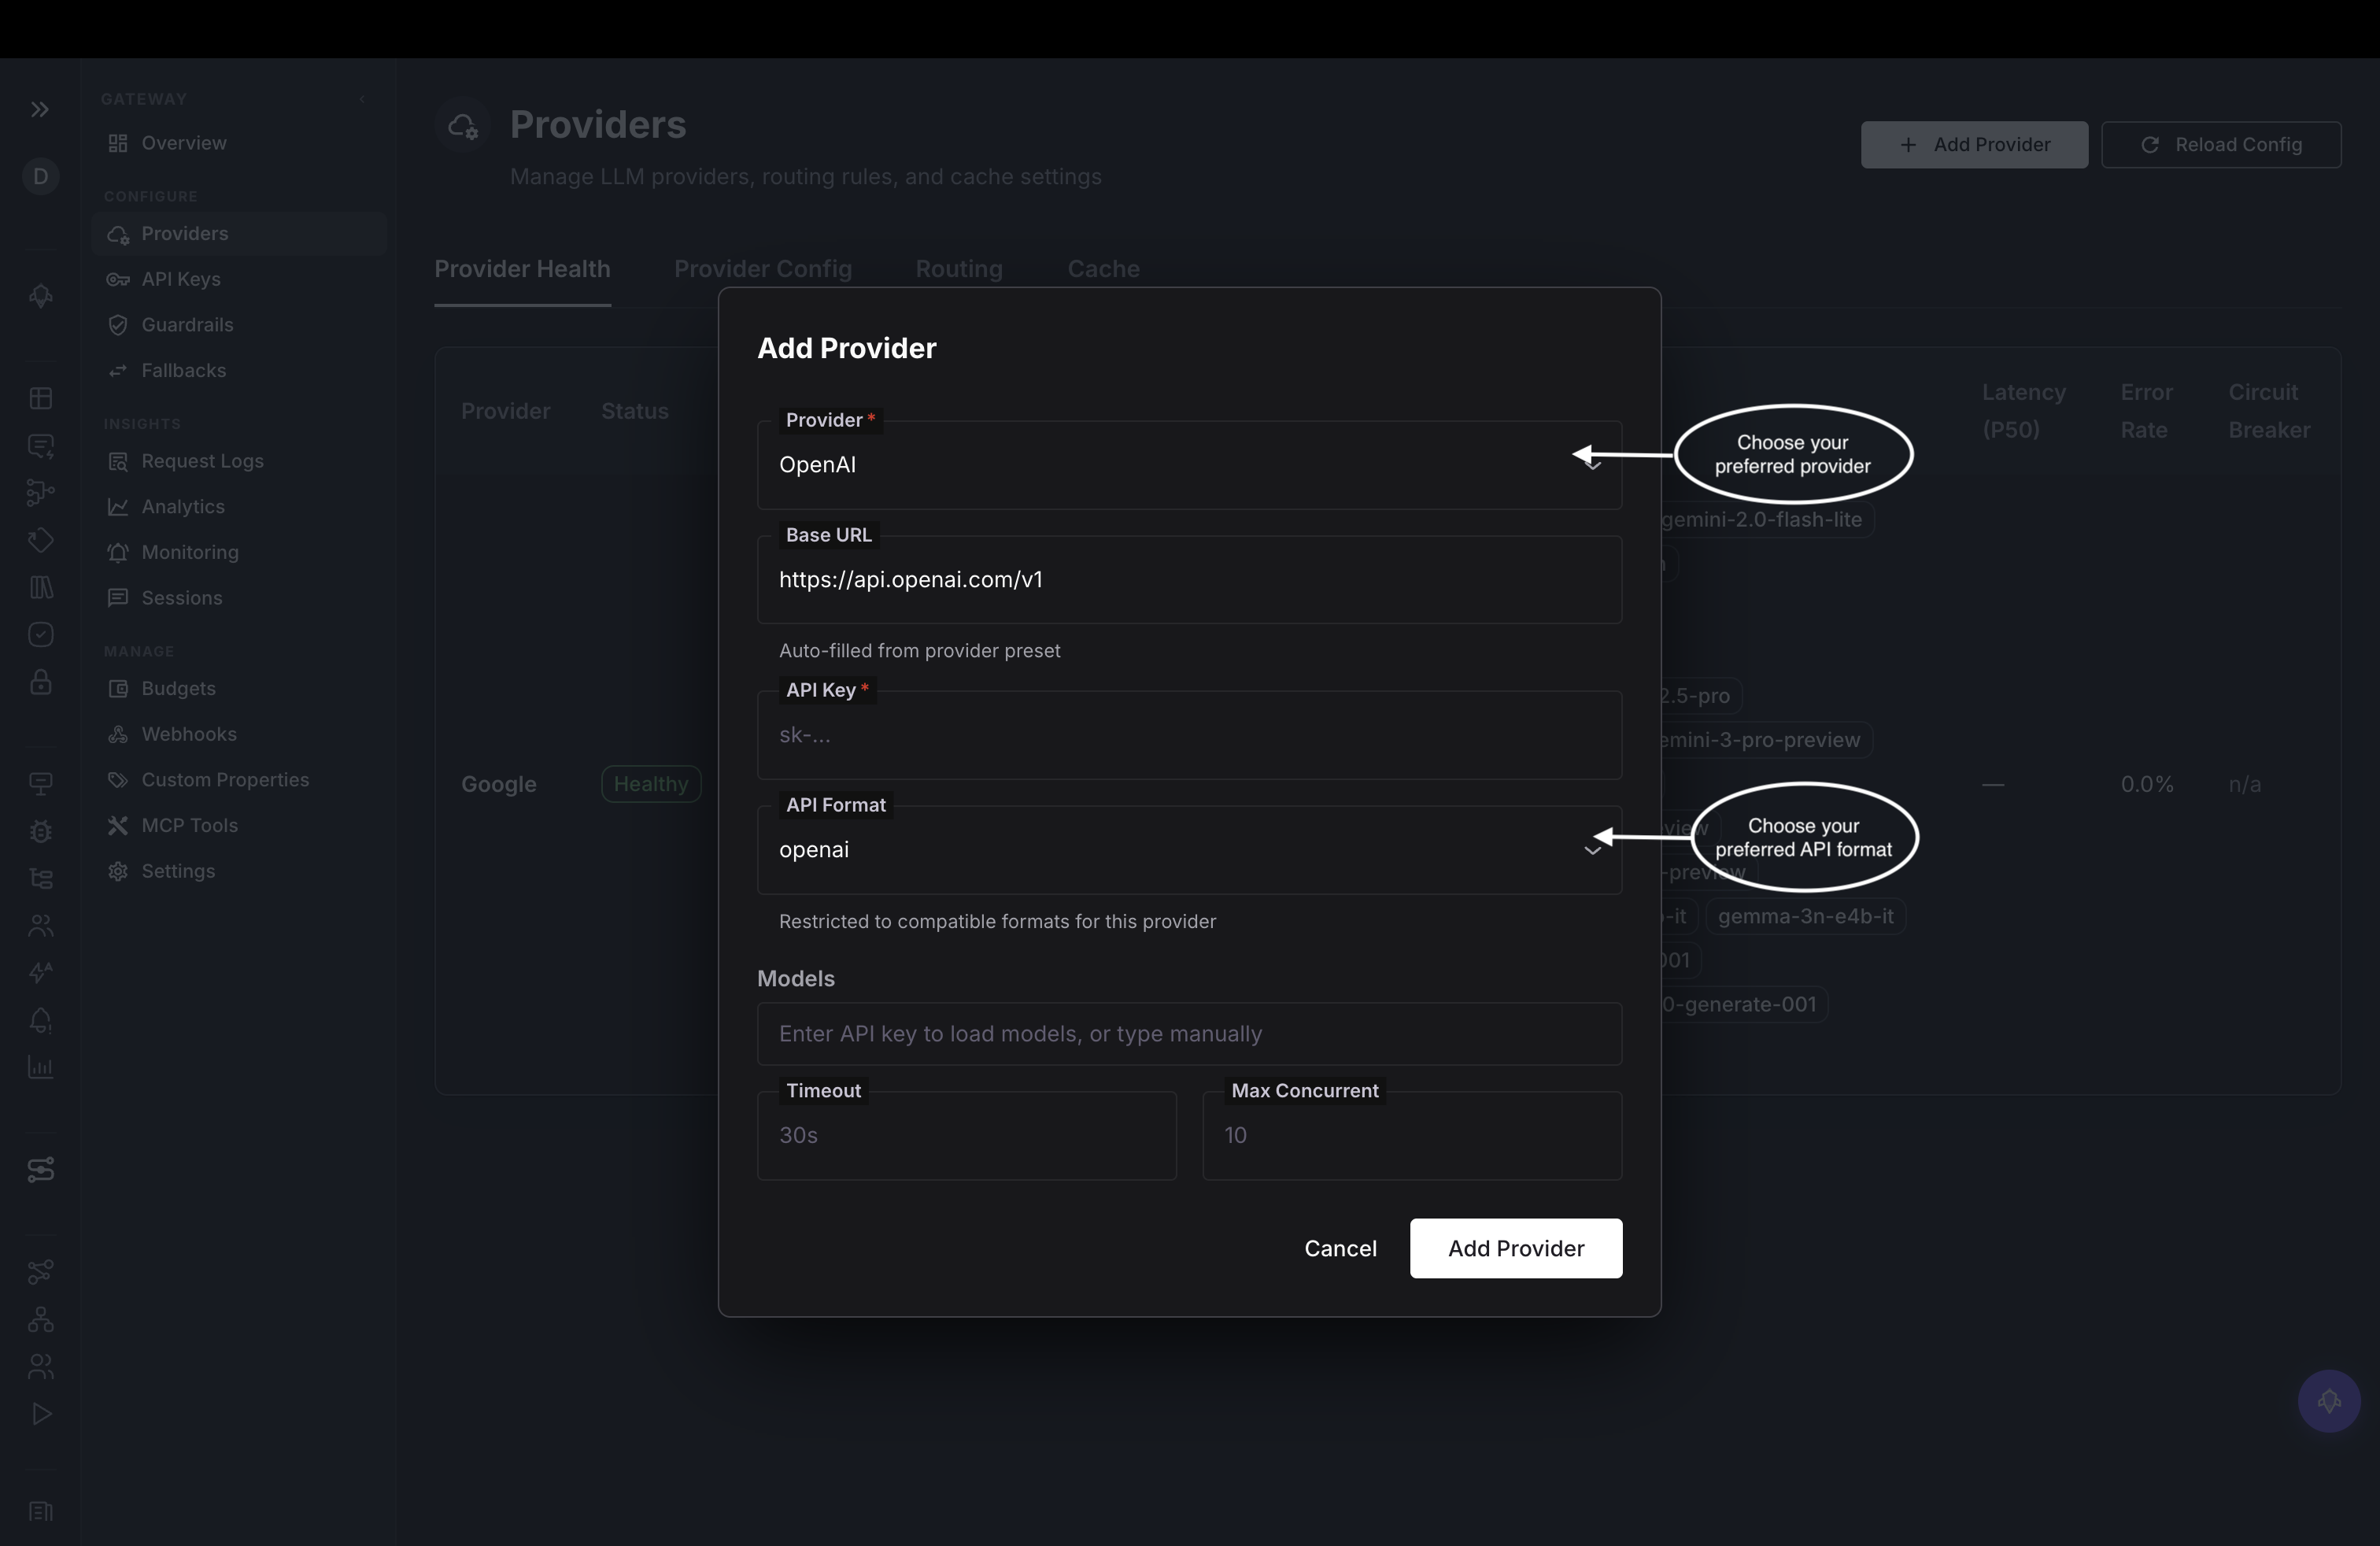

- Save it, and your provider appears in the list, ready to route requests to:

3. Install the OpenAI SDK
pip install openainpm install openai4. Set your gateway key
Set your Agent Command Center key in your terminal:
export AGENTCC_API_KEY="sk-agentcc-your-api-key-here"5. Point the SDK at the gateway
Change two lines, base_url and api_key, then send a request:
import os
from openai import OpenAI

client = OpenAI(
    base_url="https://gateway.futureagi.com/v1",   # 1. point at the gateway
    api_key=os.environ["AGENTCC_API_KEY"],          # 2. use your sk-agentcc- key
)

response = client.chat.completions.create(
    model="gpt-4o-mini",
    messages=[{"role": "user", "content": "How does Future AGI's agentcc gateway reduce LLM call cost by 80%?"}],
)
print(response.choices[0].message.content)
import OpenAI from "openai";
const client = new OpenAI({
baseURL: "https://gateway.futureagi.com/v1", // 1. point at the gateway
apiKey: process.env.AGENTCC_API_KEY, // 2. use your sk-agentcc- key
});
const response = await client.chat.completions.create({
model: "gpt-4o-mini",
messages: [{ role: "user", content: "What is the capital of France?" }],
});
console.log(response.choices[0].message.content);6. Run it
python gateway.pyYou will see the model’s reply, and the request is now flowing through Agent Command Center
Verify
Open your Future AGI dashboard and go to Agent Command Center. Your request appears there with its provider, latency, and cost:
For a programmatic check, every response also carries x-agentcc-* headers:
resp = client.chat.completions.with_raw_response.create(
    model="gpt-4o-mini",
    messages=[{"role": "user", "content": "Hello"}],
)
print("Provider:", resp.headers.get("x-agentcc-provider"))
print("Latency: ", resp.headers.get("x-agentcc-latency-ms"), "ms")
print("Cost:    $", resp.headers.get("x-agentcc-cost"))
Congratulations! You’ve successfully routed your first request!🎉
Troubleshooting
Not seeing a response? Try checking these:
- Authentication error: confirm your key starts with
sk-agentcc-(Settings → API Keys) - Model or provider error: make sure that provider is configured in Agent Command Center → Providers
- Wrong base URL: it must be
https://gateway.futureagi.com/v1
Bonus
Change the model name and the gateway translates to each provider’s format:
client.chat.completions.create(model="claude-sonnet-4-6", messages=[{"role": "user", "content": "Hello"}])
client.chat.completions.create(model="gemini-2.0-flash", messages=[{"role": "user", "content": "Hello"}])
Dive deeper
Questions & Discussion