Create personas
Build a simulated customer persona to test your agent against
A custom persona lives in your workspace, and any scenario can draw on it.
Note
Before building one, look through the Future AGI Built tab on the Personas page: 18 ready-made personas covering common customer types, all listed in the Built-in personas reference. Build your own only when none of them matches the customer you have in mind.
Creating custom personas
Under Simulate in the sidebar, open Personas and click Create persona.
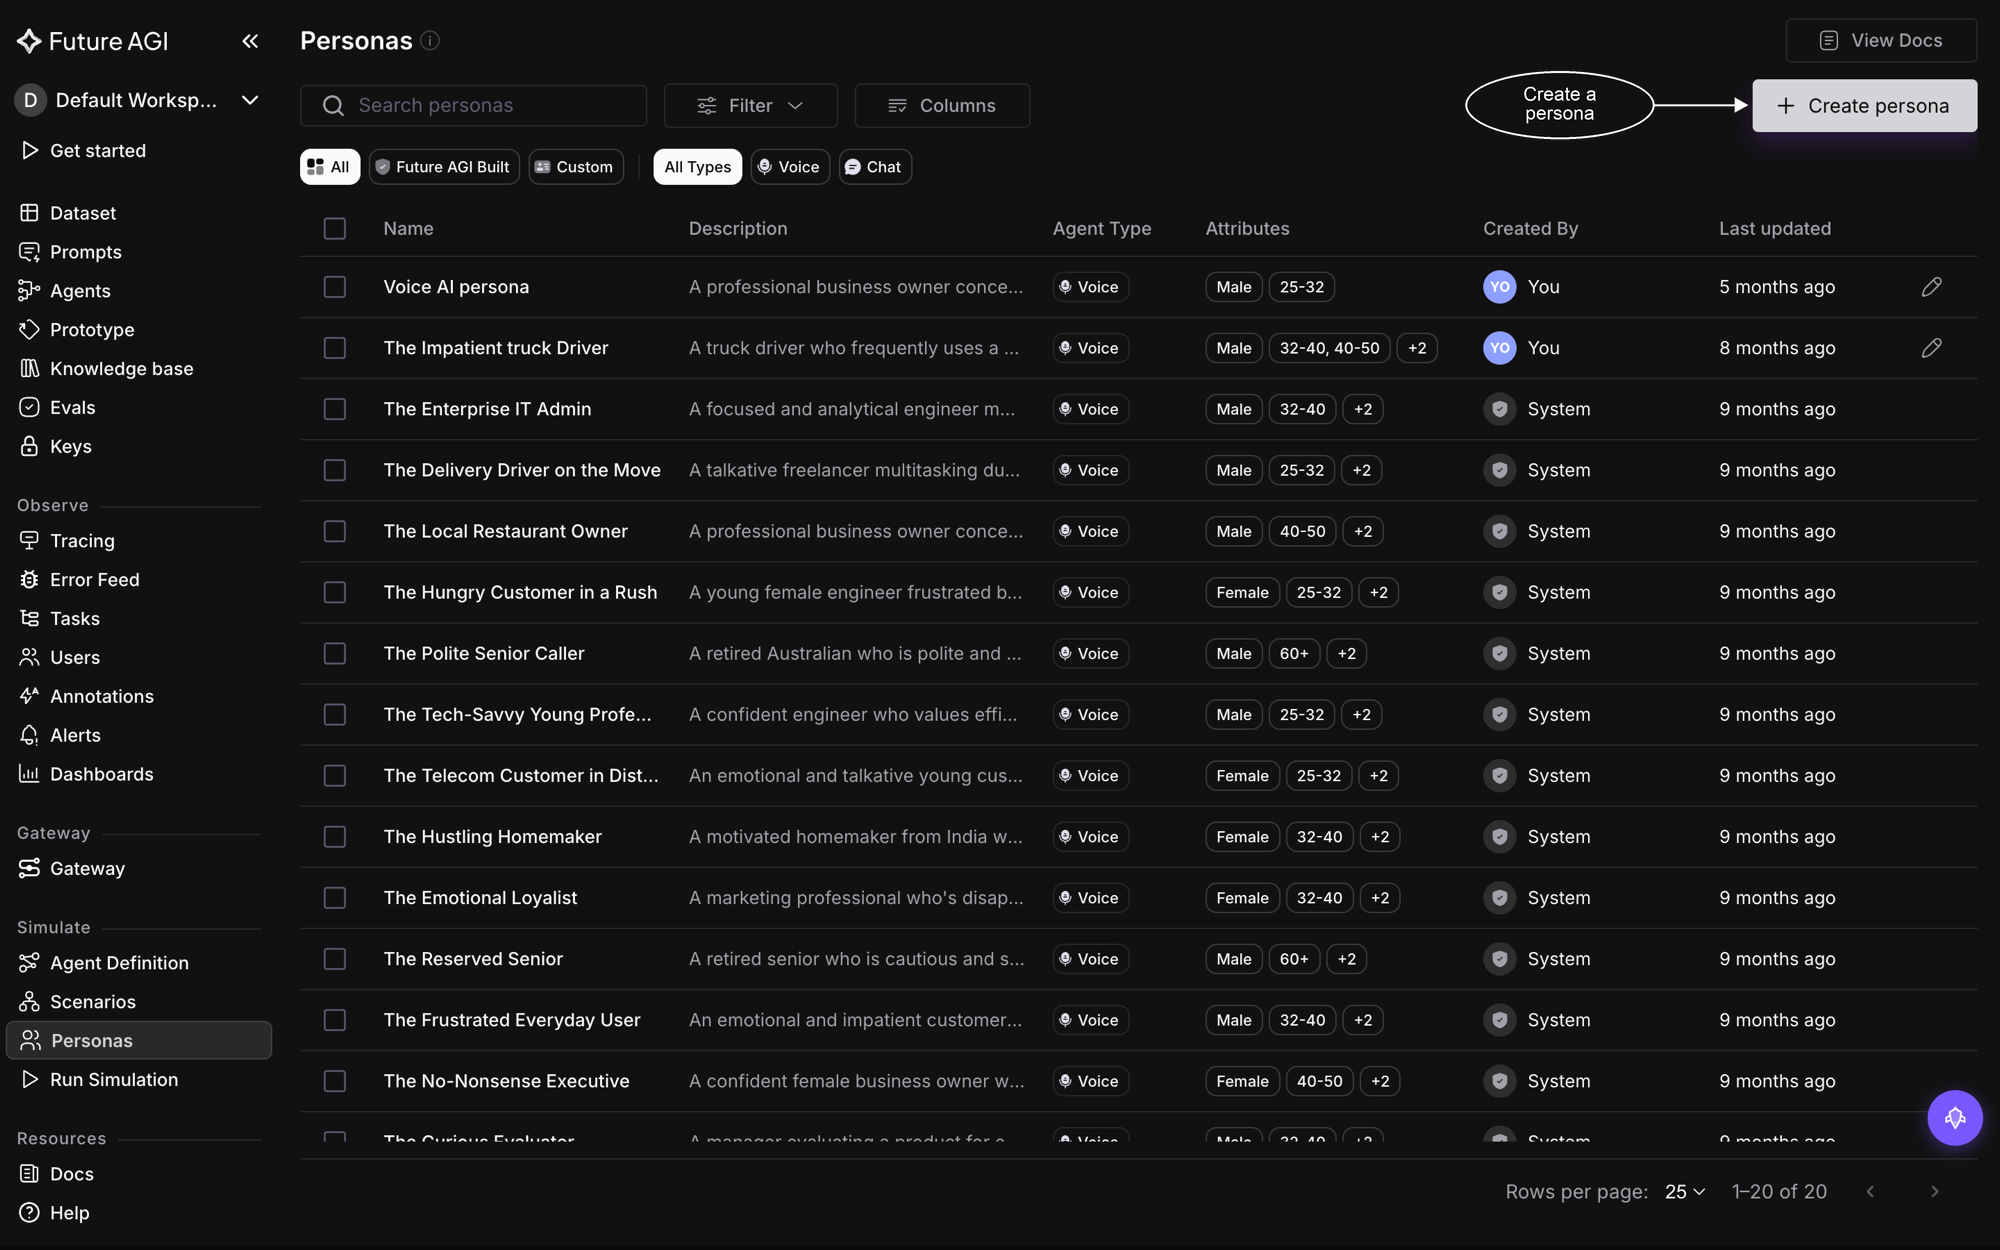
The Personas page is the pool your scenarios draw from
Choose voice or chat
Pick the channel. A persona is typed at creation and the type never changes: when you later build a voice simulation, only voice personas are offered, and the same goes for chat.
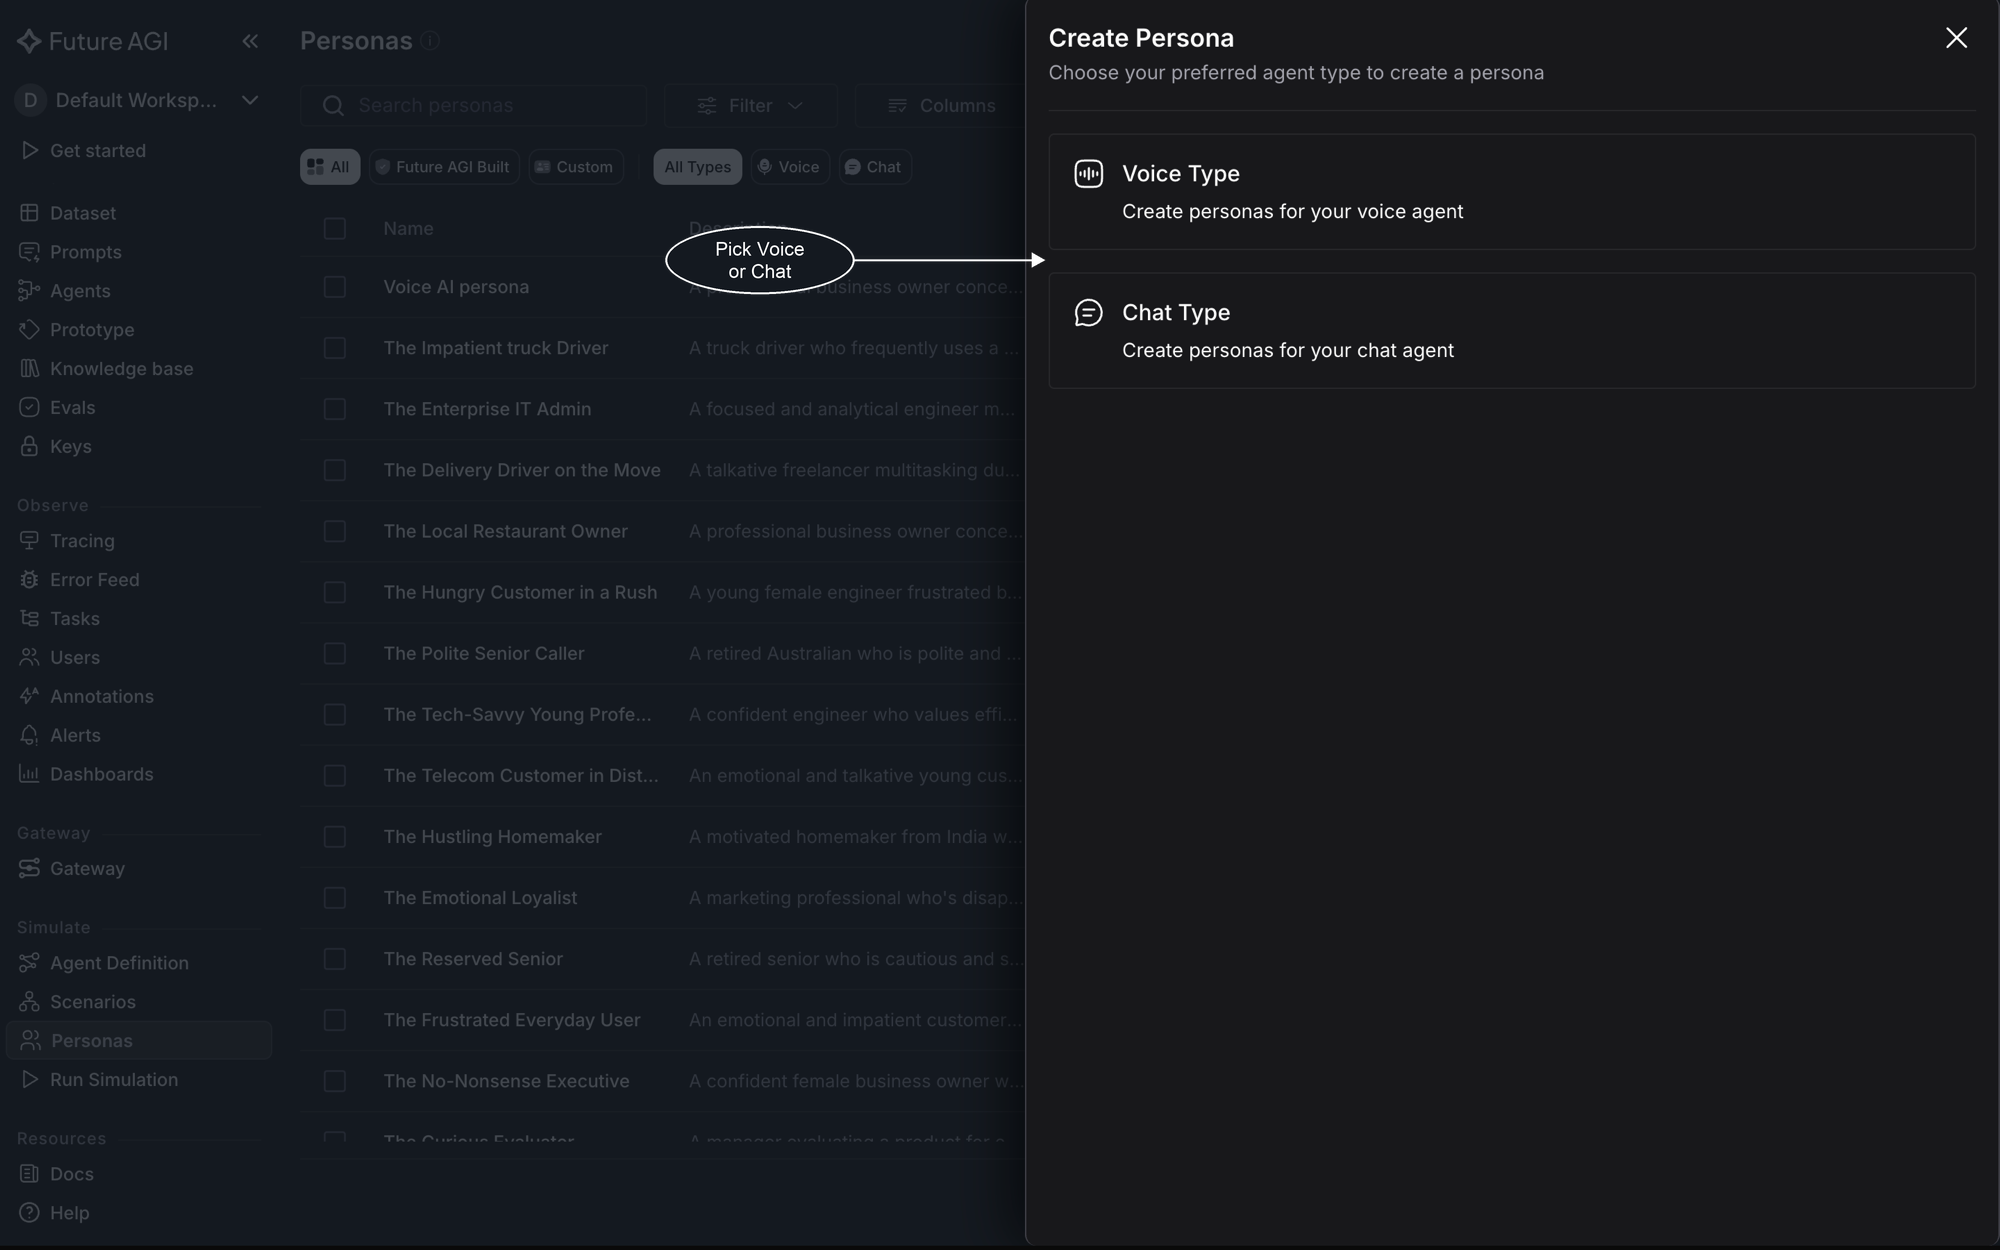
Voice or chat, fixed at creation
Describe the customer
Basic Information takes a name and a one-line description, both required. The description steers the simulator more than any single trait, so make it concrete: “a customer who is angry about the product” beats “difficult customer”. Below them sit the optional demographics: gender, age range, location, and profession.
Behavioural Settings shapes how that customer comes across: personality traits like impatient and direct or cautious and skeptical, a communication style, and on a voice persona the accent. Anything you leave unset falls back to a default.
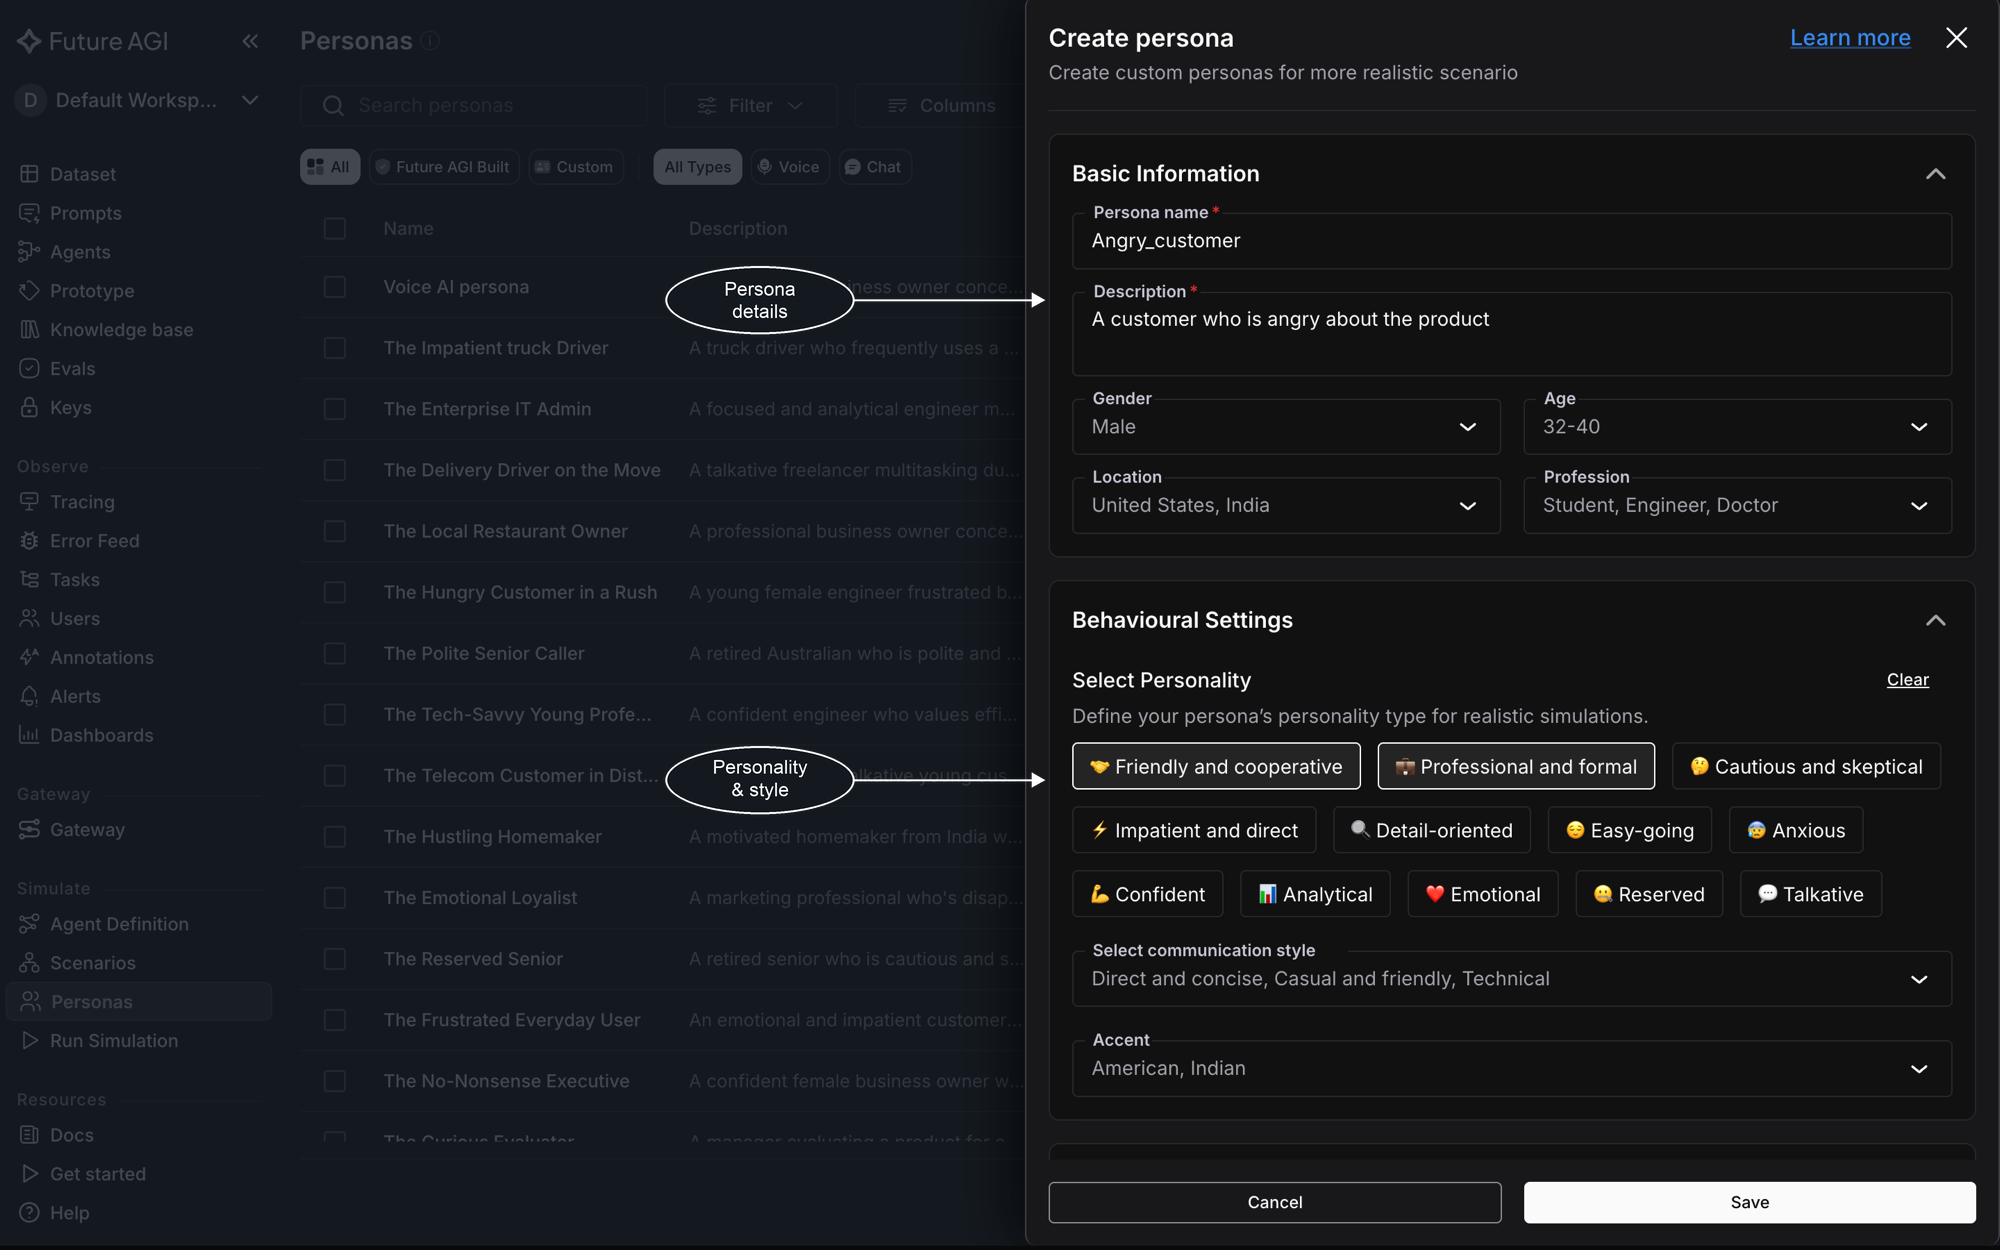
Basic Information and Behavioural Settings are the two panels of the form
Tune the conversation
How the persona holds a conversation depends on its type.
Voice settings
Conversation Settings on a voice persona controls the mechanics of the call:
- Multilingual and language: the language the persona speaks, and whether it switches between several during the call
- Conversation speed: how fast it talks, from 0.5x to 1.5x
- Background noise: play real-world noise behind the customer, to test how your agent copes with an imperfect line
- Finished Speaking Sensitivity, 1 to 10: how quickly it starts talking after your agent pauses; at 10 it jumps in after the shortest pause
- Interrupt Sensitivity, 1 to 10: how easily it stops talking when your agent speaks over it; at 1 it doesn’t respond to interruptions at all
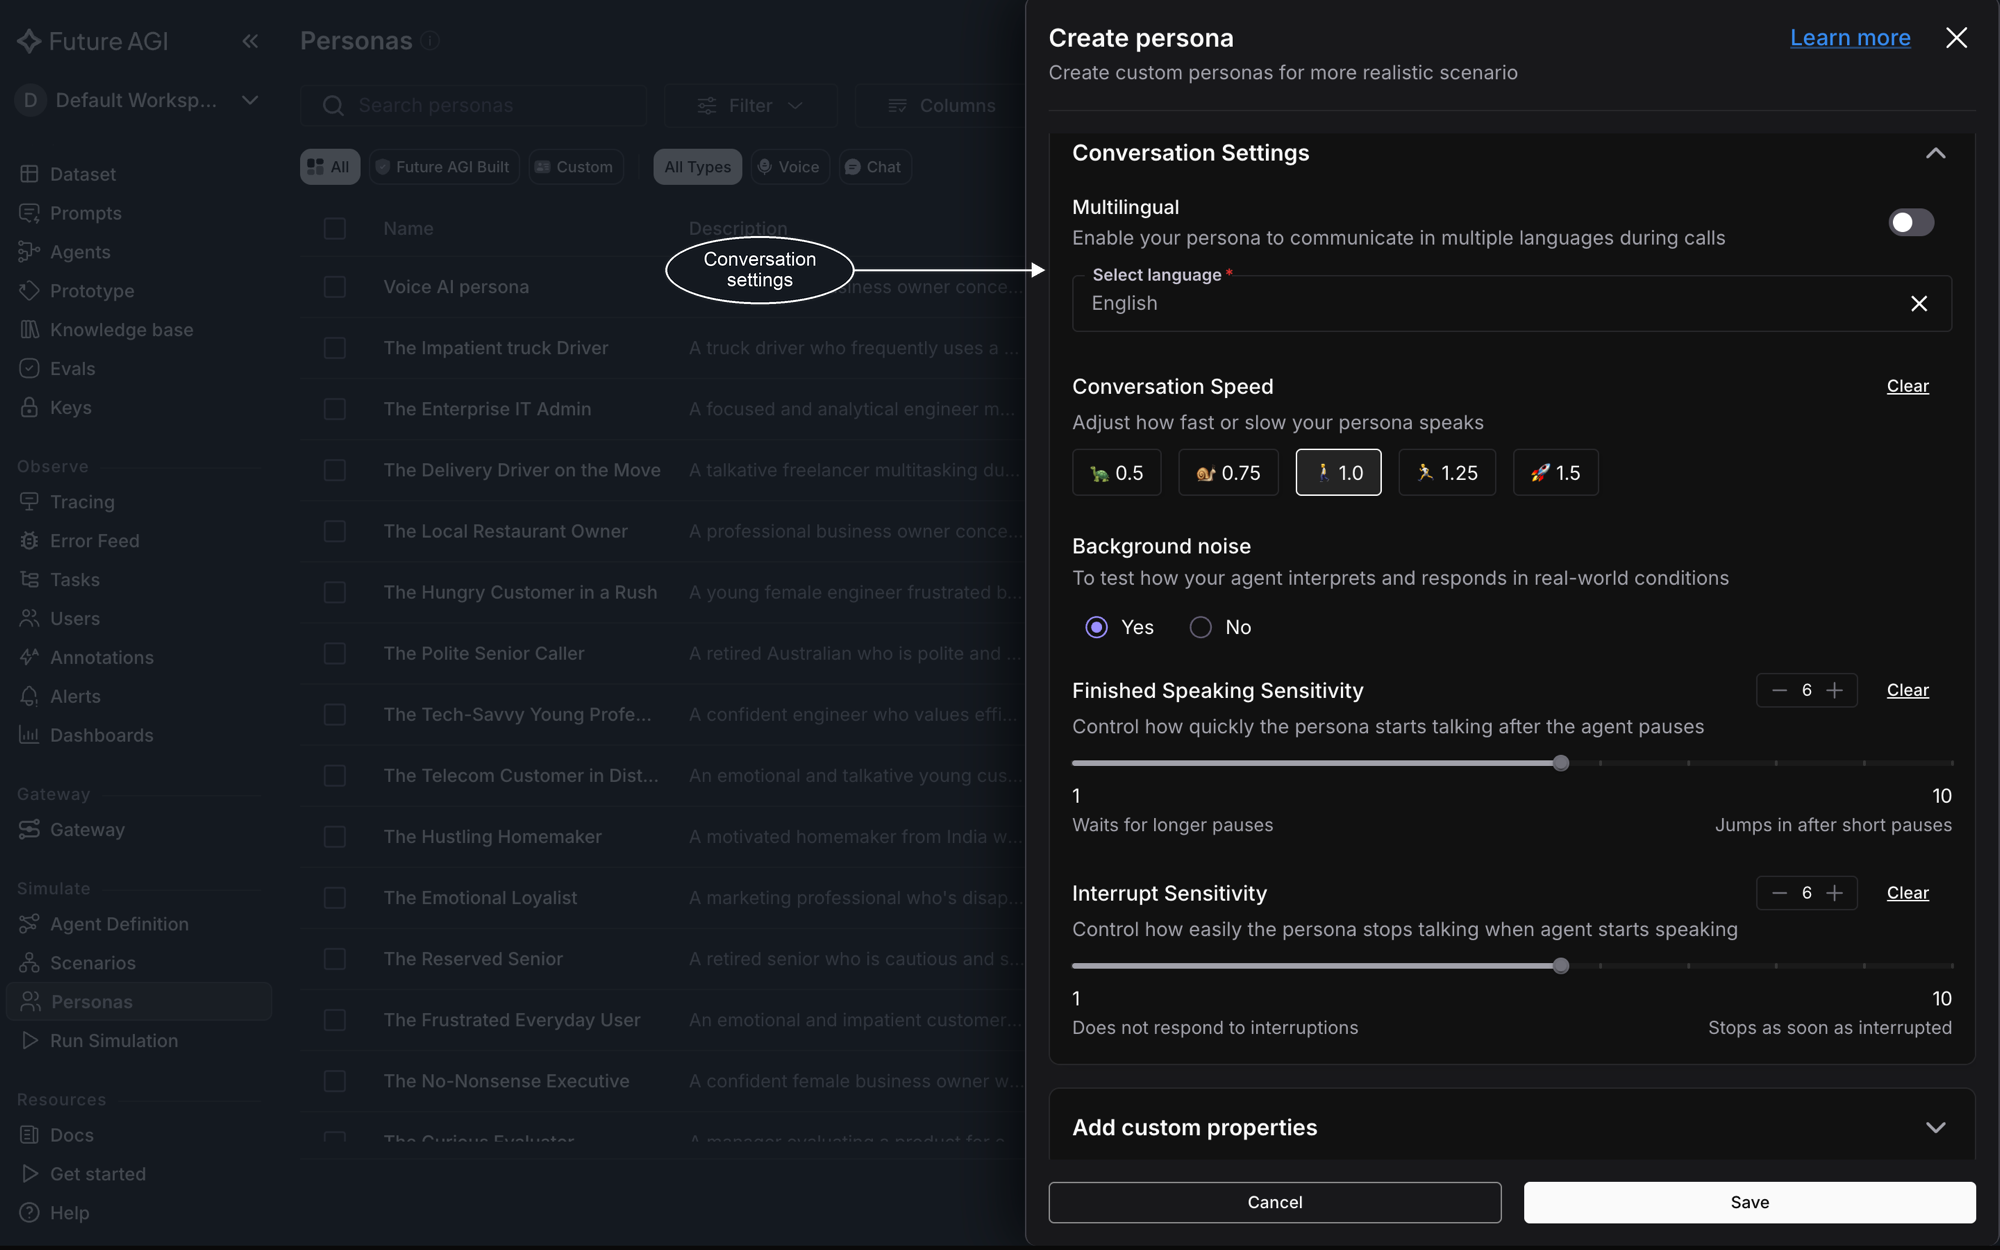
The Conversation Settings panel of a voice persona
Chat settings
A chat persona swaps the call mechanics for writing style:
- Tone: formal, neutral, or casual
- Verbosity: brief, balanced, or detailed replies
- Regional Mix: how much local phrasing colours the writing, from none to heavy
- Slang Level: from none to heavy
- Typo Level: how often typos slip into the messages, from none to frequent
- Punctuation Style: clean, minimal, expressive, or erratic
- Emoji Frequency: from never to heavy
Every one has a default, so here too you only set what matters to the test.
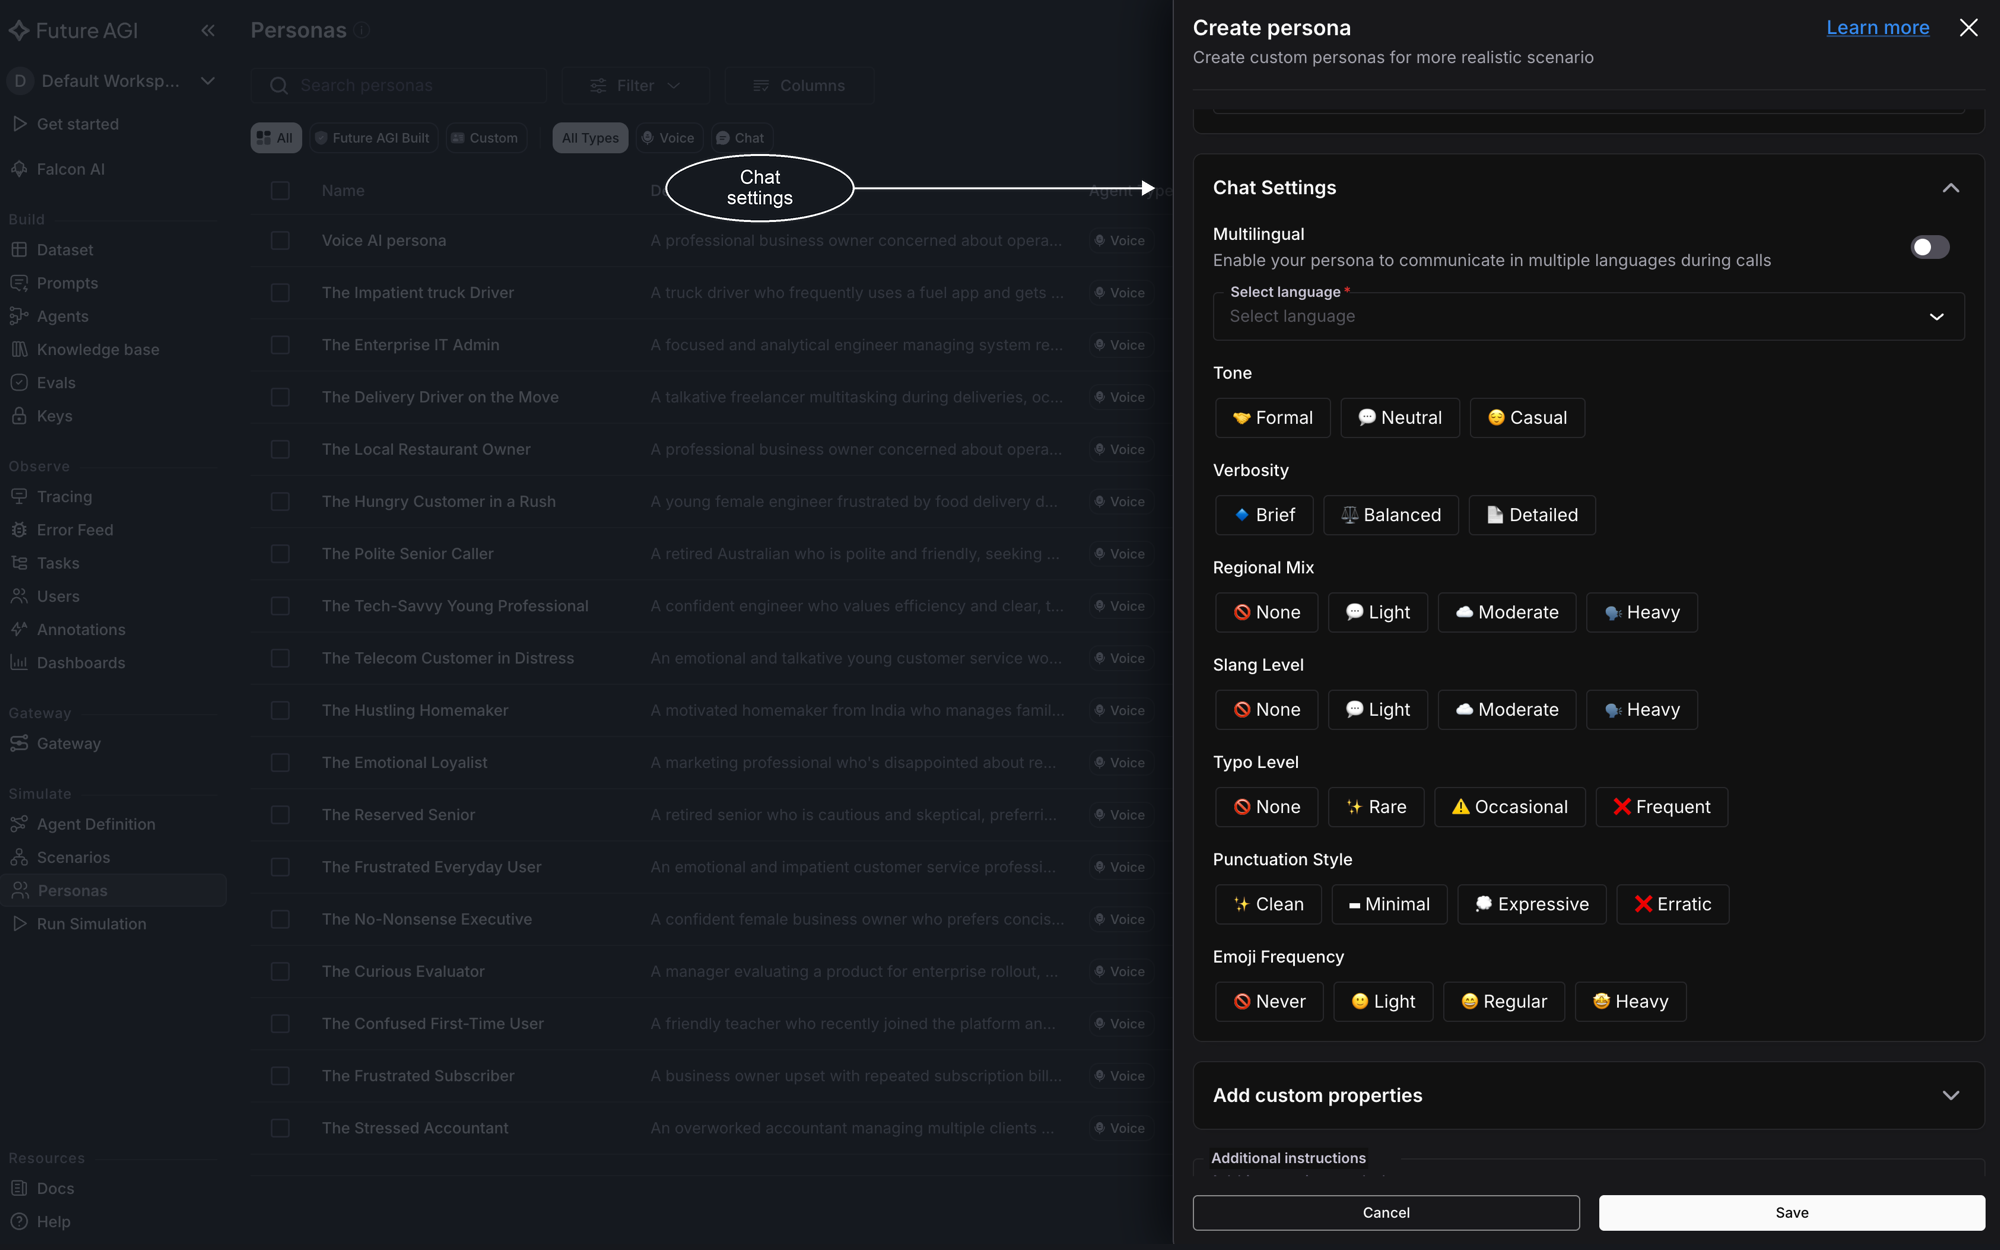
The Chat Settings panel of a chat persona
Custom properties and instructions
Add custom properties takes key-value pairs you name yourself, like insurance_type: renters, and they travel with the persona into every scenario row generated from it. Additional instructions is free-form guidance the simulator always follows, like “ask for a supervisor after the first objection”. Both are optional: when the built-in fields already cover your customer, skip straight to Save.
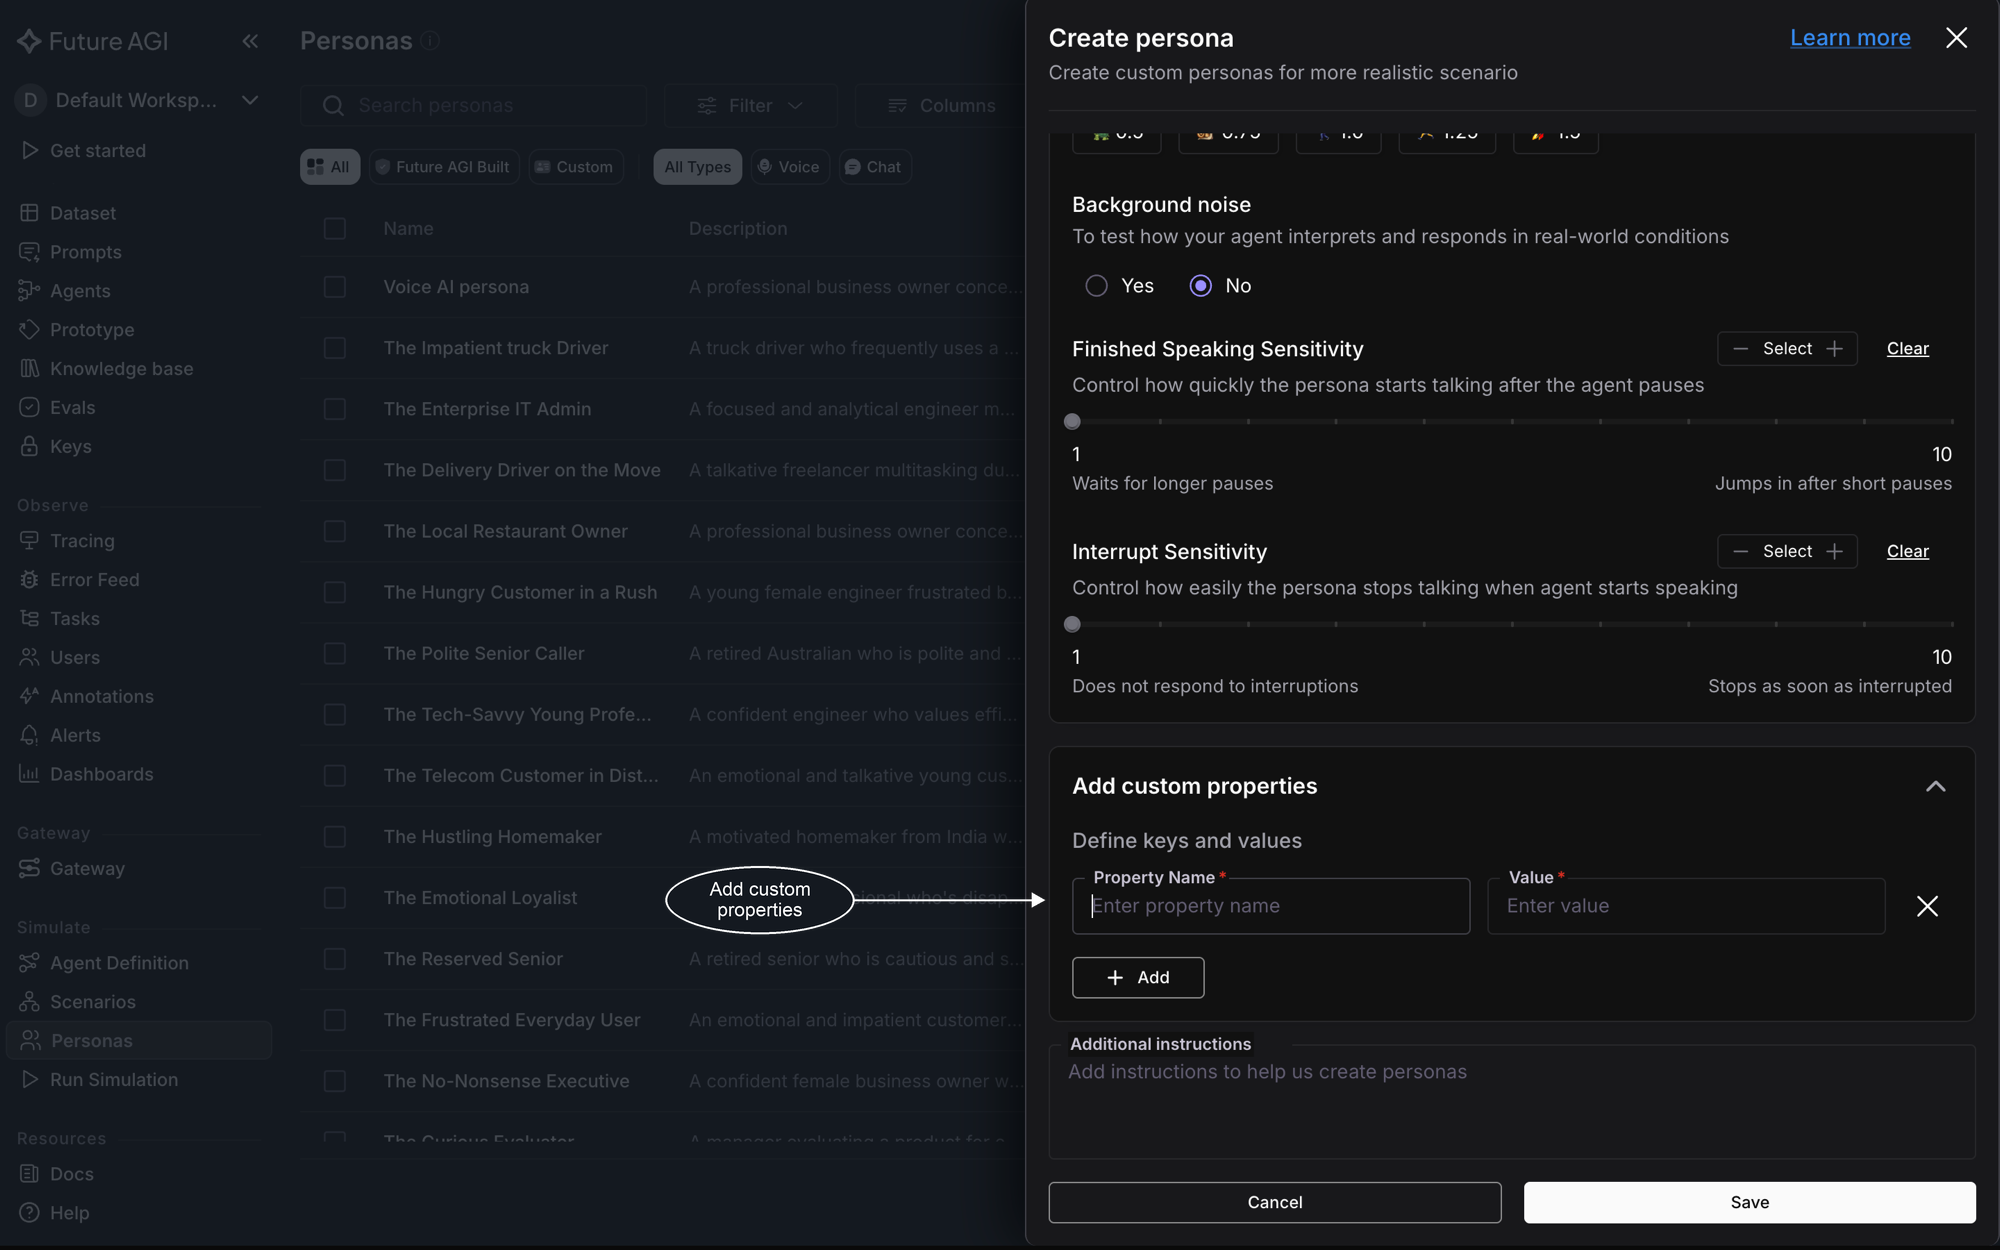
Custom properties and additional instructions on the create form
Save and find it under Custom
Click Save. The persona lands under the Custom tab of the Personas list, and from here it works exactly like a built-in one: you attach it when you create a scenario, and the scenario carries it into every run. To adjust it later, open it again from the edit icon on its row; only your personas carry one, built-in personas can’t be edited.
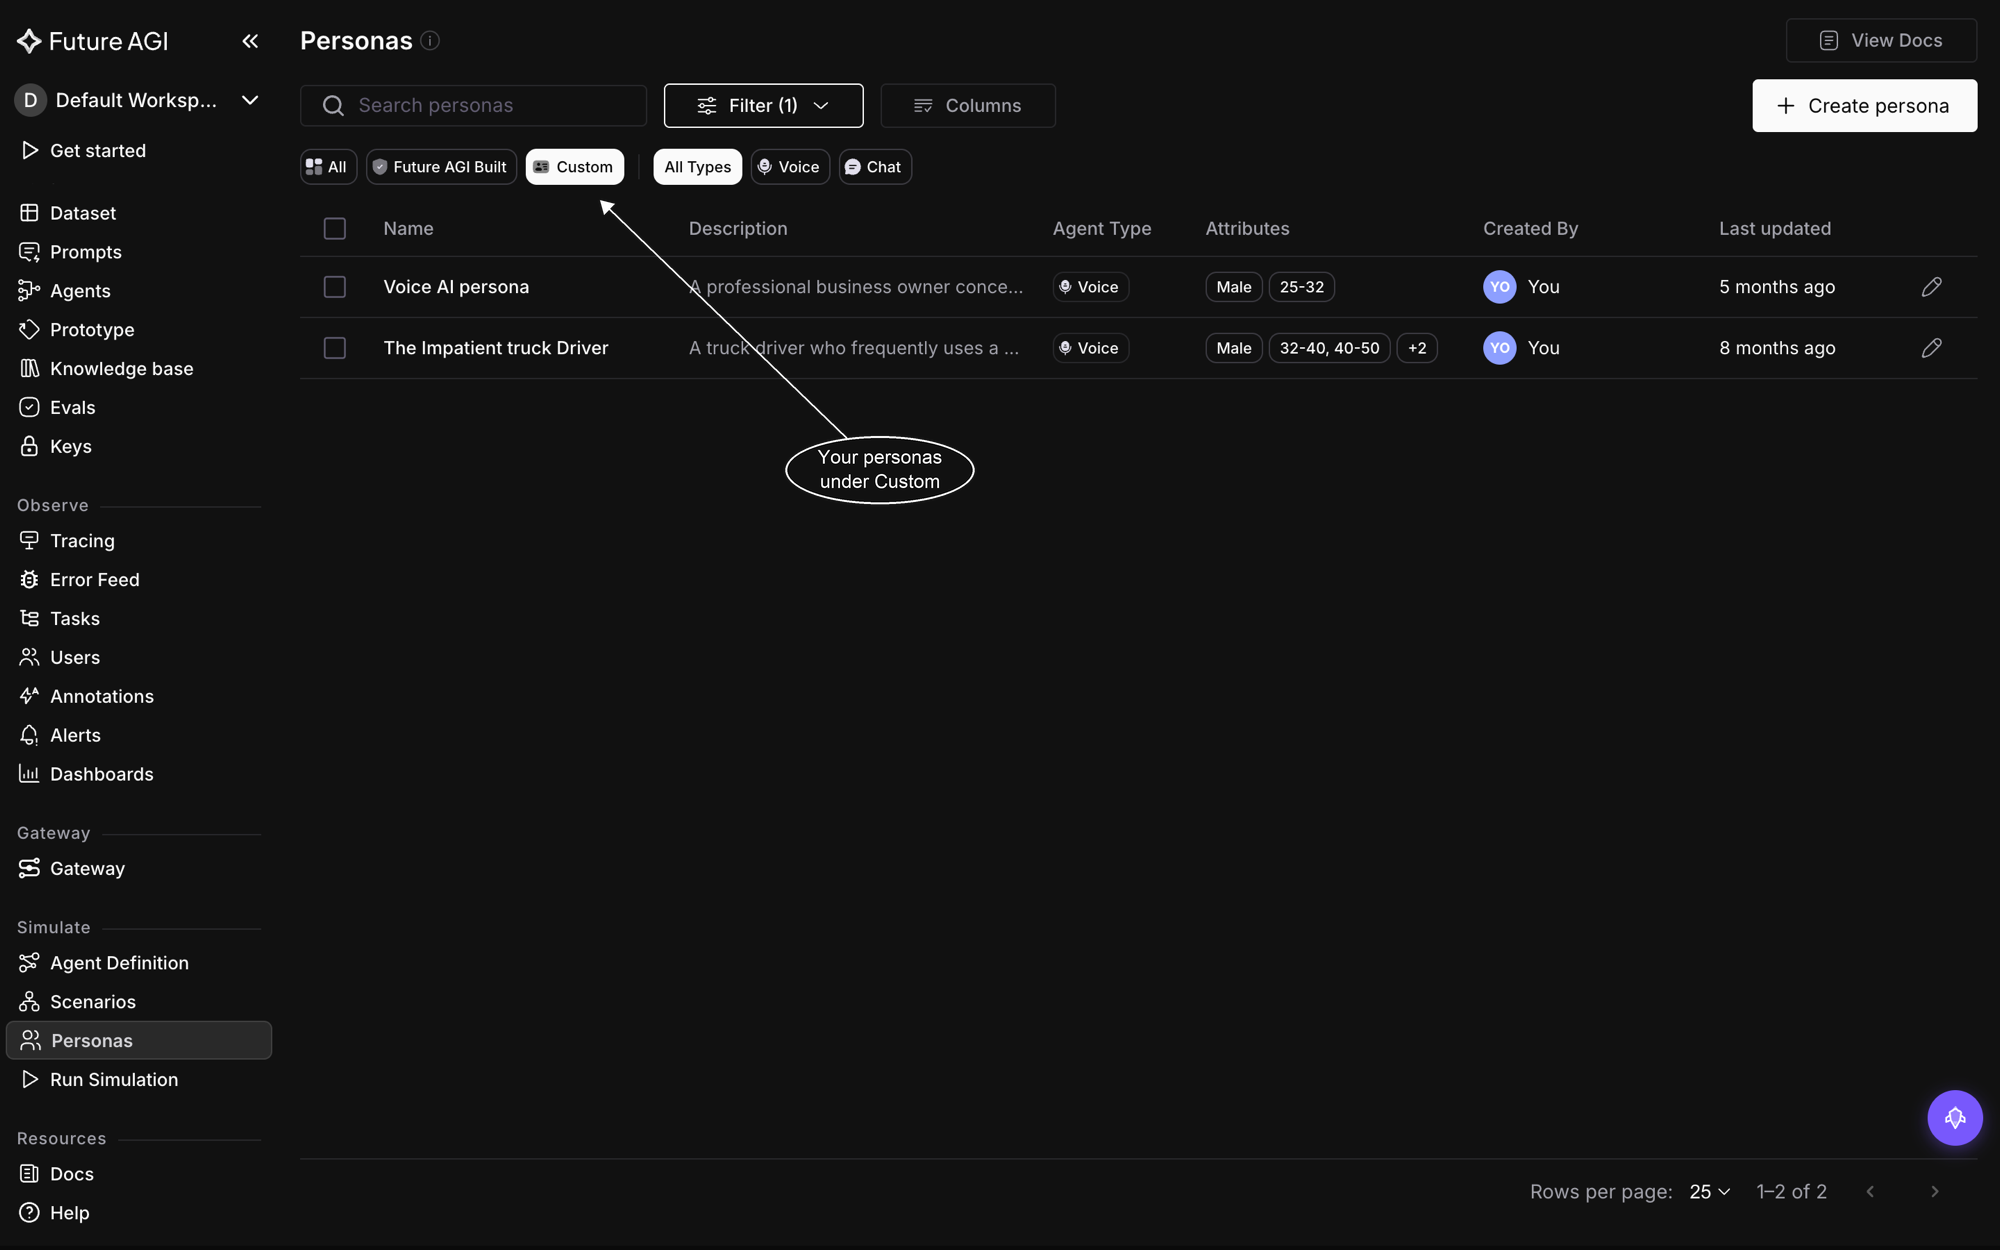
Your personas, ready for any scenario in the workspace
Dive deeper
Questions & Discussion