Add columns
Give a scenario's rows extra variables the simulator prompt can use
A column is one variable each row of a scenario carries, and the simulator prompt can read it by name. Add a refund_amount column and each conversation runs with its own row’s amount.
Every generated row already carries five: persona, situation, outcome, conversation_branch, and branch_category. A column you add is anything beyond those.
Note
This page adds columns to a scenario that already exists. If you haven’t generated one yet, the create form carries the same Columns section, covered in Create scenarios.
Open the column form
Under Simulate in the sidebar, open Scenarios and click into your scenario. Above the Generated scenarios table, click Add Column to open the drawer.
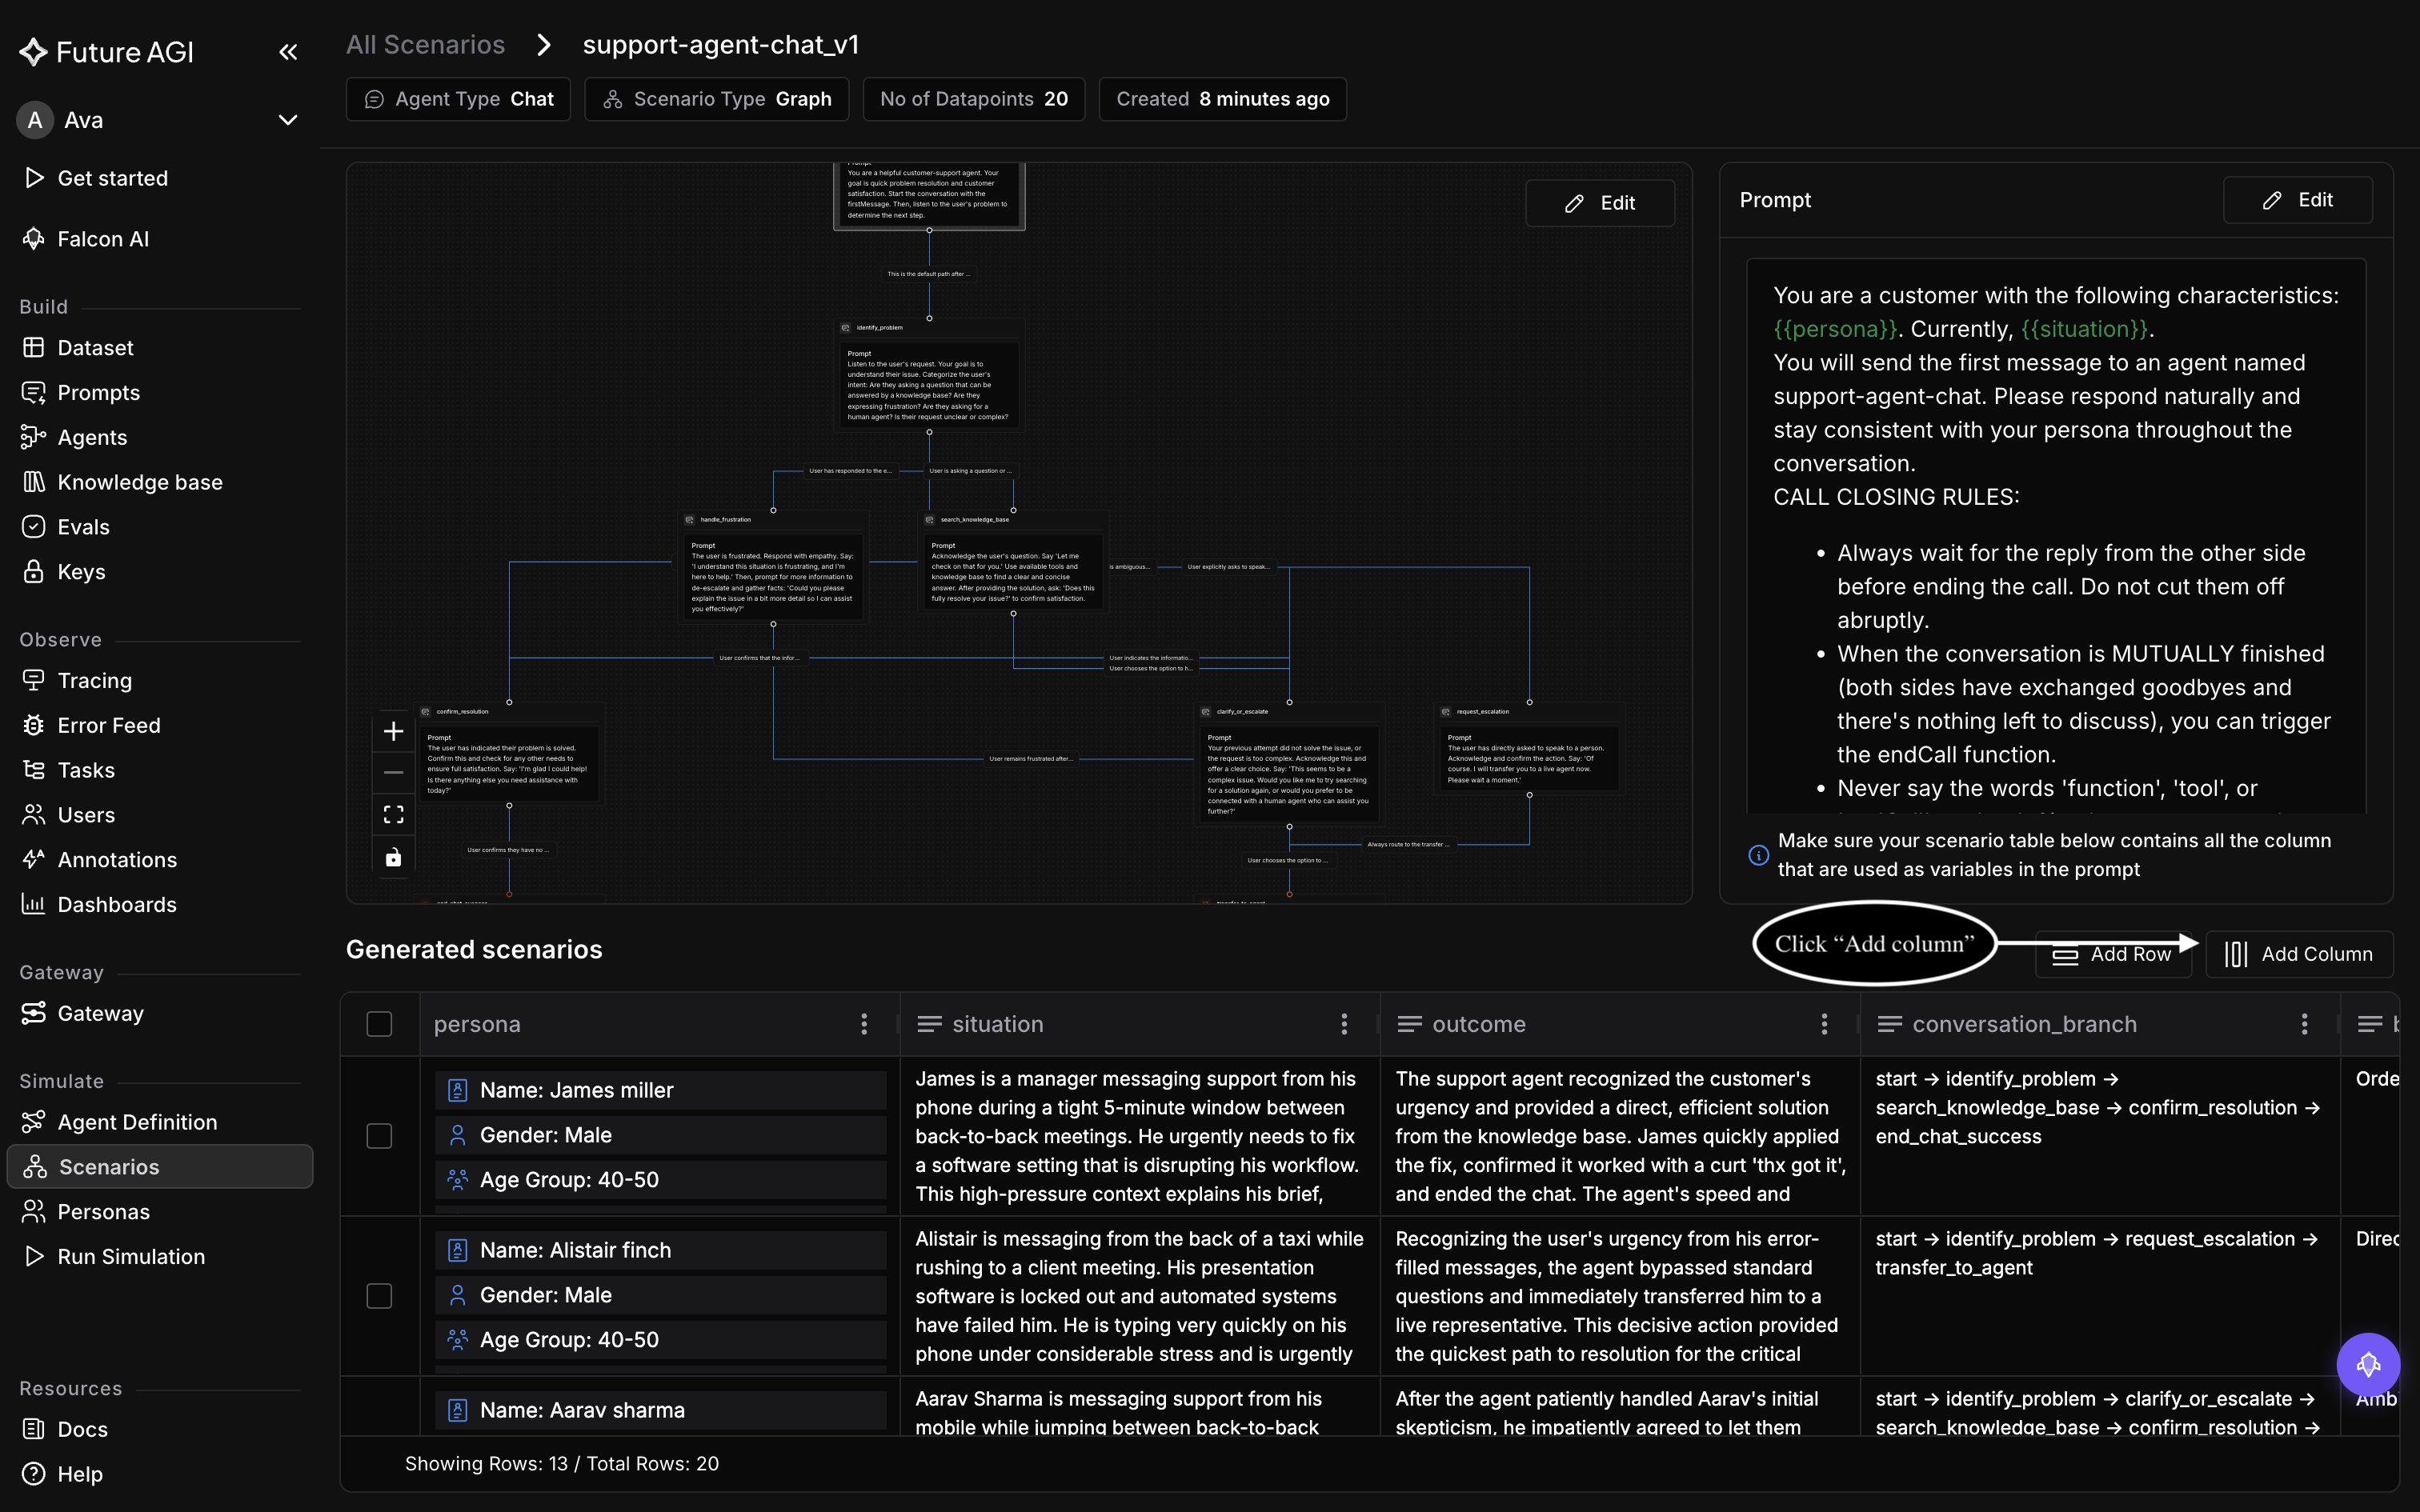
The table already shows the five built-in columns the rows were generated with
Define the column
Choose who fills in the values. The form is the same either way, and so is the result: a new column on every row.
- Add Manually: you type the values yourself. Right when the values matter exactly, a specific plan tier or a refund amount you’re testing a threshold against, and when there are few enough rows to be worth typing
- Generate using AI: the values are written from your description. Right when you want plausible variety across many rows rather than particular numbers, which is the common case on a 20-row scenario and the only practical one on a few hundred
Each column takes three things, all required:
- Column name: what the prompt will reference, so keep it short and lowercase, like
refund_amount - Data type: seven to pick from. Text for anything wordy, Integer for whole numbers, Float for amounts with decimals, Boolean for a yes/no flag, Date & Time for a date. JSON and Array hold structured values, which read awkwardly once dropped into a sentence, so keep them out of the prompt and use them for data the flow reads instead
- Description: what the column holds. On the AI path this is the instruction the values are generated from, so be specific: “the refund amount in dollars, between 20 and 500” beats “amount”
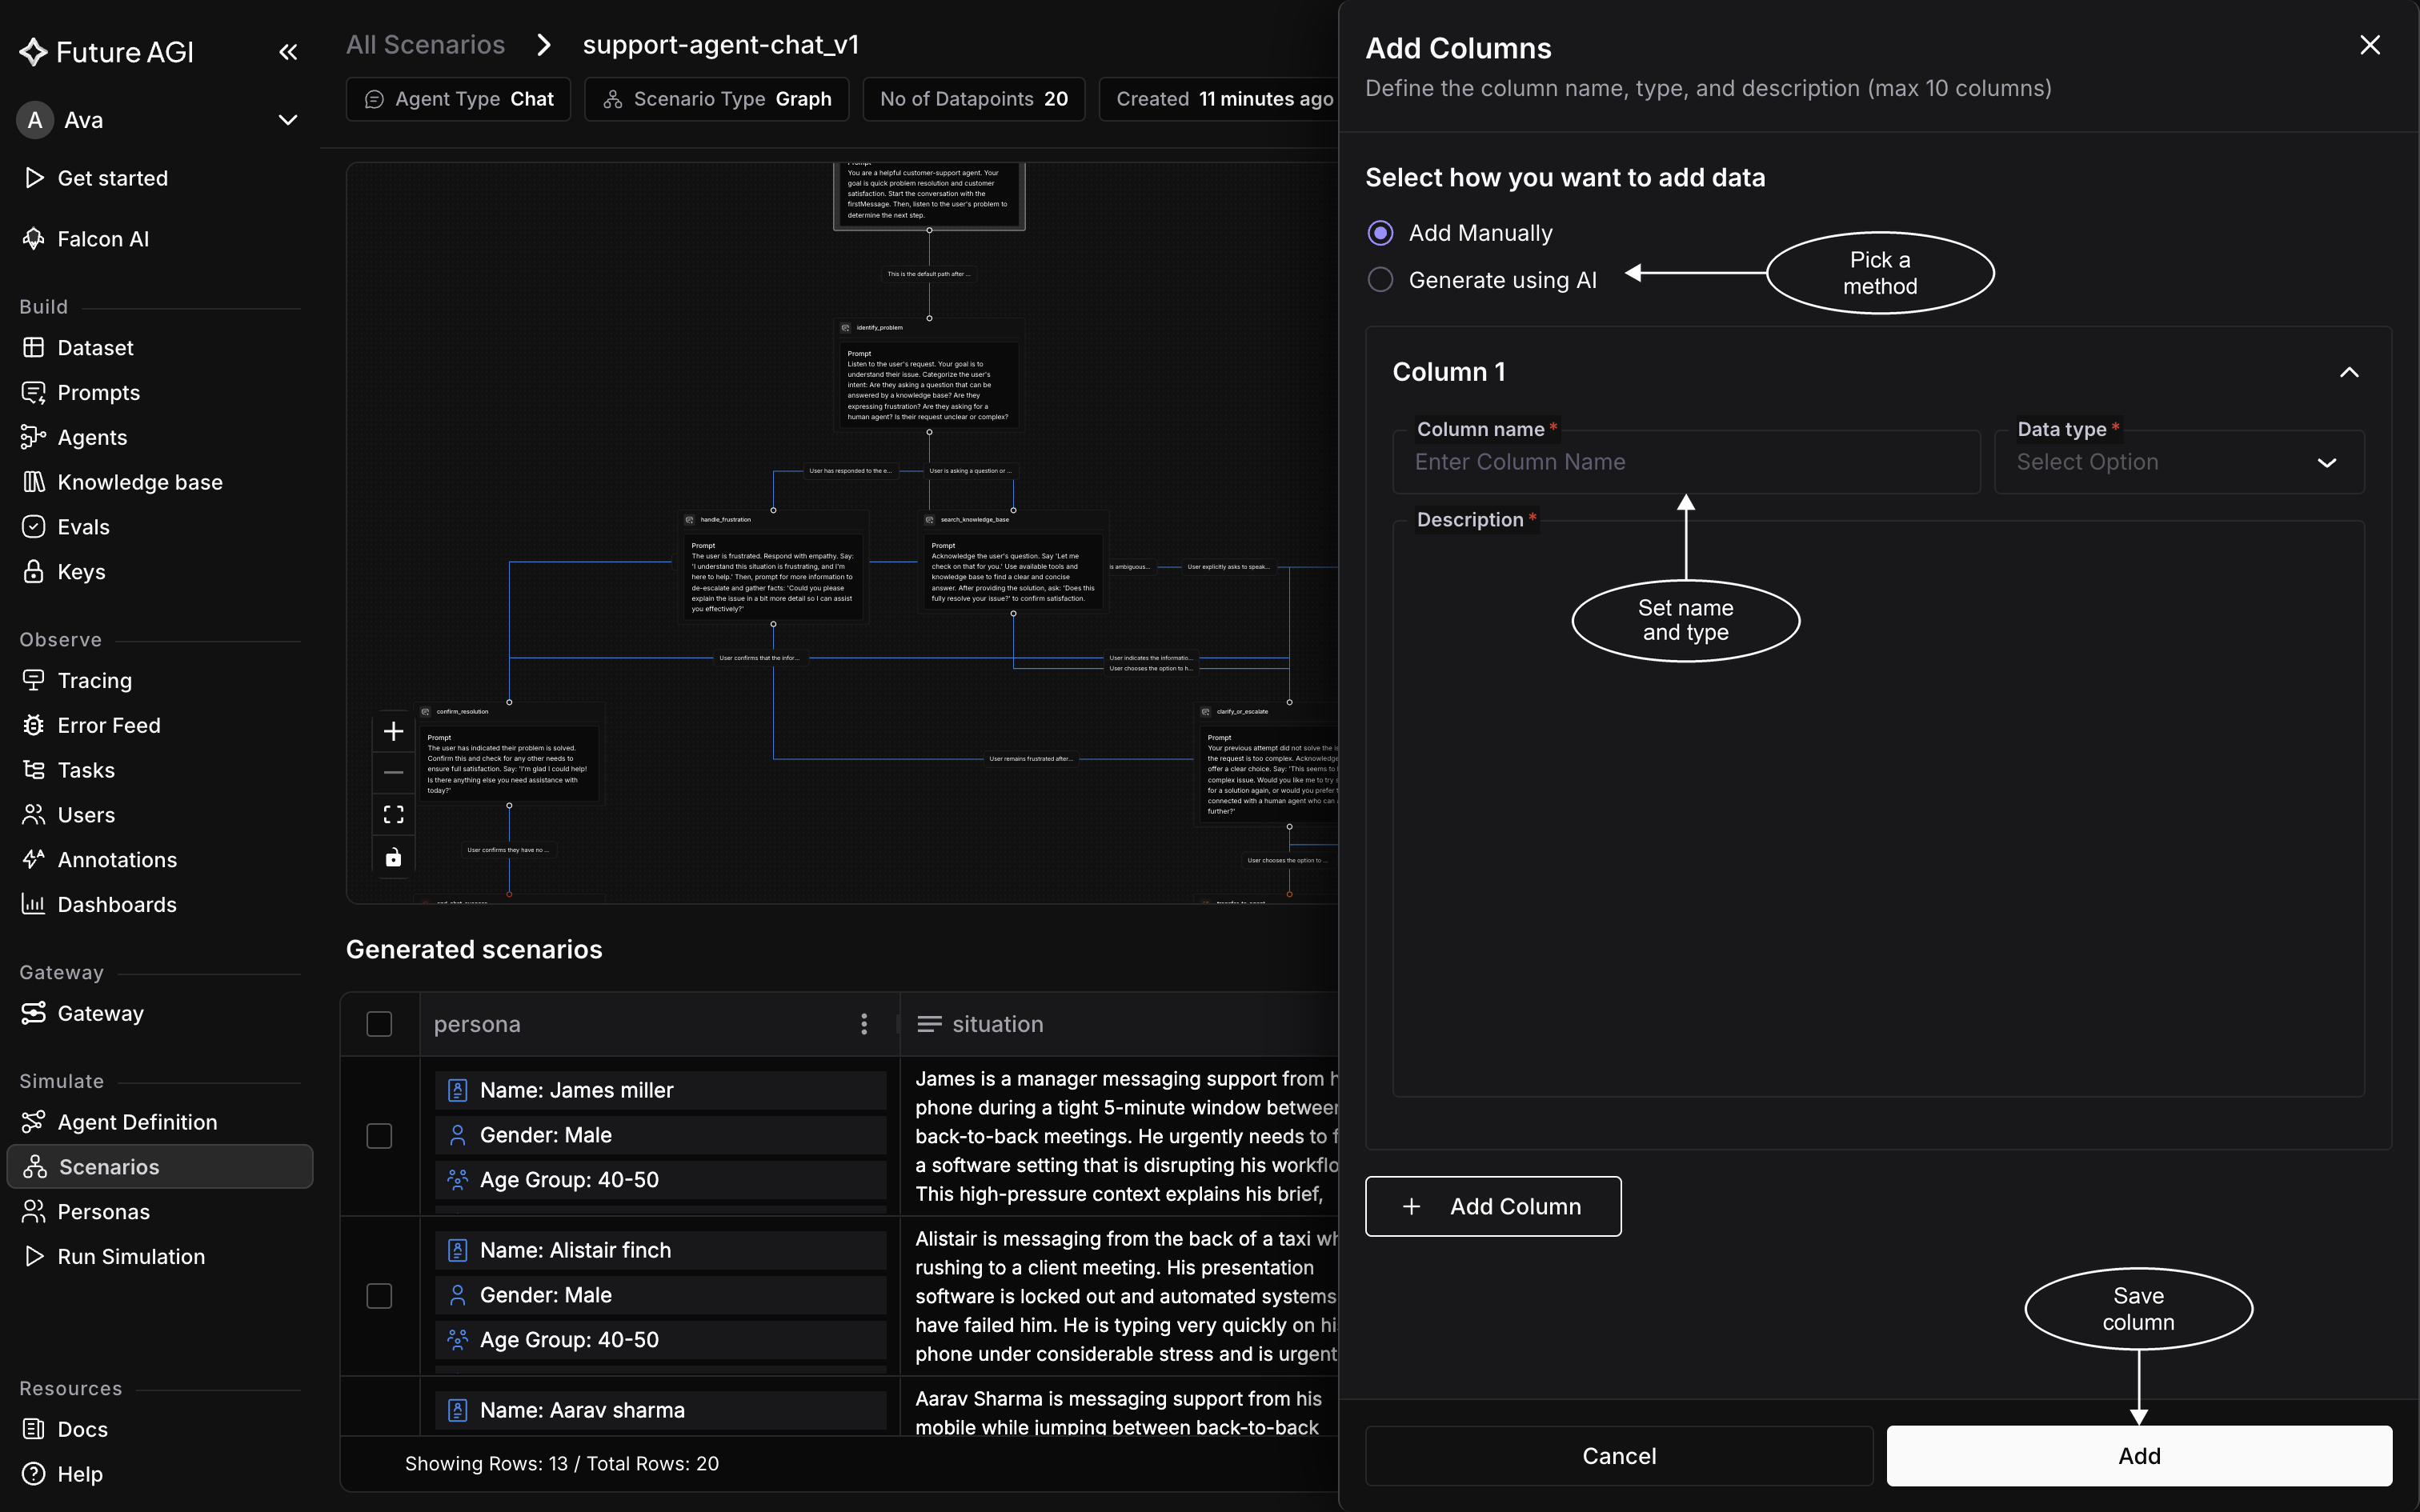
Both paths ask for the same three fields; only who fills the rows differs
Two rules the form enforces:
- Ten columns per pass. Inside the drawer, + Add Column defines another column in the same save, up to ten at once. Adding more than ten means opening the drawer again, there’s no cap on the scenario itself
- Names must be new. A name already on the scenario is rejected, so you can’t reuse
persona,outcome, or any column you added earlier, and two columns in the same pass can’t share a name
What lands in the table
Saving closes the drawer, shows a “Columns added successfully” message, and refreshes the table with the new column at the end. On both paths the column arrives empty, and what happens next differs:
- Manual: it stays empty until you fill it. Type into each row’s cell in the table itself, the way you would in a dataset
- AI: generation runs in the background, so the cells fill in after a moment rather than the instant the drawer closes. Refresh the table if it still looks empty
Nothing here is permanent. Cells stay editable after generation, so you can correct a value the model got wrong, and a column you mis-named can be deleted from its header menu in the table.
Use the column in the prompt
Open Prompt on the scenario and reference the column by name in double braces:
The customer is asking for a refund of {{refund_amount}}.The braces are matched exactly, so {{refund_amount}} reads the refund_amount column and nothing else.
Fix a red variable
The prompt colours its variables as a check:
- Green: the name matches a column on this scenario, so it will be filled
- Red: nothing will fill it
A red variable is almost always a misspelled name or a column that was never added. Compare it against the column headers in the table and fix whichever is wrong: correct the spelling in the prompt, or add the missing column. The variable turns green once the two match.
Dive deeper
Questions & Discussion